Working with Unica Journey
The following steps provide a guide to configuring HCL Discover with Unica Journey using built-in integration. The integration provides Discover with the ability to send data points to Unica Journey when an event occurs.
Tip
Always refer to the official product documentation.
Configure Unica Journey
-
Setup a Journey Link REST integration, note down the ClientID and Client Secret.

-
Create an Entry Source, node down your code. This can be either RestAPI or the Discover option.

-
Create a Data Definition file, again note down the code.
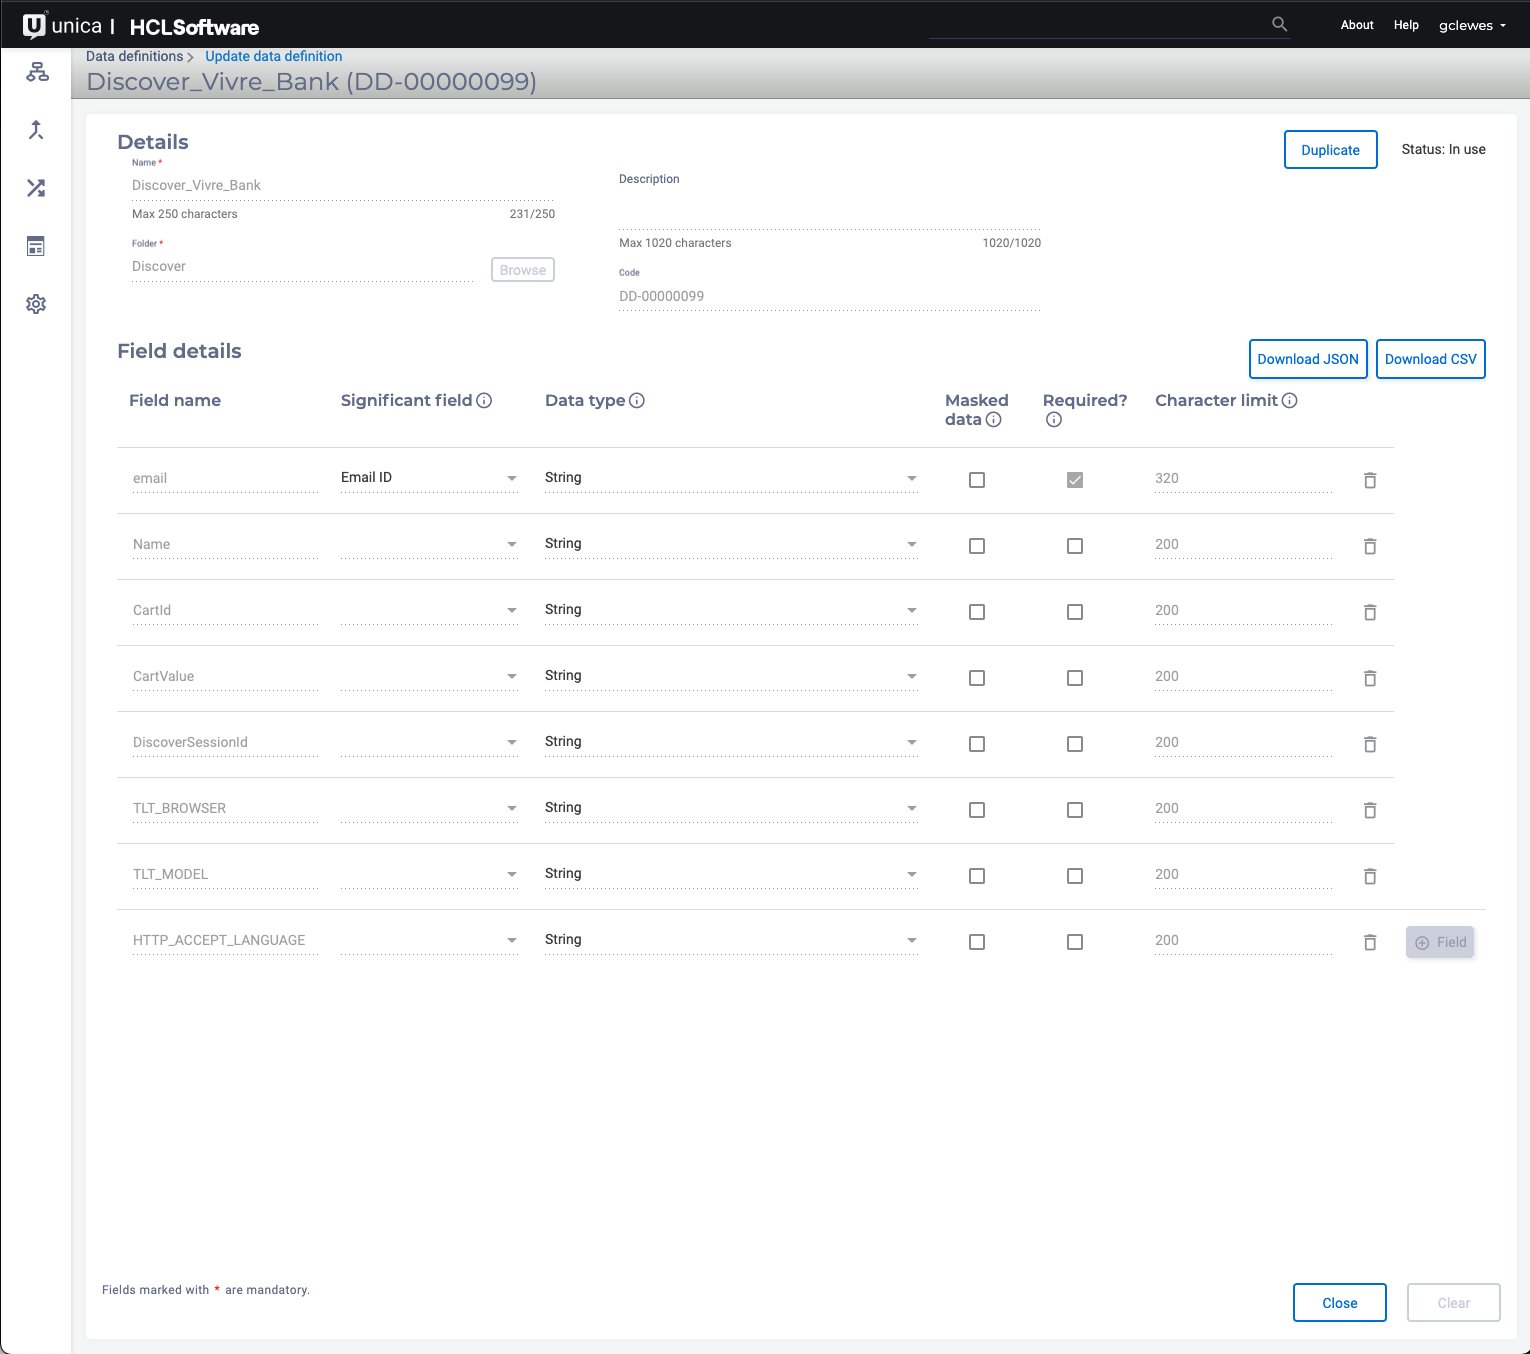
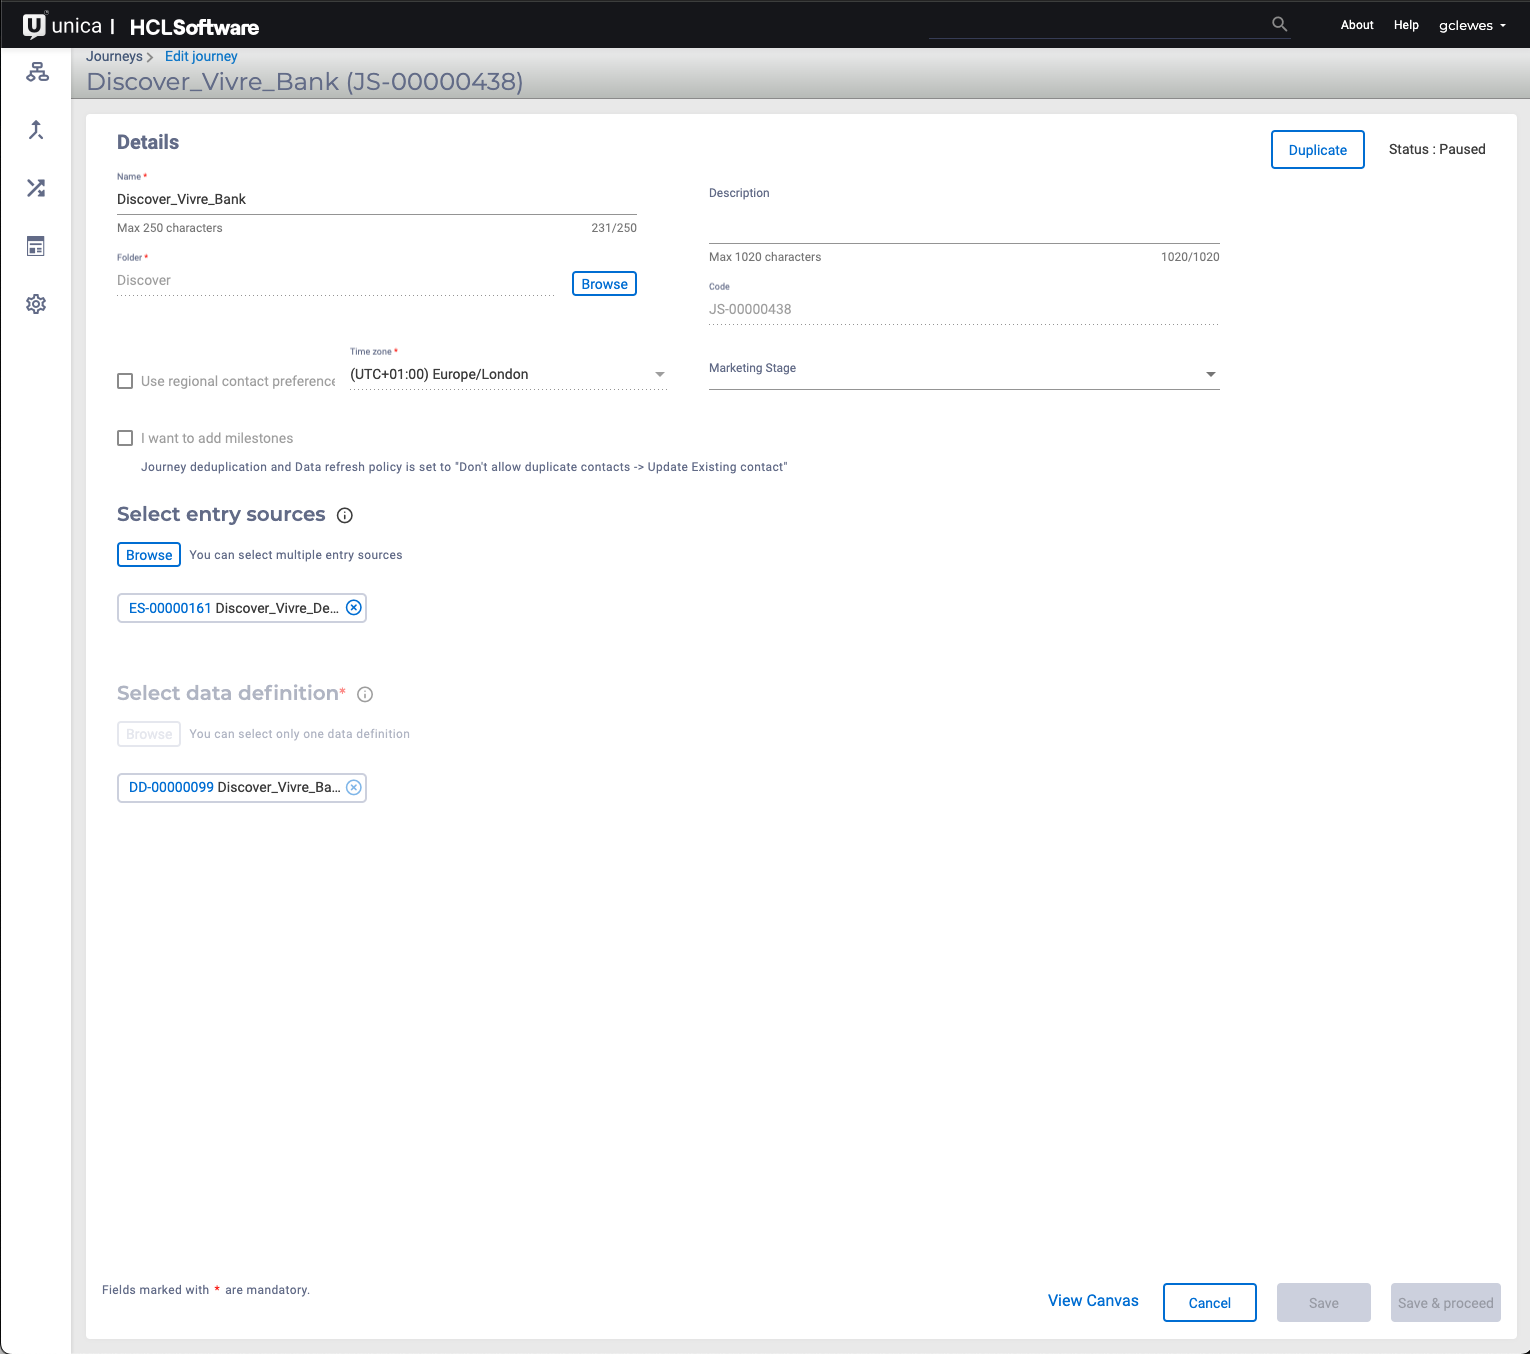
-
Create a Journey using the Entry Source and Data Definition codes you created in the previous steps.
Configure Discover
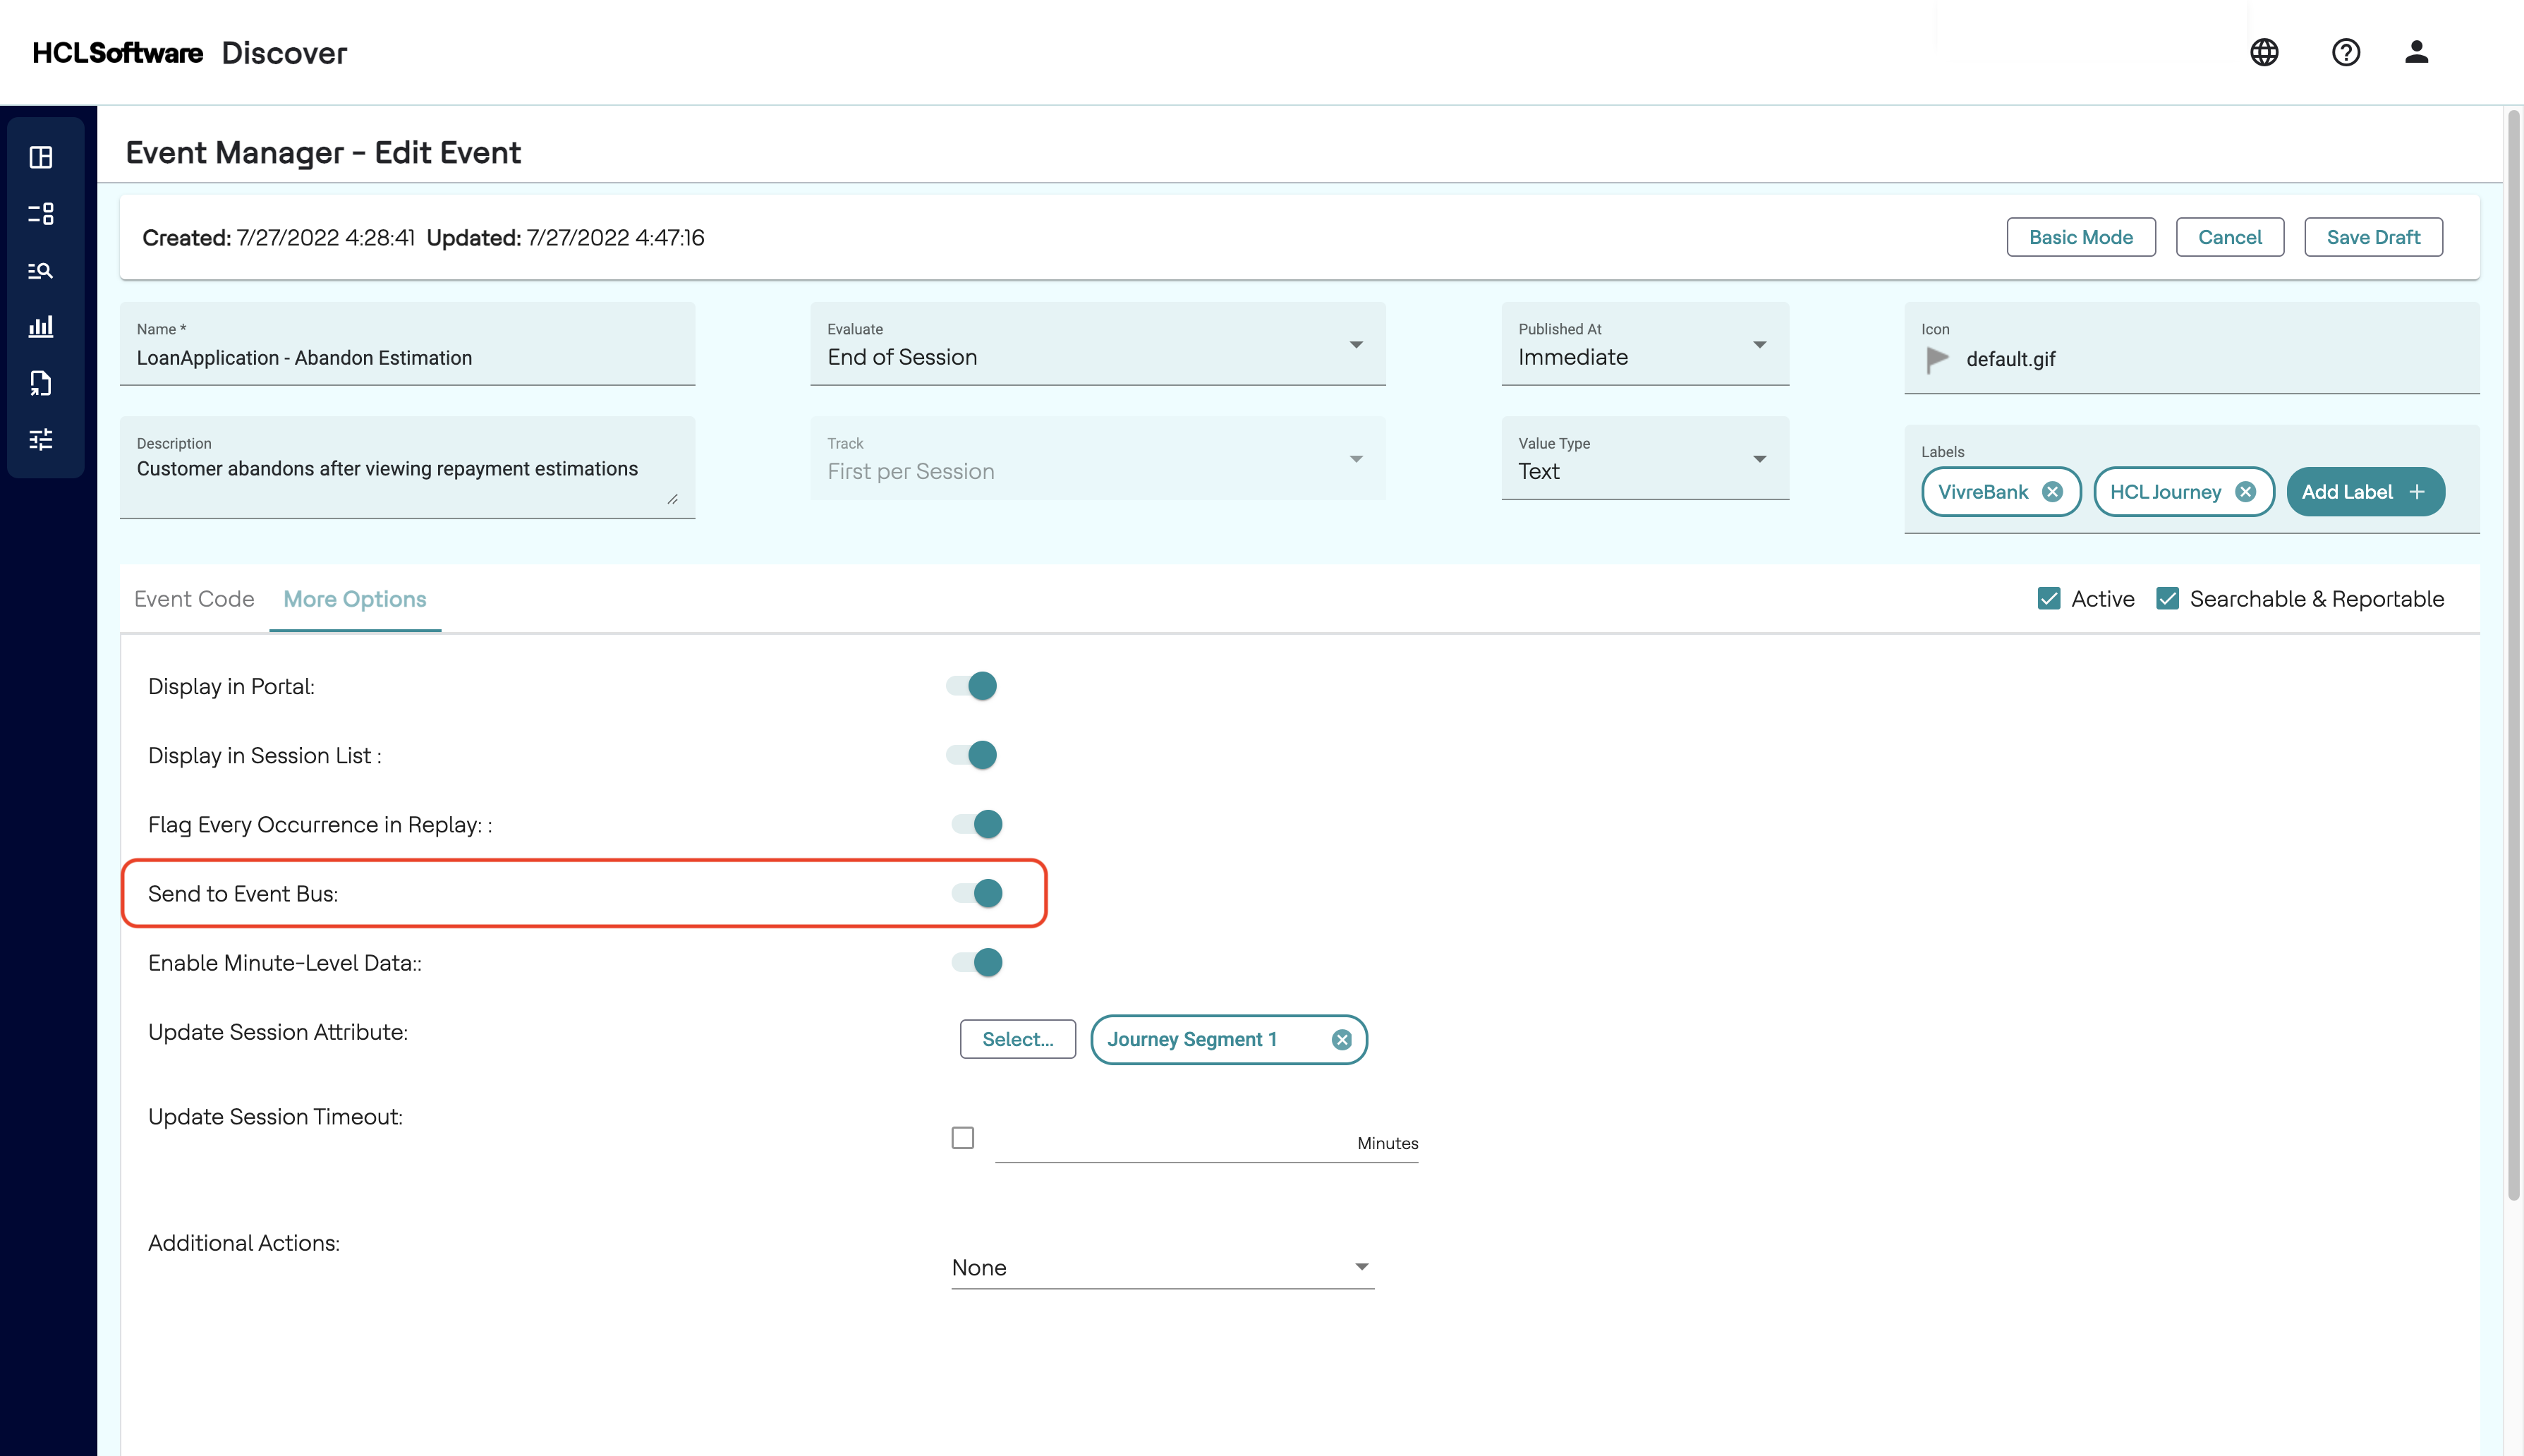
Discover Events
Ensure that the event you wish to use to trigger the integration with Journey is setup correctly and the option Send to Event Bus is enabled. This can be found in the More Options tab when editing/creating your event.
Event Bus
Configure CEP for Unica Journey by modifying the Discover DiscoverEventBus.cfg file
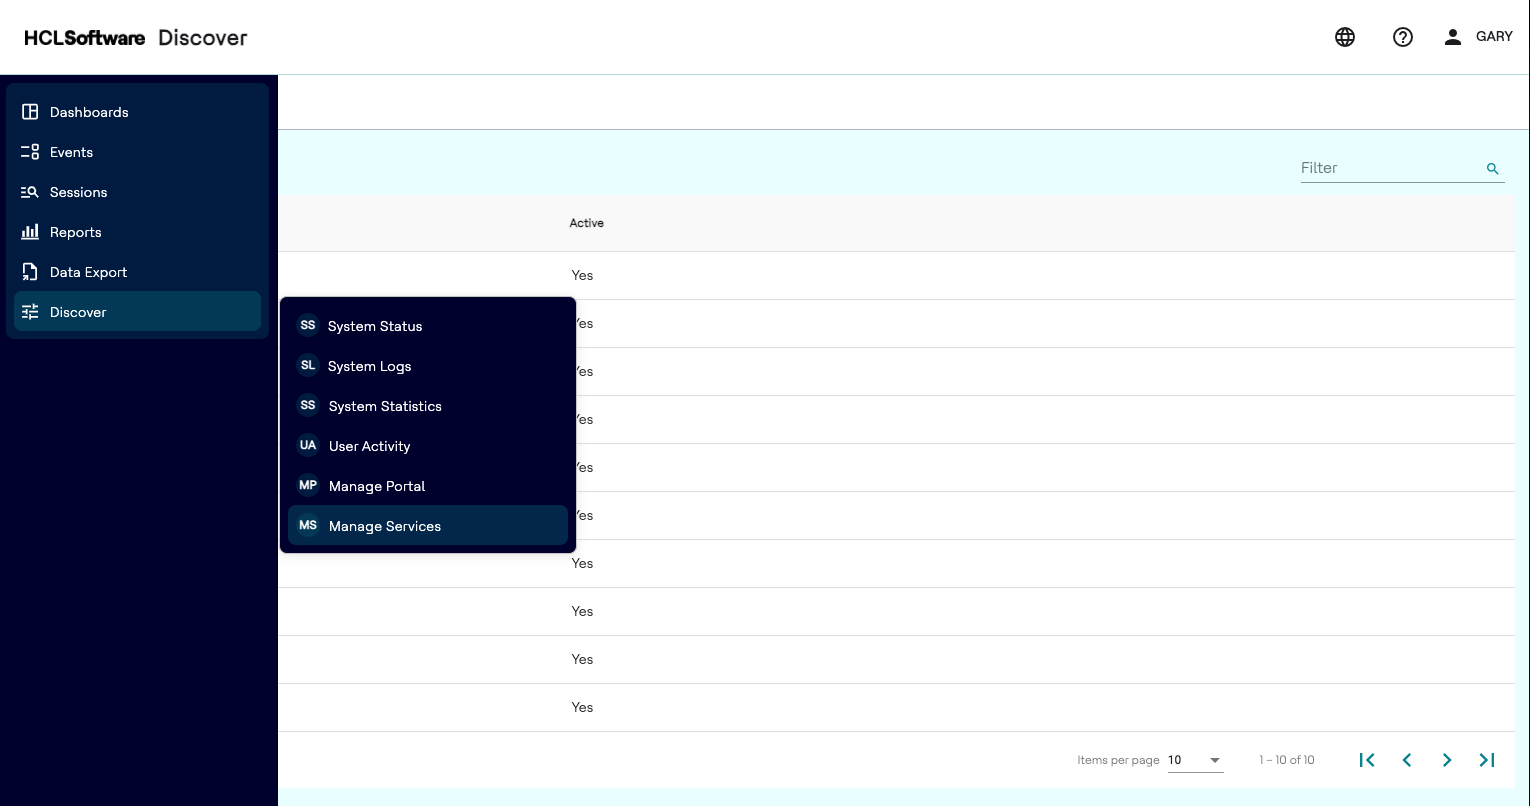
-
Navigate to Discover Services Management - Discover -> Manage Services
-
Expand your Canister/Processing server
-
Expand the
Canisteroption -
Select
Event Bus configurationthen click onView/Edit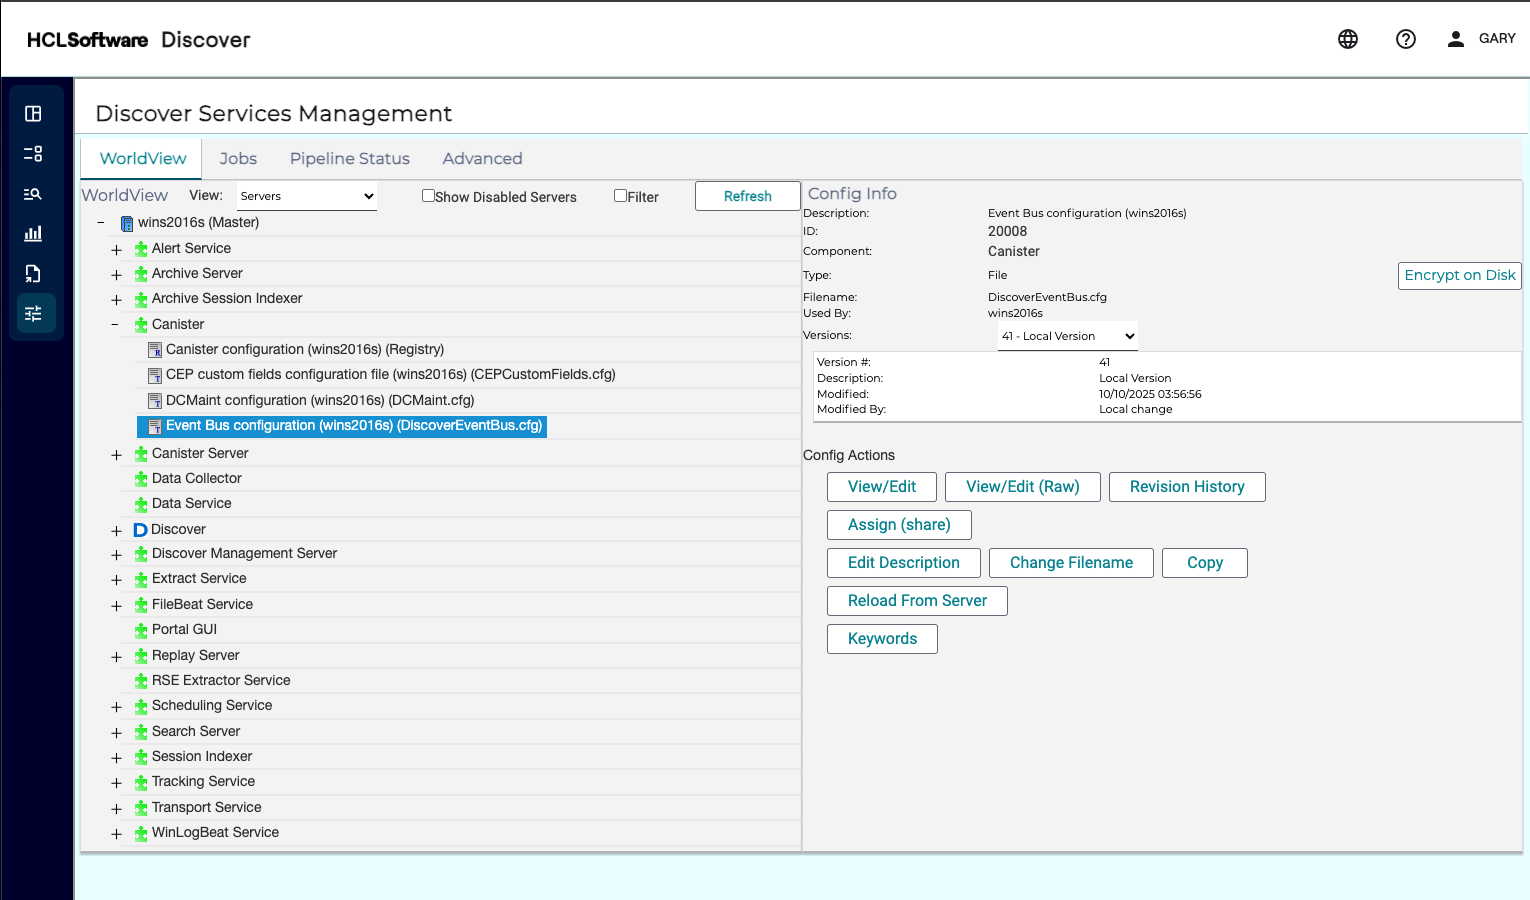
-
Drag the
CEPSession Agent from theAvailable SessionAgentson the right hand side to the pipeline on the left and place belowDecouple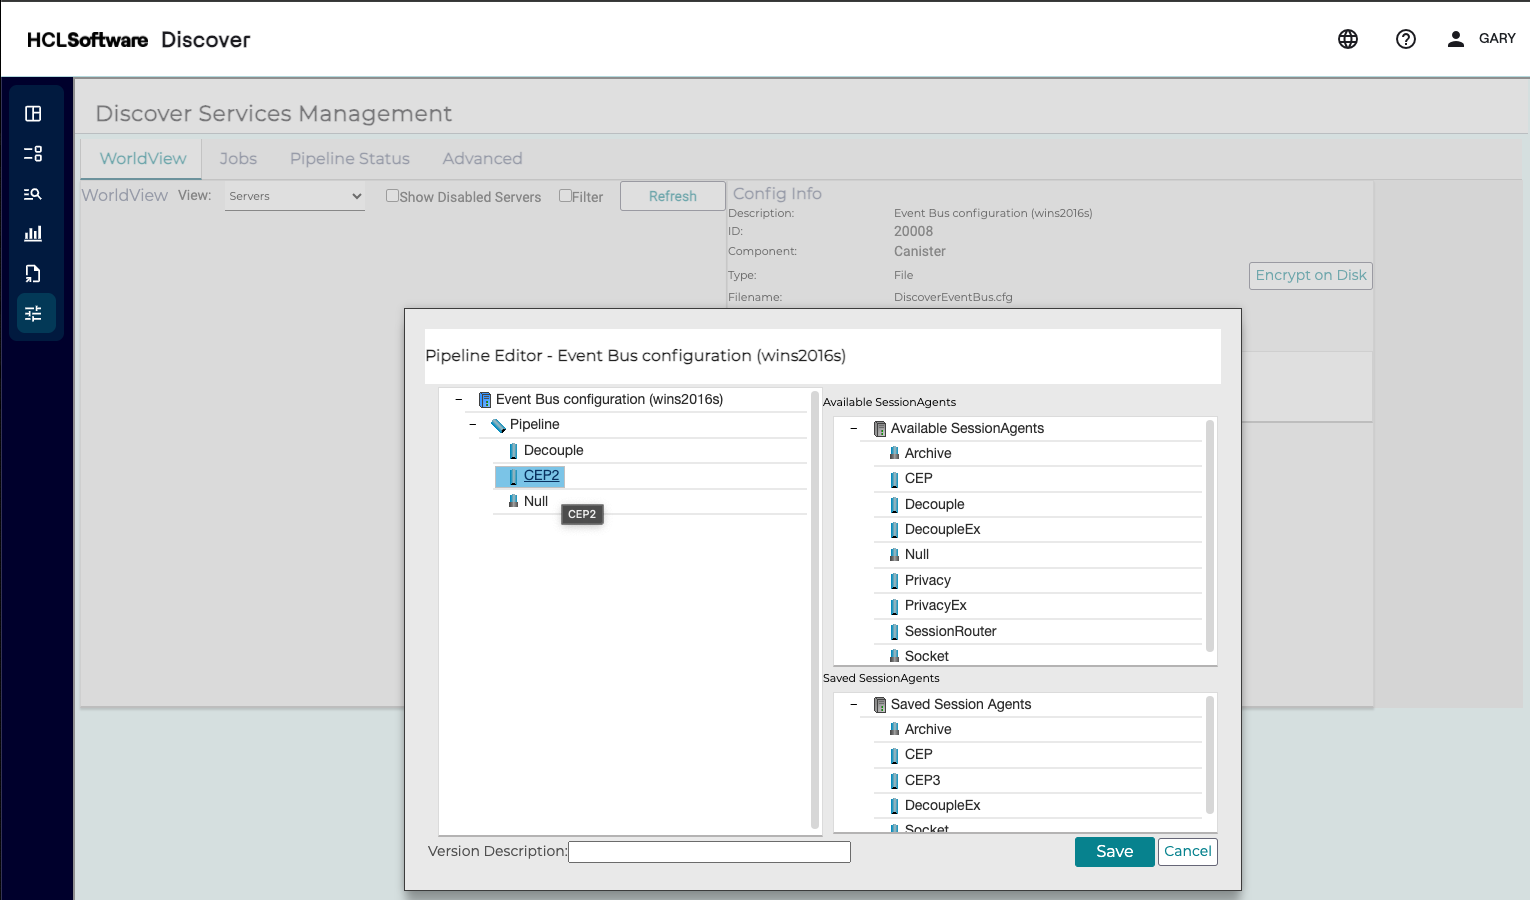
-
Once in the pipeline click on the new CEP session agent to bring up the configuration
-
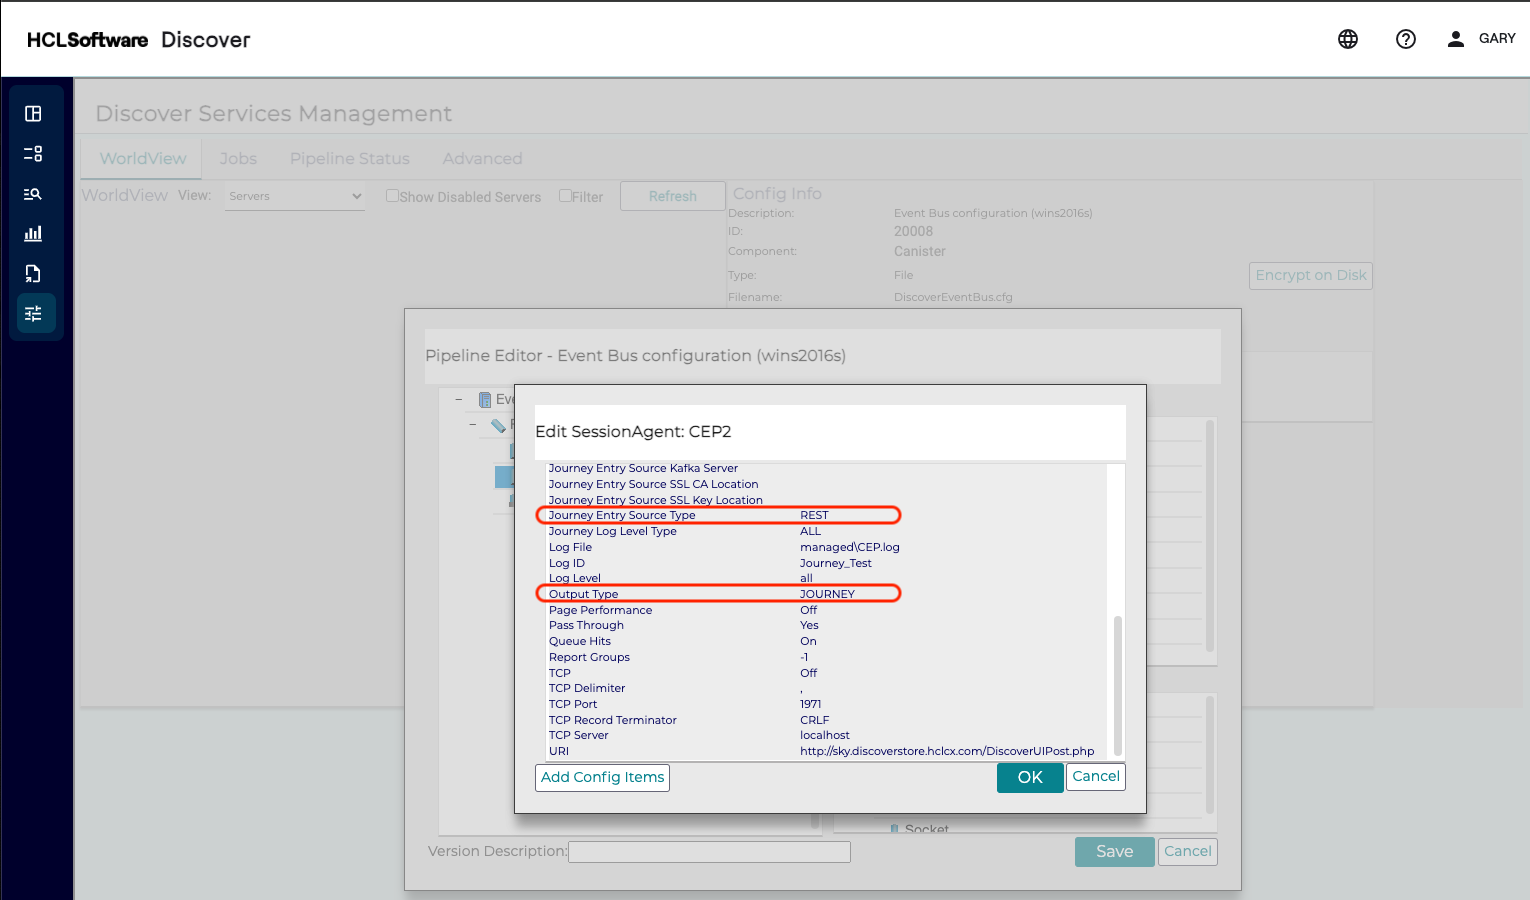
Fill out the following options:
Key Value Journey Entry Source API Client SecretClient Secret from step 1 of the Unica Journey configuration steps Journey Entry Source API ClientIDClientID from step 1 of the Unica Journey configuration steps Journey Entry Source API Serverhttps://{unica_domain}/journey/api/ Journey Entry Source TypeREST Output TypeJOURNEY 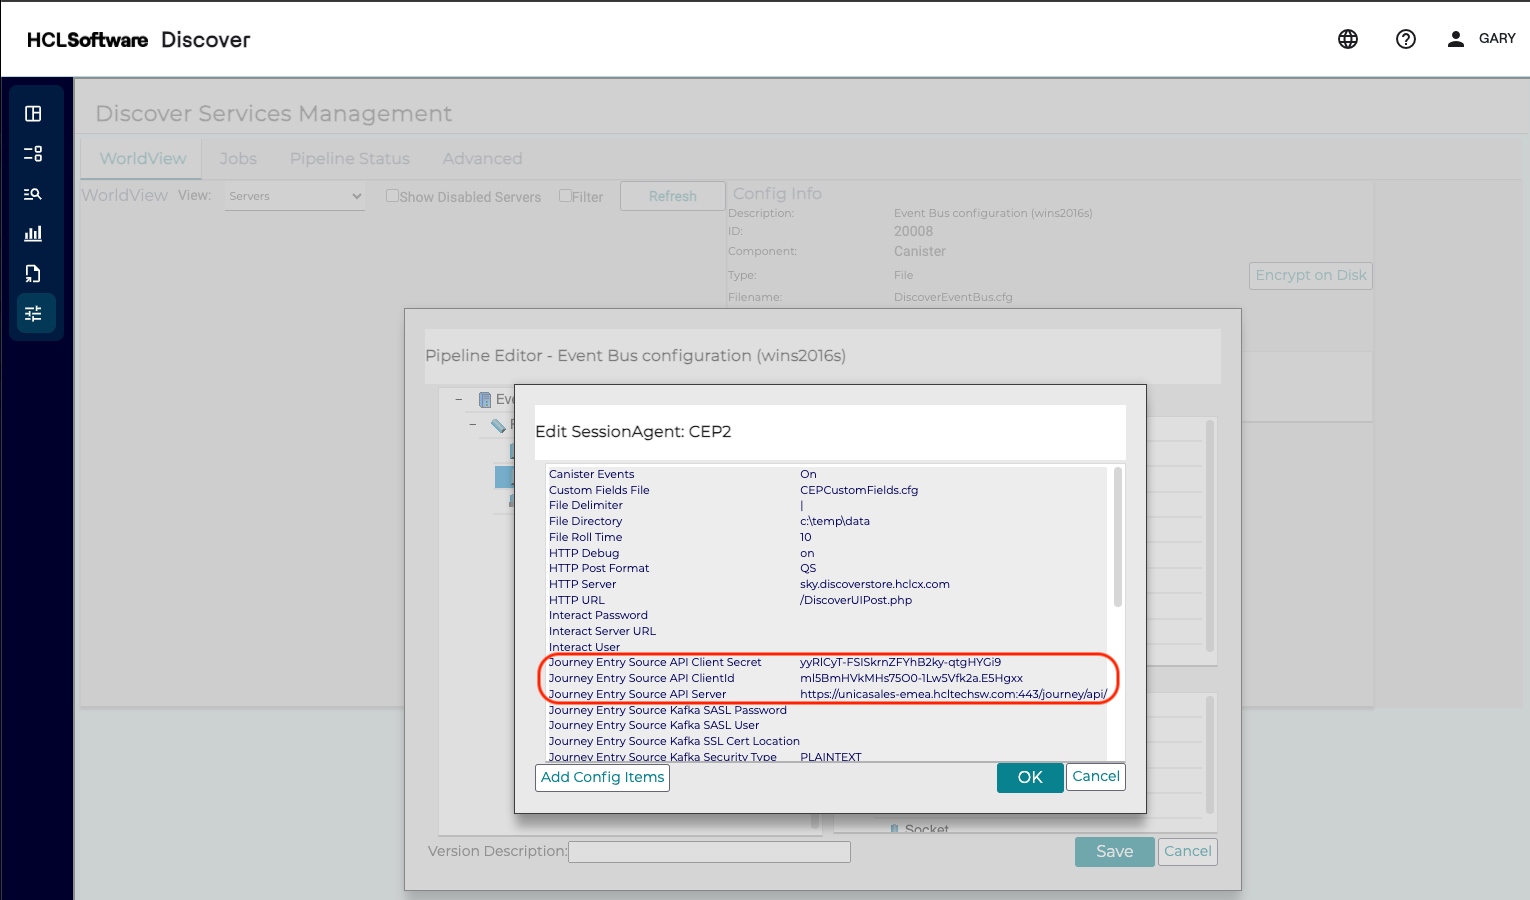
-
Click
OKthenSave
CEP Custom Fields
Configure CEP for Unica Journey by modifying the Discover CEPCustomFields.cfg file
-
Navigate to Discover Services Management - Discover -> Manage Services
-
Expand your Canister/Processing server
- Expand the
Canisteroption -
Select
CEP custom fields configuration filethen click onView/Edit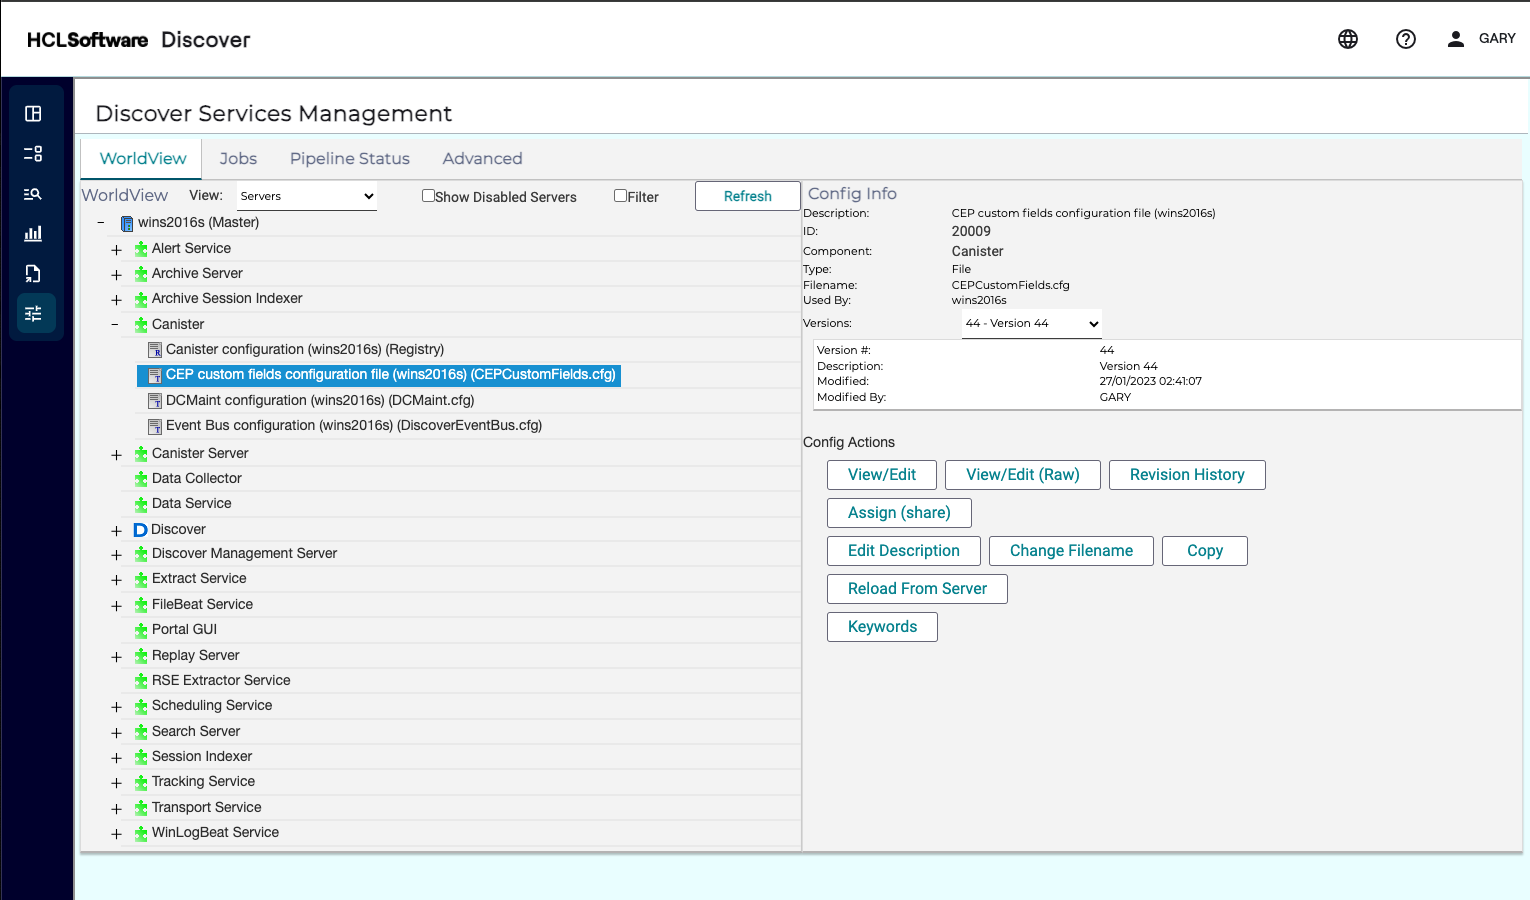
-
Scroll to the section titled
[Journey]- if there is no section in your file you can use the base configuration provided in the official product documentation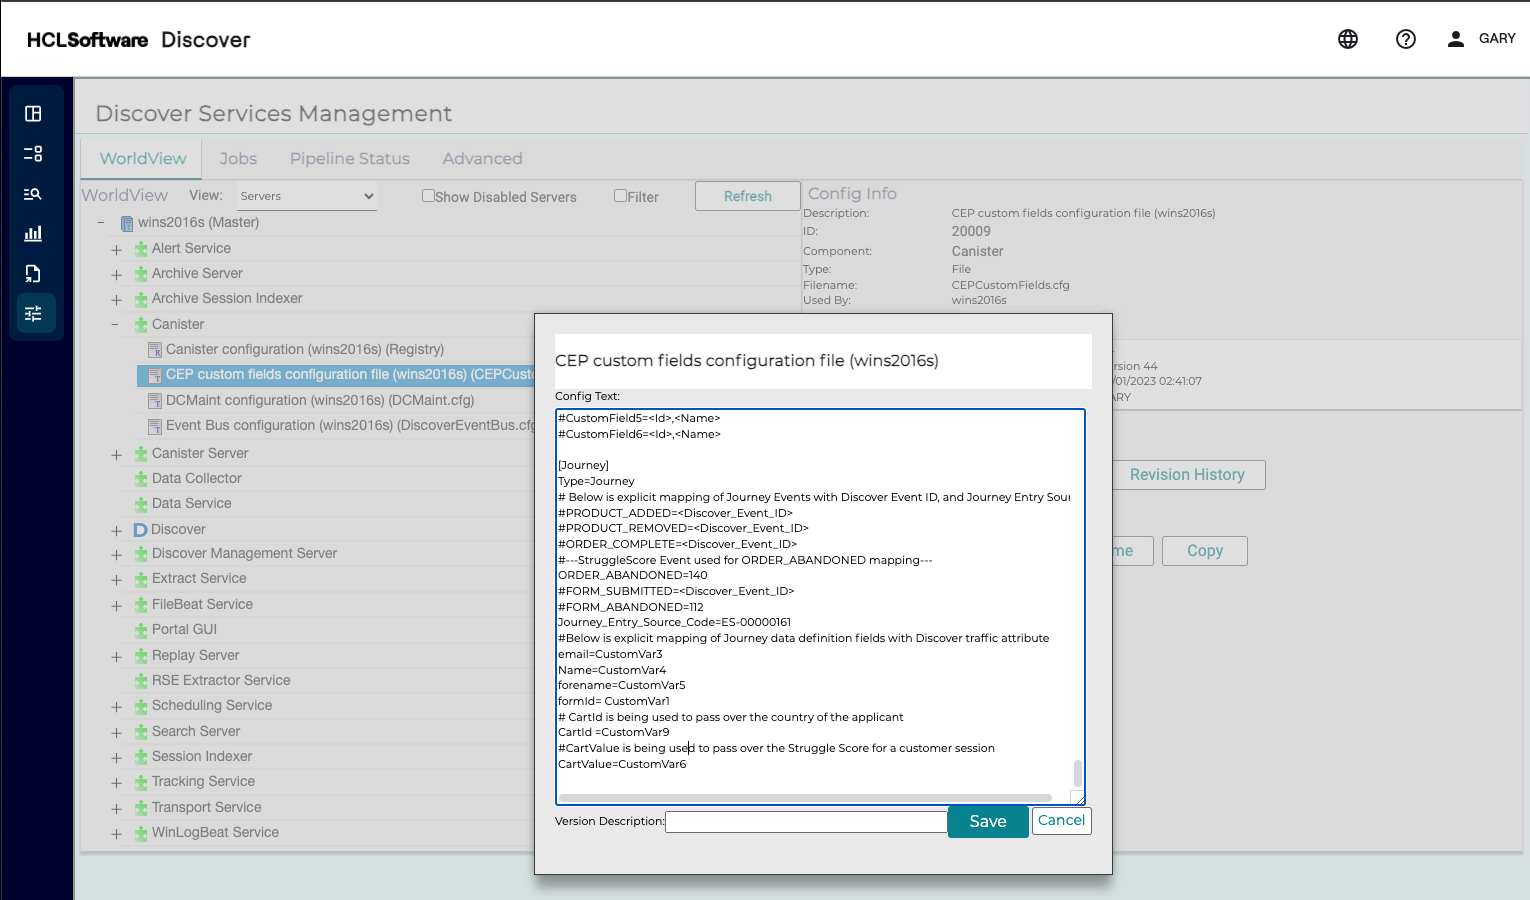
-
A basic example of the config is as follows:
[Journey]
Type=Journey
# Below is explicit mapping of Journey Events with Discover Event ID, and Journey Entry Source
PRODUCT_ADDED=<Discover_Event_ID>
PRODUCT_REMOVED=<Discover_Event_ID>
ORDER_COMPLETE=<Discover_Event_ID>
ORDER_ABANDONED=<Discover_Event_ID>
FORM_SUBMITTED=<Discover_Event_ID>
FORM_ABANDONED=<Discover_Event_ID>
Journey_Entry_Source_Code=<Journey_Entry_source_Code>

#Below is explicit mapping of Journey data definition fields with Discover traffic attribute
email=<loginid or some other field>
Name=<customer_name>
formId=<form_id>
formname=<form_name>
CartId=<cart_id_field>
CartValue=<cart_value_field>
CookieID=<JSESSIONID>
[Journey]
Type=Journey
# Below is explicit mapping of Journey Events with Discover Event ID, and Journey Entry Source
# Comment out any that are not to be used
#PRODUCT_ADDED=<Discover_Event_ID>
#PRODUCT_REMOVED=<Discover_Event_ID>
#ORDER_COMPLETE=<Discover_Event_ID>
#---StruggleScore Event used for ORDER_ABANDONED mapping---
ORDER_ABANDONED=140
#FORM_SUBMITTED=<Discover_Event_ID>
FORM_ABANDONED=171
Journey_Entry_Source_Code=ES-00000161
# Below is explicit mapping of Journey data definition fields with Discover session attributes
# CustomVarX is the id of the Session Attribute which stores the relevent data
email=CustomVar3
Name=CustomVar4
forename=CustomVar5
formId= CustomVar1
CartId =CustomVar9
CartValue=CustomVar6