Asset/ CI Management
Exception Console for Integrated CMDB Data Sources
The new Exception Console gives you controlled governance over CI data coming from multiple integrated sources (such as GDS/ROAR, BigFix, and Discovery) before it reaches the CMDB master.
All incoming records are first stored in a CMDB staging table and evaluated against Administration → CMDB settings: admins can enable a global “Push data from Integrated Sources to CMDB” flag or use a drop-down to specify which sources push directly to the master and which are routed to the Exception Console.
When direct push is enabled for a source, records from multiple feeds are reconciled and the latest record is treated as final; when routing is enabled, data appears in the Exception Console, where users explicitly accept or reject it, with automatic replacement of older pending records when new GDS or other integrated records arrive.
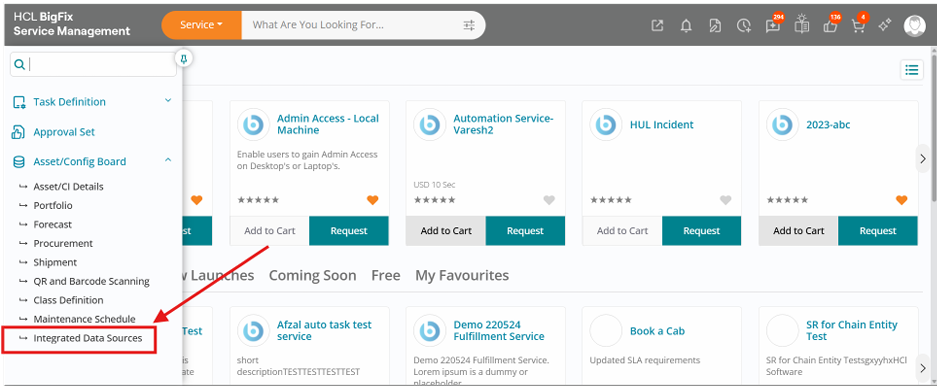
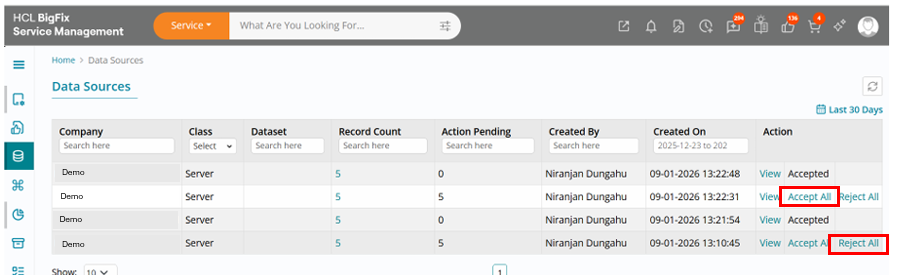
From the UI, users access this capability via Asset/CI Board → Integrated Data Source, where they see a data-source list view and can manage incoming CI create/update events in bulk or individually.
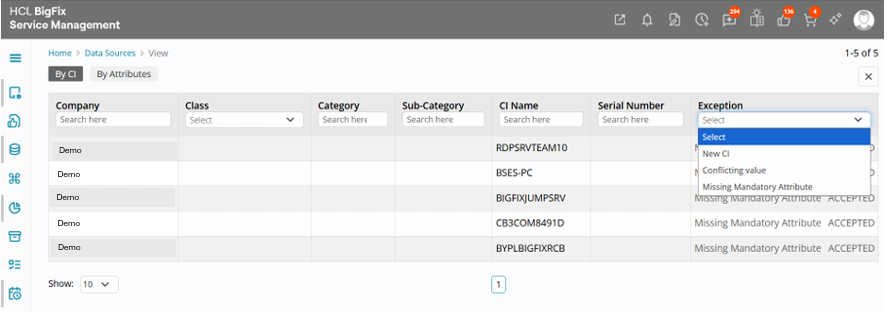
Users can accept or reject all pending CIs at once or click View to drill down into a detailed view that offers two tabs—By CI and By Attribute—and powerful filters on Company, Class, Category, Sub-Category, CI Name, Serial Number and Exception. This allows precise comparison of duplicate or conflicting attributes across sources and ensures only user-approved or system-approved data finally persisted into the CMDB master table, combining automation with human oversight for high-quality configuration data.
Agentless Discovery Integration with BigFix Service Management
The proposed integration flow between BigFix Service Management (BigFix SM) and Agentless Discovery for importing discovered configuration items (CIs) and their relationships into the CMDB. The integration follows a staged processing model in which BigFix SM periodically pulls discovery data, stores the raw payload in Staging 1 tables, transforms and validates the data into Staging 2 tables, and finally creates or updates CIs and relationships in the target CMDB.
Objective
The objective of this integration is to ensure that infrastructure and device data discovered through Agentless Discovery is brought into BigFix SM in a controlled, auditable, and scalable manner. The staged approach helps separate raw ingestion, transformation, reconciliation, and final CI/relationship creation so that errors can be isolated and reprocessing can be managed efficiently.
Scope
- Scheduled data pulled from Agentless Discovery into BigFix SM.
- Raw data ingestion into Staging 1 tables.
- Processing logic for identification, normalization, CI classification, and relationship preparation in Staging 2 tables.
- Final creation or update of CIs and relationships in BigFix SM / CMDB.
- Logging, error handling, reconciliation, and monitoring considerations.
Integration Architecture
- Source System
Agentless Discovery acts as the source of discovered infrastructure data. It identifies devices, servers, network components, operating system attributes, and potential inter-CI relationships based on scan results.
- Target System
BigFix SM acts as the consuming platform. It is responsible for receiving the source data, staging it, applying business and reconciliation rules, and persisting authoritative CI and relationship records into the CMDB data model.
Processing Layers
The integration is divided into three logical layers:
| Layer | Purpose | Output |
| Staging 1 | Raw landing area for imported discovery records | Unprocessed discovery payload |
| Staging 2 | Processed and normalized records for CI and relationship load | Qualified CI and relationship candidates |
| Final CMDB Load | Creation or update of production CIs and relationships | Authoritative CMDB records |
Detailed Process:
Scheduled Extraction
A scheduler configured in BigFix SM initiates the import based on a defined frequency such as every hour, every 6 hours, or once per day.
Staging 1: Ingestion
Staging 1 is the raw data landing zone. All records received from Agentless Discovery are written into Staging 1 with minimal transformation so that the original payload remains traceable.
Staging 2: Transformation
Staging 2 contains the processed output derived from Staging 1. This layer applies the business rules needed before creating actual CIs and relationships.
Key processing activities in Staging 2:
- Validate mandatory attributes such as hostname, IP address, serial number, or unique discovery key to create CI
- Determine CI class mapping such as Server, Network Device, Virtual Machine, Database Server, or Application Instance.
- Perform duplicate detection and identify existing CIs
- Prepare parent-child or dependency relationships.
- Set action flags such as Create, Update, Merge,
Final CI and Relationship Load
Once Staging 2 records are marked as Ready, the final loader creates or updates CIs in the CMDB. After CI creation is completed successfully, the relationship loader creates the corresponding links between parent and child CIs.
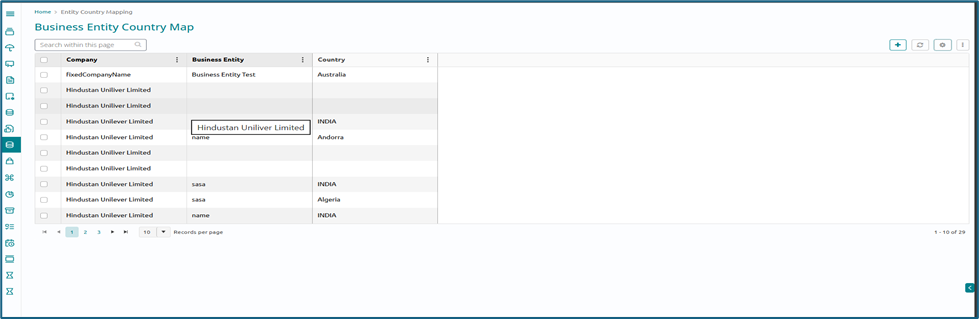
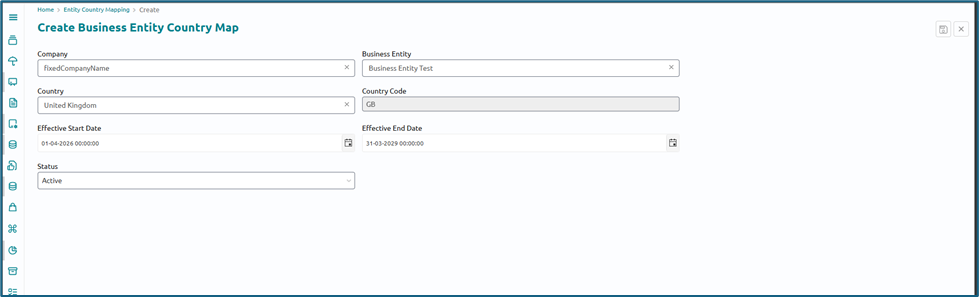
Entity Country Mapping
To record and maintain the list of countries in which each Business Entity is operational, so that compliance, taxation, reporting, and service rules can be driven correctly per entity and country. Multi-entity, multi-country setups are standard for global operations and reporting.
How to map countries to the business Entity
- Admin opens the Entity–Country Mapping page.
- Admin selects a Business Entity from the list or search.
- System displays current countries linked to that entity (if any), including attributes
such as:
- Country / Country Code (ISO)
- Status (Active / Inactive for that entity)
- Default Currency, Tax Regime, and any regulatory flags (e.g., GDPR, local data residency).
- Admin clicks Add Country and chooses one or more countries from the catalog.
- For each selected country, Admin optionally configures country-level settings for that
entity, such as:
- Whether the entity can sell/operate in that country.
- Default billing currency and tax configuration.
- Local reporting requirements / compliance tags (e.g., EU, US, APAC).
- Admin saves the mapping; system validates against duplicates and mandatory fields.
- The system makes these mappings available to downstream processes:
- Service / product availability by entity–country.
- Correct tax and currency handling for transactions.
- Country-level reporting and consolidation per entity.
- To map Business Entity with country, Navigate to Entity country mapping in Asset config board.
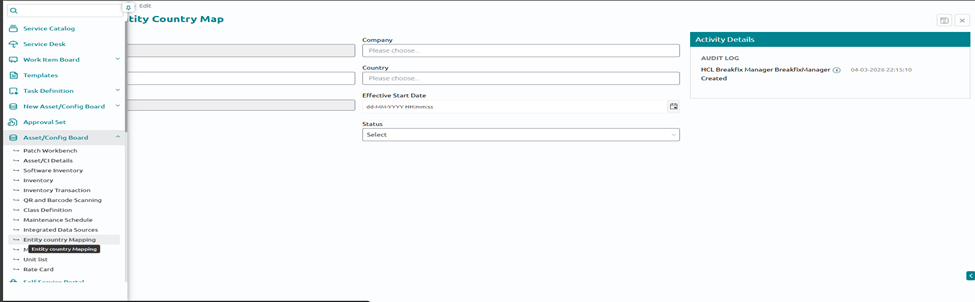
- Click on + icon to create a new mapping
- Fill in all the details.
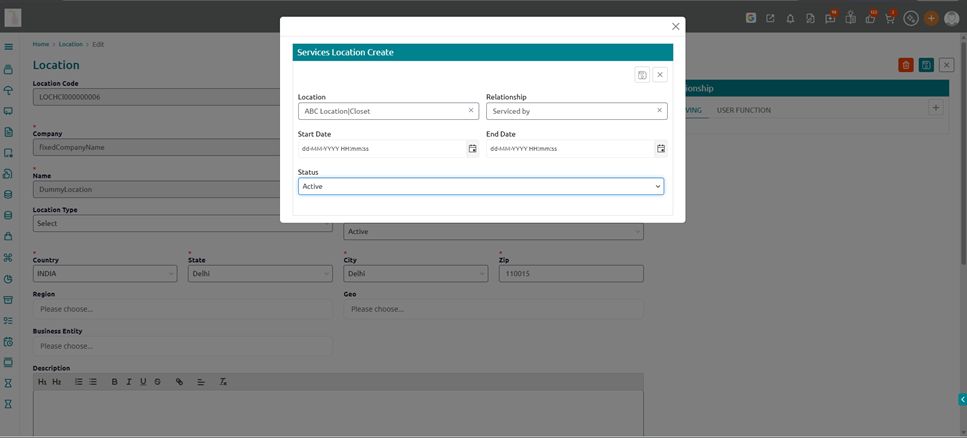
Service location mapping
A Serving Location is the designated site or location that is responsible for serving a particular operational location. It defines where infrastructure, inventory, or support capacity is anchored for that location, and is used for routing requests, planning capacity, and reporting service coverage. In the system, each location or site can be mapped to one or more Serving Locations
How to map a serving location to a location
- Navigate to location module in foundation
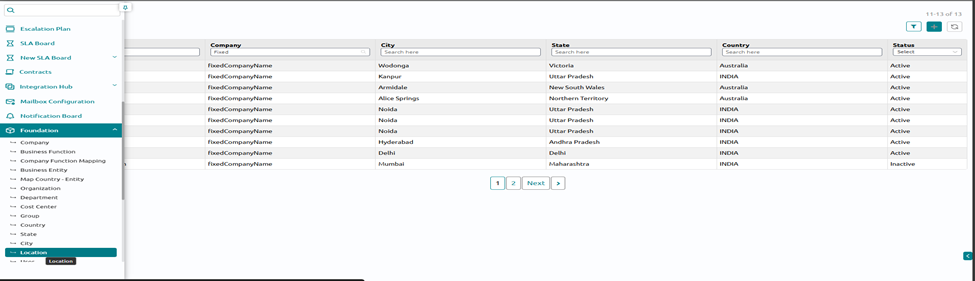
- Click on the location record for which serving location needs to be defined and then click on edit
- On the right side click on “ serving” and fill in the details. This will create the relationship between 2 locations
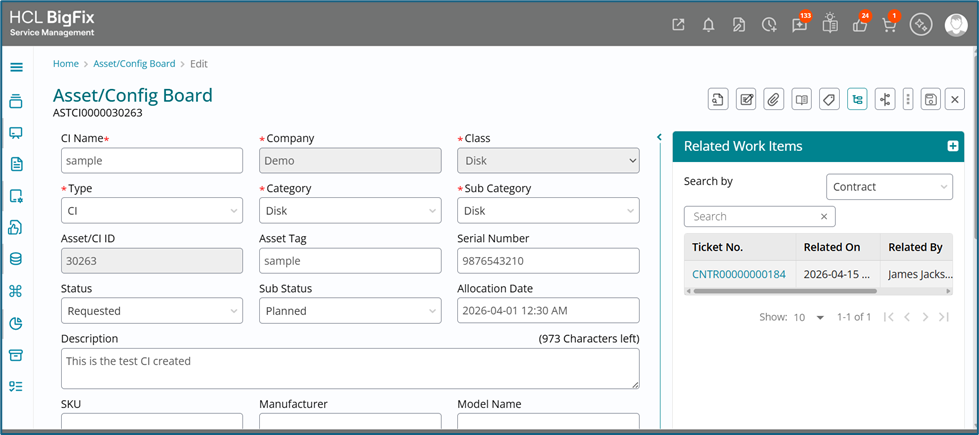
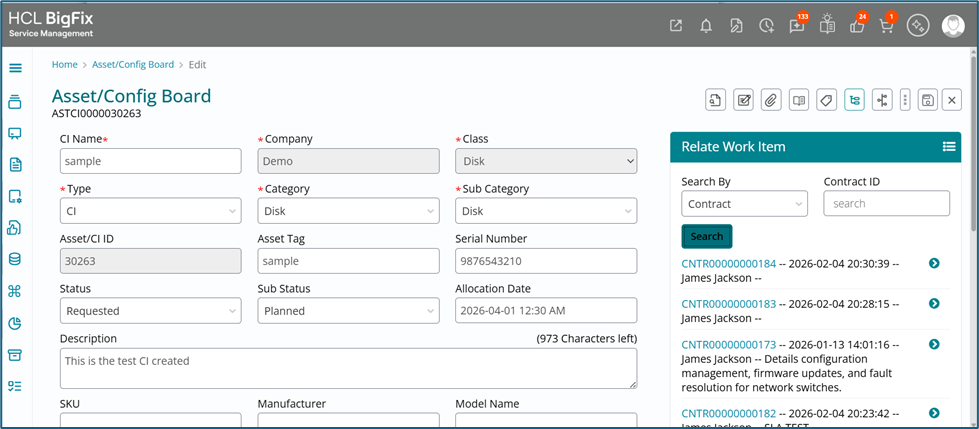
Relate Contract Records From CI Form
The purpose of this capability is to allow contract records to be linked directly to Configuration Items (CIs) within the Related Work Items section of the CI form, ensuring that stakeholders can easily view and manage the contractual relationships associated with a CI.
This relationship enables:
- Improved visibility into active service, maintenance, or support contracts
- Accurate tracking of contract validity, renewal, and expiration
- Better alignment between asset, configuration, and contract management
- Informed decision-making during incident resolution, change planning, and lifecycle management
How to relate contracts in CI form:
- Navigate to the Asset/config board. Open a CI in edit mode. On the right hand side in
the related work item section select contract

- On the next screen either put the contract # to search or just click on search. It will show the list of all the contracts. Just click on the link button on the right side.
- Click on the relate button. It will relate the contract to the CI
-
Click on the relate button. It will relate the contract to the CI