Updating WebSphere to support Keycloak SAML Authentication for Connections
To accomplish SSO using WebSphere® Application Server as a service provider partner to identity providers (IdPs - In our case it is Keycloak), you must establish partnerships between the WebSphere Application Server SAML service provider and external SAML identity provider i.e. keycloak.
Before you begin
Procedure
-
Install the SAML ACS Application
Choose one of the following approaches:
-
Install the SAML ACS application by using the python script:
cd /opt/IBM/WebSphere/AppServer/bin ./wsadmin.sh -f installSamlACS.py install bvtdb2Node01 server -
Using the Administrative WAS Console
-- Navigate to:
Applications > Application type > Websphere Enterprise applications-- Select Install
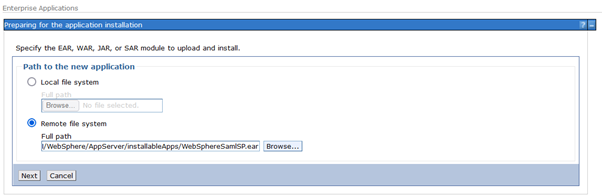
-- Select Remote file system and choose the following EAR file:
/opt/IBM/WebSphere/AppServer/installableApps/WebSphereSamlSP.ear-- Click Next on each screen and Save on the last screen
-
-
Apply Target Servers
Enterprise Applications > WebSphereSamlSP > Manage Modules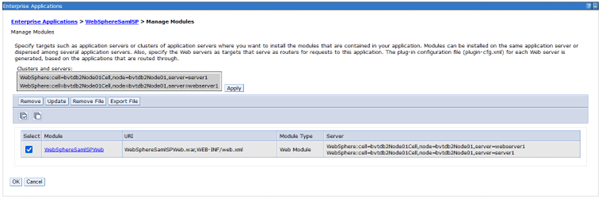
-
Configure Single Sign-On Settings
Navigate to:
Global security > Single sign-on (SSO)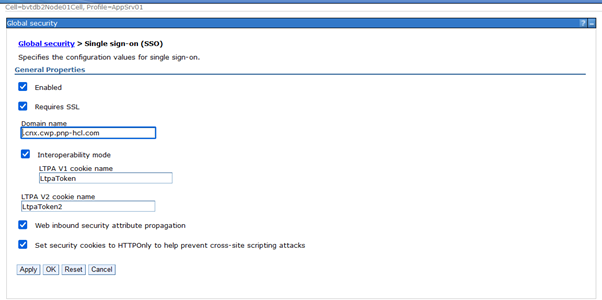
-
Add TAI Properties for ACSTrustAssociationInterceptor
Navigate to:
Global security > Trust association > Interceptors > com.ibm.ws.security.web.saml.ACSTrustAssociationInterceptorProperty Value sso_1.sp.acsUrl https://your_application_url/samlsps/kcacs sso_1.sp.filter request-url^=/homepage|/login|/service/authredirect.jsp;request-url!=forceLogin;request-url!=/login_redirect sso_1.sp.idMap localRealm sso_1.sp.trustAnySigner true sso_1.sp.charEncoding UTF-8 sso_1.sp.disableDecodedURL true sso_1.sp.enforceTaiCookie false sso_1.sp.principalName NameID sso_1.idp_1.SignleSignOnUrl Copy "Target IDP initiated SSO URL" from keycloak client property "IDP Initiated SSO URL Name" sso_1.idp_1.EntityID https://{keycloak_server}/auth/realms/{realm} sso_1.idp_1.certAlias kcsamlcert sso_1.sp.login.error.page Same as value of sso_1.idp_1.SignleSignOnUrl sso_1.sp.trustStore NodeDefualtTrustStore sso_1.sp.targetUrl https://{your_application_url/homepage/web/login_redirect?redirectUrl=/homepage sso_1.sp.useRelayStateForTarget true sso_1.sp.useRealm WAS_DEFAULT sso_1.sp.includeCacheKey false sso_1.sp.includeToken true sso_1.sp.preserveRequestState true sso_1.EntityID https://your_application_url/samlsps/kcacs
-
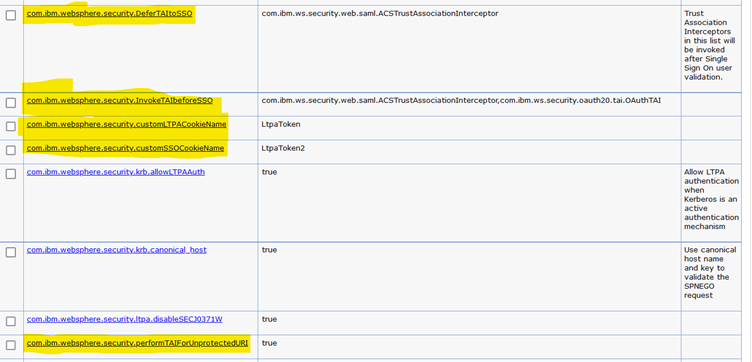
Configure Global Security Custom Properties
Navigate to:
Global security > Custom propertiesSet/update the following(highlighted) properties with respected values.
Note
If any of the properties doesn't exist, add it.
-
Configure Signer Certificate
Import IDP metadata file (Refer to last step in Keycloal configuration)
cd /opt/IBM/WebSphere/AppServer/bin/
./wsadmin.sh -lang jython -username username -password password
AdminTask.importSAMLIdpMetadata('-idpMetadataFileName Path_to_metadata.xml -idpId 1 -ssoId 1 -signingCertAlias kcsamlcert')
AdminConfig.save()
Navigate to below path to check if certificate has been imported successfully:
Global security > SSL certificate and key management > Key stores and certificates > NodeDefaultTrustStore > Signer Certificates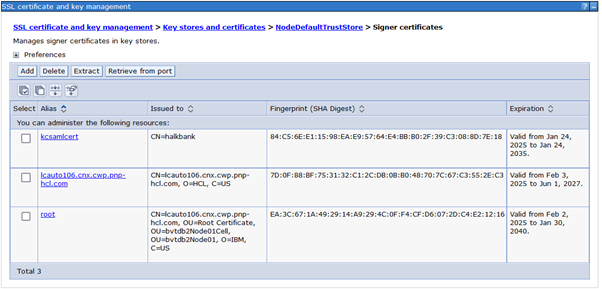
-
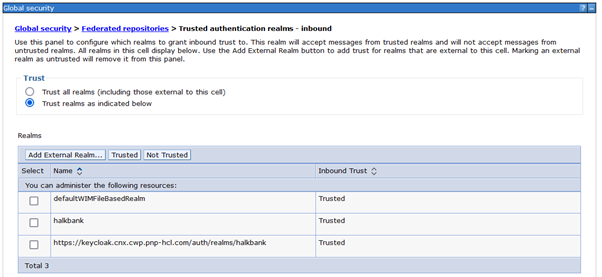
Add Trusted Realms
Navigate to:
Global security > Federated repositories > Trusted authentication realms – inbound-
Click Security > Global security > RMI/IIOP security > CSIv2 inbound communications > Trusted authentication realms – inbound.
-
Click on Add External Realm.
-
In the External realm name field, enter the value for realmName and realm URL from keycloak.
-
Click OK.
-