Shift Management
This screen allows the user to apply shifts, its duration, its validity and week off days for the users so that during ticket assignation, based on the shift details, the tickets will be assigned to those users which are available at that time.
- To apply shifts for user, click on Roster Management->Shift management.
Figure 1. Shift Management 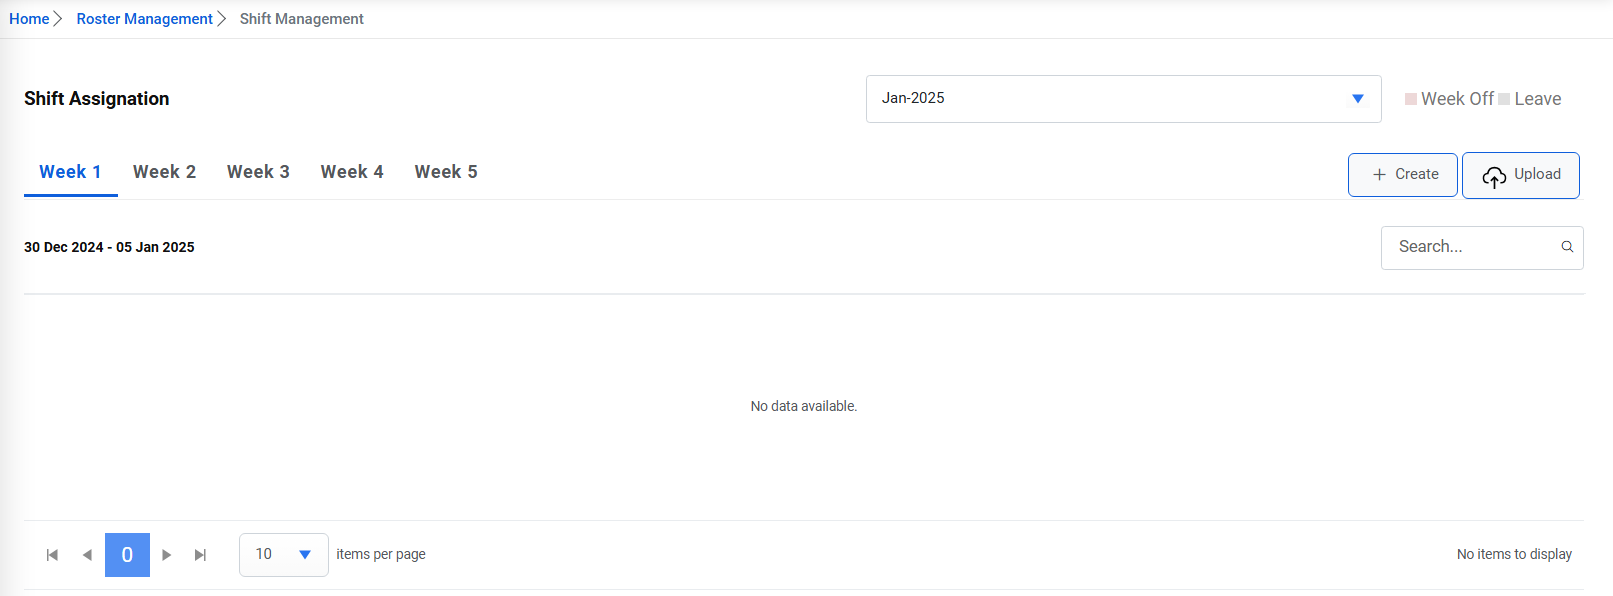
- Shift can either be created one by one or can be uploaded in bulk.
- To create shift, click on the create button.
Figure 2. Create Shift 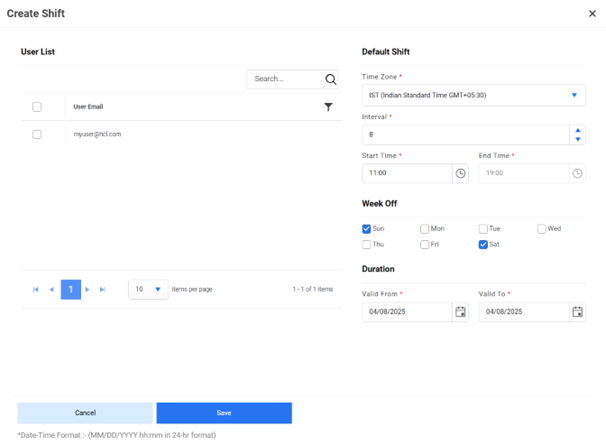
- By default, the data of shift will be populated based on the data given in Default shift management page.
- To create shifts for any user, select the user, its time zone, shift interval, start, week
off days and validity.Note:The End Time will be disabled and auto populated by adding the default interval, in the Start Time, defined for that time zone.
Figure 3. Create Shift (Cont.) 
- Click on save. The alert below will be generated.
Figure 4. Success Message 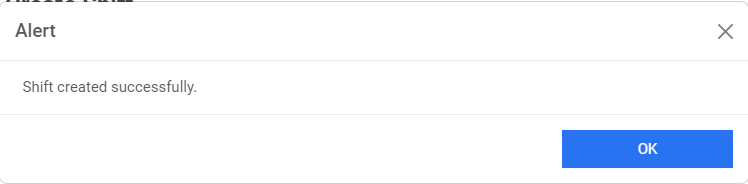
- The grid will be populated based on the selected month and user applicable shift in the
selected week.
Figure 5. Shift Assignation 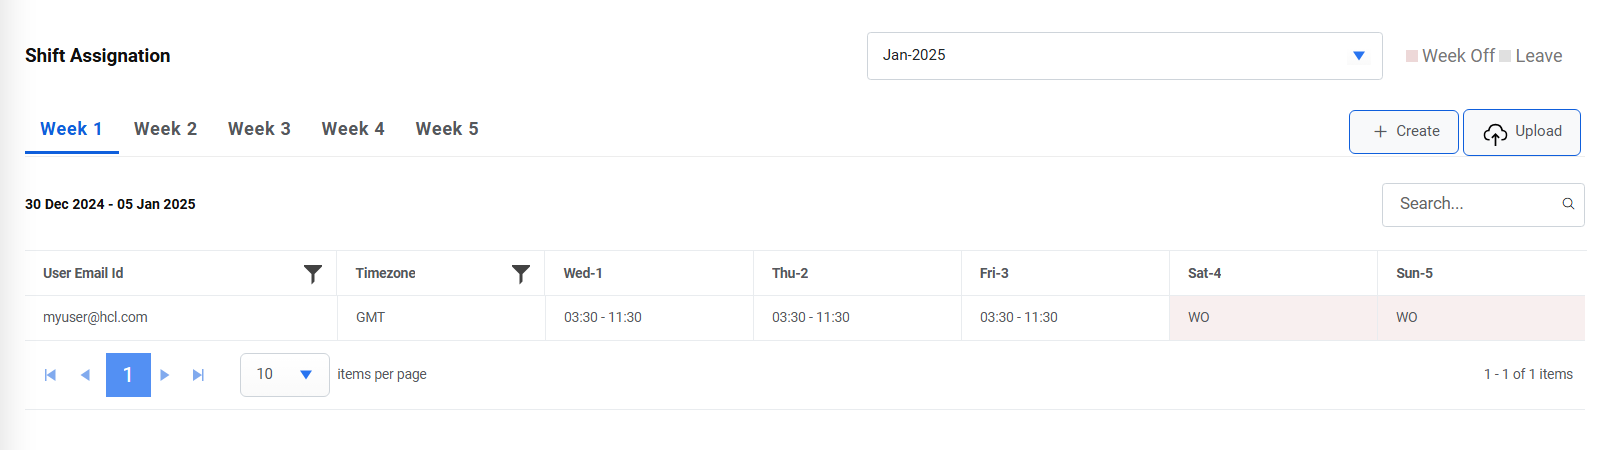
- To bulk upload the user shift’s details, click on the Upload button.
Figure 6. Bulk Upload Users Details 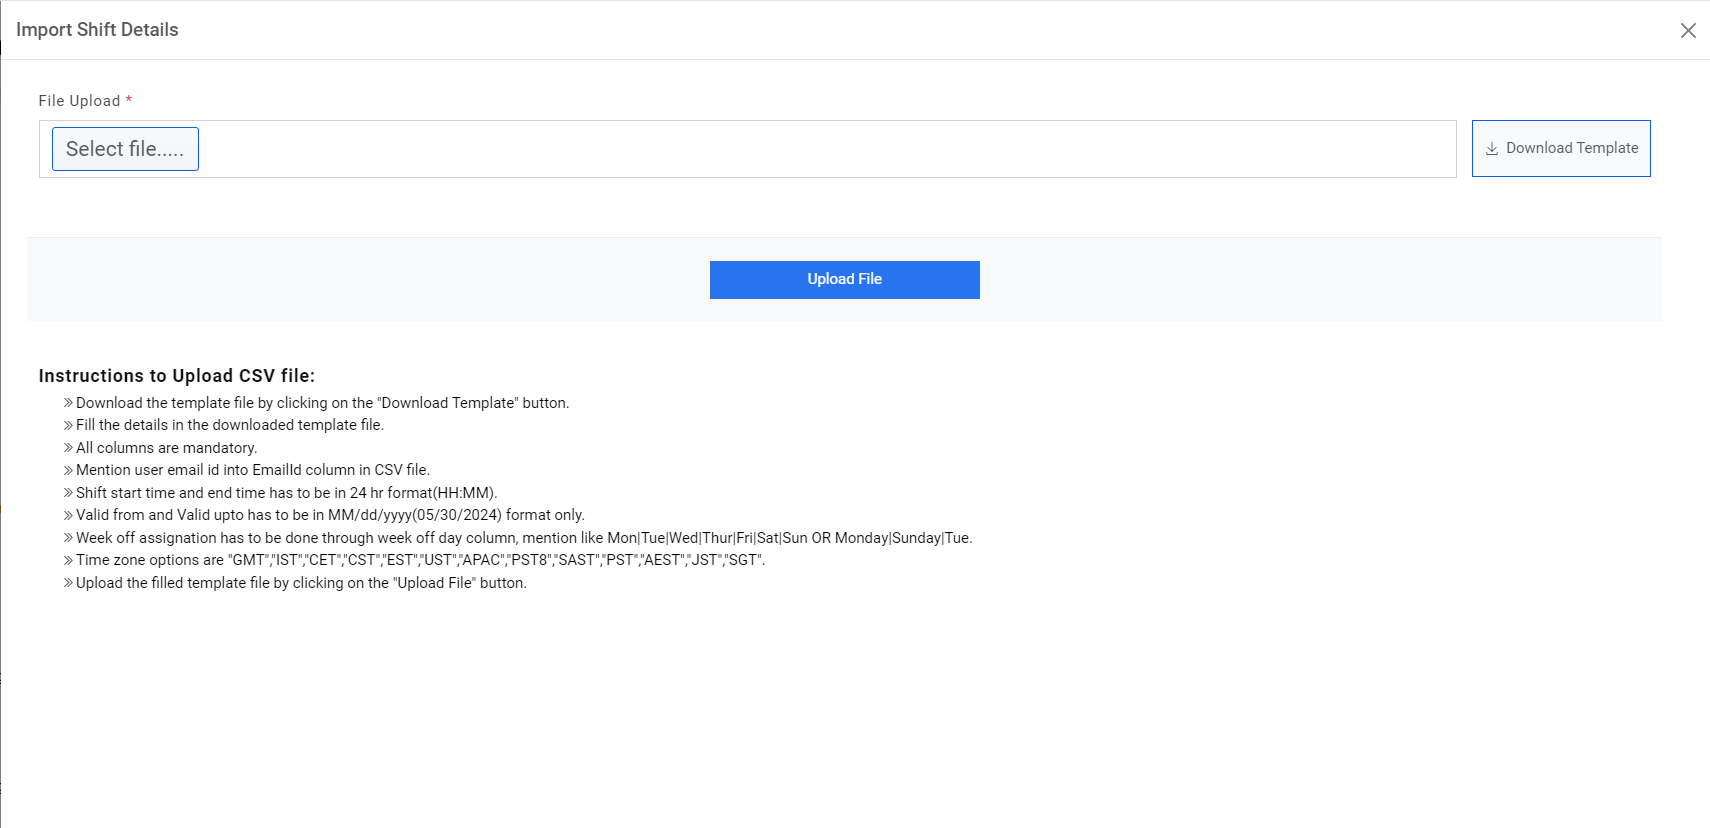
- Click on Download Template button to download the valid template.
- Fill the template with valid data by referring to the instructions to upload the CSV file.
- Select file and click on upload.
- On successful upload, the alert below will be generated on the screen.