Manage Organizations
As a Super Administrator, users can use the Manage Organizations page to set up an organization and begin the iAutomate configuration.
To create an organization, perform the following steps:
- On the main menu bar, click Configuration and then Manage
Organizations . Then click on the plus sign.
Figure 1. Manage Organization 
- The New Organization
page appears.
Figure 2. New Organization 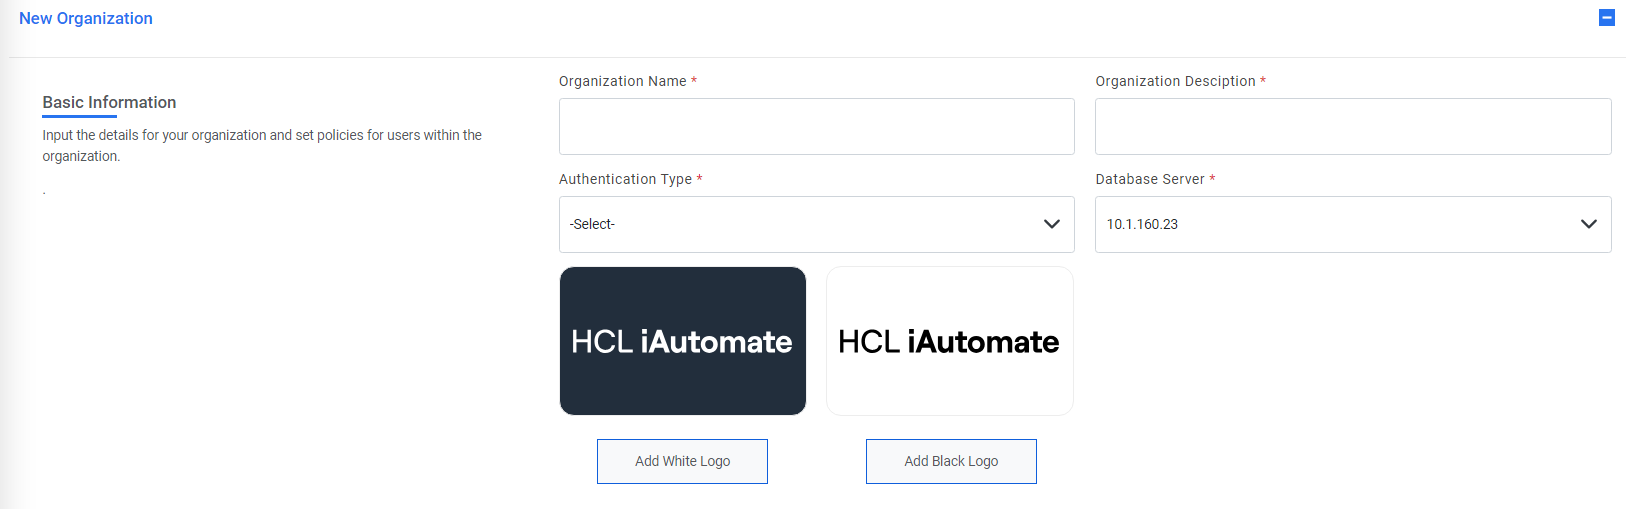
- Type the name of the customer to be created in the Organization field.
- Type the customer description in the Organization Description field.Note:The supported file type for uploading an image as a logo is .jpg, .jpeg, and .png and the recommended file size is not over 10 KB.
- Select the ITSM Tool Type from the Module Name field.
Figure 3. Select ITSM Tool Type 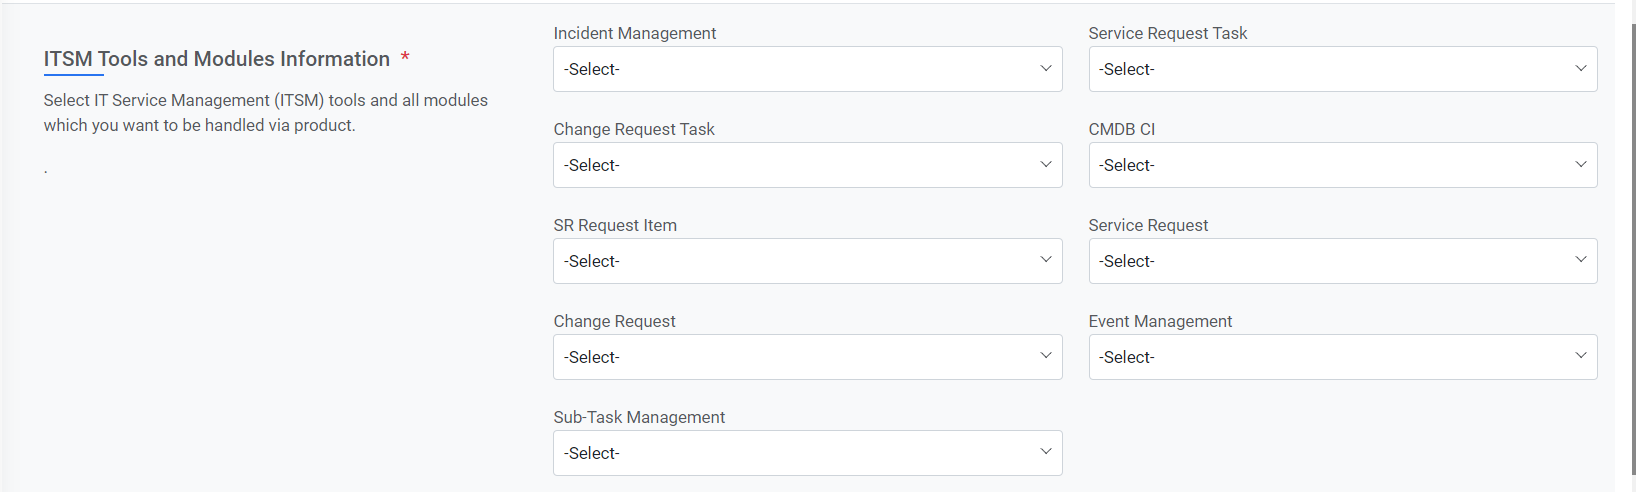
- Select the required Runbook Tool from the list of tools.
Figure 4. Select Runbook Tool 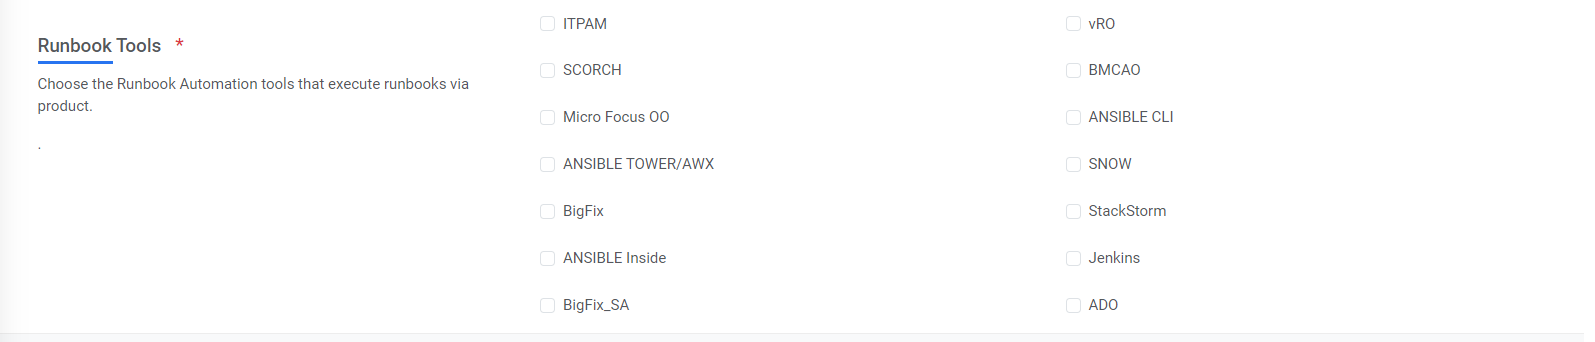
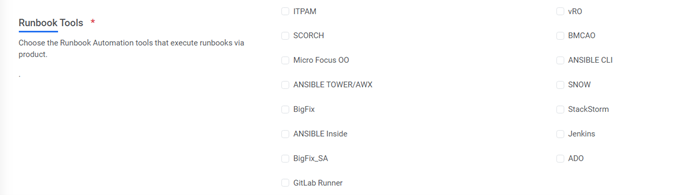 Note:You can select single or multiple automation tools against the selected module.
 - To manage database files, select the Database Server from the lists available in the Database Server field.
- Select the Authentication Type from the following options:
- FORM: Users are authenticated without Active Directory (AD) support.
- LDAP: Users are authenticated using their AD credentials.
-
SAML: Users are authenticated using the SSO (Single Sign On) credentials that
allow security credentials to be shared by multiple computers across the network.
Figure 5. Authentication Type Selection 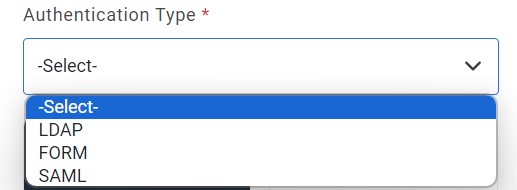
Note:The selected authentication type will reflect while managing the user as explained in Add New User - Enter a numeric value in the Password Expiration Days field. This numeric value
defines the password expiration days for the user of the corresponding user.Note:Password Expiration Days will be visible only in case of FORM authentication type.
- Selection of SAML authentication prompts the additional fields to be filled.
- Type the ID in the SSO ID field.
- Type the URL in the SSO URL to access the iAutomate website.
- Type the name ID in the SSO Name ID field.
- Enter the tool in the SSO Tool field.
- Enter the Logout URL.
Figure 6. Select Authentication Type (SAML) 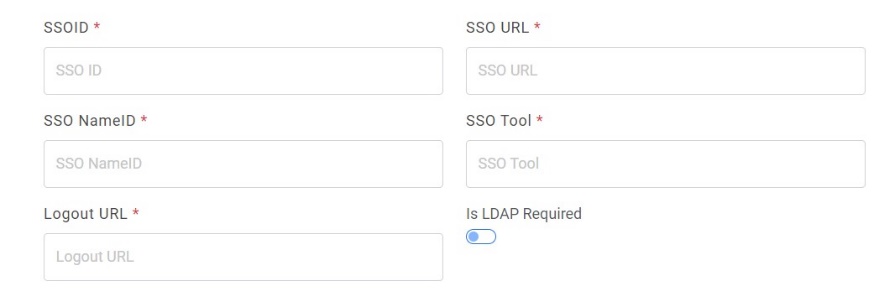
- Enable Is LDAP Required field if the user needs to fetch the data from LDAP.
- Selection of LDAP authentication prompts the additional fields to be filled.
- Enable Is SSL Required field if configuration Run over LDAPS
- Type the LDAP URL.
- Type the LDAP UserID.
- Enter the LDAP Password.
- For LDAP password, click on Add Password button next to it. If the password is
available in plaintext, then select Input type as Input Text and enter the password in
Value field. Else if it is available in Azure Key Vault then select Input Type as Azure
Key Vault and then select any of the configured details from the value field. Else if it
is available in any Key Vault such as CyberArk or Secret Manager then select Input Type
as CyberArk or Secret manager respectively and then select any of the configured details
from the value field.
Figure 7. Password in Plaintext .jpg)
Figure 8. Password from Key Vault (CyberArk) 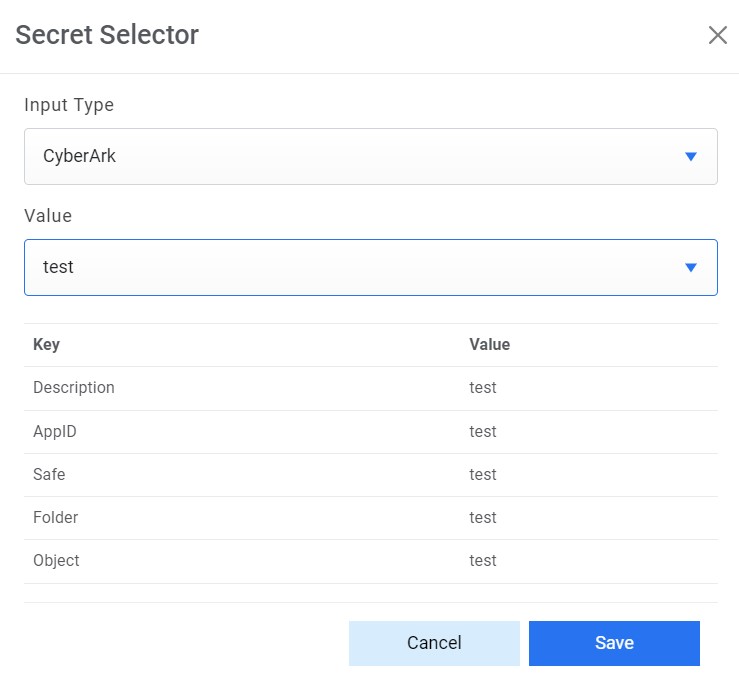
Figure 9. Password from Secret Manager 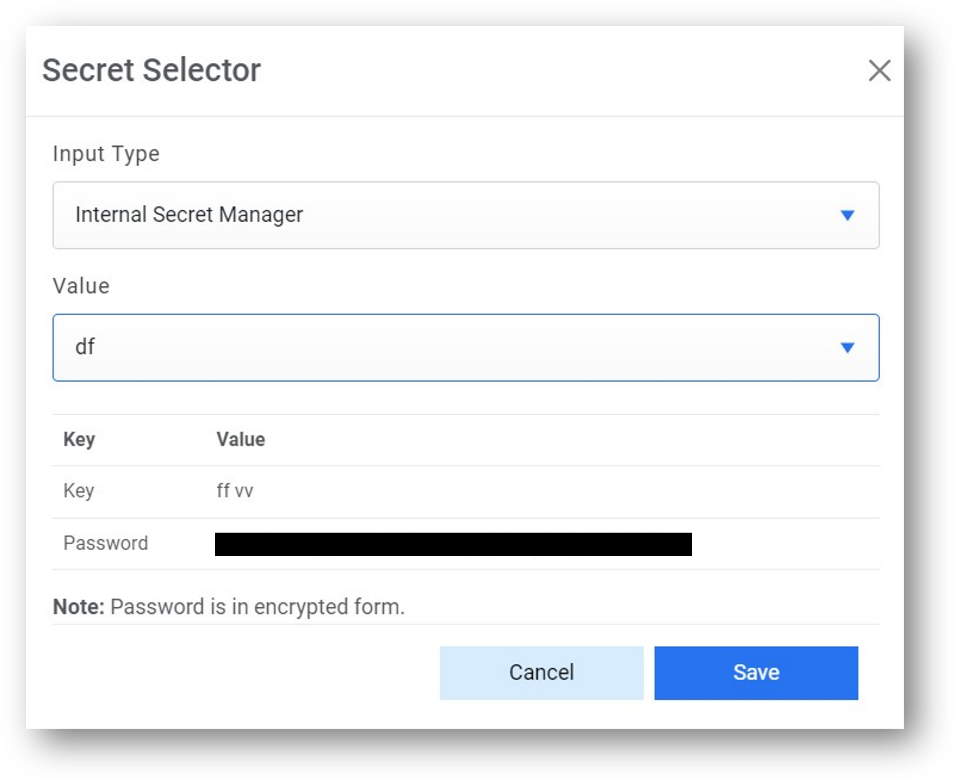
Figure 10. Password from Azure Key Vault .jpg)
- Click on Test Connection to check accessibility of LDAP from service. If
an alert is generated saying ‘Use only WhiteListed URL’ then refer to ‘HCL iAutomate KRS
Guide’ to whitelist any URL.
Figure 11. Select Authentication Type (LDAP) 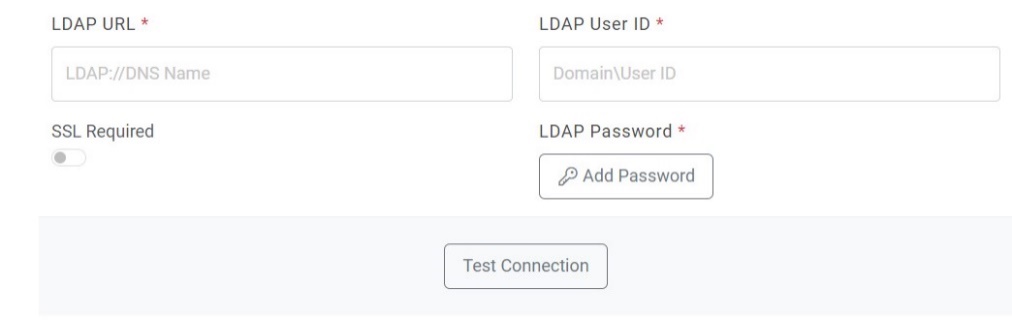
- Click Save.
- A confirmation dialog box appears. Click OK.
Figure 12. Organization Creation Confirmation 
- The new organization is added and listed in a tabular view.
Figure 13. Organization Creation Confirmation 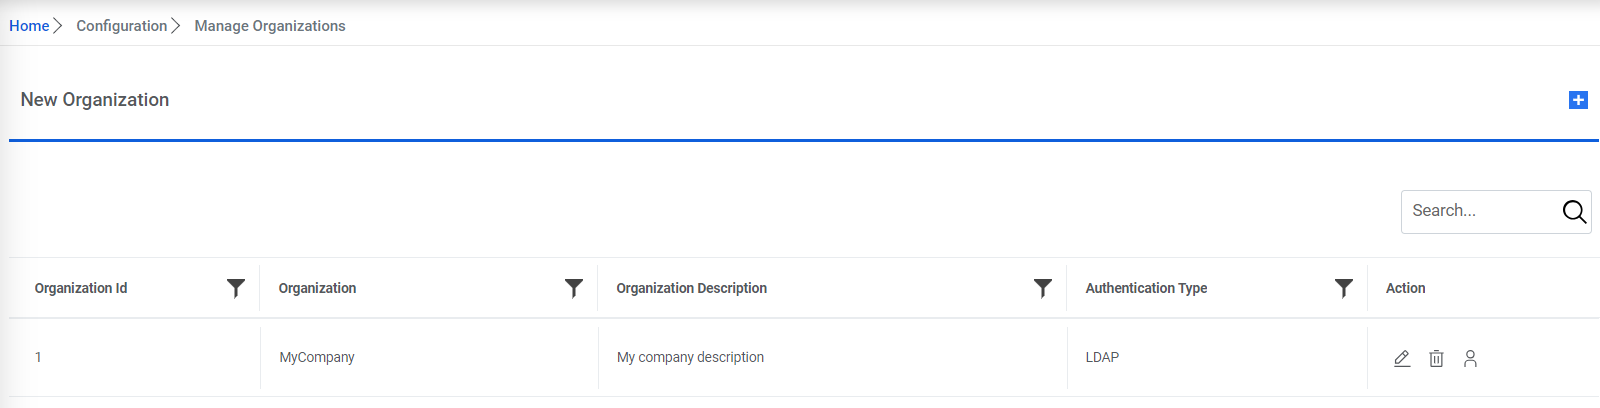
- In the case of LDAP, click
 to
enter the LDAP Group Information.
to
enter the LDAP Group Information.Figure 14. Enter LDAP Information 
- Enter LDAP Group Name and select the Group Name from the dropdown.
- Check Is API if this group user needs to be treated as an API user.
- Click
 to add group.
Figure 15. Enter LDAP Group Name  Note:Users can add multiple groups, and a group can be deleted by clicking
 icon.
icon. - After having added the group details, click Submit.Note:All fields marked with an asterisk (*) are mandatory.
View Organization
Users can view the organizations available in the iAutomate environment by performing the following steps.
- On the main menu bar, click Manage Organizations.
- The Manage Organizations page appears.
Figure 16. Figure View Organization 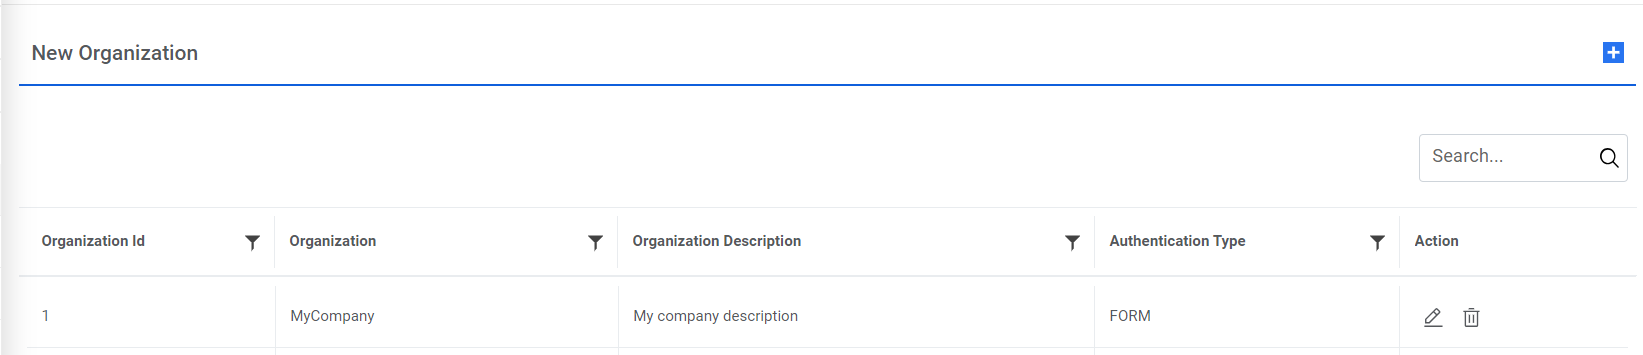
- This screen lists all the available organizations in a tabular view with the organization name and organization description. It also allows user to create an organization by clicking Add New, which redirects you to Manage Organizations screen to create an organization and edit or delete existing organizations.
Edit Organization
Users can open an existing organization, review the available information, and edit the organization’s details.
To edit the existing organization, perform the following steps:
- On the Manage Organizations page, click
 corresponding to the organization that you want to edit.
Figure 17. Edit Organization .png)
- This redirects you to the Edit Organization page with all the details auto filled details.
- Edit the required details and click Update.
Figure 18. Edit Organization 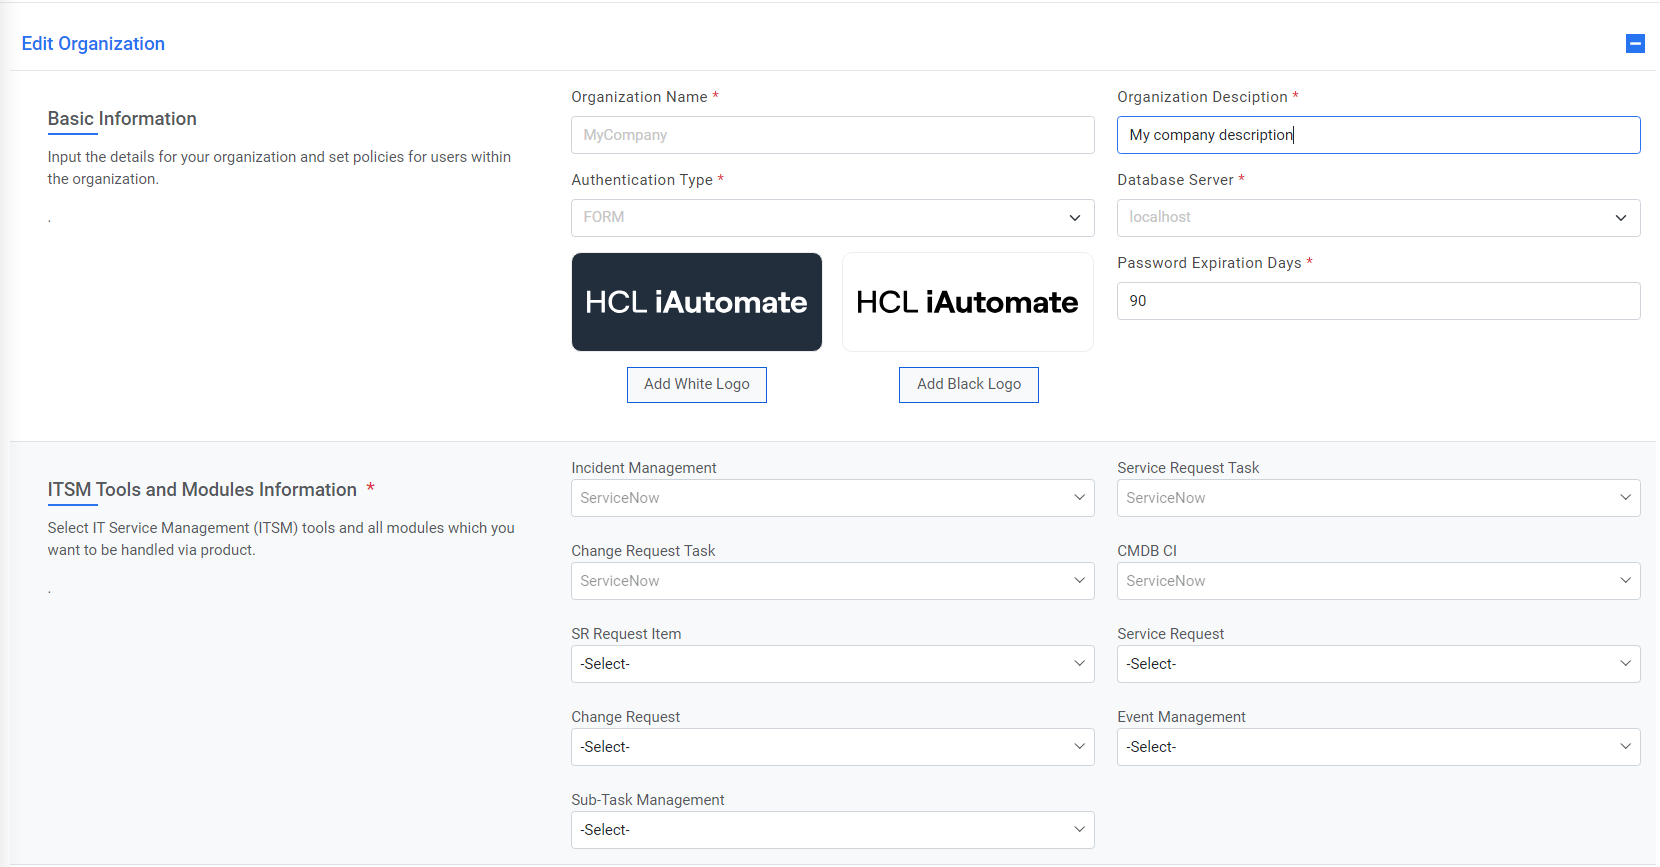
Figure 19. Edit Organization (Cont.) 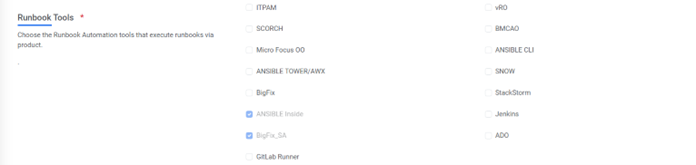
- To view the updated organization, click List. This will redirect you to View Organization Manage Organizations.
Delete Organization
If a user no longer requires a certain organization, it can be deleted from the environment.
To delete an organization, perform the following steps:
- On the Organization List page, click
 next to the organization user wants to delete.
Figure 20. Delete Organization .png)
- Click OK to confirm.
Figure 21. Confirm Deletion .jpg)