User Management
A Super Administrator or Organization Admin can add other users in an organization.
For user management, perform the following steps:
- On the main menu bar, click on RBAC menu.
- Click User Management. The User Management page appears.
Figure 1. User Management 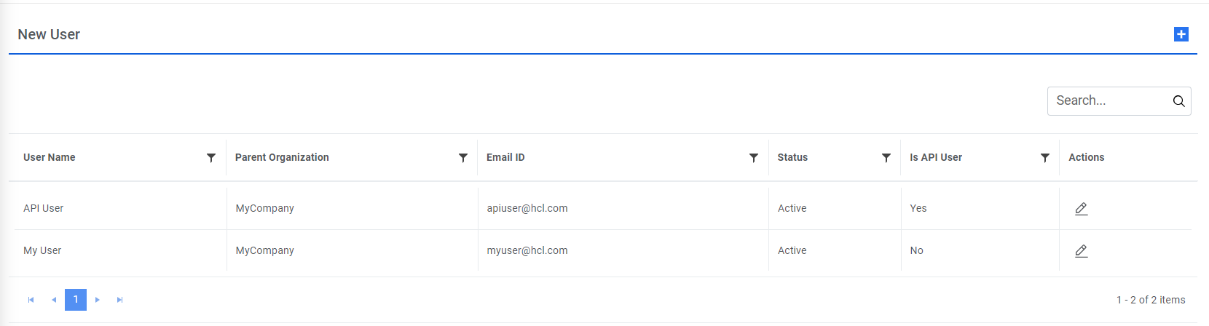
- It lists the available users in a tabular view and allows users to create a new user, edit the existing user, and unblock any locked user.
Add Single User
A Super Administrator or Organization Admin can add a new user to the organization by performing the following steps:
- On the User Management screen, click plus sign. The Add User page appears.
Figure 2. Add New User 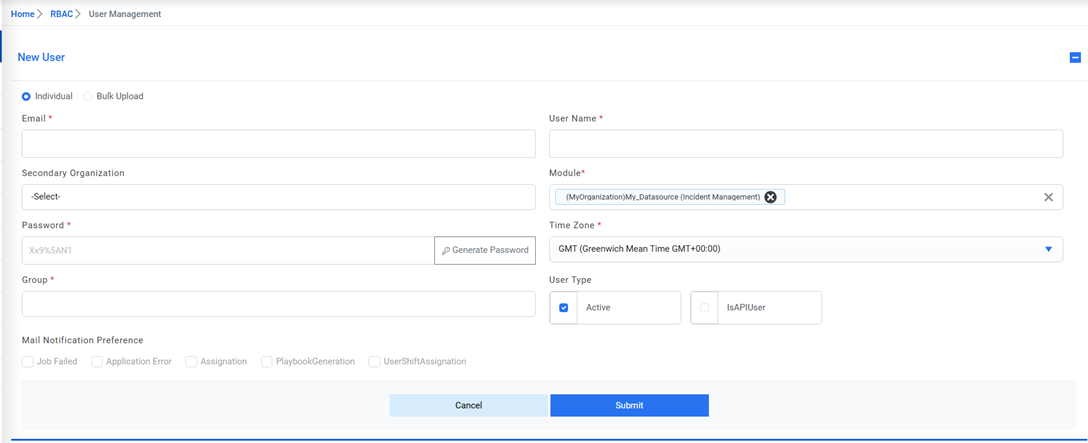
- You must provide the details for the following fields on the Add New User
page.
- Specify the email address to send or receive notifications in the Email field.
- Specify the username.
- Select the secondary organization if the user wants to view/configure for other
organizations as well.Note:In case of super admin, the module dropdown shows the data source of the organization selected in top header. For org admin, it shows the data source of the organization selected during login.
Further fields get auto populated based on the authentication type of selected organization during login. In the case of the organization is with Form Based Authentication; the user password will be auto generated in the Password field.
Note:This password field remains invisible in the case of organization with SAML and LDAP based authentication. But if any form-based organization is selected in secondary organization option then the password field will be visible and the password being saved in that case will be used during login if the user selects this secondary organization.Figure 3. Select Organization 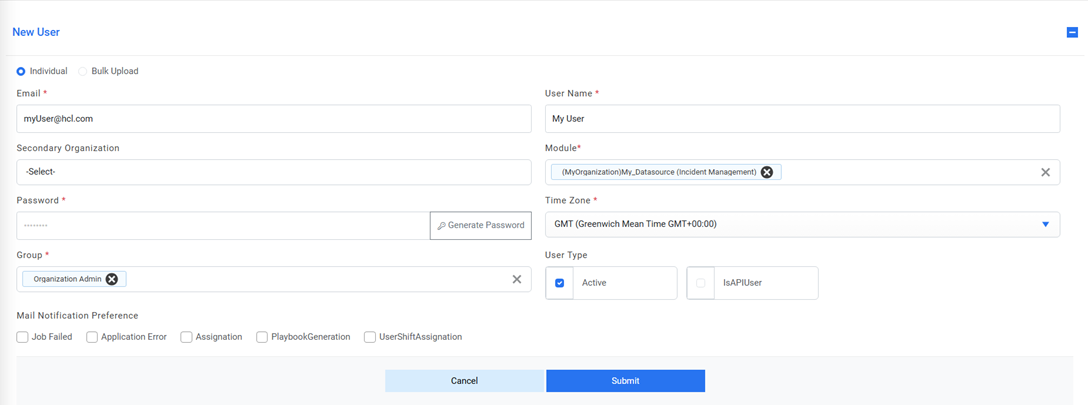
- Select other organizations to which the user needs to be mapped in Secondary Organization.
- Select the Time Zone to which the user belongs.
- Select an Active check box to activate the user immediately after creation.
- Select IsAPIUser check box to enable the user to access certain services of
iAutomate only through APIs and not the Web User Interface.
Figure 4. Add New User (Cont.) 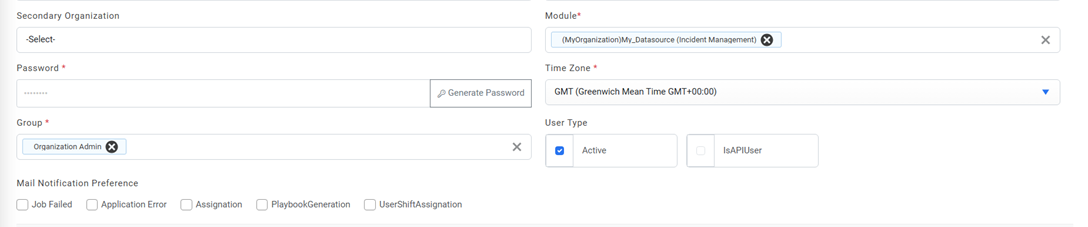
- Select the Mail Notification Preference based on which if valid SMTP details are
configured then the corresponding emails will be sent to the user.Note:The bulk upload option is only visible to organization admin.
- Click Submit.
- A confirmation dialog box appears.
Figure 5. Add New User (Cont.) 
The new user is added and appears in a list of users.
Bulk Upload of User
Users can view upload the user data and its profile data by filling the template and uploading.
To bulk upload user data, perform the following steps:
- On the User Management page, click on the New User.
Figure 6. Edit User 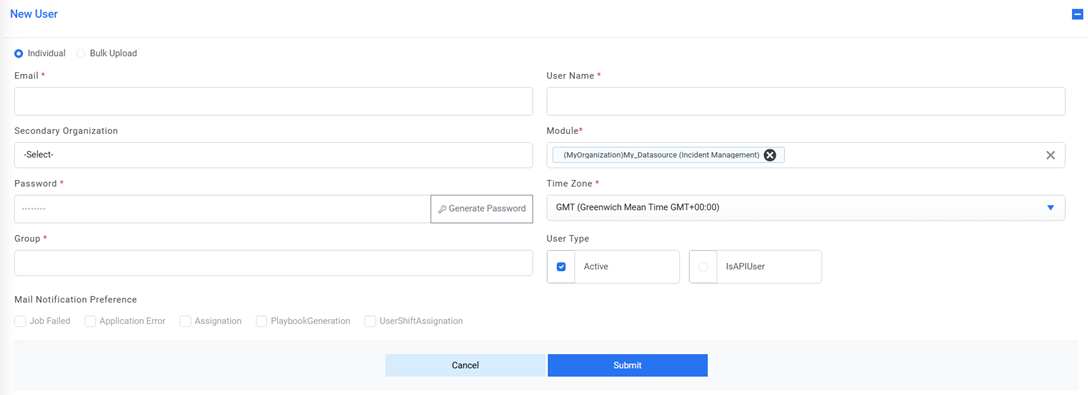
- To upload bulk user data, select the ‘Bulk Upload’ option.
Figure 7. Edit User (Cont.) 
- Download the template and fill out the data of users that need to be bulk uploaded.
- Click on upload.
- A confirmation dialog box appears.
Figure 8. Edit User (Cont.) 
Edit User
Users can view an existing user, review the available information, and edit the user details.
To edit the existing user, perform the following steps:
- On the User Management page, click
 next to the user, the user wants to edit.
Figure 9. Edit User 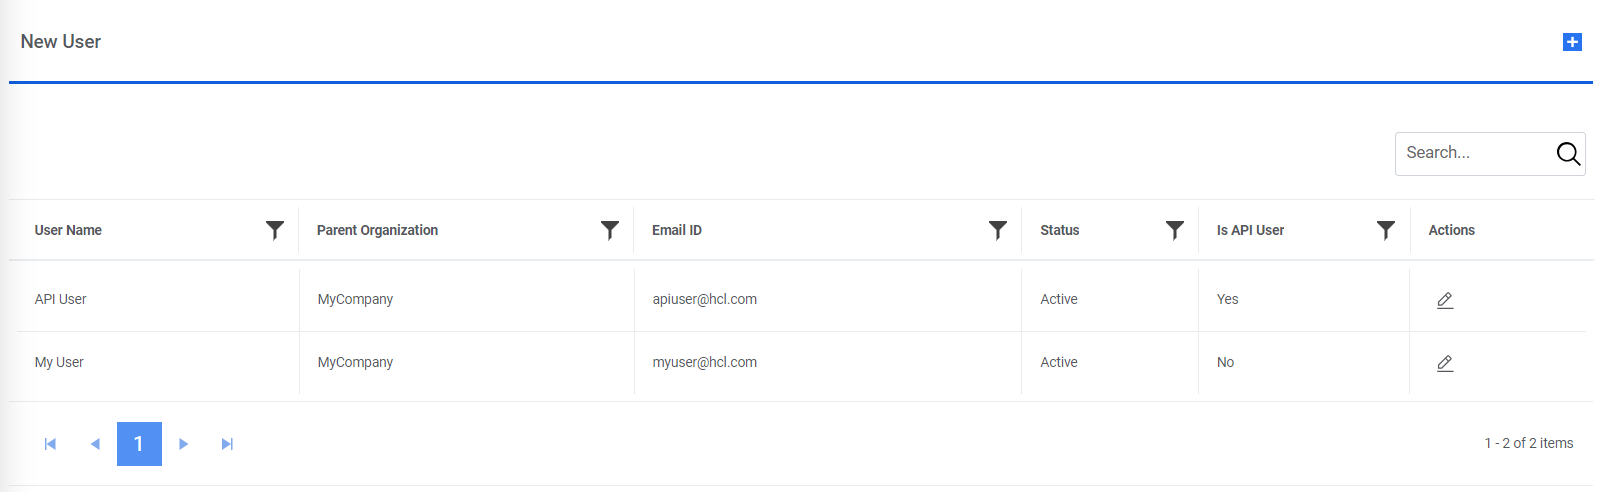
- Edit the details as required and click Update to save
changes.
Figure 10. Edit User (Cont.) 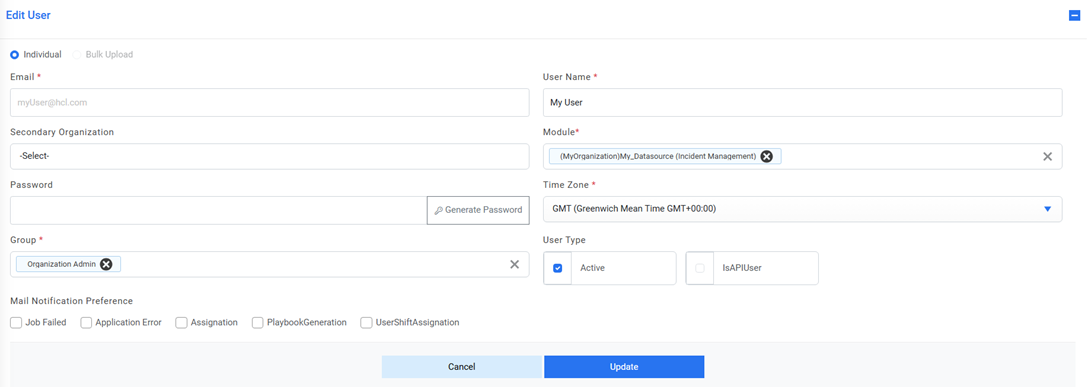
- A confirmation dialog box appears on the screen.
Figure 11. Edit User (Cont.) 