
Intelligent Triage
Smart Routing
Log into HCL BigFix Service Management and, upon landing on the consumer homepage, use the global search to type and search for the Report an Issue offering.
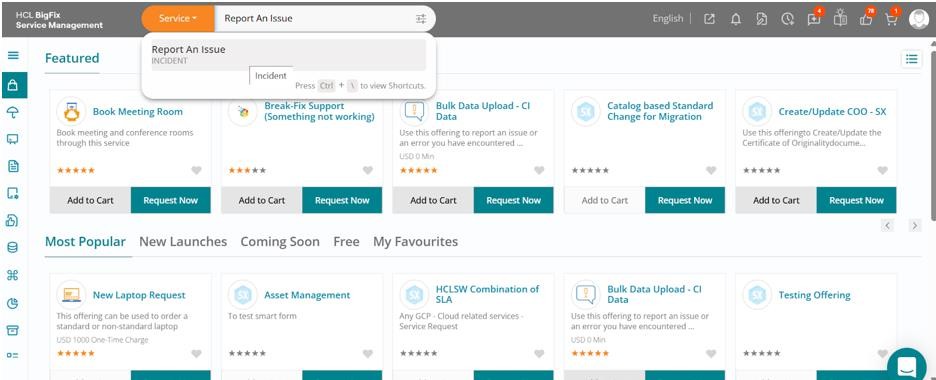
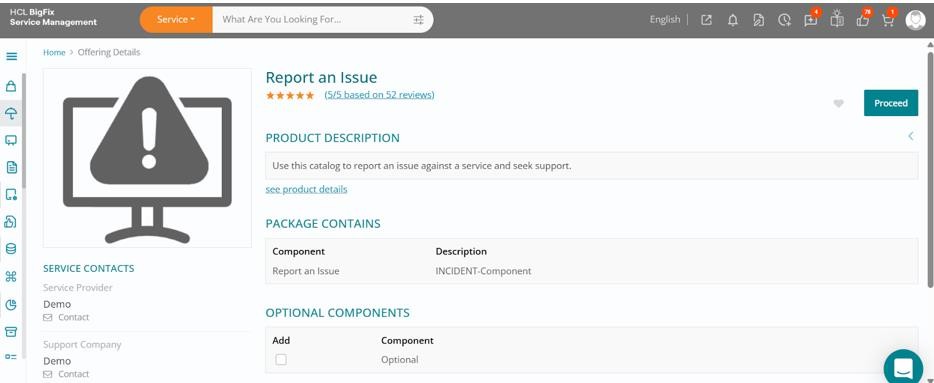
Click on the offer to open the offering details page. You may review the details and then click on the Proceed button located on the right side of your screen to continue.
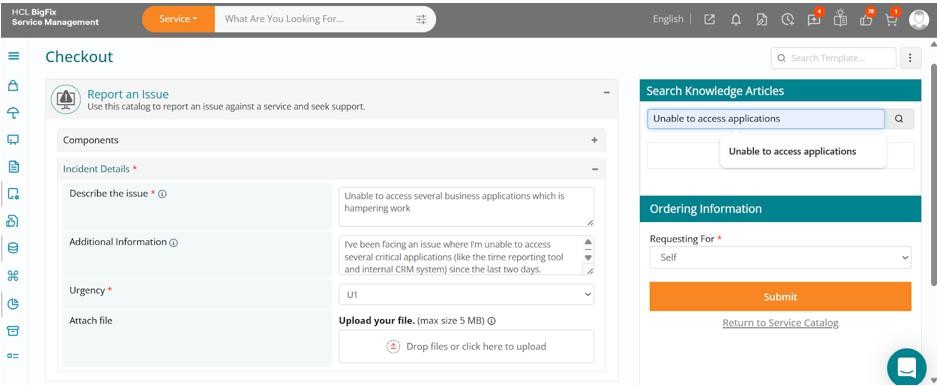
Fill in your issue details in the left section of the Checkout page. On the right section, select either Self or On Behalf, then click Submit to log the issue.
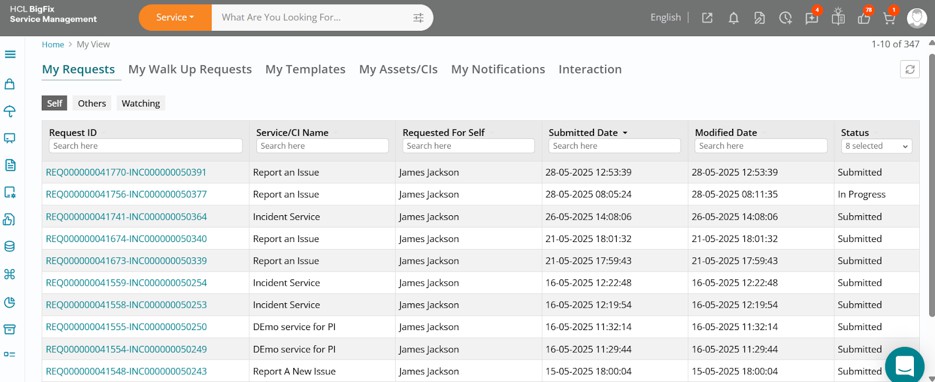
In this case, we selected Requesting for as Self and submitted the issue. You will be redirected to the My Requests - Self section, where the submitted ticket appears at the top of the list. If you had selected On Behalf, the ticket would appear under the My Requests - Others section.
Next, log in as a support user and navigate to the Work Item Board from the application menu on the left-hand side.
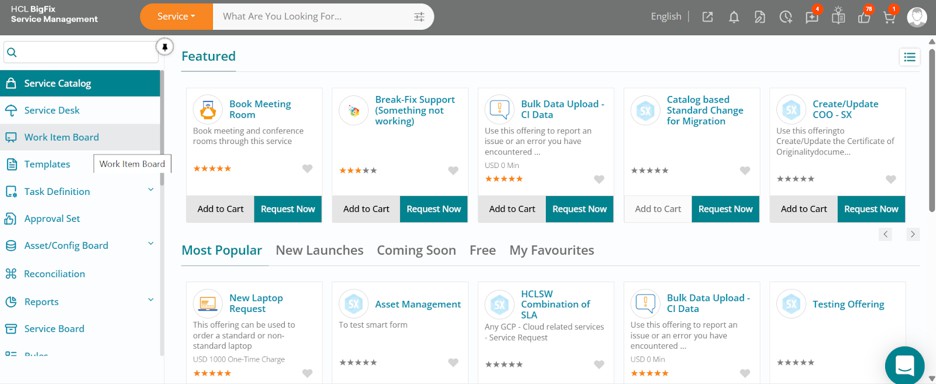
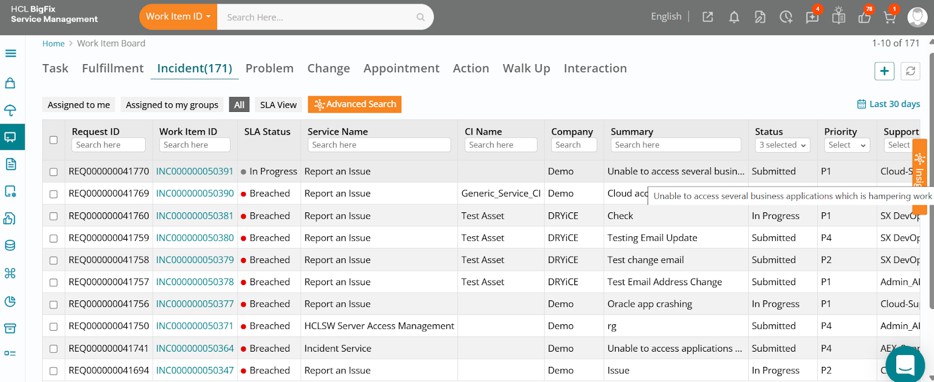
Click on the Work Item Board, then go to the Incident tab to view all open incidents. The list view will show the latest incidents at the top.
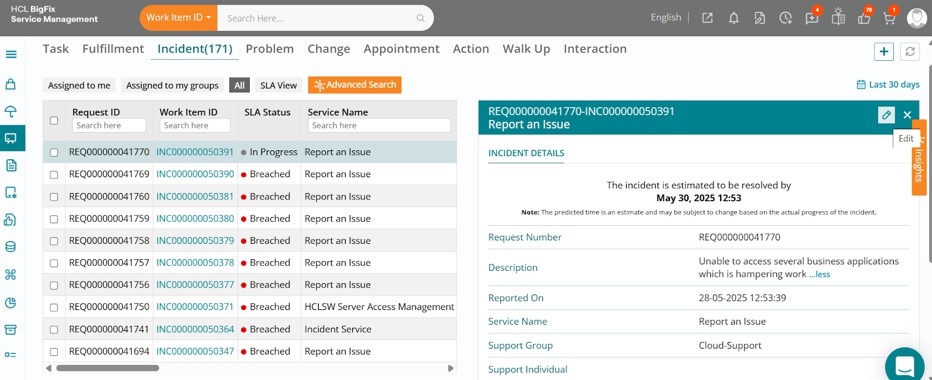
Click on the relevant incident, then click the Edit button in the drawer that opens on the right-hand side of your screen.
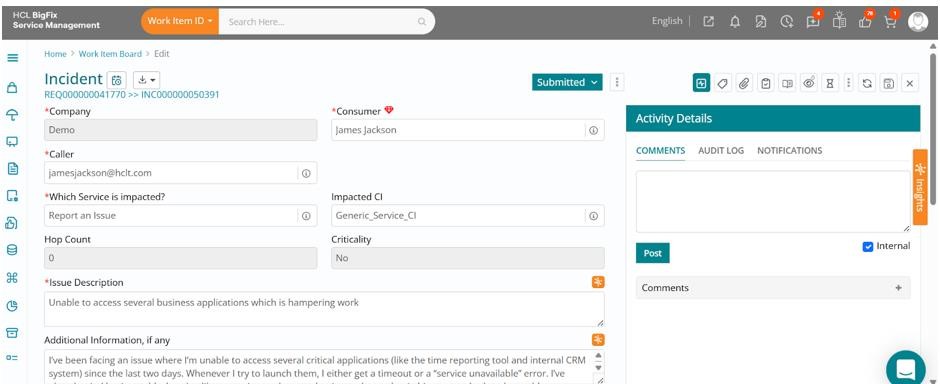
The full incident form will open, displaying the ticket details.
Scroll to the bottom of the form. If assignment rules are configured, the system will automatically route and assign the ticket to the appropriate support group. In this example, the ticket was automatically assigned to the Cloud Support group.
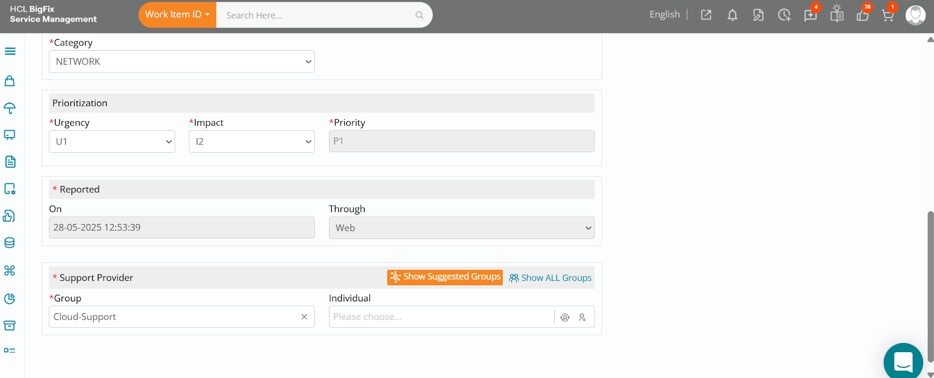
Click the orange Show Suggested Groups button to view AI-based recommendations for the most relevant support group(s) to handle the incident.
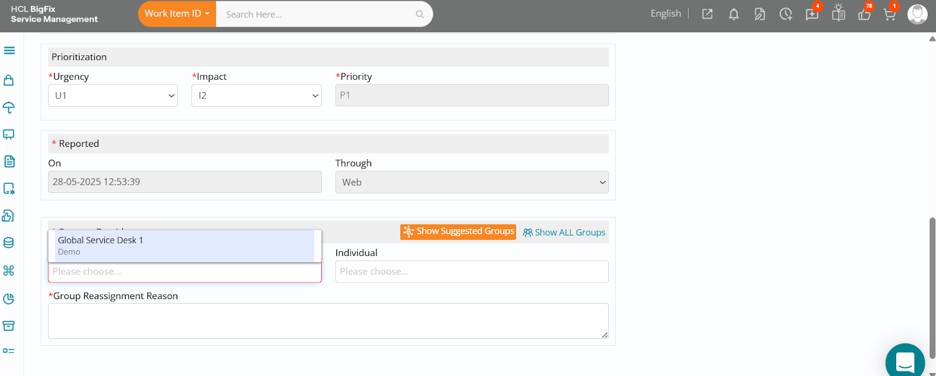
If you agree with the AI recommendation, select the suggested group. Then, in the Individual
field, you’ll see the AI-suggested agent(s) from that group appear.
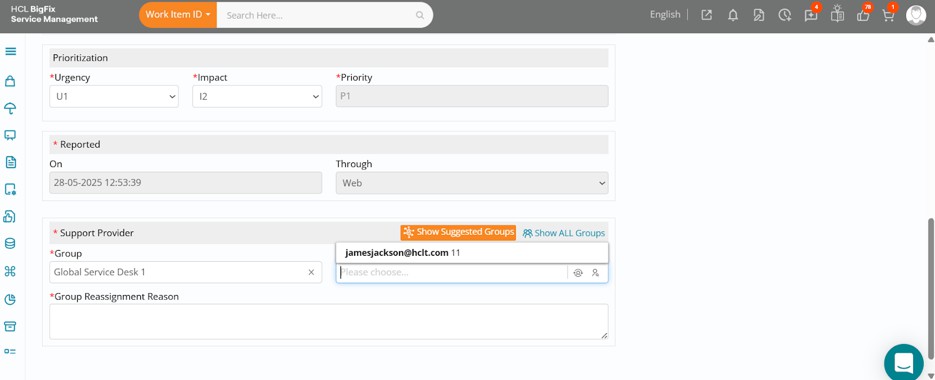
In this case, James Jackson is suggested as the most suitable agent to investigate and resolve the issue. If you agree, select the agent and enter the required group reassignment reason.
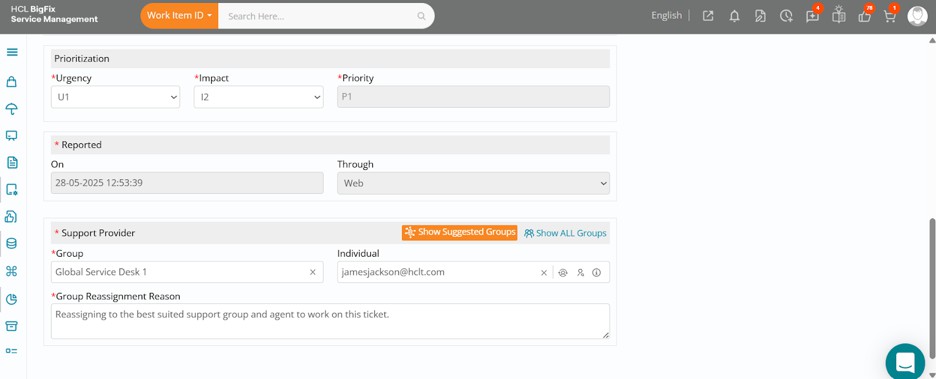
Scroll to the top and click the Save button in the top-right corner to save your updates and complete the reassignment.
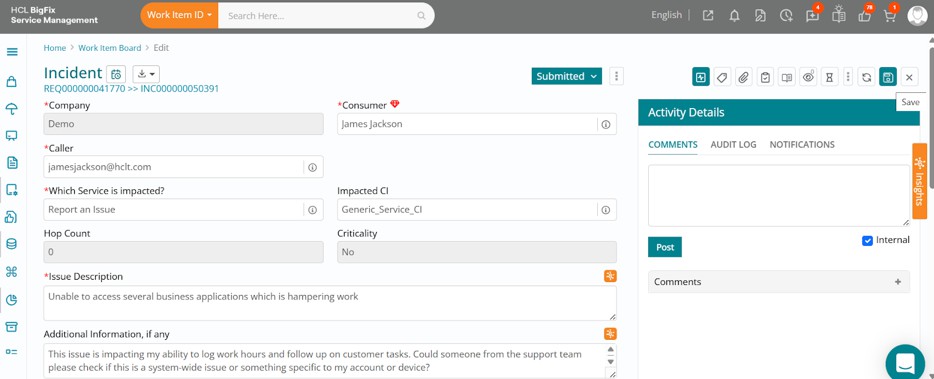
This feature uses machine learning algorithms to analyze both historical and current ticket data, enabling intelligent triage by recommending the most relevant support group(s) and agent(s) best suited to handle the issue effectively.
Priority Prediction
Log into HCL BigFix Service Management as a support user and navigate to the Work Item Board from the application menu on the left-hand side.
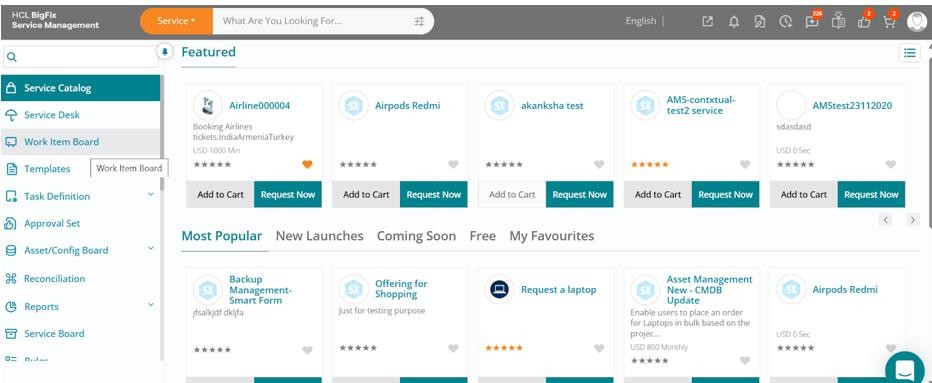
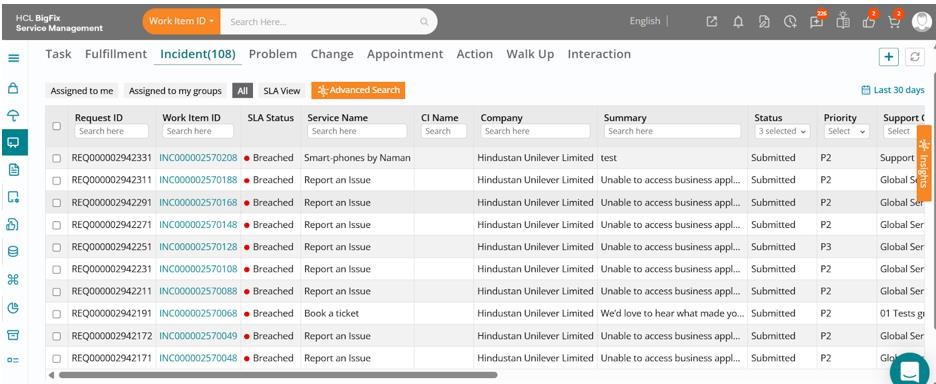
Click on the Work Item Board, then navigate to the Incident tab to view all open incidents. Let’s begin by reviewing an incident that was reported directly by the user through the consumer portal.
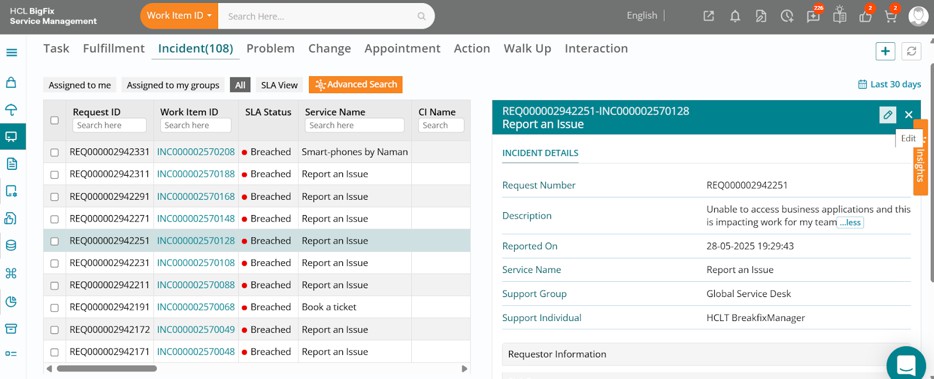
Click on the relevant incident, then click the Edit button in the drawer that opens on the right-hand side of your screen.
The full incident form will open, displaying the ticket details.
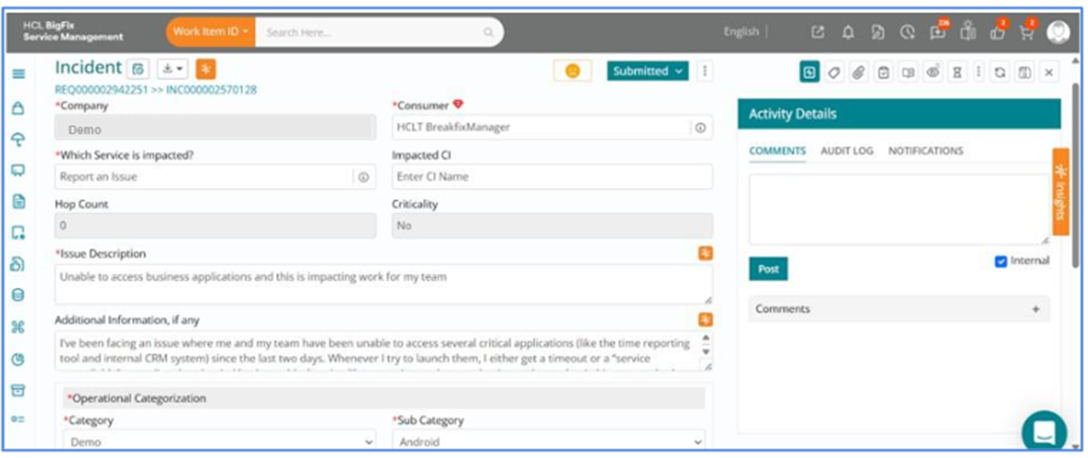
Scroll down and review the ticket information. In this case, the ticket was raised by a user mentioning impact to their entire team, indicating that multiple users are affected. However, the priority is currently set to P3, which does not seem appropriate given the scale of impact.
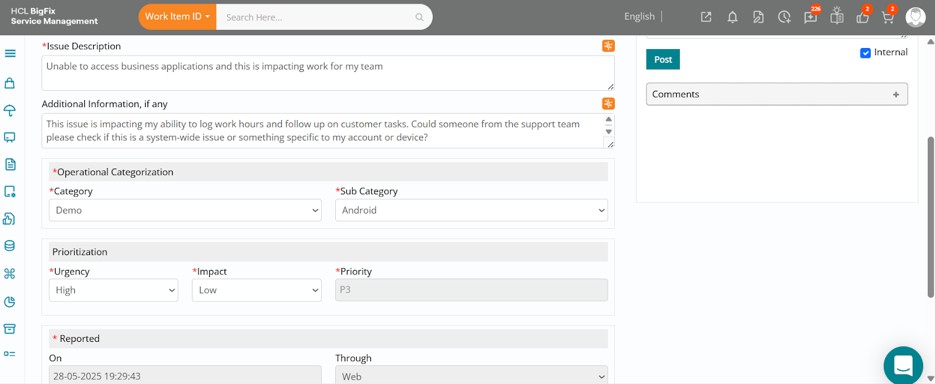
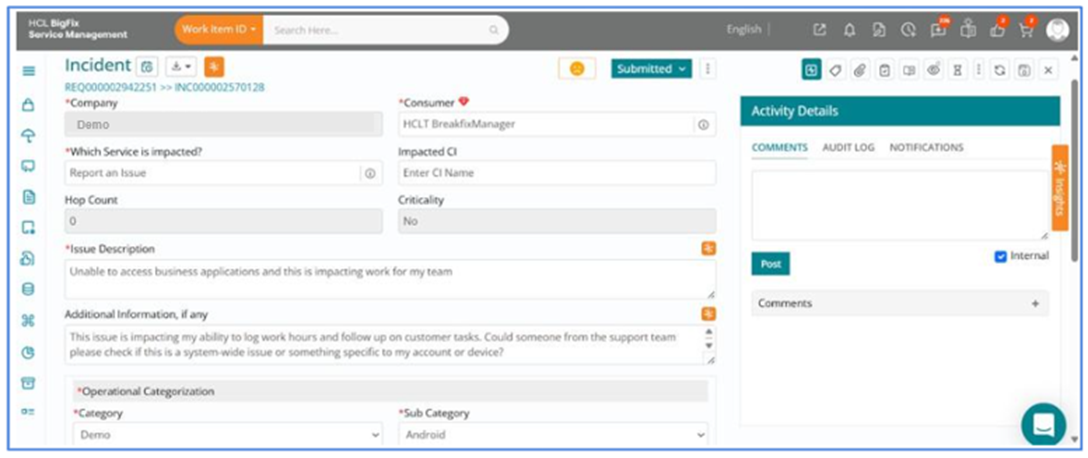
This is where you can navigate to the right of your screen and click on the orange-coloured Insights button, followed by selecting Intelligent Triage to expand that section.
You will see Priority listed as one of the options under Intelligent Triage. All data under the
Insights section is AI-generated using machine learning models.
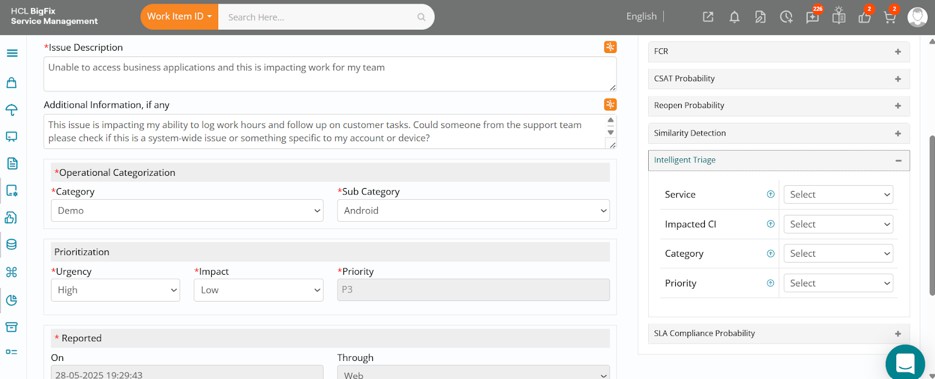
Click on the arrow beside the Priority field, then open the dropdown to view the AI-suggested priority based on this ticket’s context.
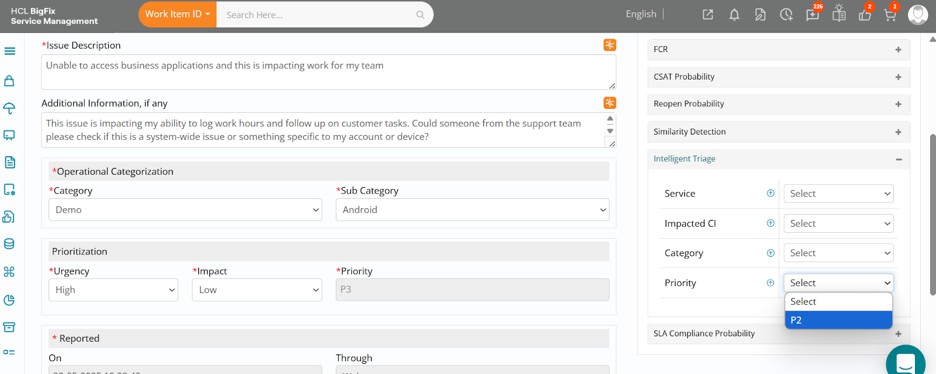
In this case, AI recommends a P2 priority, which aligns better with the stated impact, as multiple users are affected. You can choose to accept the AI-suggested priority, update the priority field accordingly, then scroll to the top and click the Save button in the top-right corner to save the incident details.
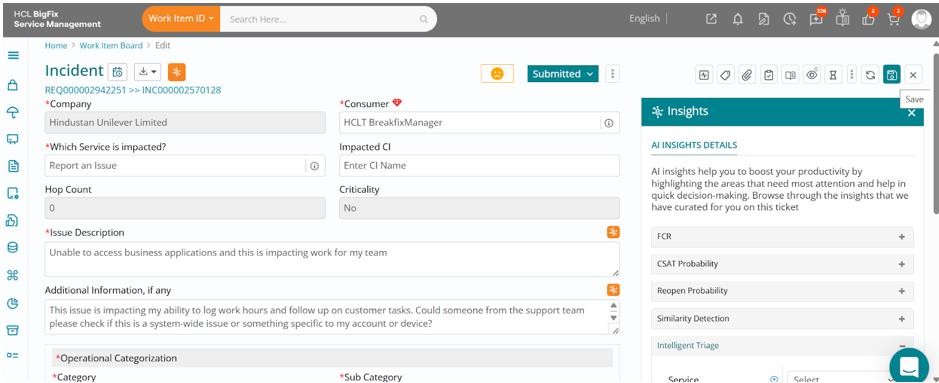
Let’s next consider a scenario where an incident needs to be created by the service desk or support user directly from the Work Item Board, based on a conversation with a user or upon observing an issue through any other source, etc.
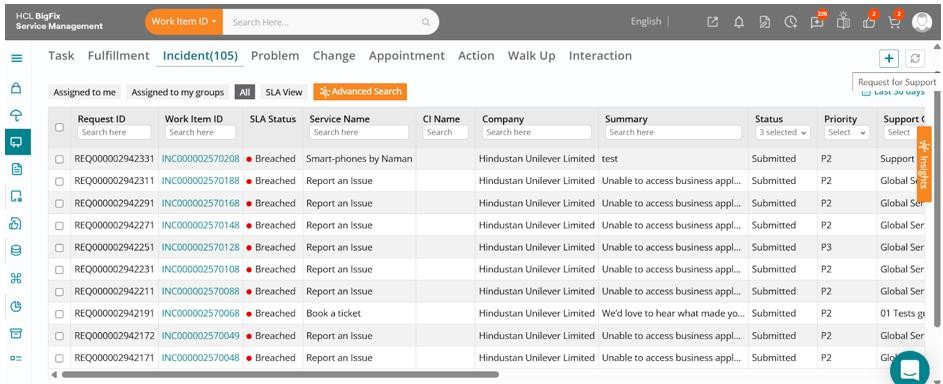
Navigate to the Incident section within the Work Item Board and click on the Request for Support (+) button to begin creating a new incident ticket.
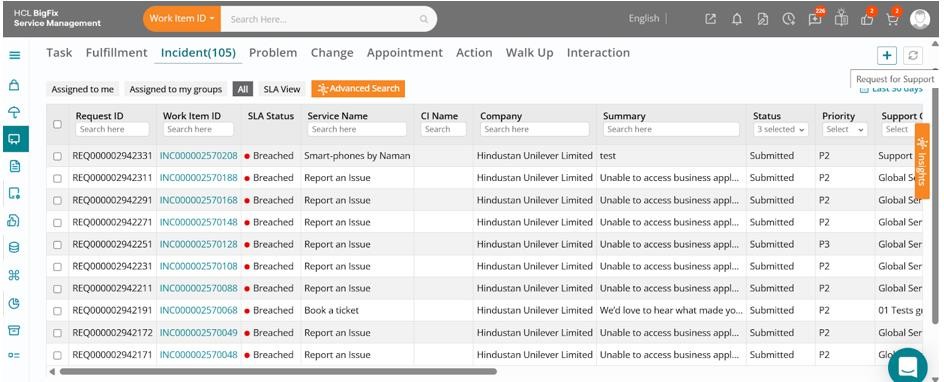
The incident form will open, where you can fill in details such as Company, Consumer, Which Service is impacted? Issue Description, Additional Information (if any), and so on.
The bare minimum details required for AI to predict the priority of the ticket using machine learning are the Company and the Issue Description.
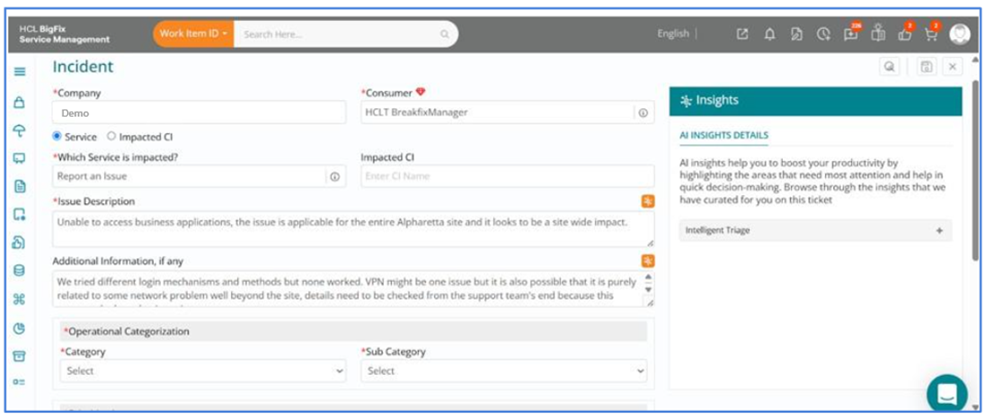
Expand Intelligent Triage under the Insights section on the right side of the screen, and you will see Priority listed as one of the available options. All information under the Insights section is AI-generated using machine learning models.
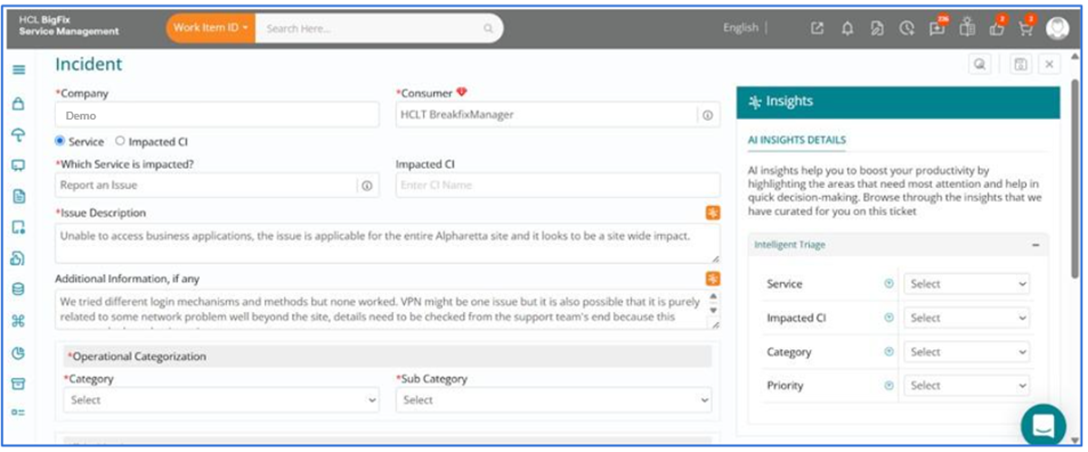
Click on the arrow next to the Priority field, then open the dropdown to view the AI-suggested priority based on the context of this ticket.
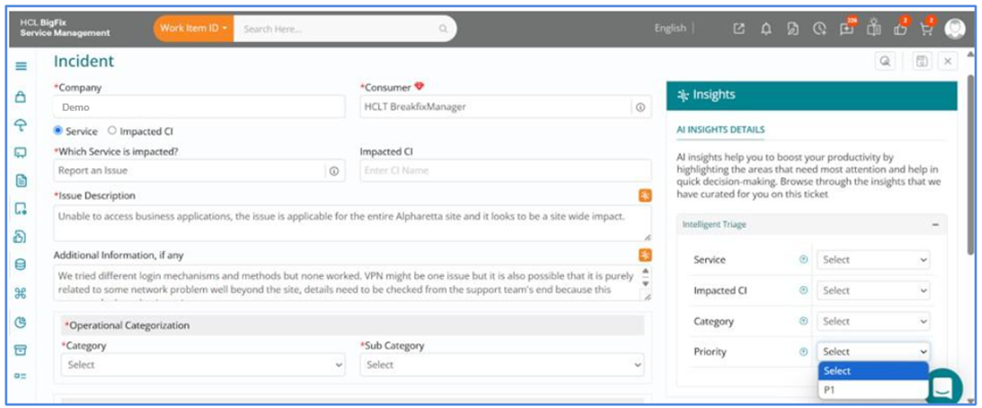
In this case, AI recommends a P1 priority, which is appropriate considering a site-wide impact has been reported. You can choose to accept the AI-suggested priority, update the field accordingly, then complete the other mandatory fields in the incident form. Finally, scroll to the top and click the Submit button in the top-right corner to submit the incident.
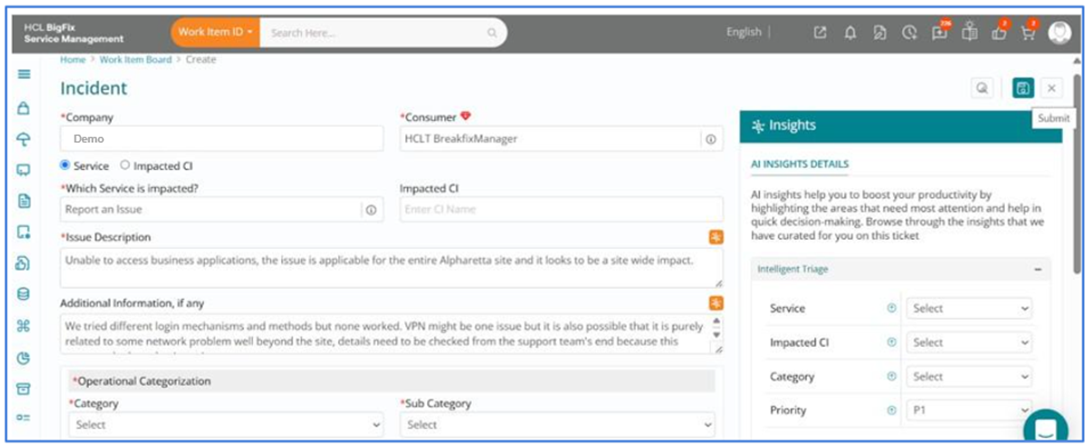
This feature leverages machine learning algorithms to analyze historical ticket data along with the current ticket information, enabling intelligent triage by recommending the most appropriate ticket priority.
Category, Service and Impacted CI Prediction
Log into HCL BigFix Service Management as a support user and navigate to the Work Item Board from the application menu on the left-hand side.
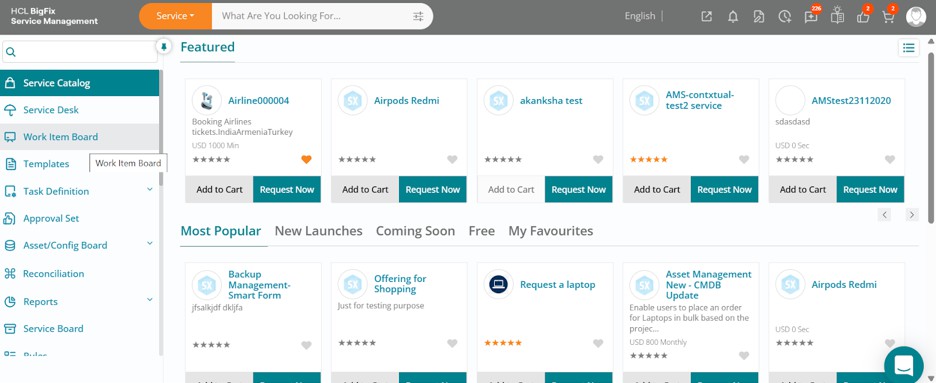
Click on the Work Item Board, then navigate to the Incident tab to view all open incidents. Let’s begin by reviewing an incident that was reported directly by the user through the consumer portal.
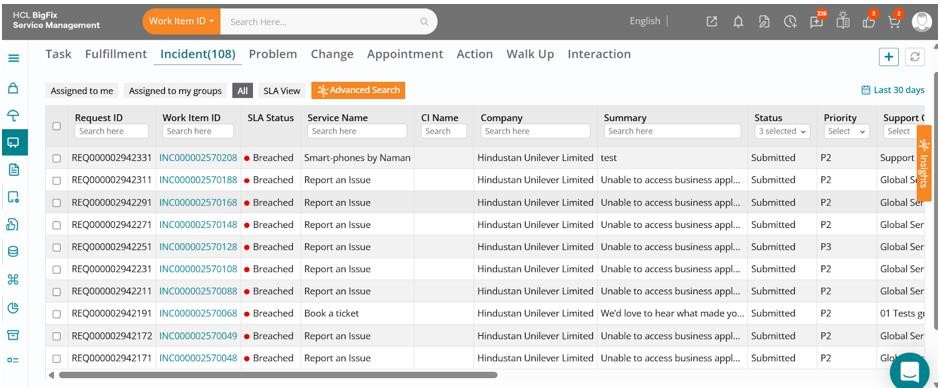
Click on the relevant incident, then click the Edit button in the drawer that opens on the right-hand side of your screen.
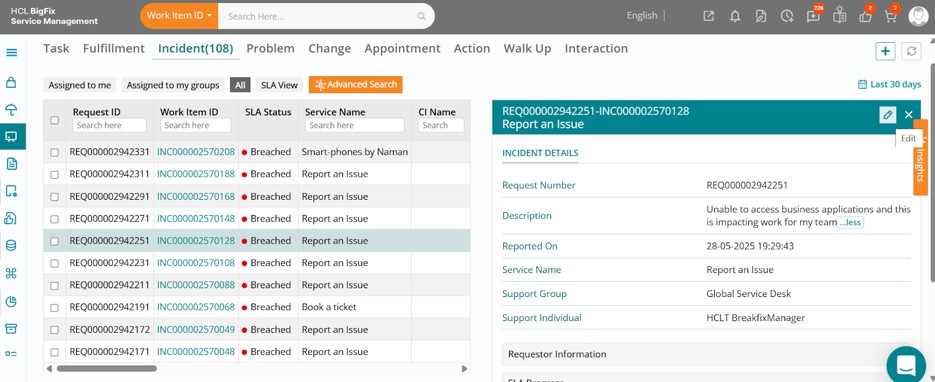
The full incident form will open, displaying the ticket details. Review the ticket information. In this case, the ticket was raised by a user by ordering a different service, with no impacted Configuration Item (CI) mentioned. As a service desk or support agent, you may have manually set the operational categorization based on your understanding of the issue.
However, you might want to check what AI recommends as the appropriate Service, Configuration Item (CI), and Categorization for this case, using historical ticket patterns and contextual analysis.
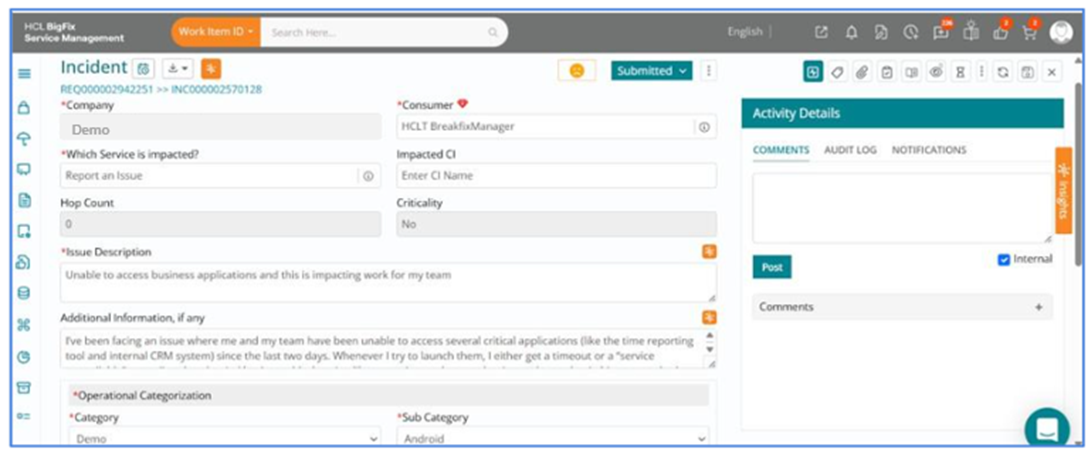
This is where you can navigate to the right of your screen and click on the orange-coloured Insights button, followed by selecting Intelligent Triage to expand that section.
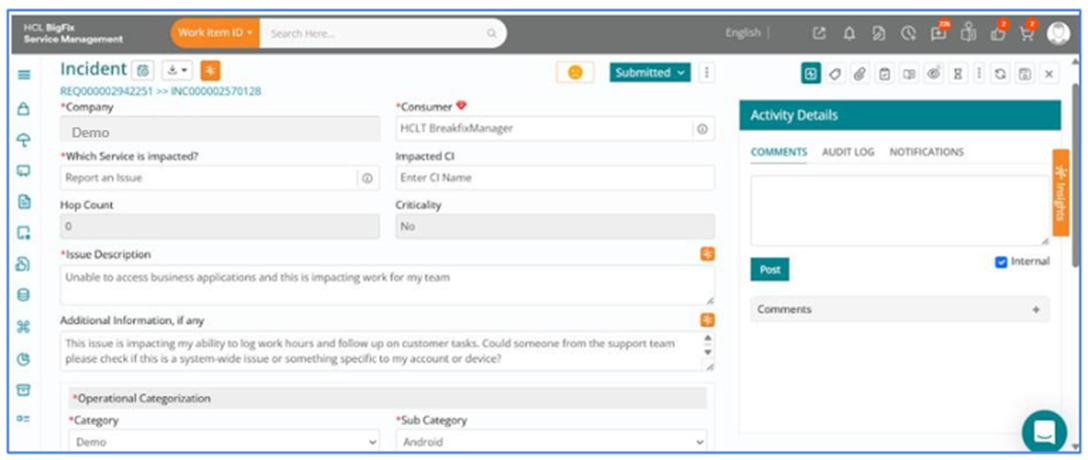
You will see Service, Impacted CI, Category, and Priority listed as options under Intelligent Triage. All data under the Insights section is AI-generated using machine learning models.
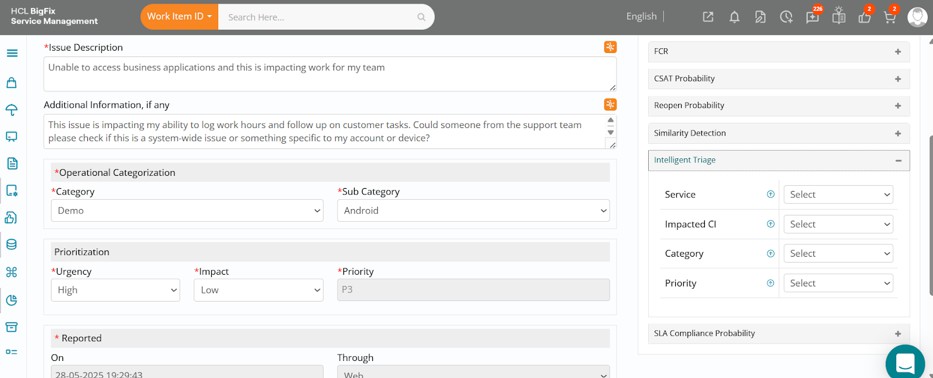
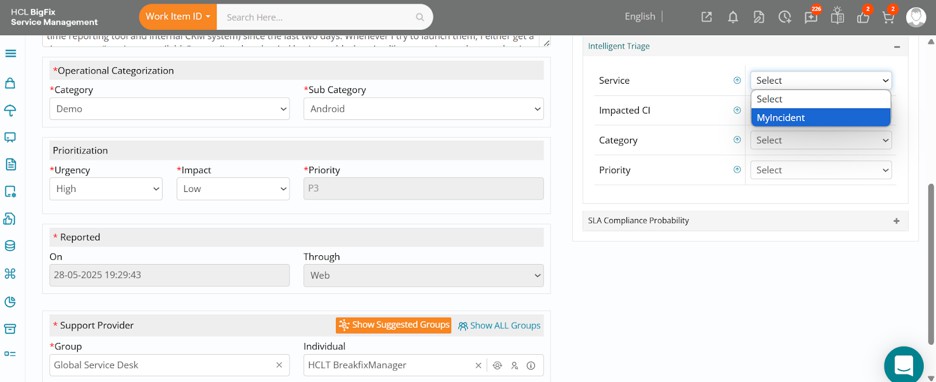
Click on the arrow beside the Service field, then open the dropdown to view the AI-suggested service based on the context of this ticket.
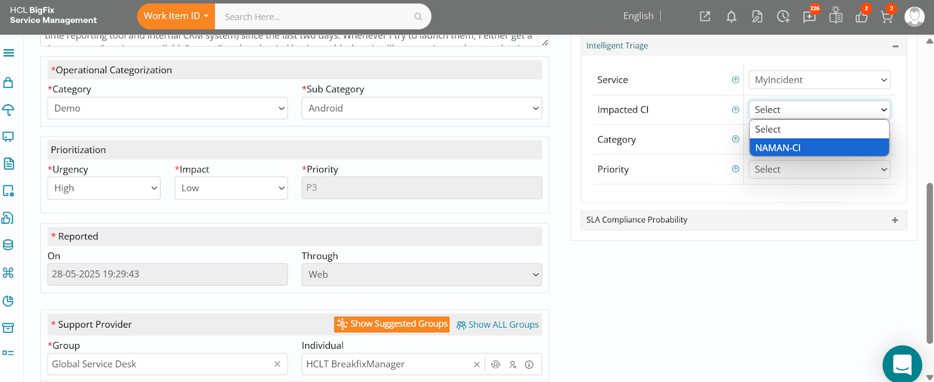
Next, click on the arrow beside the Impacted CI field, then open the dropdown to view the AI- suggested impacted CI based on this ticket’s context. Repeat the same steps for the Category field as well to view the AI-suggested categorization.
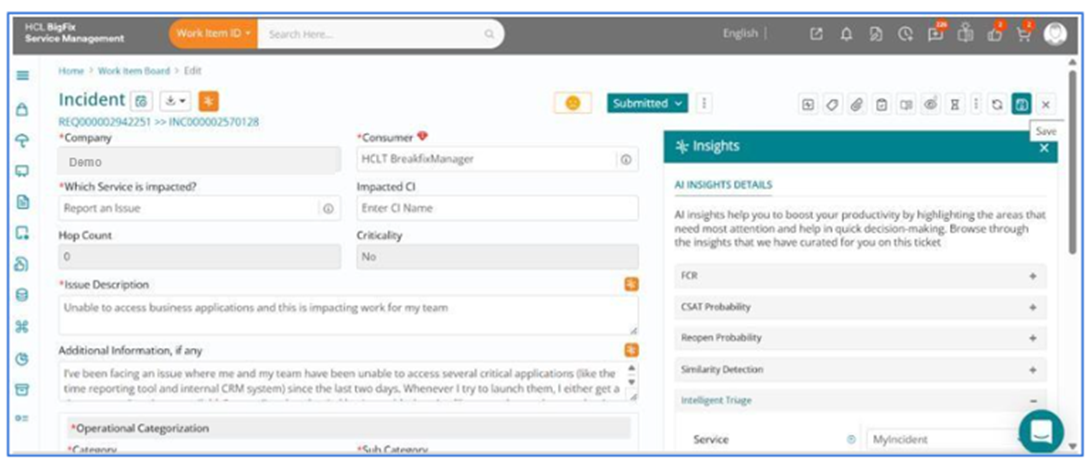
In this case, AI recommends appropriate values for Service, Imparted CI, and Category, which align well with the issue reported. You can choose to accept the AI-suggested values and update the fields accordingly. Finally, scroll to the top and click the Save button in the top- right corner to save the incident details.
Let’s next consider a scenario where an incident needs to be created by the service desk or support user directly from the Work Item Board, based on a conversation with a user or upon observing an issue through any other source, etc.
Navigate to the Incident section within the Work Item Board and click on the Request for Support (+) button to begin creating a new incident ticket.
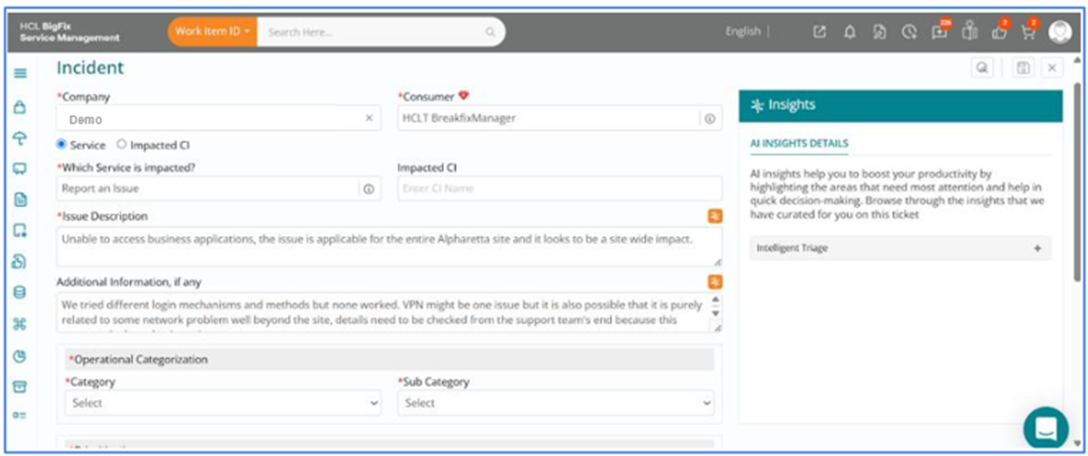
The incident form will open, where you can fill in details such as Company, Consumer, Which Service is impacted? Issue Description, Additional Information (if any), and so on.
The bare minimum details required for AI to predict the Service, Impacted CI, and Category of the ticket using machine learning are the Company and the Issue Description.
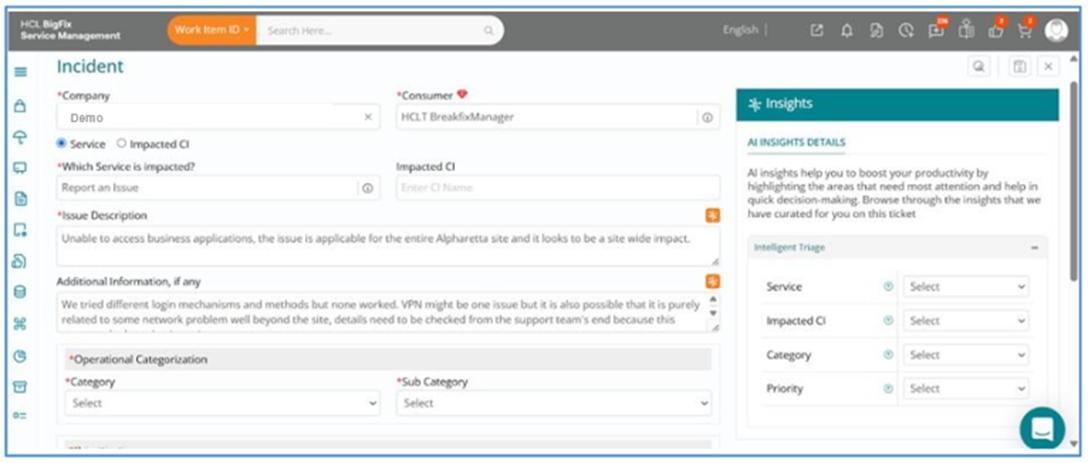
Expand Intelligent Triage under the Insights section on the right side of the screen, and you will see Service, Impacted CI, Category, and Priority listed as options under Intelligent Triage. All information in the Insights section is AI-generated using machine learning models.
Click on the arrow beside the Service field, then open the dropdown to view the AI-suggested service based on this ticket’s context. Next, click on the arrow beside the Impacted CI field, then open the dropdown to view the AI-suggested impacted CI, also based on the context of this ticket.
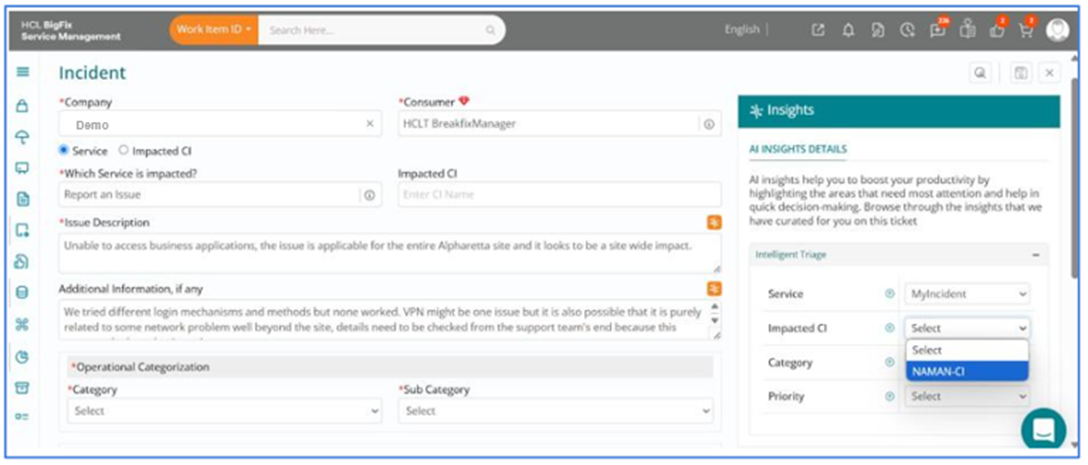
Repeat the same steps for Category as well. You will see multiple options for Category, as AI is recommending that this incident might fall under more than one possible classification. This is a configurable setting based on organizational requirements.
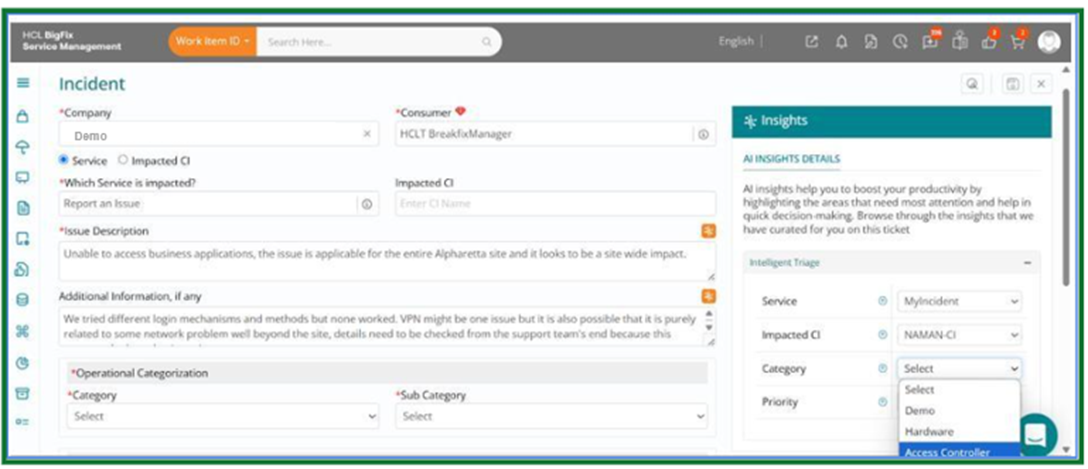
In this case, AI recommends the appropriate values for Service, Impacted CI, and Category, which align well with the issue reported. You can choose to accept the AI-suggested values and update the fields accordingly.
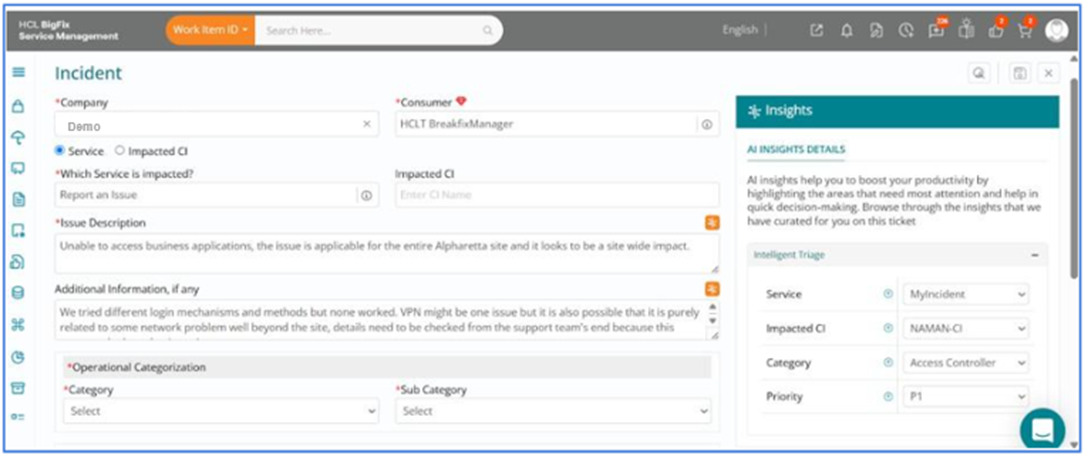
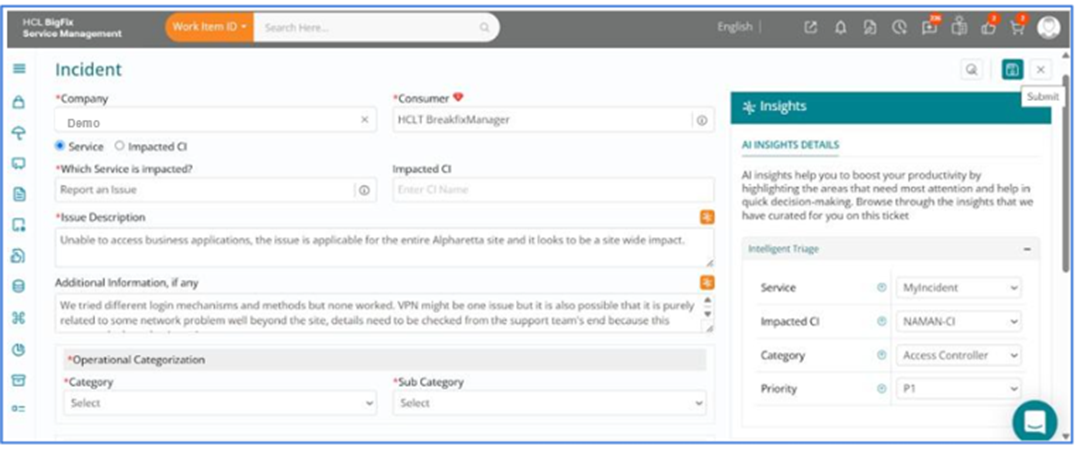
Finally, scroll to the top and click the Submit button in the top-right corner to submit the incident details.
This feature leverages machine learning algorithms to analyze historical ticket data along with current ticket information, enabling intelligent categorization/routing by recommending the most appropriate Service, Impacted CI, and Category for a ticket.