Manage Collections
Users can manage collections, which are a logical grouping of document repositories, and configure multiple repositories.
To manage collections, perform the following steps:
- On the main menu bar, click Knowledge and then click Manage Collections.
- The Manage Collections page appears.
Figure 1. Manage Collections 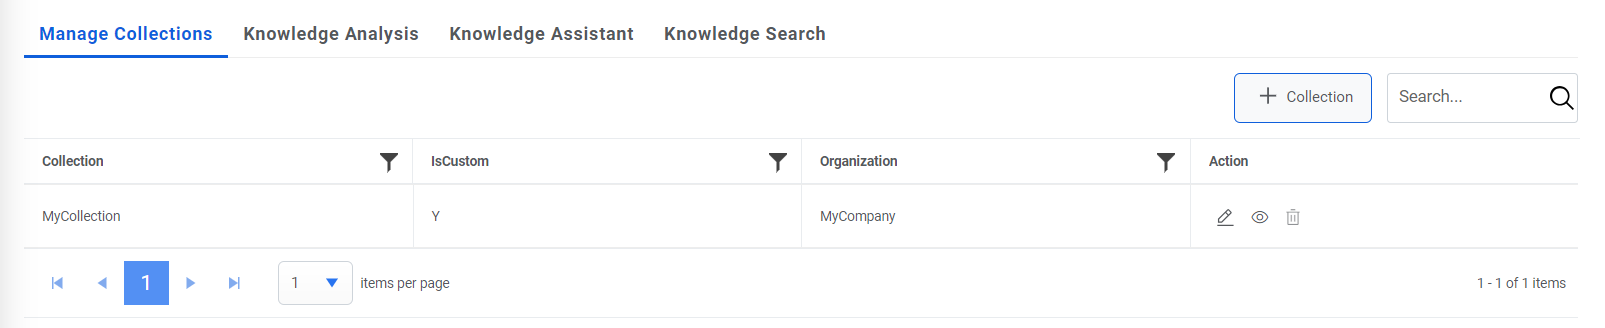
- Click on Add Collection tab to add a collection.
- Provide the collection name, the collection description.
- In the case of Super Admin, Select a type of collection from the Collection Type
field. The collections may be of the following types:
- Generic- Available for all organizations and contains the default collection configuration.
- Custom- Customized for organizations and contains the customer specific
collection configuration.
Figure 2. Manage Collections 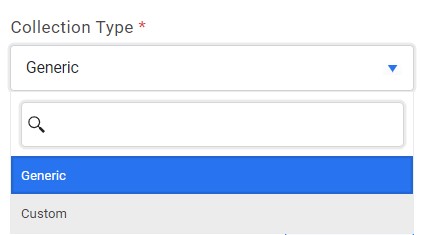
- For generic type, User can select the organizations along with the one selected at the top, to which collection needs to be mapped.
- For Custom type, collection will be mapped to the organization selected in the top header of the page.
- Click on Save to create the collection. The collection will now be listed on the grid.
Figure 3. Manage Collections (Cont.) 
Figure 4. Manage Collections (Cont.) 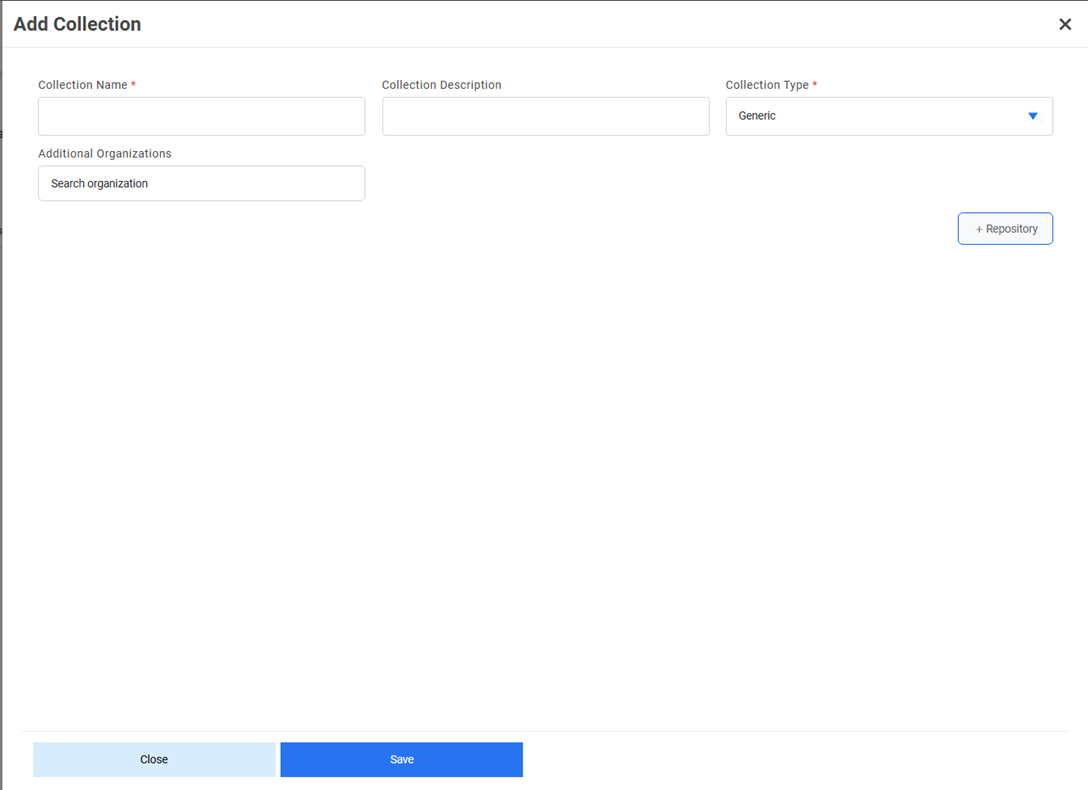
Manage Repositories in Collections
Users can define the repository configuration based on the type of repositories, such as Web URL , ServiceNow, File Folder, and Satori that will be deployed in the environment.
To manage the repositories, perform the following steps:
- On the Manage Collections page, click on
 icon corresponding to the collection.
Figure 5. Manage Repository 
- This lists the existing repositories under the selected collection and enables user to
view the documents, view the status, or delete existing repositories, and add
repositories.
Figure 6. Manage Repository 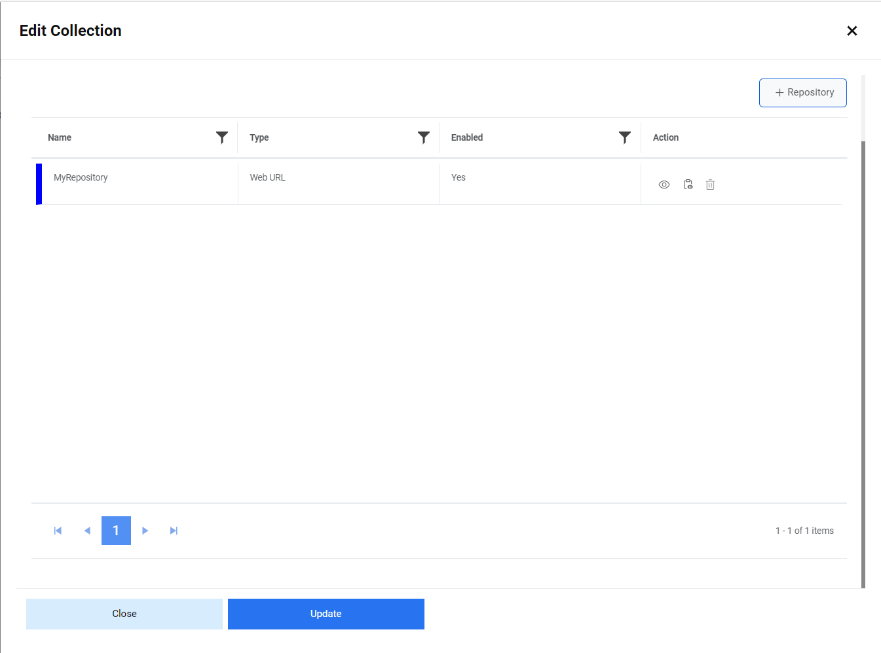
- To view the documents associated with a repository, click
 next to the repository.
Figure 7. Manage Repository (Cont.) 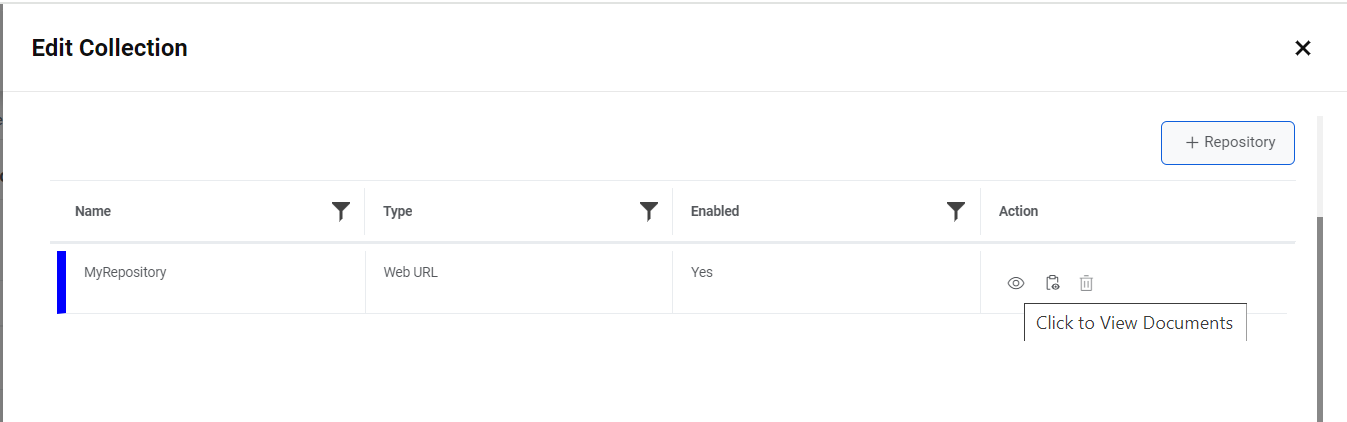
- The Document Summary page appears, displaying the Total Documents and Total
Processed Documents in a tabular view.
Figure 8. Manage Repository (Cont.) 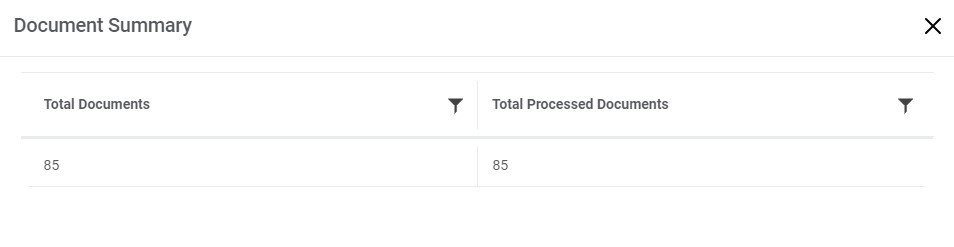
- To view the repository
status, click
 next to the repository.
Figure 9. Manage Repository (Cont.) 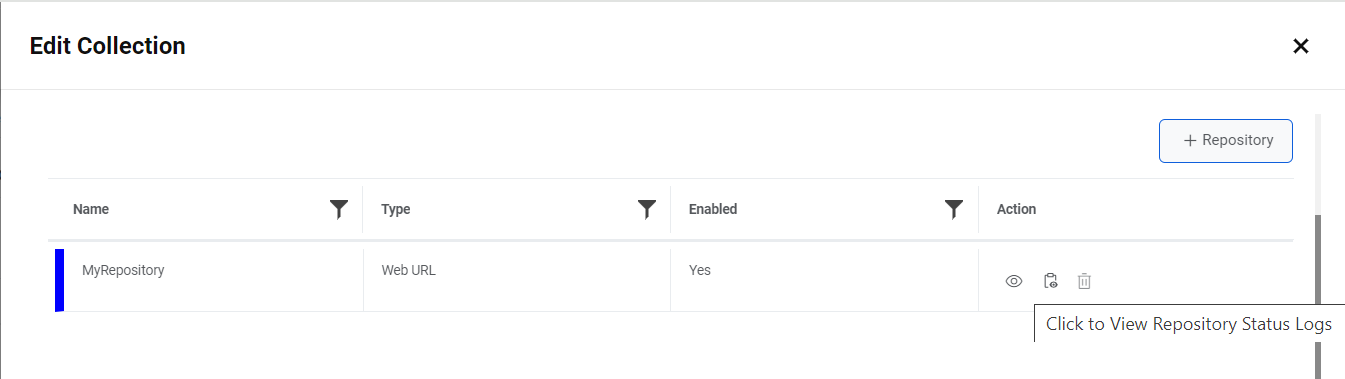
- The Repository Status Log page appears and displays the status summary for each
concurrent repository.
Figure 10. Manage Repository (Cont.) 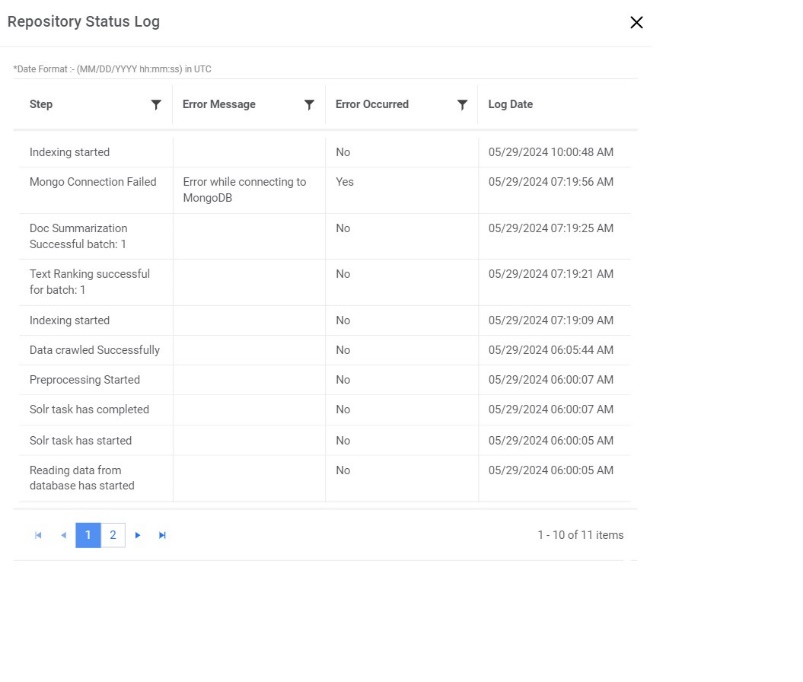
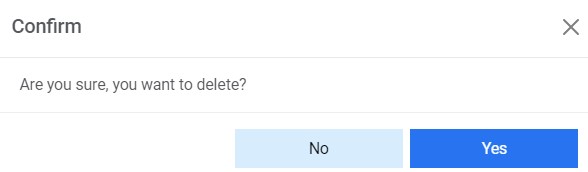
- To delete a repository, click on
 and below alert appears.
Figure 11. Manage Repository 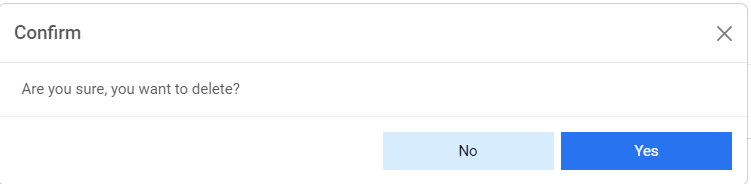
- Click on Yes to delete the repository.
Add Repository
Users can configure repository in the collection by using the following steps:
- On the Manage Collections page, create or edit a collection and click on +
Repository button.
Figure 12. Add Repository 
- It displays the following fields to fill in the appropriate details:
- Type the repository name in the Name field. This must be unique for each repository.
- Type the repository description in the Description field.
- Select Schedule Type.
Figure 13. Add Repository (Cont.) 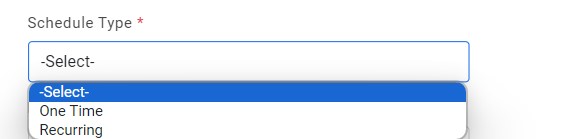
- To schedule the recurring update of repository, select the frequency interval in
Second, Minute, Hour, Day, or Month and type the
duration next to the Occurring Every field.
Figure 14. Add Repository (Cont.) 
- Select the Repository Type to store data. The following types of repositories
are available to store data:
- Web URL
- File Folder
- Satori
- ServiceNow
Figure 15. Add Repository (Cont.) 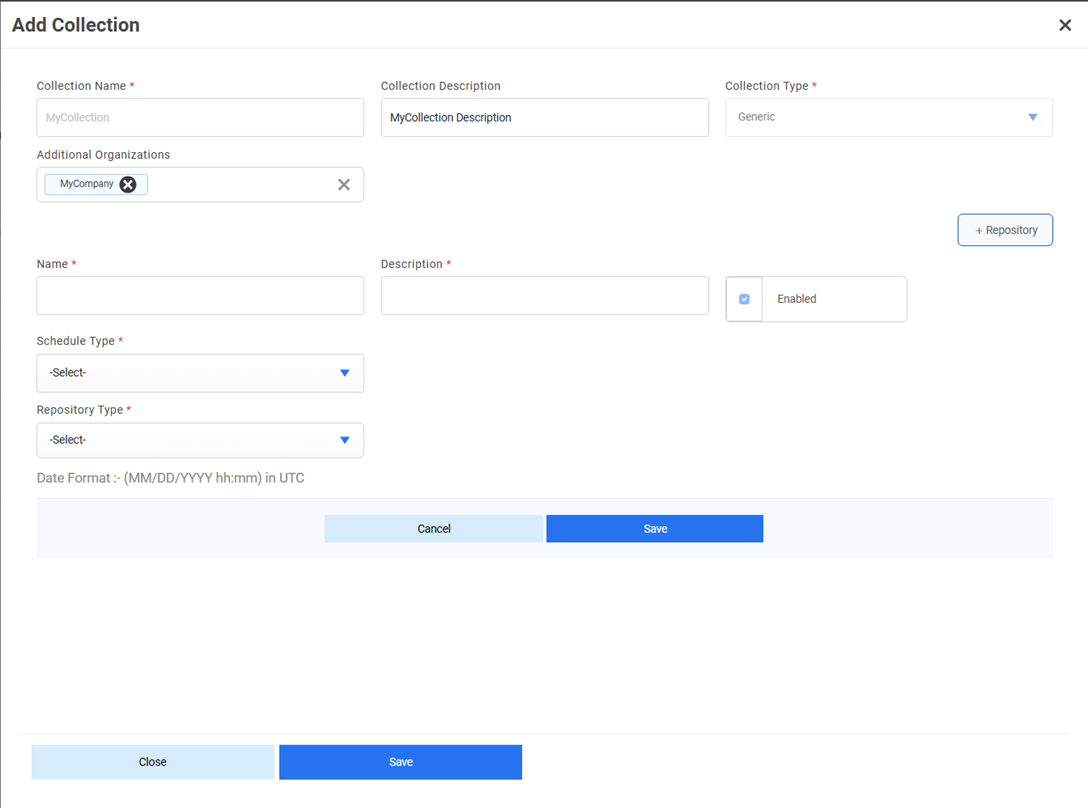
- Selecting the repository type displays the following fields.
- In case of Web URL repository type:
- Type the root URL for the website to be crawled in the URL field.
-
Specify the level to which the documents are to be crawled in the Depth Level field.
-
Select Restrict Domain checkbox to filter for documents of the same domain as mentioned in the URL.
Figure 16. Add Repository (Cont.) 
- In case of File Folder repository type:
- Specify a path in the local drive where the documents have been stored in the Folder Path field.
-
Figure 17. Add Repository (Cont.) 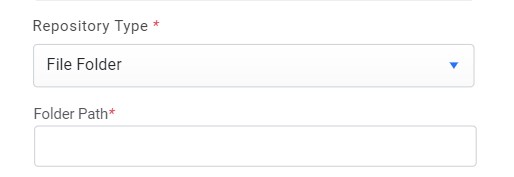
- In the case of Satori repository type:
- Type the URL of the selected repository in the Repository URL field .
-
Type the username and password (encrypted form) of the domain user with access to the repository in the UserName and Password field.
-
Type the domain name in the Organization Domain field.
-
Type the user ID in the UserId field.
-
Type the base URL of Satori in the Satori URL field.
Figure 18. Add Repository (Cont.) 
- In the case of ServiceNow repository type:
- Type the URL of the selected repository in the URL field .
-
Type the username and password (encrypted form) of the ServiceNow user with access to the repository in the UserName and Password fields.
Figure 19. Add Repository (Cont.) 
- Click Save.
Figure 20. Add Repository (Cont.) 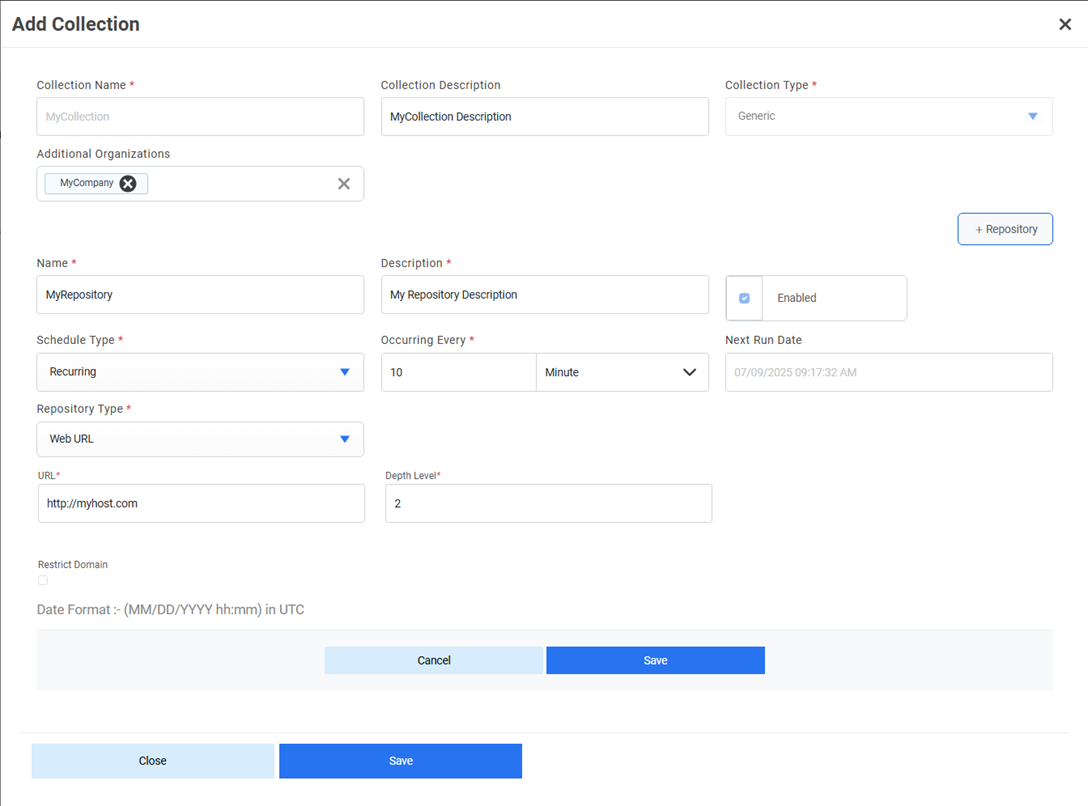
- A confirmation dialog box appears.
Figure 21. Add Repository (Cont.) 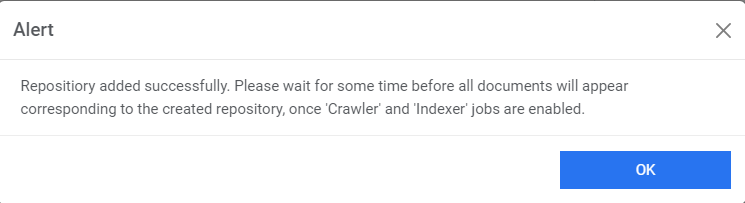
- This adds the new repository and lists it in a tabular
view.
Figure 22. Add Repository (Cont.)