SLA Administration
Navigating to the SLA Board
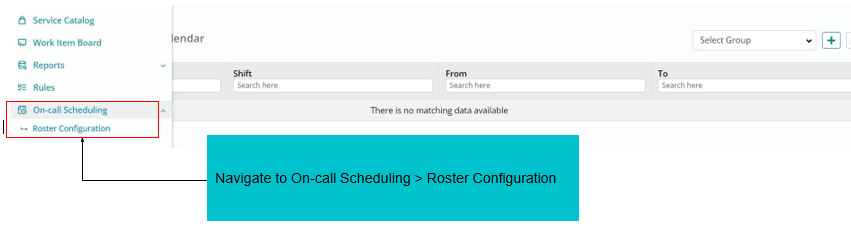
Select SLA Board to Add new SLA rule or update an existing rule
Prerequisite - Only the users who have the roles of “SLA User” and “SLA Manager” can define the SLA rules.


Once form is saved, a new section in the right side will be enabled to add holiday. Multiple entries can be added as holidays by clicking on Add button after saving the earlier entry.

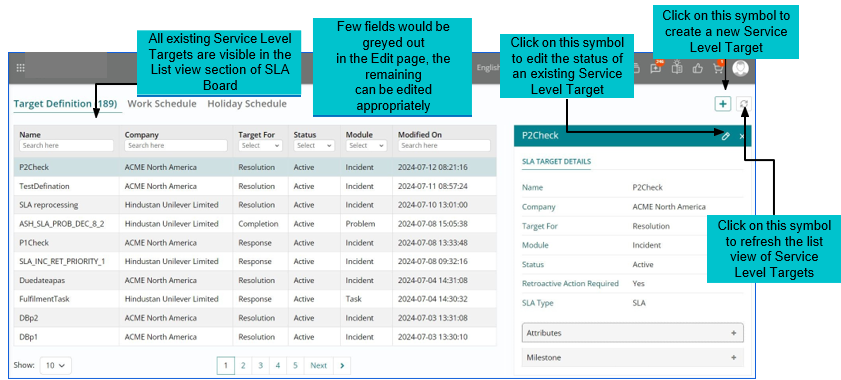
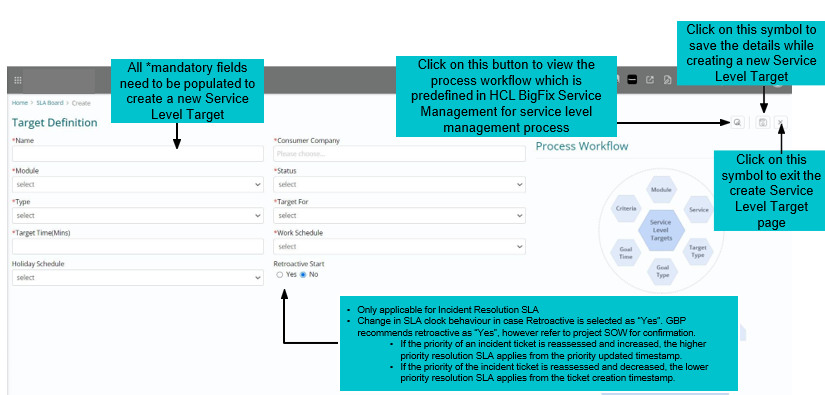
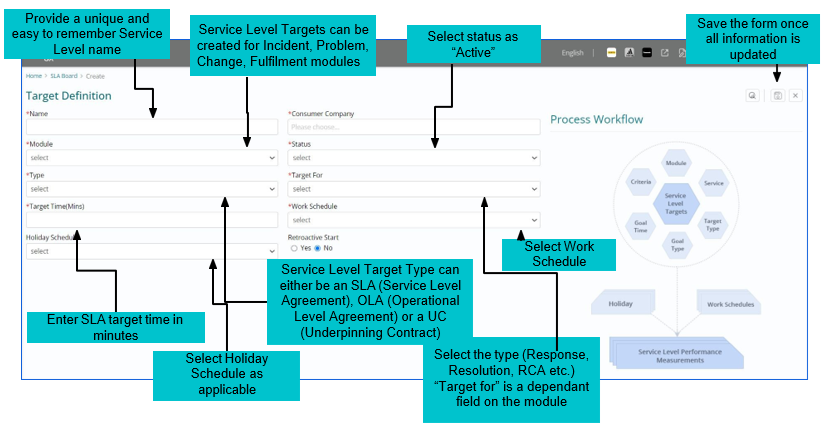
Change Service Level status to “Active” on the main SLA form, once all information is updated. Service Level would only attach to the ticket in “Active” status
Once SLA form is saved in “Draft” Status, these options will be enabled- Specify Attribute Values or Specify Milestone Values.
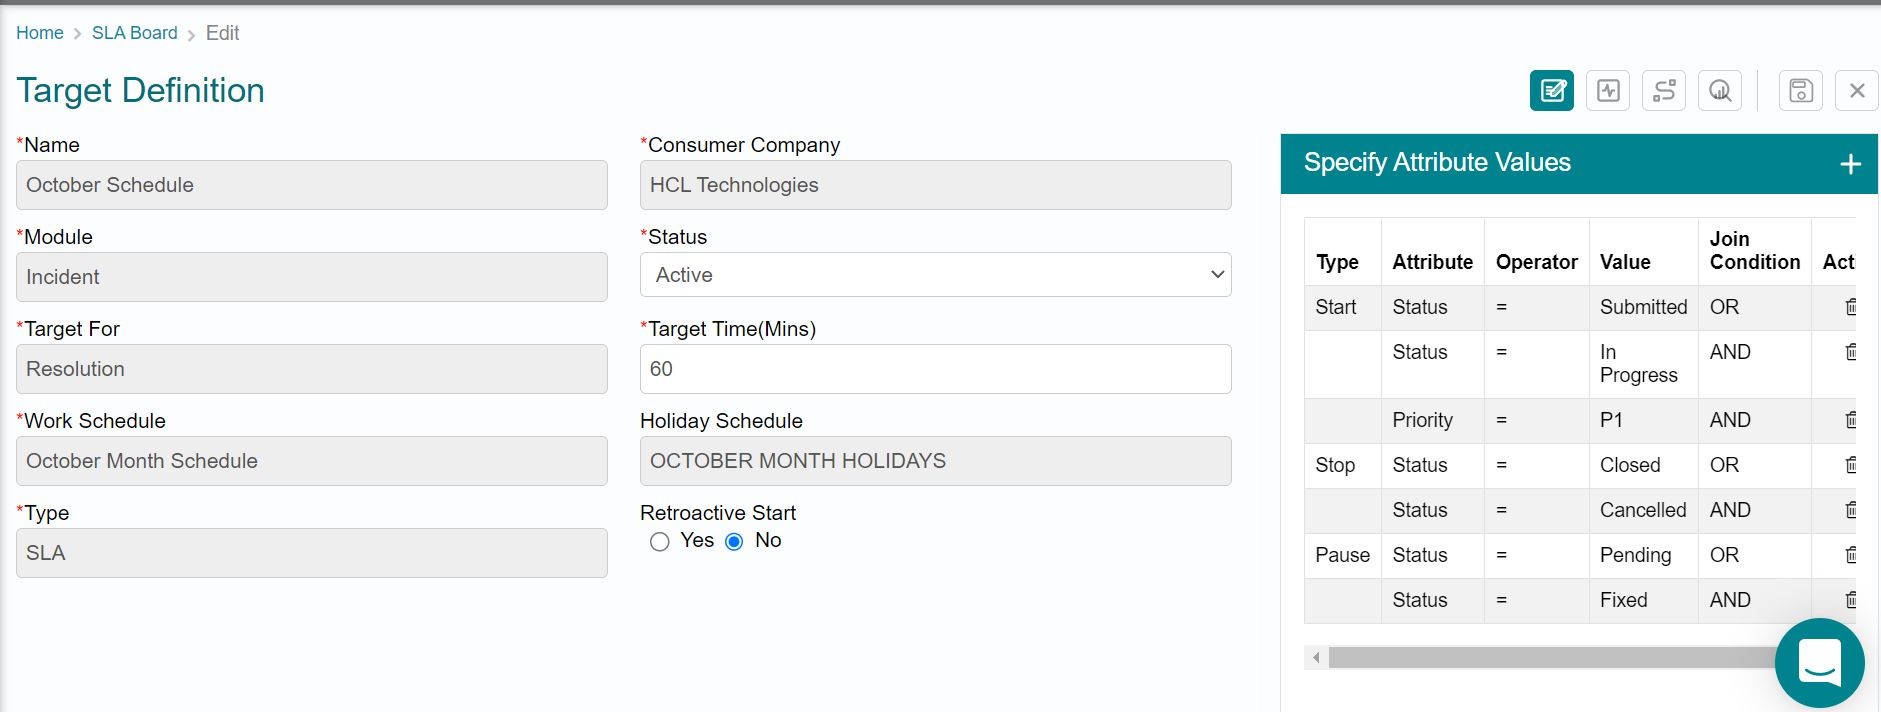
Click on the “+” icon to:
- Provide the Start, Stop, Pause conditions.
- Options to configure conditions based on Status, Assignment Group, Priority, Service, Impacted CI, Requestor, Class
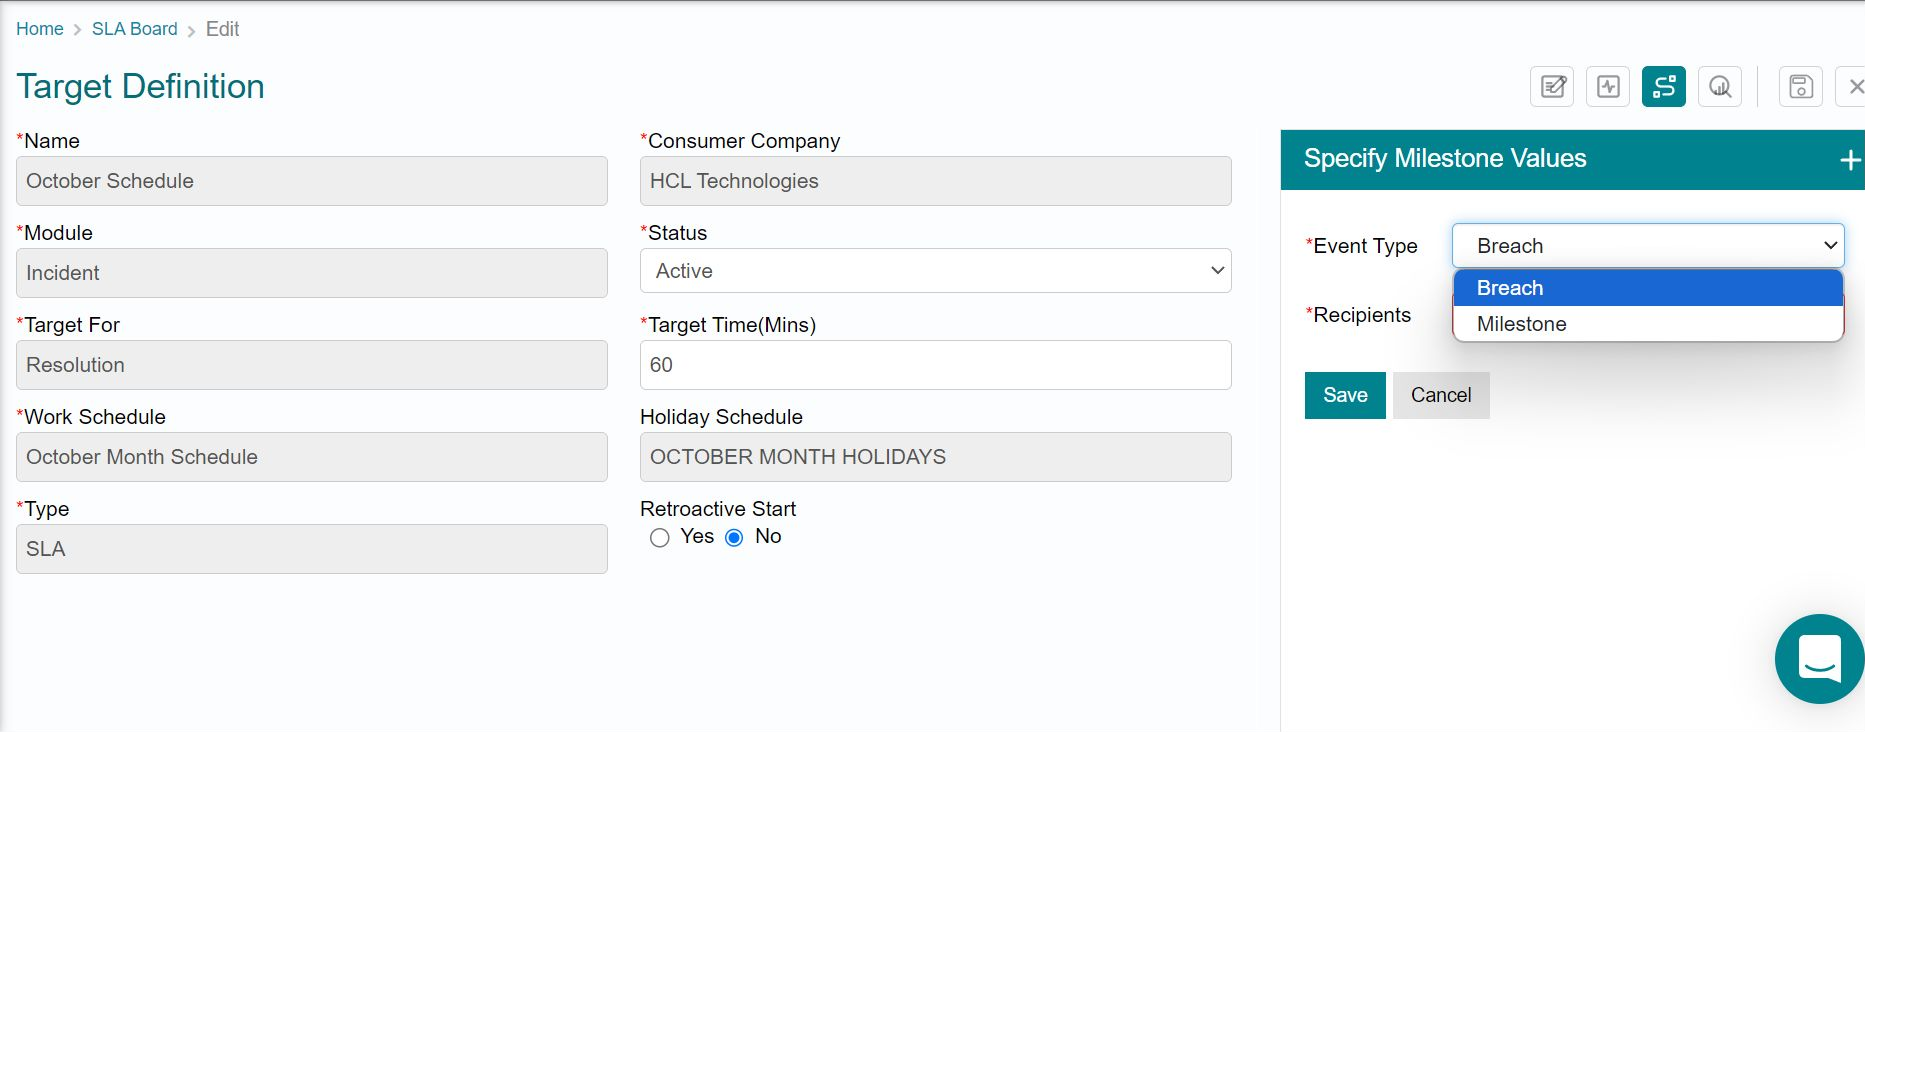
- Milestone notification type can be set in 2 conditions:
- Breach (Ticket SLA breached)
- Milestone (Ticket SLA thresholds reach to 50% or 75%)
- Select recipients from the dropdown. Option to specify individual is also available
On Call Scheduling Administration
AIOSEM stands for Assignee Identification(AI), On-call scheduling(OS), Escalation Management (EM) Assignee Identification - Auto assignment, show user availability info on Work Items.
On-call Scheduling - Create rosters and manage schedules.
Escalation Management - Define a point of contact if primary on-call person doesn't respond.
On- call scheduling is a roster management application for Support Groups. This application helps a roster manager to manage schedules and availability of fulfillers.
Use Case: Let’s say, a Global Service desk team offers 24*7 support in 3 shifts. Sara Clarke, the Service Desk manager, wants to create an on-call schedule to manage the availability of each team member. Based on the on-call schedule, Incidents need to be assigned to the available fulfiller.
Below are the details of the 3 shifts and their schedules. The team observes 2 holidays; however, the Service Desk Manager assigns one on-call fulfiller on holidays to ensure 24*7 availability.
| Shift Name | Work Schedule | Holiday Schedule |
| Day Shift | 8 am to 4 pm IST | Holidays: 26th January, 15th August |
| Evening Shift | 4 pm to 1 am IST | |
| Night Shift | 1 am to 8 am IST |
There are 9 members in the team and below are the rosters that the manager wants to assign for the months of August and September.
| Roster for month of August and September | Shift Name | People assigned to the roster |
| 1st to 31st August | Day Shift | Jane, Mark, John |
| 1st to 31st August | Evening Shift | Amy, Ana, Tim |
| 1st to 31st August | Night Shift | Ron, Mike, Shane |
| 1st to 30th September | Day Shift | Ron, Mike, Shane |
| 1st to 30th September | Evening Shift | Jane, Mark, John |
| 1st to 30th September | Night Shift | Amy, Ana, Tim |
Prerequisites: User having Roster Manager role can create an on-call schedule and manage rosters
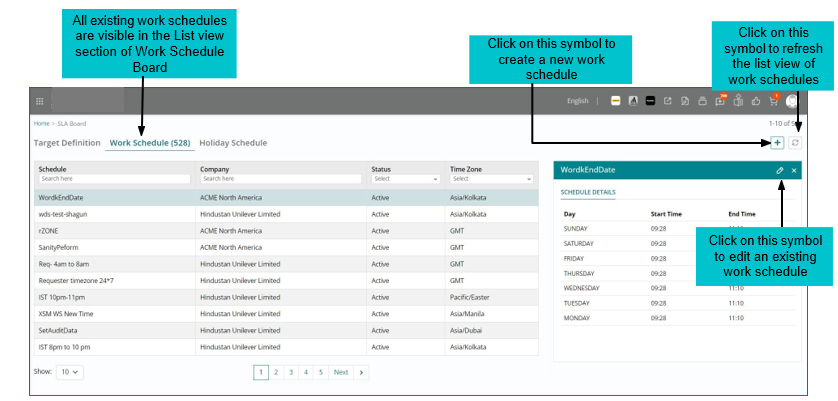
Step 1: Create a Work Schedule
Create a work schedule for the 3 shifts. If a work schedule already exists, it can be reused. For this use case, we need to create 3 work schedules.
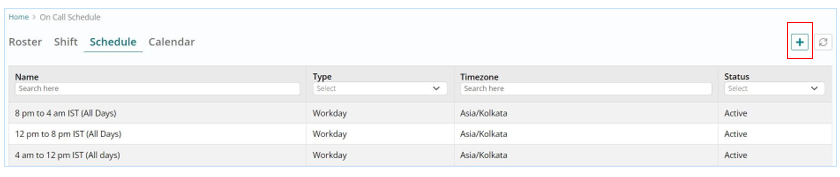
-
Click on the “+” icon to create a new Schedule.
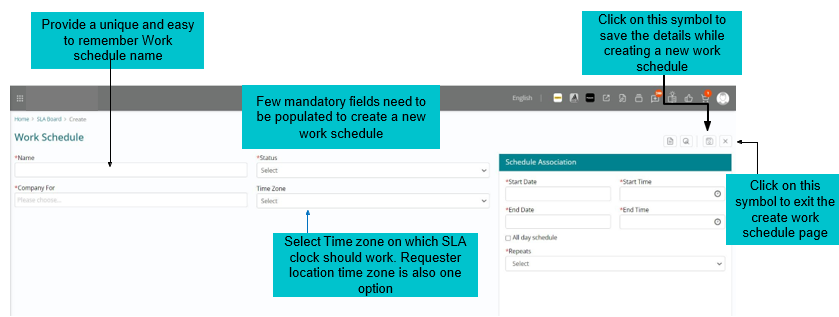
-
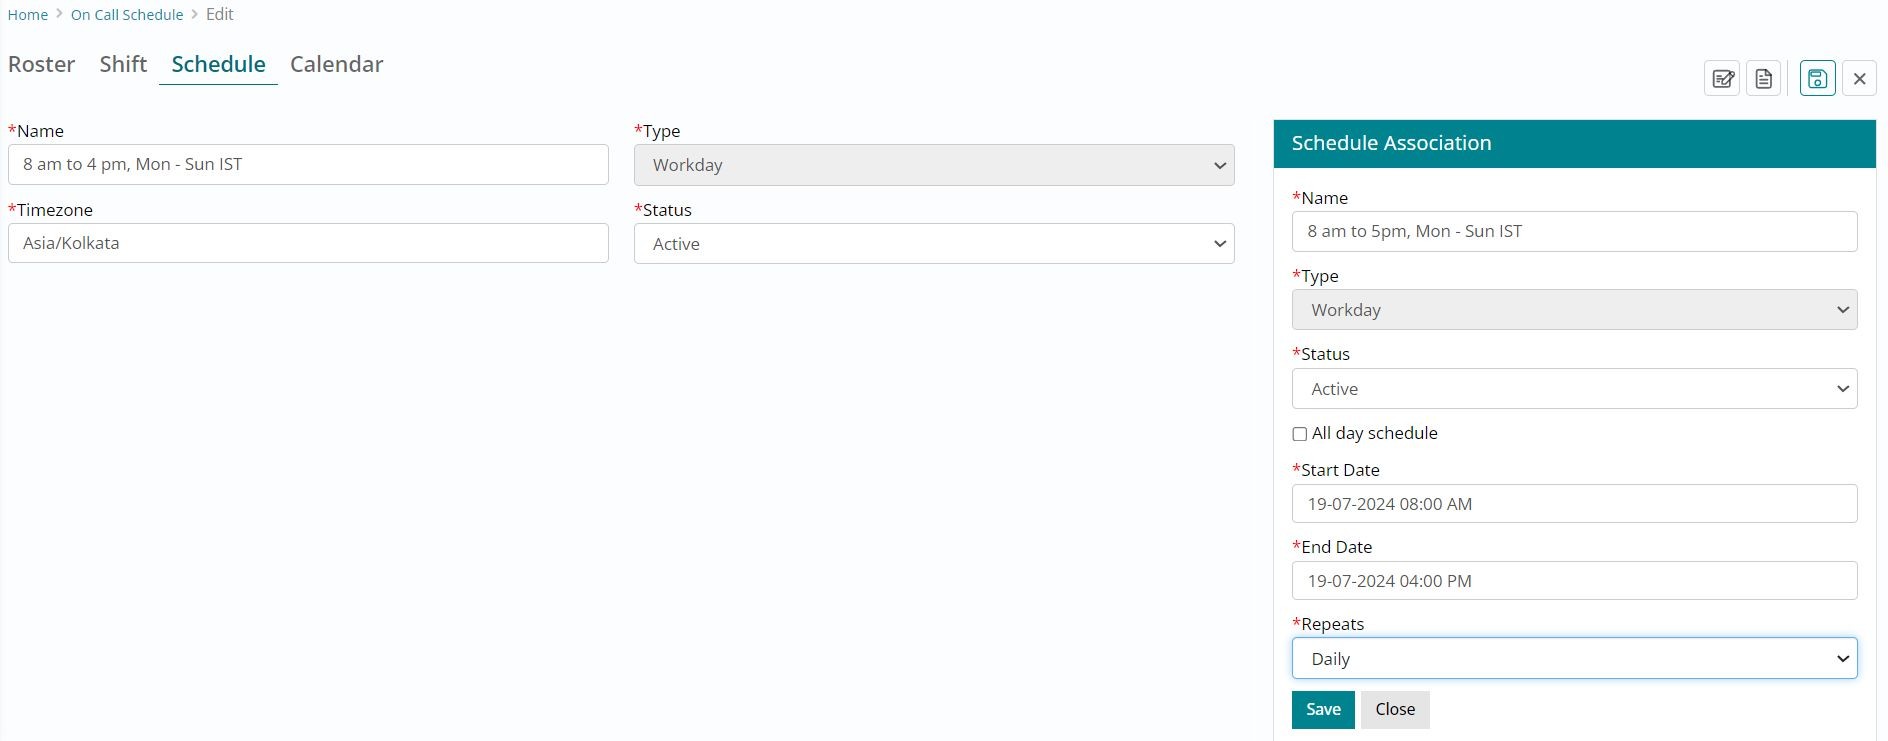
Fill in all the mandatory fields and click on save Name: Provide a name for the work schedule
-
Type: Work Schedule / Holiday Schedule. Select type = Workday to create a work schedule
-
Timezone: Select the applicable timezone Status: Active / Inactive
-
On clicking save, provide the details in the Schedule Association section. Name: Name can be same as the schedule name
-
All day schedule: Select this option for a 24 hour schedule Start Date: Specify the start time of the schedule.
-
End Date: Specify the end time of the schedule Repeats: Daily / Specific.
-
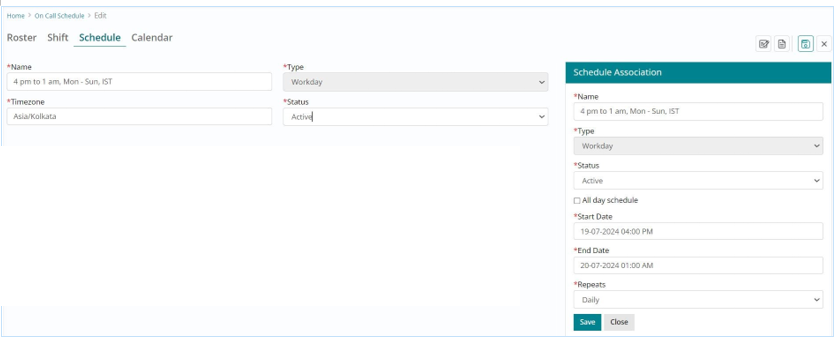
Similarly create a work schedule for 4pm to 1am, Mon-Sun, IST.
-
Here, while creating the schedule association, note the details to be entered in start and end date:
-
Since the schedule starts from 4pm and ends on 1 am the next day, specify a consecutive end date to signify the schedule ends the next day.
Click on “+” to create a new schedule.

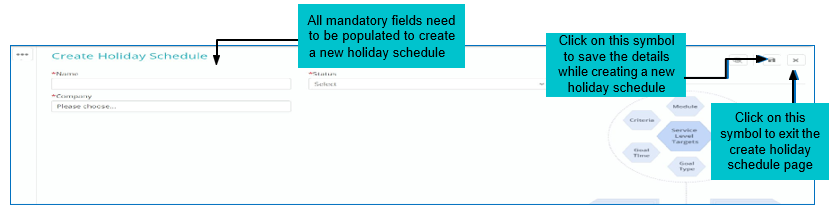
Step 2: Create a Holiday Schedule
Holiday Schedule is used to provide/add the list of holidays for effective planning and smooth operation flow.
-
Fill in all the mandatory fields and click on save Name: Provide a name for the work schedule
-
Type: Holiday Schedule. Select type = Holiday to create a holiday schedule Timezone: Select the applicable timezone
-
Status: Active / Inactive
-
On clicking save, provide the details in the Schedule Association section. Name: Name can be same as the schedule name
-
All day schedule: Select this option for a 24 hour schedule Start Date: Specify the start time of the schedule.
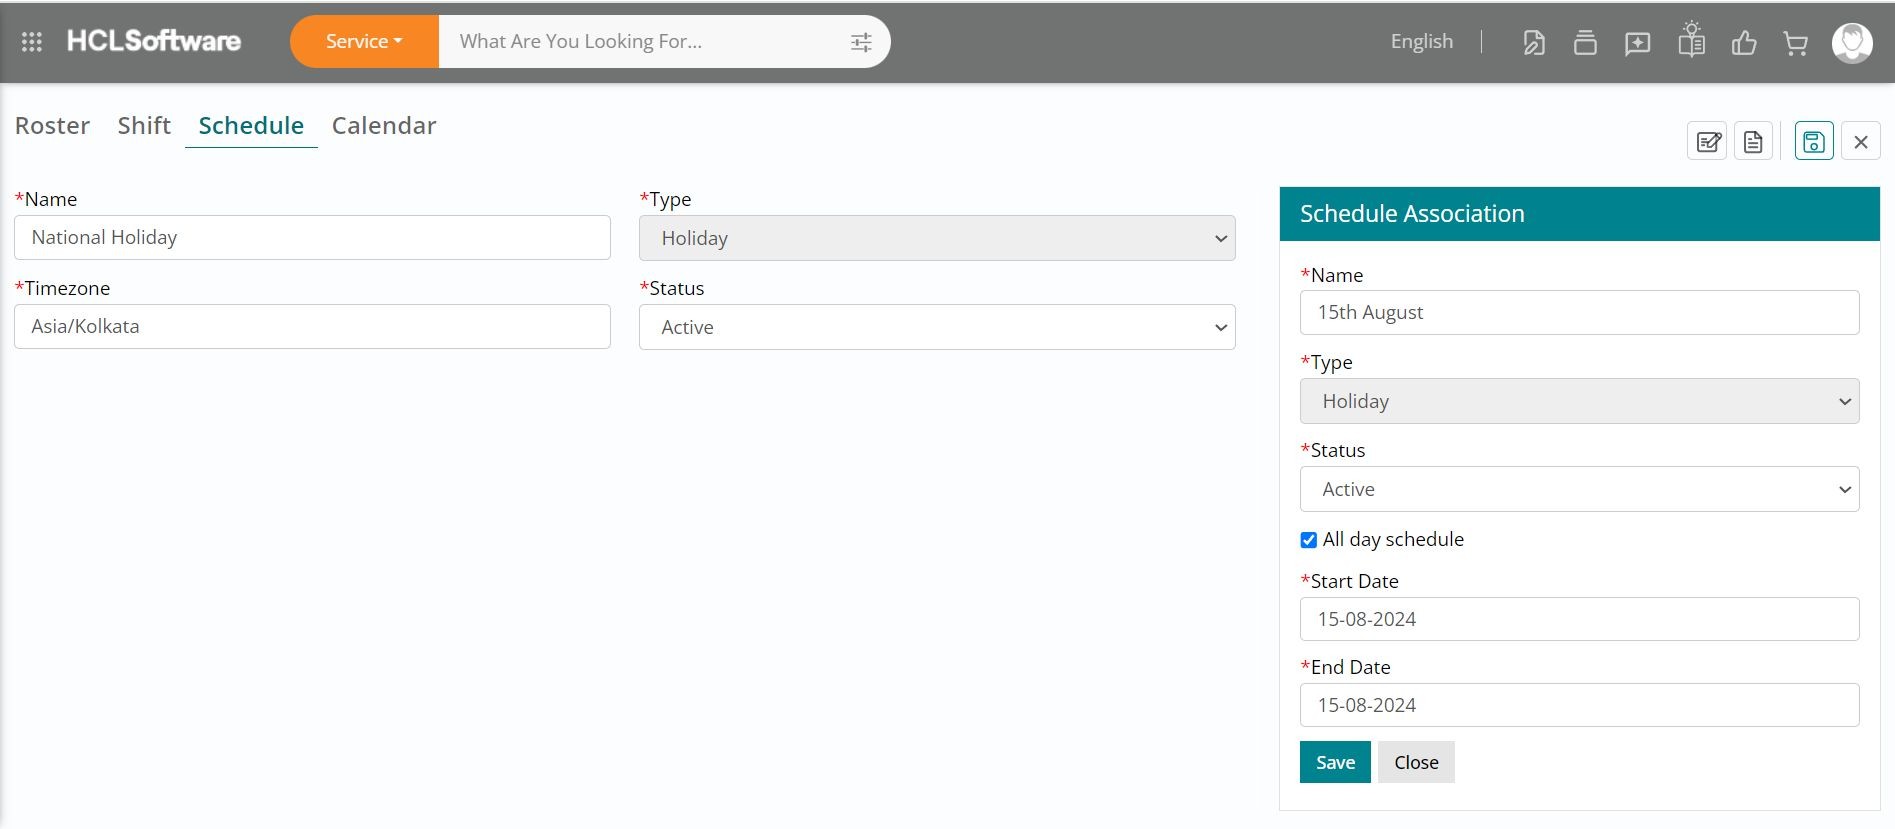
-
End Date: Specify the end time of the schedule

-
After entering all the information, save the information.
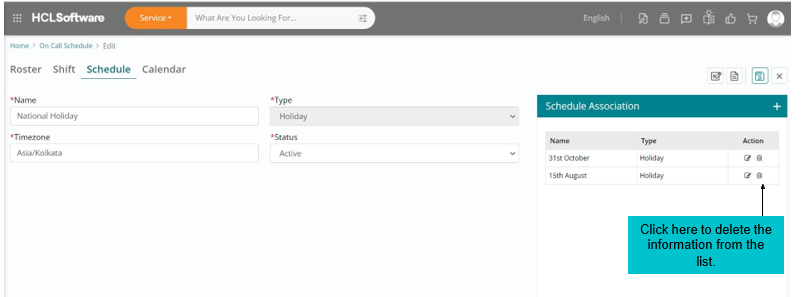
The holiday schedule association is editable only for Name and the status.
In a one holiday schedule a user can add multiple holiday list. i.e. User can add all the holiday list of a year in one list
User need to delete the existing holiday and create a new one as the holiday list is editable only for limited information.
Users can create shifts for efficient resource management and increase productivity. Multiple shifts can be created in this section.
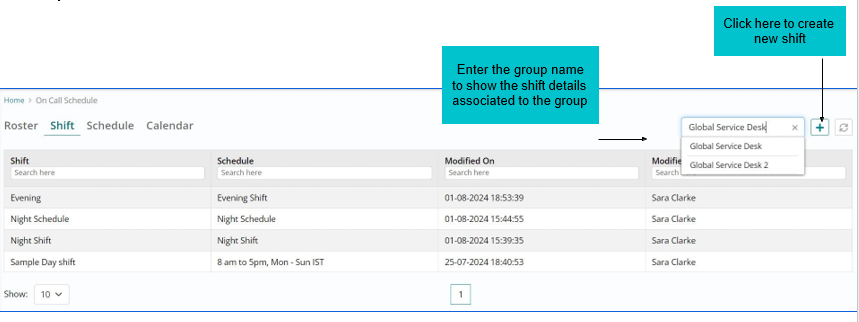
The shift schedule will be visible to the user depending on the granted access to the groups.
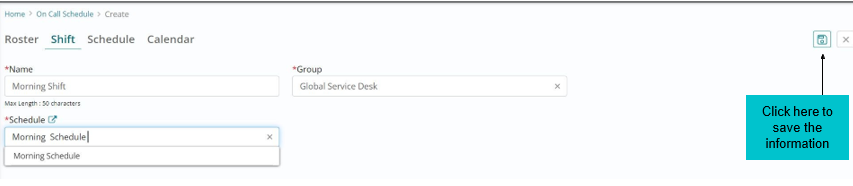
The user needs to select the already created group, name and schedule to create a new shift.
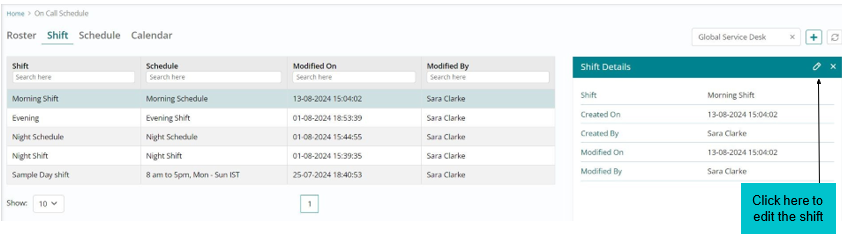
By clicking on the specific shift, the edit option will be enabled.
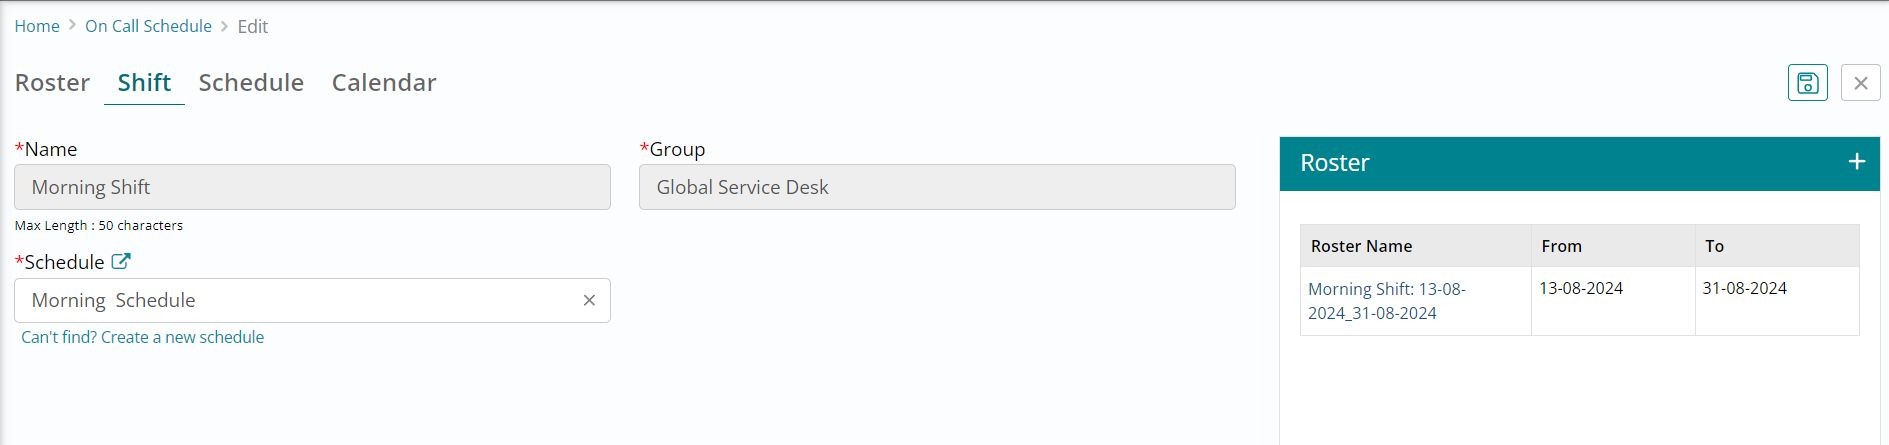
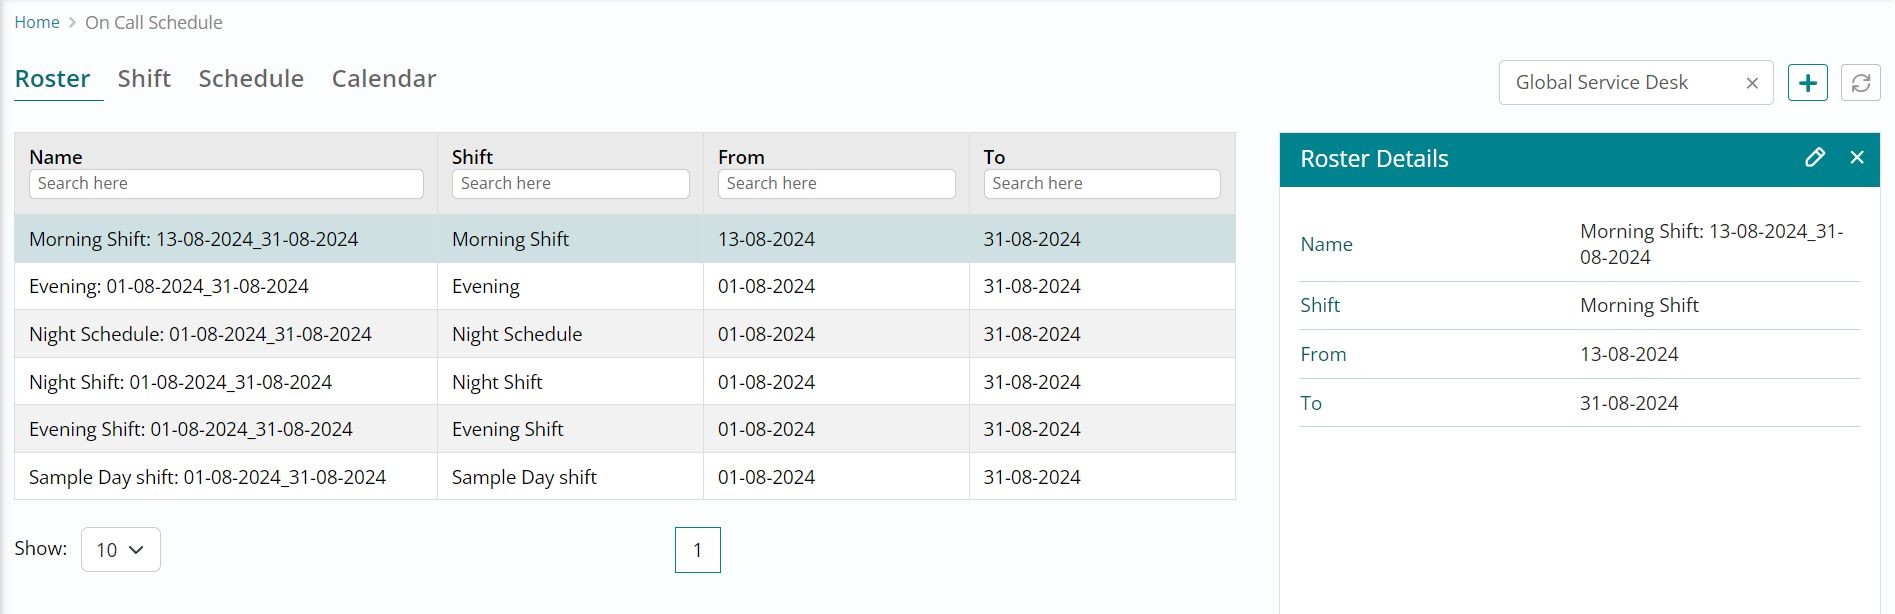
Roster associated to the shift will be displayed. When user clicks on the roster name tab, a new tab in the browser will be opened which will display the roster details and list of the members associated to the shift.
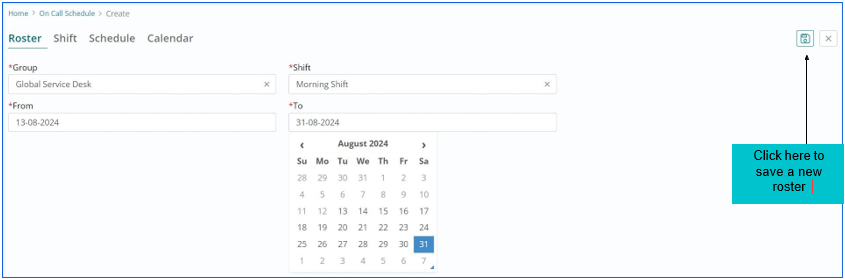
User can create a roster for planning the members in specific shift how many of them should be covered.
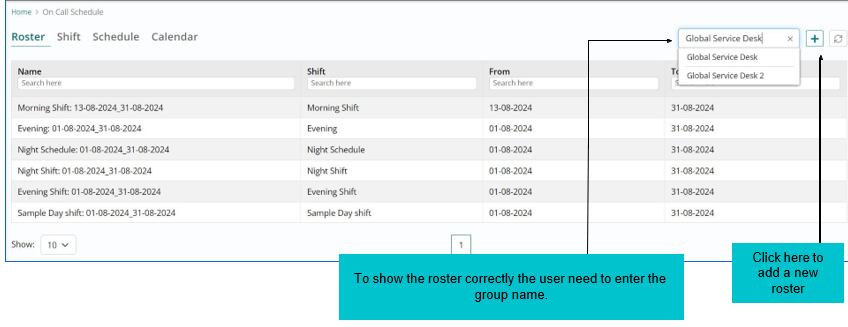
To create the roster correctly we need to enter the group name.
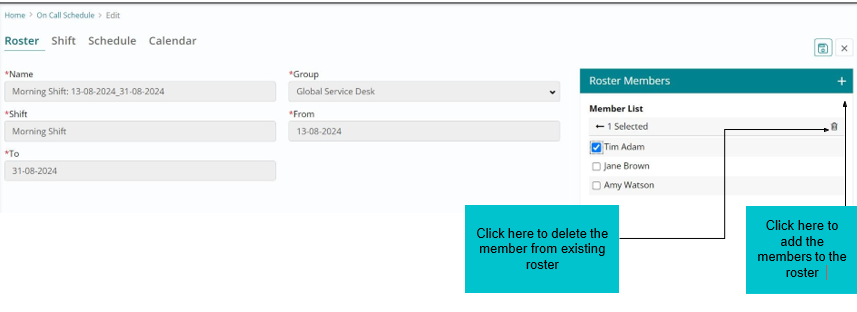
To edit the Roster details, click the “Edit” icon.
User can view day wise roster of all the members in the team and do the necessary modifications as displayed in the picture.
User can filter the details using the search options provided in the columns
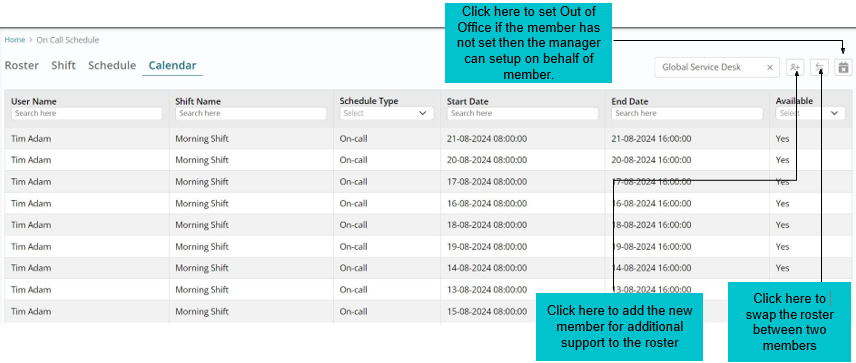
Enter member name Which shift member need to add coverage Specific date, then click add to submit the details.

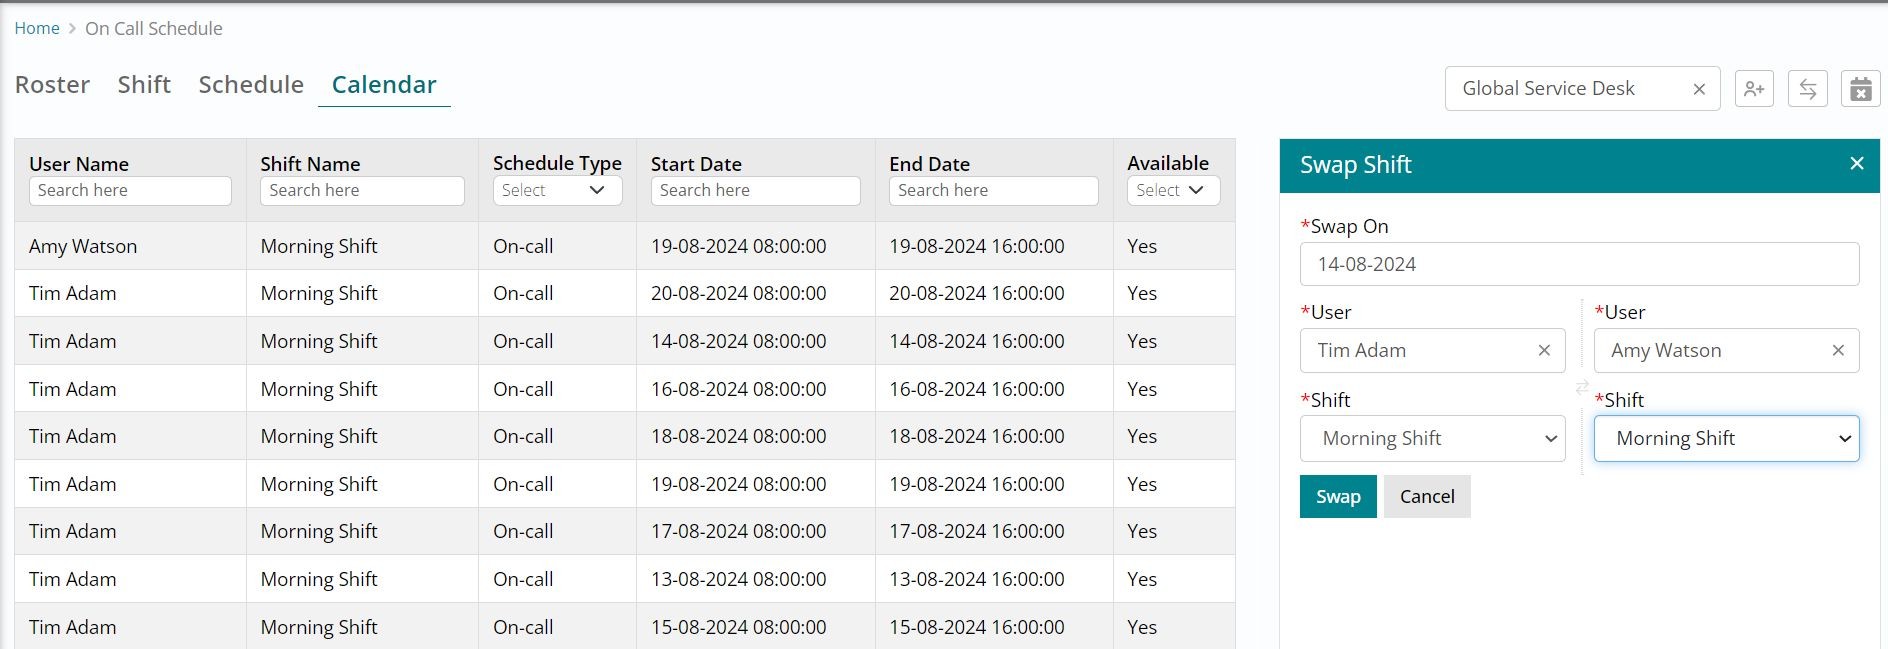
Enter Swap date, users name who are willing to swap and their respective allocated shifts then click on swap, the users shift will be swapped.
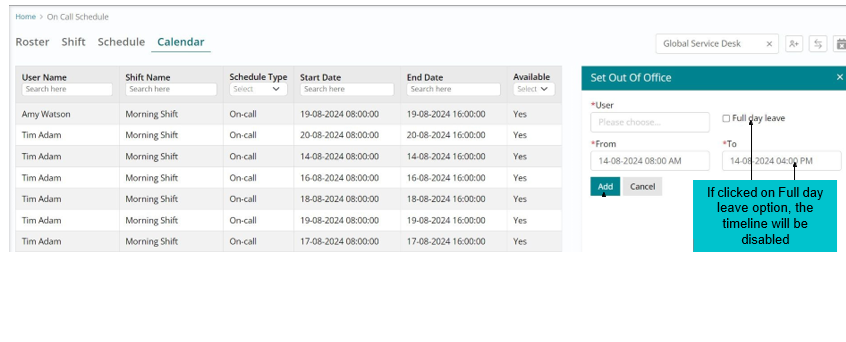
Enter member name, and date and time then click on add to set Out of Office for the member.
Assignee Identification feature applies intelligent automation algorithms to identify and assign fulfillers on work items based on their availability and workload. This automation brings substantial reduction in the time and effort that a group manager or a fulfiller should spend to identify the right assignee.
Features:
- Auto assignment - Intelligent automation identifies the best match based on the availability and workload and automatically assigns the incident to a fulfiller. This completely removes the need of a manual intervention for unassigned tickets. Auto assignment to Individual is available for Incidents.
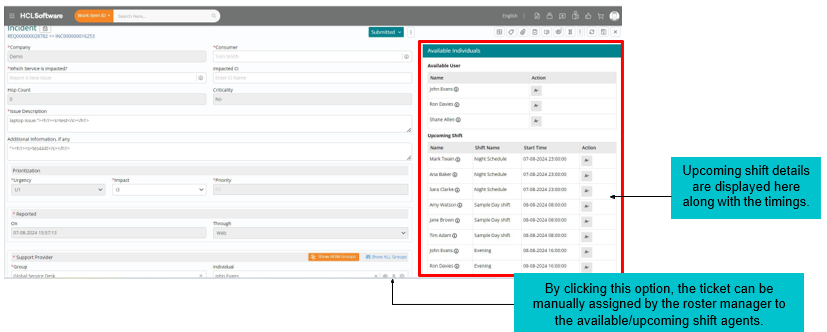
- Availability information - Although auto assignment is in place, there can be scenarios where fulfillers / group managers need to manually look up the list of available individuals. For example, if a fulfiller is about to end his shift and wants to handover the work items to another individual in the upcoming shift, then rather than randomly assigning a person, the fulfiller can look up the availability and assign to the right person. This feature is available on all Work Items (Incident, Problem, Change, Fulfilment and Task).
To enable the auto assignment feature, the app admin needs to navigate to the group section in Foundation.
Prerequisite: Only app admin can do the changes.
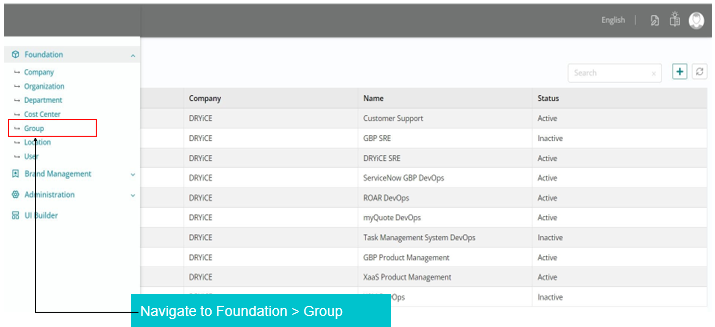
There will be many groups in the group section, the app admin can select to which group the assignment feature needs to be enabled.
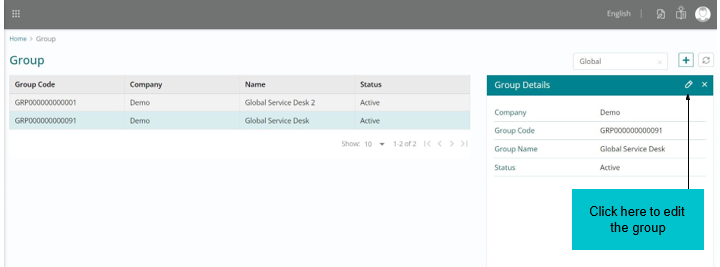
User (app admin) need to search the group name and click on edit option on the specific group name to which the auto assignment option to be enabled.
The tickets will be auto assigned to the members in the shift which will help to avoid/reduce manual work.
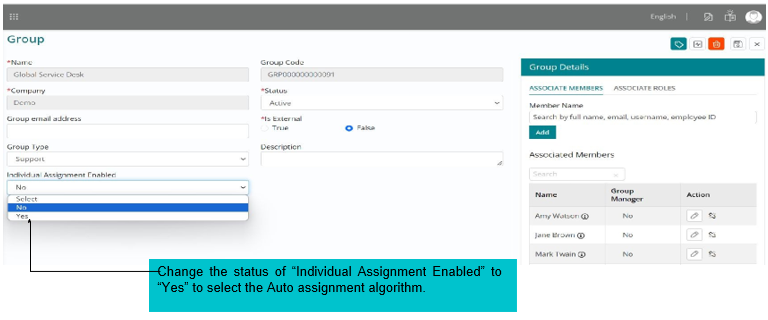
User can select the algorithm method as mentioned in the picture.

User can select two algorithms as mentioned below,
Round Robin: This algorithm ensures each member of team receives an equal opportunity to handle incoming tickets.
Definition: When a new ticket is created, it is assigned to the next available agent in the queue. The system automatically assigns tickets based on the order in which agents are listed. Once an agent completes the ticket, they go to the end of the line, and the next agent in line receives the next incoming ticket.
Last Assignment First: This algorithm is an approach for ticket assignment that prioritizes the most recently assigned or last available resource.
Definition: In this algorithm, when a ticket comes in, it is assigned to the last agent who completed a task. This will help to utilize resources that have finished a similar or related task which in turn leads to reduced downtime between task completions and new assignments.
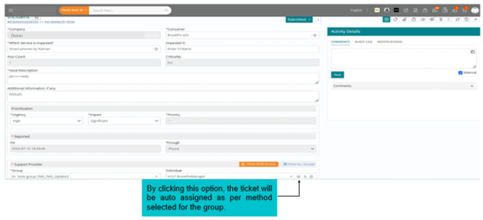
The tickets will be auto assigned to the members in the group as shown in the picture below. When user clicks on auto assign option on the right pane, the comments, audit log and notification options will be displayed.
Pre-requisite: Auto assignation is useful for the on-call schedule configuration.
Tickets can be manually assigned to group members as illustrated below. If the designated fulfiller is unavailable for the day, the admin can assign the ticket to alternate fulfiller.
The user can manually assign tickets based on the information from upcoming shift details and designate them to the fulfiller.