Branding Administration
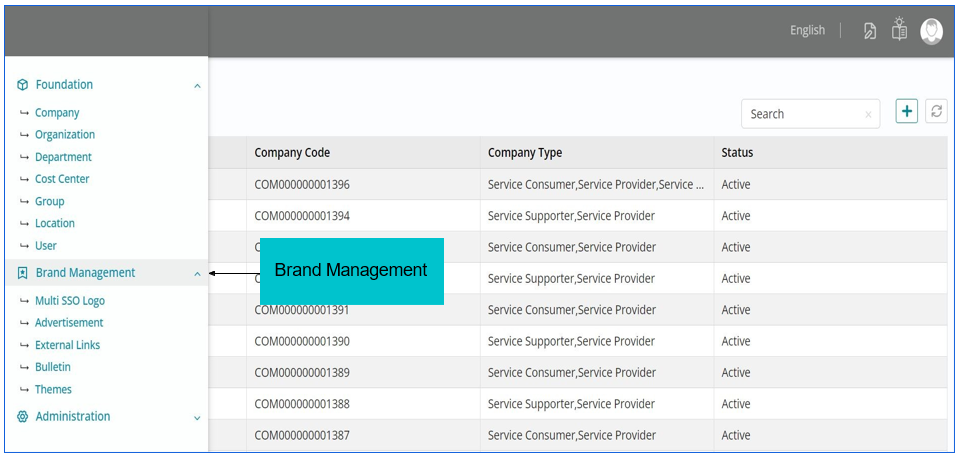
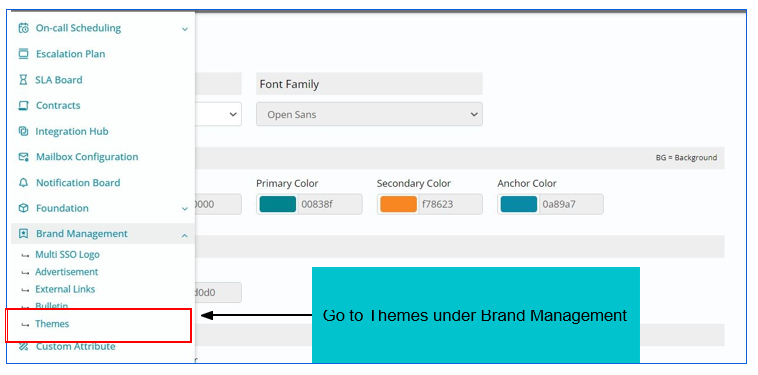
Navigating to Brand Management
This module is a powerful tool that allows you to customize the look and feel of the application to align with the company's brand requirements. You can make a selection from a wide range of color schemes and fonts to enable a cohesive and seamless experience for the users. For multi-tenant instances, each tenant can even design their own theme.
A Bulletin can either be a broadcast summary of news, a report / newsletter issued by an organization or a brief official statement which is published on the service catalog page.
As illustrated and highlighted below, the Bulletin will be displayed in the service catalog page, multiple bulletins can be displayed in a sequence.

Bulletin List View
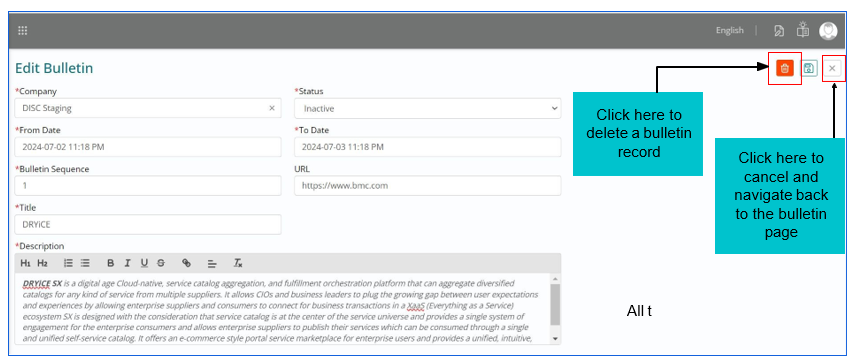
A bulletin once created, would get populated in the list view with visibility of the fields Company Name (associated company), Sequence, URL, From Date, To Date and when clicked on a bulletin, edit option will be available with a search functionality.
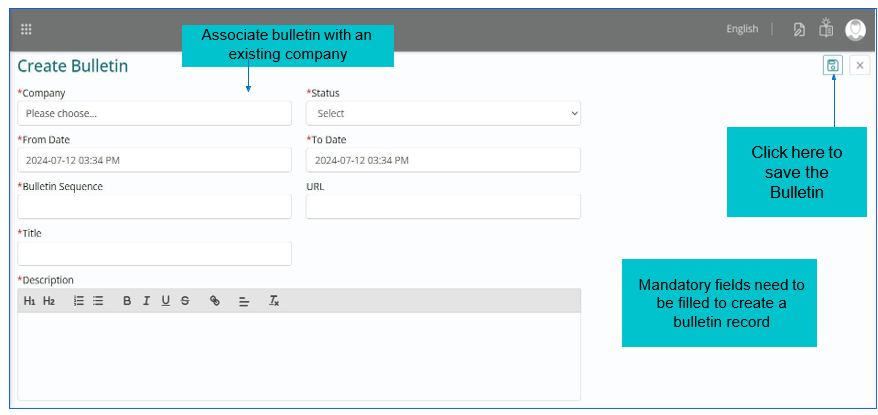
- The form to ‘Create Bulletin’ includes fields as listed below:
- Company – A dropdown with the list of companies configured, amongst which selection can be made. It is to be noted that a bulletin record can be associated with a specific company only when the company record already exists and is visible under company list view.
- Status – A dropdown with the values (Active / Inactive) indicating whether a bulletin is valid or not.
- From Date – A calendar enabled field to select the date from which the bulletin would be valid and would therefore be visible to the entire user community.
- To Date – A calendar enabled field to select the date up to which the bulletin would be valid and would therefore be visible to the entire user community.
- Title – A free text field to fill in the unique title for a bulletin being created which would be visible to the entire user community.
- Description – A free text field to fill the summary (brief description) for the bulletin being created which would be visible to the entire user community.
- URL – A free text field to fill in the URL related to the bulletin being created.
- Bulletin Sequence – A free text field to fill in the sequence of the bulletin to be published.

All the fields can be edited appropriately.
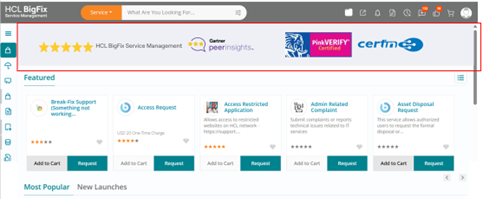
An Advertisement is an announcement promoting an upcoming product, service or event on the service catalog.
As illustrated and highlighted below, the advertisement will be displayed in the service catalog page, multiple advertisements can be displayed in a sequence.
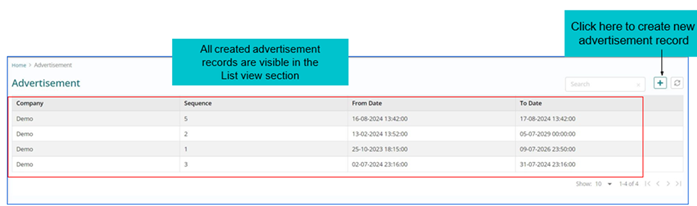
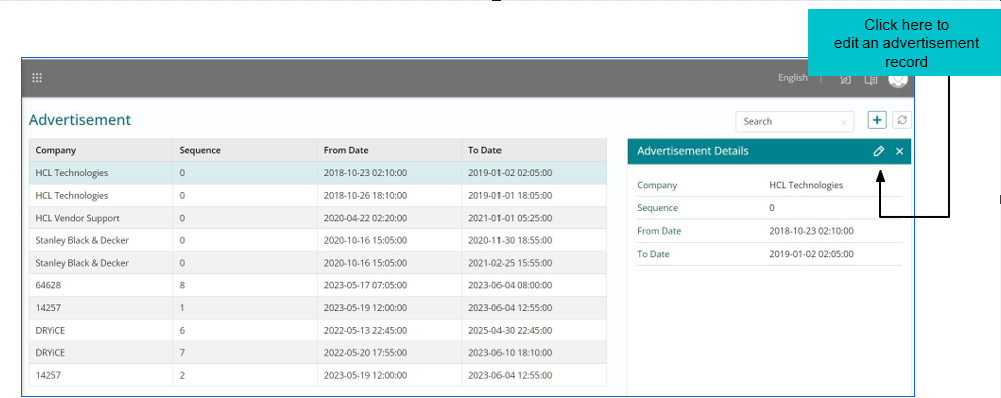
An advertisement once created would get populated in the list view with visibility of the fields Company Name (associated company), From Date, To Date and when clicked on an advertisement, edit option will be available with a search functionality.
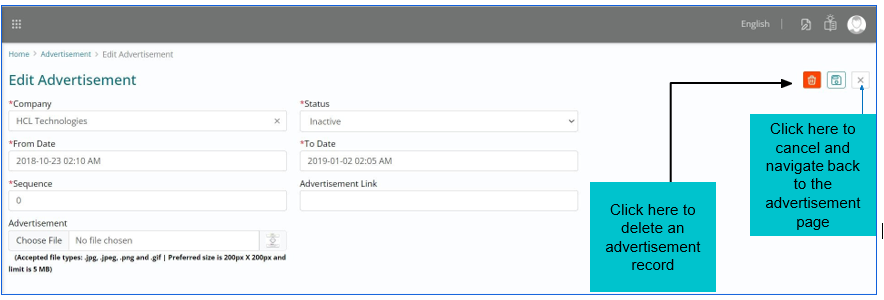
All fields need to be populated to create an advertisement record
-
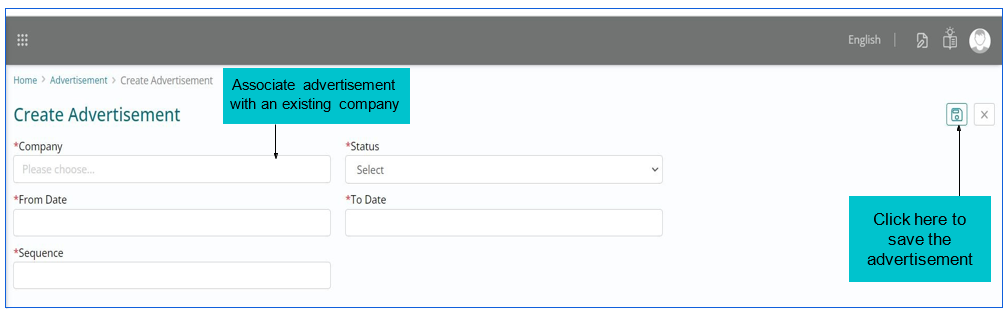
Configuration of Advertisement - The form to ‘Create Advertisement’ includes fields
as listed below:
- Company – A dropdown with the list of companies configured, amongst which selection can be made. It is to be noted that an advertisement record can be associated with a specific company only when the company record already exists and is visible under company list view.
- Status – A dropdown with the values (Active / Inactive) indicating whether an advertisement is valid or not
- From Date – A calendar enabled field to select the date from which the advertisement would be valid and would therefore be visible to the entire user community
- To Date – A calendar enabled field to select the date up to which the advertisement would be valid and would therefore be visible to the entire user community
- Sequence - A free text field when the visibility of the advertisement can be set.
- Advertisement Link – A free text field to fill in the URL related to the advertisement being created within permissible size limits and accepted file types, which would be visible to the entire user community once created by the administrator in advertisement.
- Advertisement File - A image file can be uploaded with 5MB file size with jpg, jpeg, png and gif format with size of 200px X 200px.
 All the fields, namely Company,
Status, From Date and To Date are auto populated from the advertisement record but are
editable and can be modified accordingly.
All the fields, namely Company,
Status, From Date and To Date are auto populated from the advertisement record but are
editable and can be modified accordingly.

The Advertisement link and the image/file uploading option will be enabled only after entering the mandatory information and then save the new advertisement.
An External Link is a link that points at an external domain. It can be added from the homepage to get routed directly from HCL BigFix Service Management.
As illustrated and highlighted below, the external link will be displayed in the service catalog page, multiple external links can be displayed in a sequence.

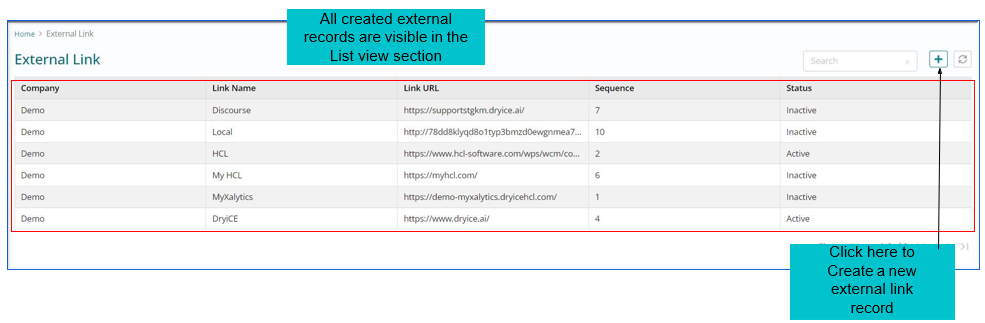 An External Link record once created
would get populated in the list view with visibility of the fields Company Name (associated
company), Link Name, Link URL, Sequence, Status and when clicked on a external link, edit
option will be available with a search functionality.
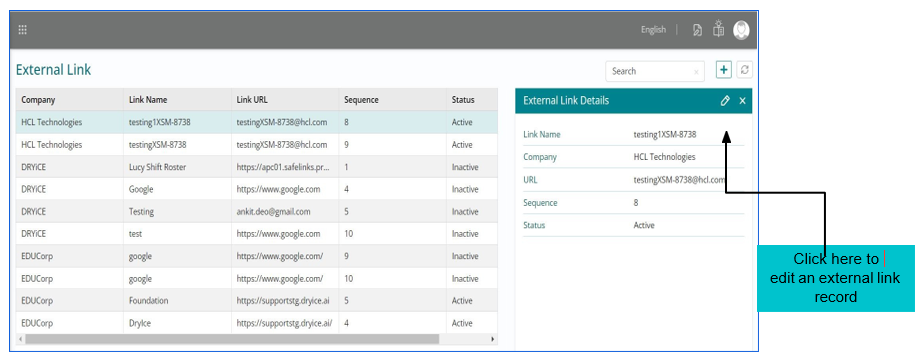
An External Link record once created
would get populated in the list view with visibility of the fields Company Name (associated
company), Link Name, Link URL, Sequence, Status and when clicked on a external link, edit
option will be available with a search functionality.
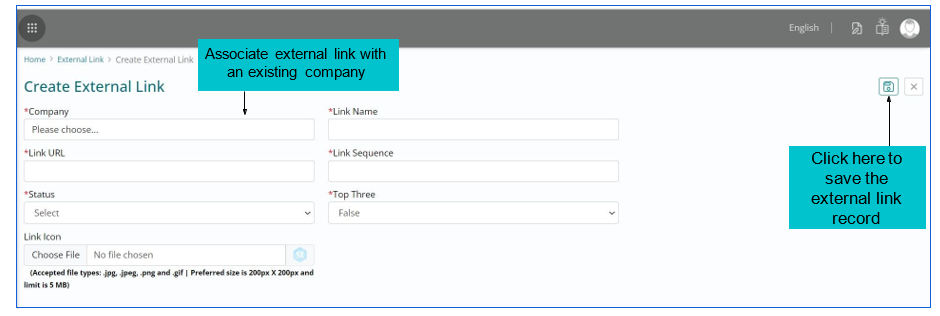 Configuration of External link - The form to ‘External link’ includes fields as listed
below:
Configuration of External link - The form to ‘External link’ includes fields as listed
below: - Company – A dropdown with the list of companies configured, amongst which selection can be made. It is to be noted that an external link record can be associated with a specific company only when the company record already exists and is visible under company list view.
- Link Name – A free text field to specify the name of external link
- Link URL - A free text field to fill in the URL related to the external link being created.
- Link Sequence – An integer field to capture the sequence for the external link
- Status – A dropdown with the values (Active / Inactive) indicating whether an external link is valid or not
- Top Three – A dropdown with the values (True / False) which describes precedence of the link in HCL BigFix Service Management homepage.
- Link Icon - This option is to choose a file / image and upload the same within permissible size limits and accepted file types, which would be visible to the entire user community once created by the administrator in external link.
 All the fields namely, Company,
Status, link name, link URL etc. are auto populated from the advertisement record but are
editable and can be modified accordingly.
All the fields namely, Company,
Status, link name, link URL etc. are auto populated from the advertisement record but are
editable and can be modified accordingly.

Integrating Single Sign-On (SSO) with the admin settings is a crucial security and operational best practice. It means that the high-privilege accounts used to configure and manage the ITSM system are protected by your central identity provider.
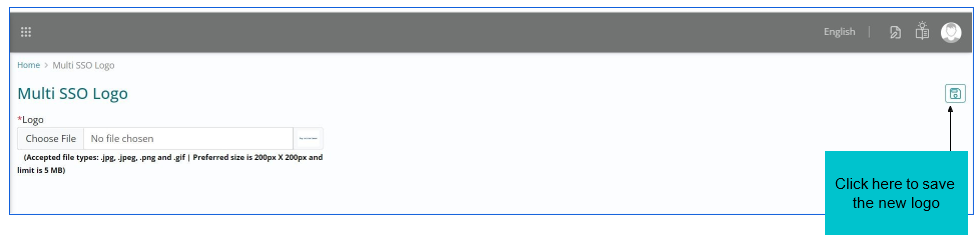
Configuration of Multi SSO Logo –
- The enterprise can choose their own logo upto 5MB of size.
- Onlyspecific format of file is accepted i.e., JPEG, JPG, PNG and GIF.
- Thepreferred logo size is 200px X 200px.
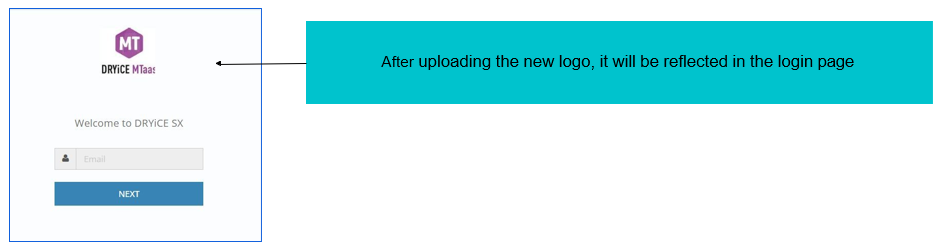
For a multi-tenant instance, a service provider can configure a logo that will appear on the multi-tenant login page. This configuration is not available on dedicated instances as it is not required.
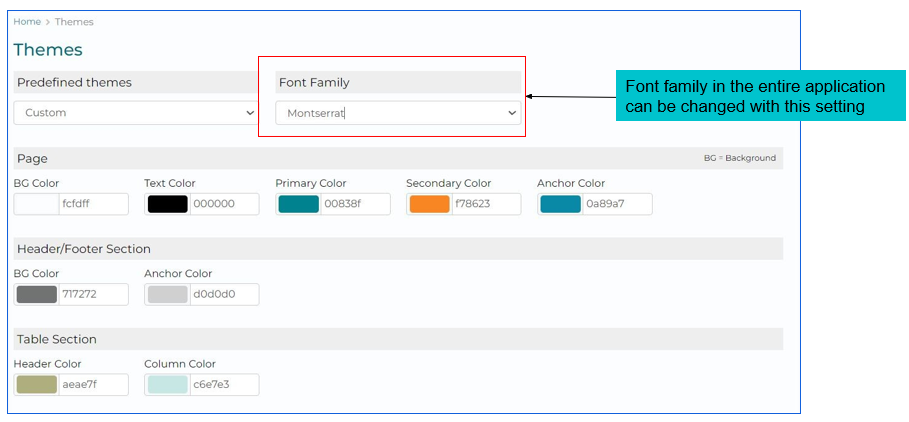
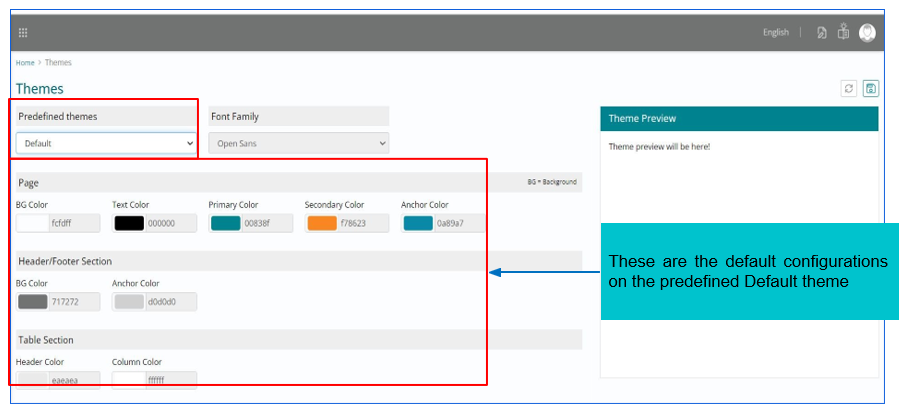
With the Themes feature, you can customize the look and feel of the application as per the brand requirements of your company. You can select from a wide range of colour schemes and fonts to enable a cohesive and seamless experience for the users.
On a multi-tenant instance, each tenant can design their own theme to have a control over the aesthetics for creating a unique user experience.
A collection of configurable UI elements make it easy for the admins to set a different theme for each component of the UI. Below mentioned components of the UI are configurable.
- Page settings
- Header and Footer settings
- Table settings
- Font family
Each UI component mentioned above has a set of configurable elements as described in the upcoming sections.
Default theme settings cannot be modified; however custom theme can be created by the admins and can reset back to the default them if required.
Prerequisite: You need to have an Administrator role to create a custom theme:
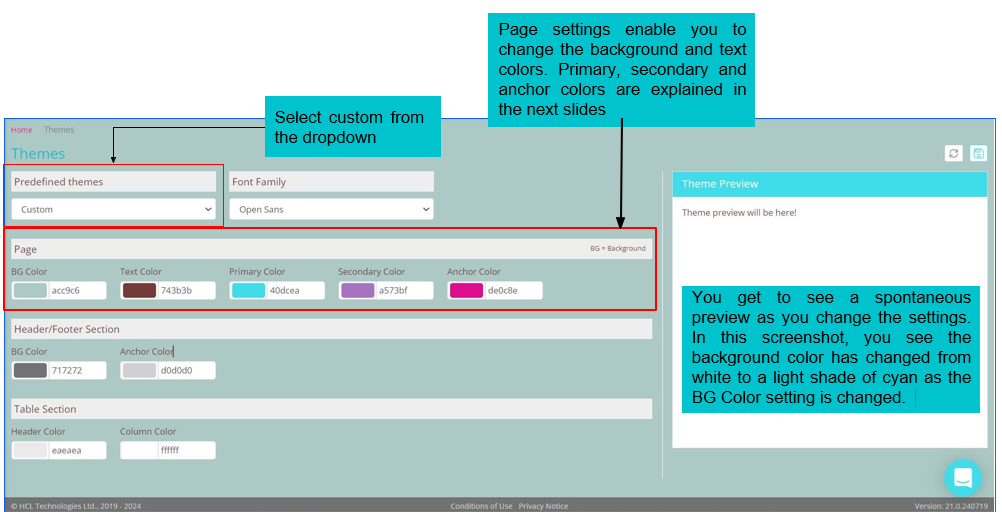
- Page Settings
- Primary Color – The details that are showing in green color appears when primary color is modified.
- Secondary Color – The details that are boxedshowing in blue color appears when
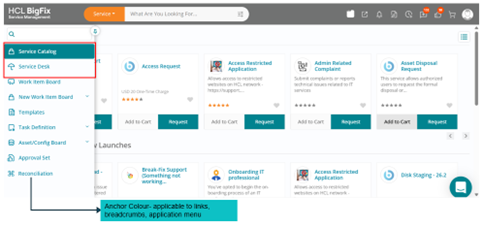
secondary color is modified.

- Anchor Color – The details that are showing in pink color appears when anchor color is modified.
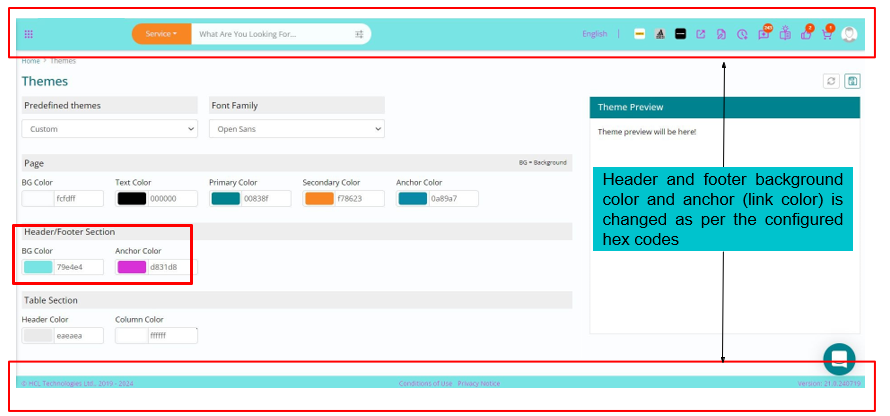
- Header and Footer Settings
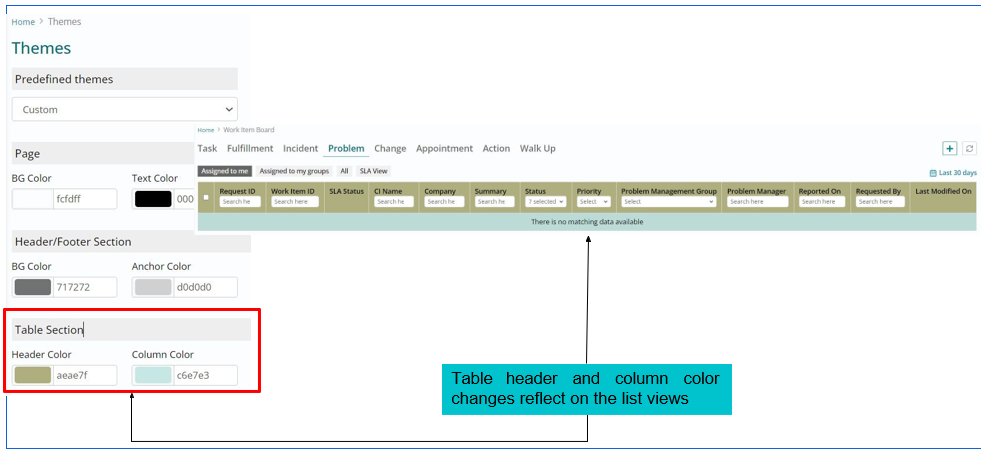
- Table Settings: The table that are showing in Peach and Red color appears when
table sections header and column color is modified.
- Font Family setting