Script Analysis
In case of unavailable runbooks for a certain set of ticket categories, iAutomate helps the users by automatically downloading relevant scripts from internal and external data sources. Users can view, validate, and customize those scripts for future use.
To configure a script analysis, perform the following steps:
- On the main menu bar, click Analysis.
- Click Script Analysis. The Script Analysis page appears.
Figure 1. Script Analysis 
- This lists the available analysis types in a tabular view and enables users to view and build or approve analysis.
View Analysis
Users can view information for an already defined analysis type.
To view the script analysis, perform the following steps:
- On the Script Analysis screen, click
 corresponding to the analysis you want to view.
Figure 2. View Analysis 
- The Ticket Variation Details page appears that includes the count of ticket variations
in the categories - No Runbook Available, Script Downloaded, and Script
Approved.
Figure 3. View Analysis (Cont.) 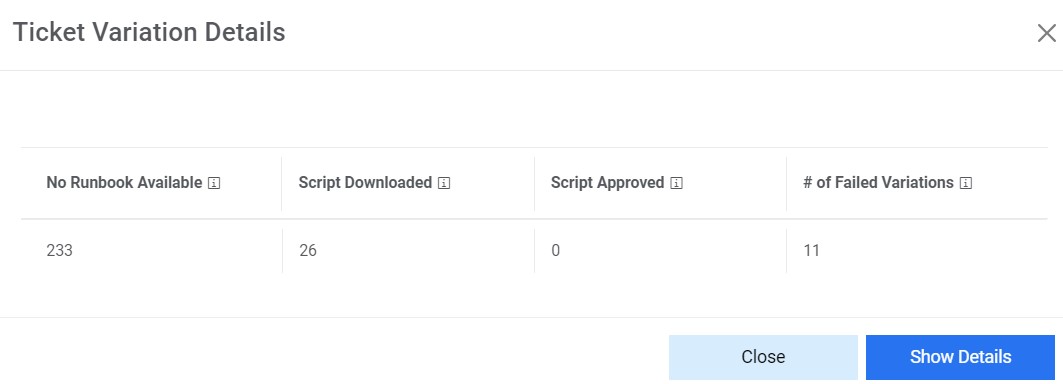
- Click Show Details to view the details including the count of ticket variations
for which No Runbook Available, Script Downloaded but not Approved, Script Available,
Script Downloaded and Approved, and Script in Progress.
Figure 4. View Analysis (Cont.) 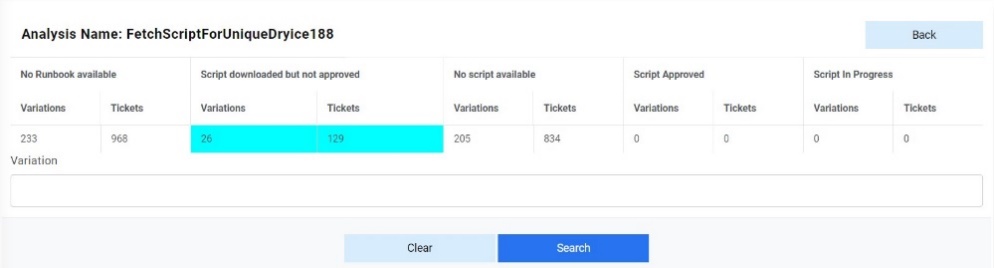
- To scale down the search for variations, type the keywords in a search box next to the Variation field and click Search.
Build/Approve Analysis
Users can build or approve script analysis by performing the following steps.
- On the Script Analysis page, click
 next to the analysis type you want to approve.
 - The Manage Scripts page appears and lists the available variations in a tabular
view.
Figure 5. Build/Approve Analysis 
- iAutomate provides easy search capabilities to access required scripts from the list of
scripts based on certain keywords. Type a value in the Search box and then click
Search.
Figure 6. Build/Approve Analysis (Cont.) 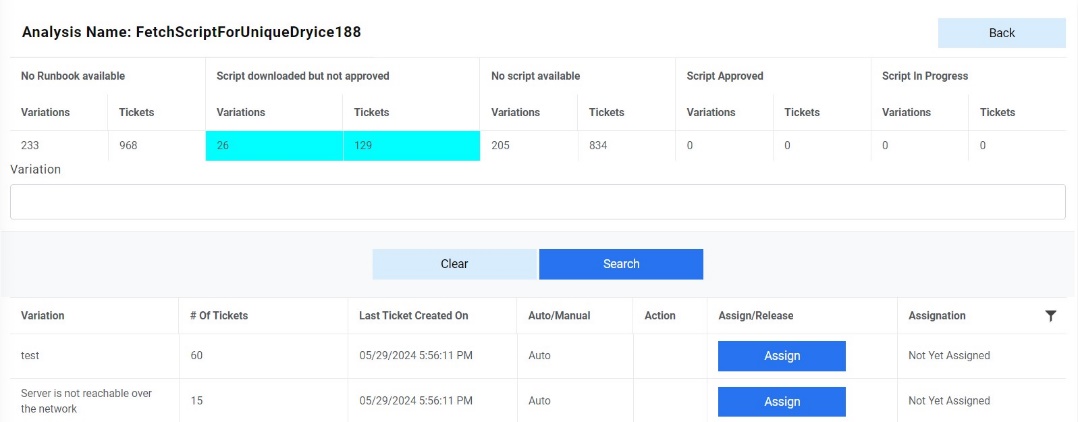 Note:Choose Clear to cancel the search.
 - To allow the variation to be used for script analysis, click Assign and the
variation will be assigned to the logged in user.
Figure 7. Build/Approve Analysis (Cont.) 
- After the variation is assigned, the variation status changes to Release and the
Assignation column displays the name of the assignee.
Figure 8. Build/Approve Analysis (Cont.)  Note:If user clicks Release, then the variation status will again change to Assign and will become available for assignment to another user.
 - In the Action column, click
 next to the variation to approve the associated scripts of the
variation.
next to the variation to approve the associated scripts of the
variation.Figure 9. Build/Approve Analysis (Cont.) 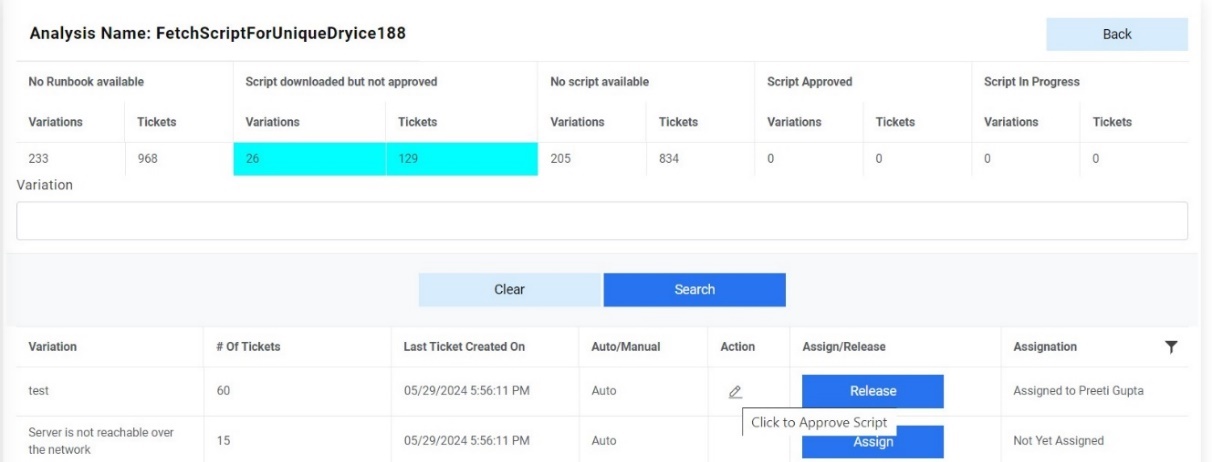
- A list of scripts for the selected variation appears in
a tabular view that enables you to download the scripts in
scripts text by clicking Retrieve appearing next to the scripts.
Figure 10. Build/Approve Analysis (Cont.) 
Users can add multiple scripts simultaneously using the Export to Excel function or add a single script by clicking Create a New Script from the grid below.
Upload an Excel to Configure Multiple Scripts
Users can create multiple scripts simultaneously using the Export to Excel function.
To create multiple scripts, perform the following steps:
- On the Manage Script page, select Create a New Script at the bottom of the
grid.
Figure 12. Build/Approve Analysis (Cont.) 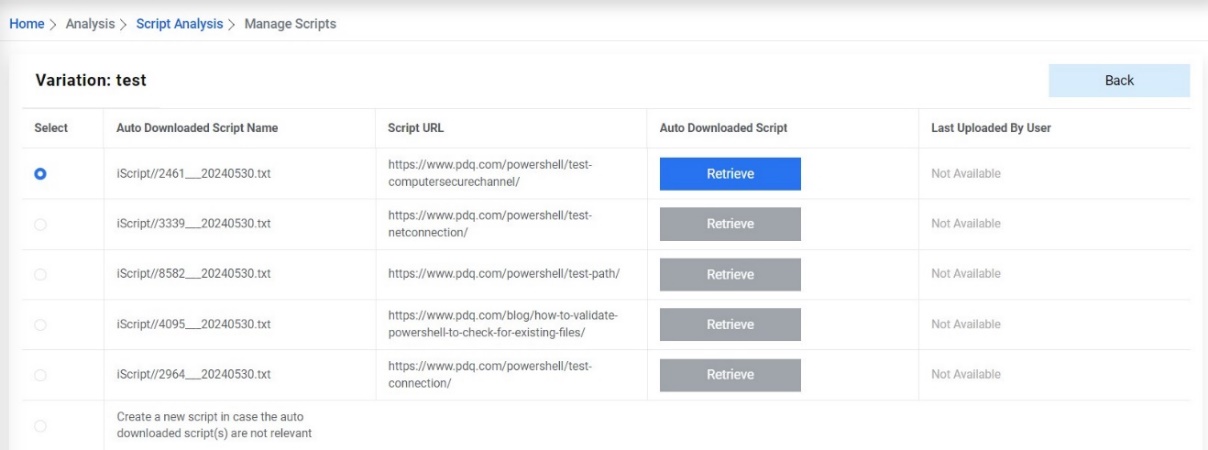
- This auto fills the Upload field.
Figure 13. Build/Approve Analysis (Cont.) 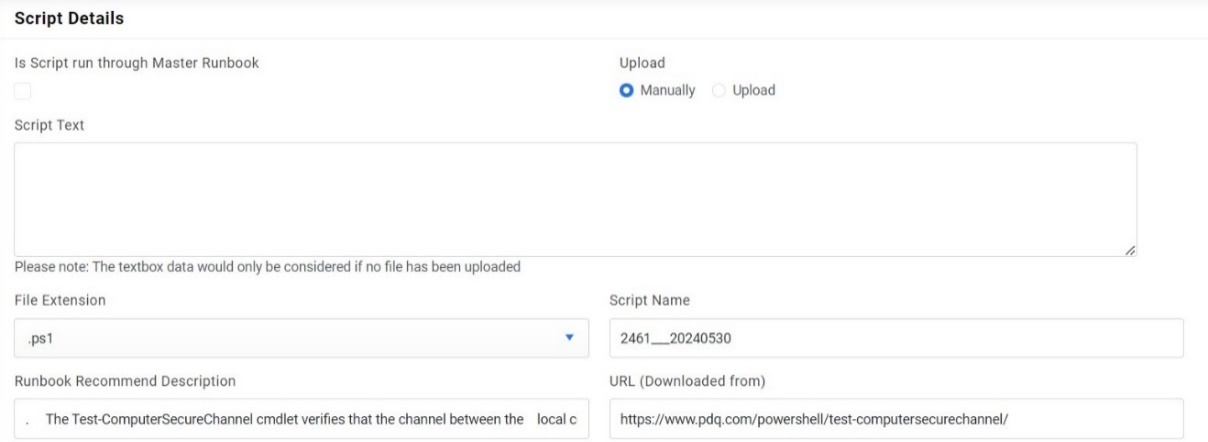
- Click Choose File to upload multiple scripts at the same time. This adds the new scripts and appears in a list.
Create Single Script
User can create a single script for analysis by using the following steps:
- On the Manage Script page, select Create a New Script at the bottom of
the grid.
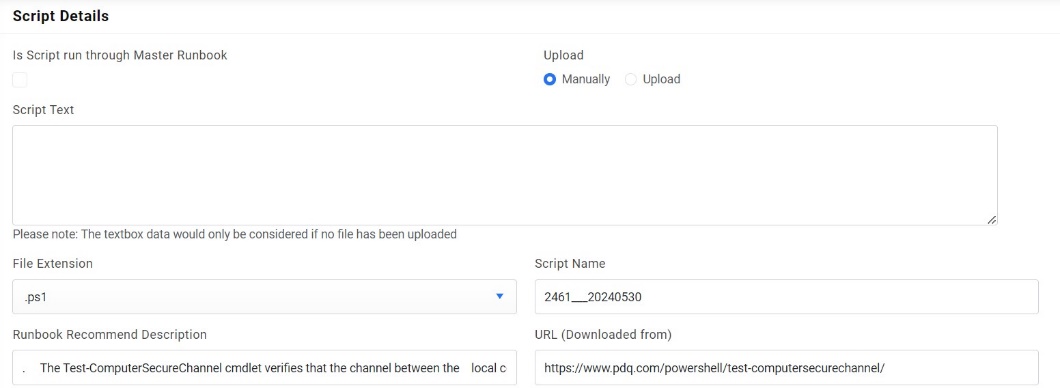
Figure 14. Build/Approve Analysis (Cont.) 
- It auto-fills the following fields below the Upload option.
- To create a single script, fill in the details below.
- Type the Script Name, the Script Description, and then type the
URL from where the user downloaded the script.
Figure 15. Build/Approve Analysis (Cont.) 
- Type the Category of script, then the Sub-Category of the script.
- Select the checkbox, if you want to Add Bucket Description to Recommendation.
- Type the Recommendation Description, then the Runbook Tags.
Figure 16. Build/Approve Analysis (Cont.) 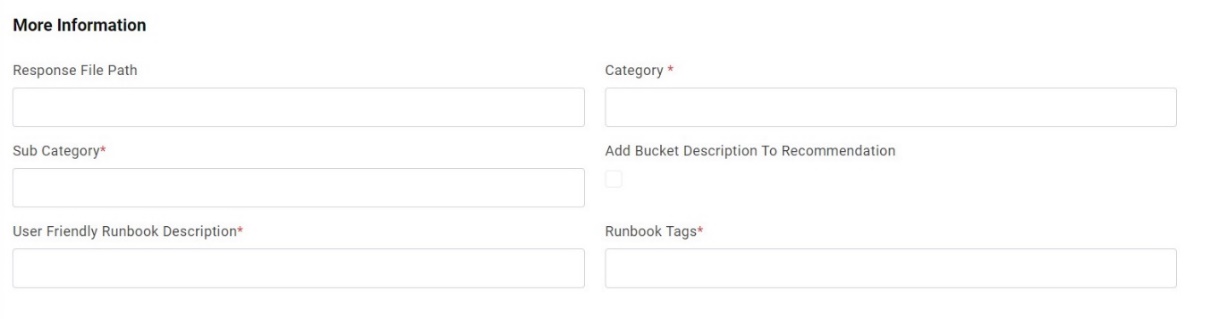
- After the user has added the values, provide the following parameters to create a
script:
- Parameter Name- Specifies a name for the parameter to be used in the script for analysis.
- Field Type:
- Text: specifies that field type is text
- Secureparameter: specifies that the parameter is secured and will be saved in encrypted form in database.
-
Is Mandatory- Select True or False if the parameter details added are mandatory or not.
-
Parameter Description- Describes the parameter.
-
Parameter Label- Specifies a unique user-friendly name for the parameter to be added.
-
Default Parameter Value - Specifies the default value for the parameter.
-
Parameter type- Specifies the method for script parsing.
-
IsScript Parameter- To specify that parameter is script parameter.
-
Is CIBased Parameter- To specify that parameter is CI Based
-
Is ReadOnly parameter- To specify that the parameter is read only parameter.
-
Action- Enables user to edit or delete the existing parameter by clicking Edit or Delete.
-
Add- Adds a new row to add another parameter.
- Click Save Changes to add the new script.
Figure 17. Build/Approve Analysis (Cont.)  Note:Users cannot edit a script after the analysis is approved.
While saving, user can add this created script as a runbook to the runbook tools present in the system by giving a user-friendly name. Then click on Submit. The created script will now be visible under the selected runbook tool.
Figure 18. Build/Approve Analysis (Cont.) 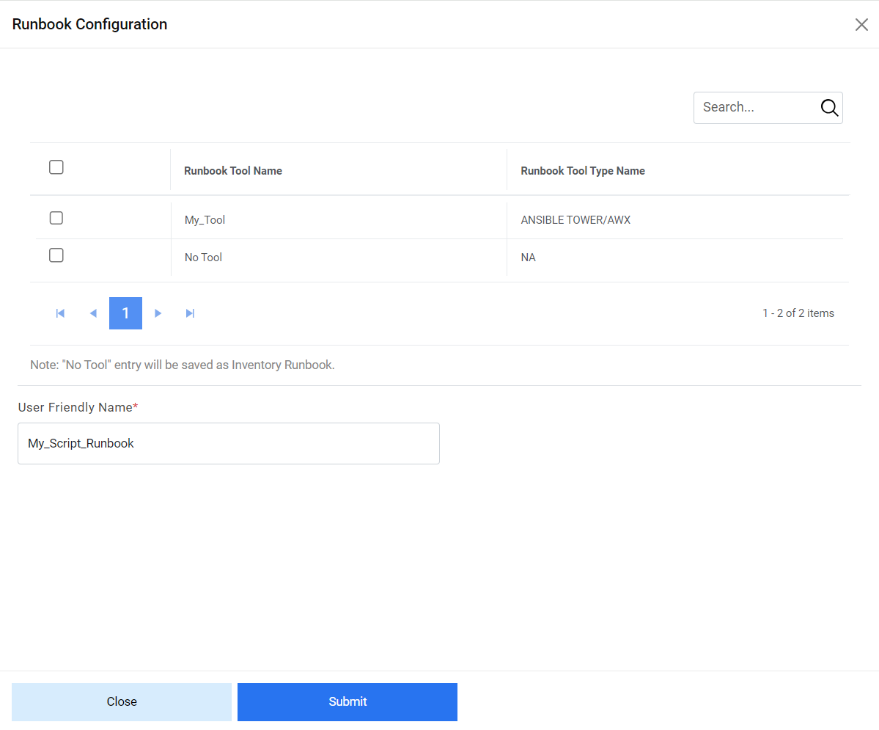
- Type the Script Name, the Script Description, and then type the
URL from where the user downloaded the script.