My Reports
This section highlights the reports that are accessed by Requester.
- Metering
- My Dashboard Requester
- Top Bottom Nodes
- My Bills
- Request Analytical Report
- Request Trend Compare
- SLA Report
Resources
To create and manage objects within object types on a platform, the Requester needs to follow the below steps:
- On the main menu bar, click Resources.
- The drop-down appears with the following option:
- Select Platform from the list of cloud service providers.
- Select the Object Type from the list of infrastructure resources.
- Click Go.
It lists down the available Object Types in a tabular view which enables the requester to perform various actions as listed below on the object types.
- About My Objects
- Bulk Delegation
- Remove Delegation
- Grid Column Arrangement
- Actions
- Object and Health Details
- Object Order Details
.png)
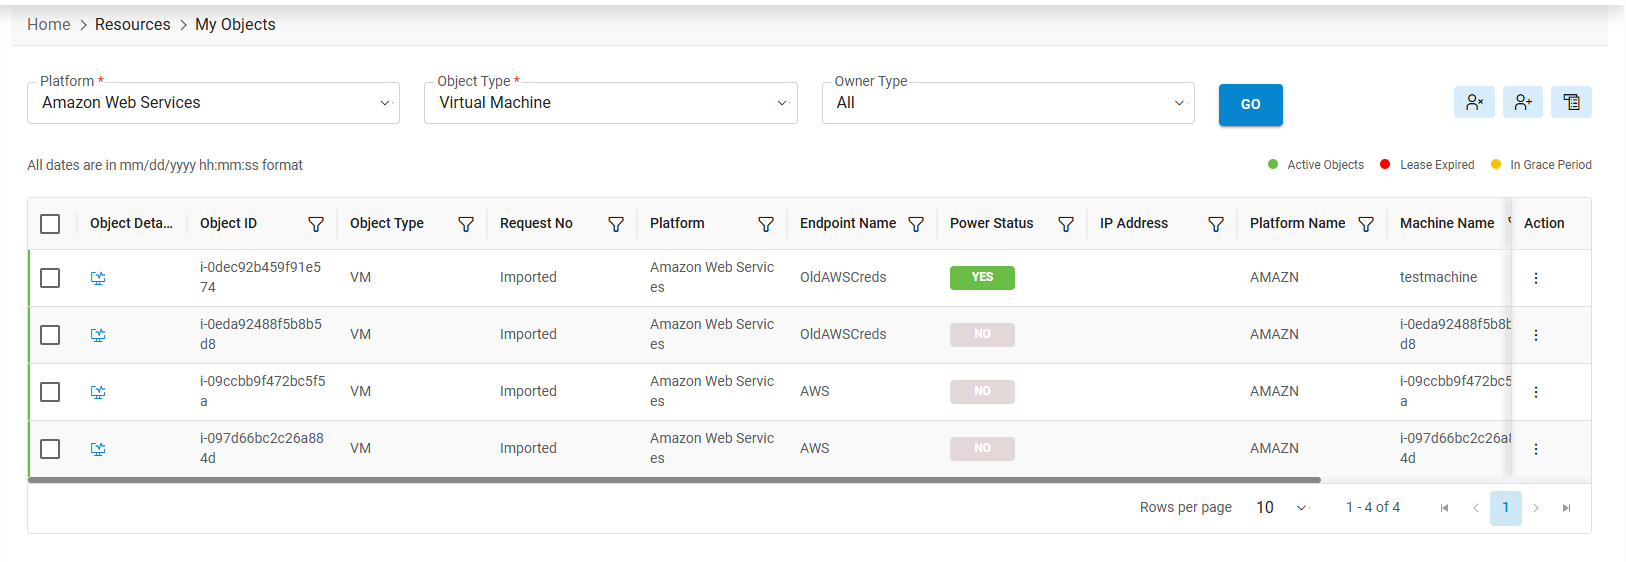
About My Objects
This section will provide the details of fields on My Objects Page.
.png)
Refer to the below table to understand the fields mentioned in the above figure.
| Fields | Description |
|---|---|
| Platform | The name of Cloud service providers |
| Object Types | Infrastructure resource |
| Owner Type | Resource owners include Delegate or Self |

|
Checkbox to select specific or multiple Object Type(s). |

|
Object and Health Details. |

|
Remove Delegation |

|
Delegate object(s) to another user. |

|
Grid Column Settings |

|
List of all the actions available on specific object. |
 (Object
and Health Details) – This column will only be shown for Object Type is Virtual
Machine
(Object
and Health Details) – This column will only be shown for Object Type is Virtual
MachineBulk Delegation
To transfer/ delegate the object(s) to another user, follow the steps below:
- Select the Objects by clicking on the checkbox
.png) corresponding to the objects that
need to be transferred to another user.
corresponding to the objects that
need to be transferred to another user. - Click on Add Delegate user button
.png) on pane.
on pane. - A pop up appears.
Figure 4. My Objects - Add Delegate User 
- Enter the User/RBAC Group name in the text box and click on Add.
- A Success Message appears on the screen:
Remove Delegation
To remove the object(s) delegates/transferred to another user, follow the steps below:
- Click on Remove Delegation button (
.png) ) on pane.
) on pane. - A pop up appears. Enter the User/RBAC Group name in the text box and click on the GO button.
- A grid populates with all the delegated objects to this user.
Figure 5. My Objects - Remove Delegation 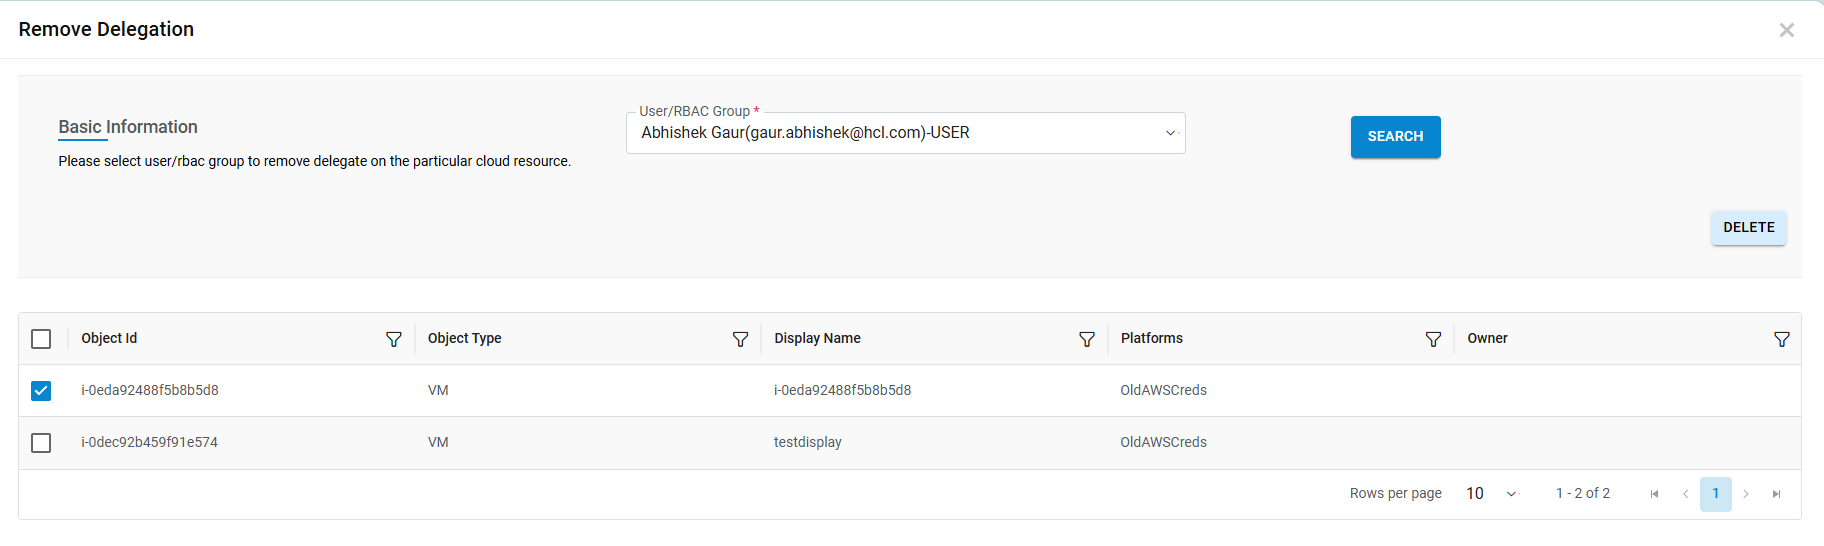
- Select the object by clicking on the checkbox.
- Click Delete.
- A successful message appears on the screen.
Figure 6. My Objects - Remove Delegation 
Grid Column Arrangement
To arrange (show/hide) the columns related to selected object type. Then follow the steps below:
- Click on the Column Settings button
 on the pane.
 - A screen will appear where requesters can configure the columns which will be
visible/hidden on My objects page. This popup contains 2 sections:
- Available Columns – List of columns that are not shown on the screens.
- Selected Columns – Already selected columns.
- Users can move the column from Available to Selected column section which needs to be visible on the page. And vice versa i.e., Selected to Available to hide the columns.
- To update the settings, click Save.
Figure 7. My Objects - Grid Column Arrangement 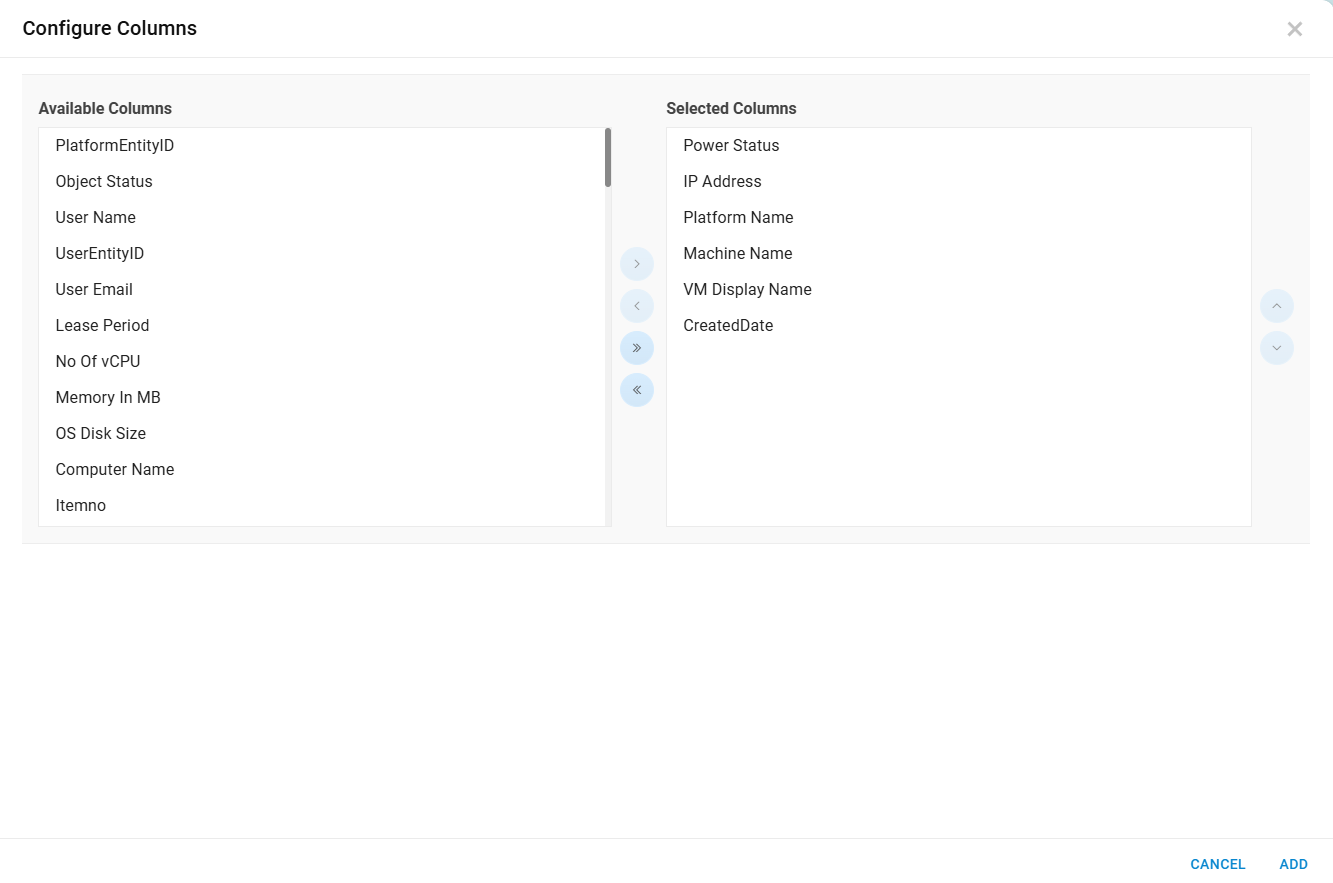
Actions
This section provides details on how to access the actions available for the respective object.
- Scroll to the last column in the grid (Action).
- Hover the mouse over the Action link.
- The drop-down appears with the following options:
Figure 8. My Objects - Actions 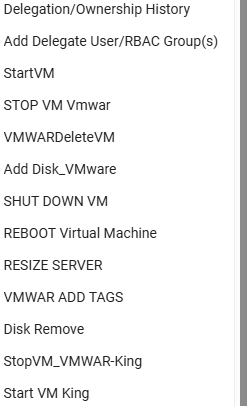
- Click on the action “StartVM”. This opens the Start VM Request form.
Figure 9. My Objects - Actions 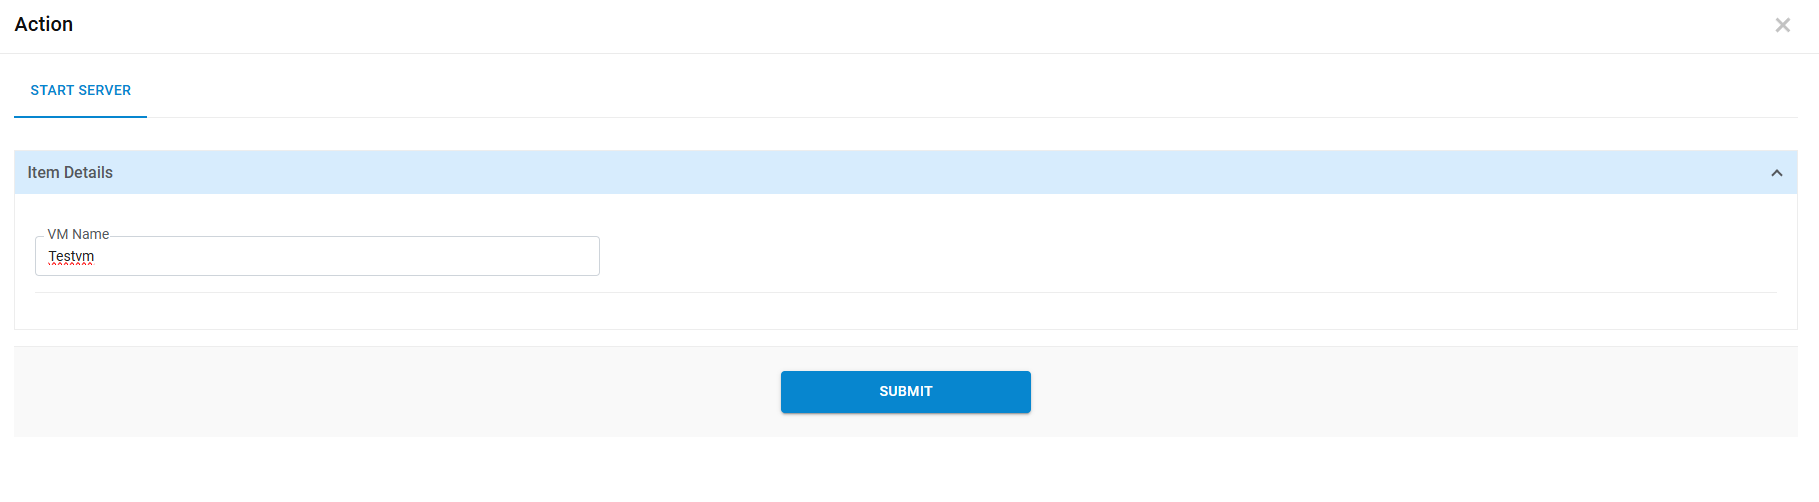 Note:The form and UI fields may vary as per configuration done by provider admin.
 - Fill in all required fields and Click Submit.
- A successful message appears on the following screen.
Figure 10. My Objects - Actions  Note:For more Actions and Actions related to other Object Type, kindly contact the Provider admin user, or refer the HCL BigFix CLM Configuration Guide - Provider Module
 - Click on the action “Delegation/Ownership History”. The below form opens.
Figure 11. My Objects – Actions (Delegation/Ownership History) 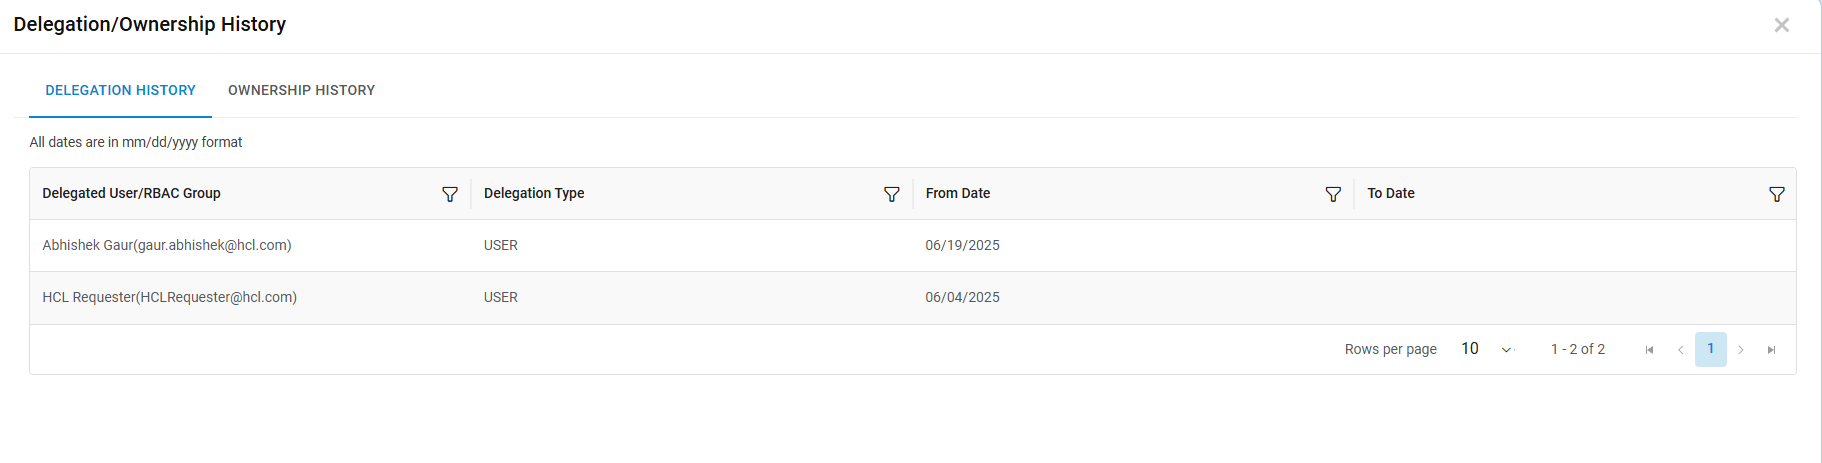 Note:Using this form, the requester user can see the Delegation History and Ownership history with respect to Object id. Delegation history can be filtered by Status filter (i.e., Active/Inactive).
 - Click on the action “Add Delegate User/RBAC Group(s)”. The below form opens:
Figure 12. My Objects – Actions (Add Delegate User/RBAC Group(s)) 
Object and Health Details
This section will provide details about Object and Health. To view the Object and Health Details follow the steps below:
- Click Object Details (
.png) ) on the
navigation column of the grid.
) on the
navigation column of the grid.Figure 13. My Objects - Object and Health Details 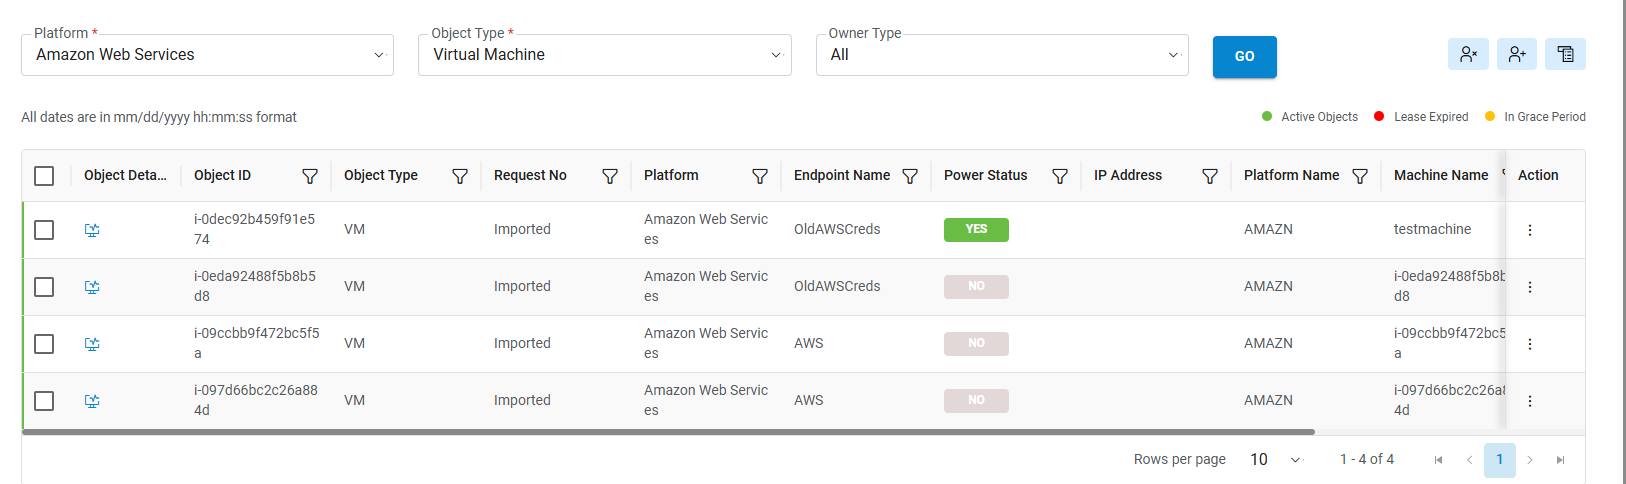
- The Cloud Control pop-up appears with the following types of object details:
- The Basic Details tab includes the Object ID, Request No., Object Type, and Power Status.
- The health tab includes Machine Utilizations Graph information.
- Click Close (
 ) to close
the pop-up window.
) to close
the pop-up window.Figure 14. My Object - Object and Health Details (Cont.)  Note:By default, the Basic Details tab appears.
If the Health tab is not visible, kindly contact the Provider admin user to configure the performance job.
- Click on Object ID that generates the summary of object type.
- Click Close (
 ) to close the
pop-up window.
) to close the
pop-up window.Figure 15. My Objects - Object and Health Details (Cont.) 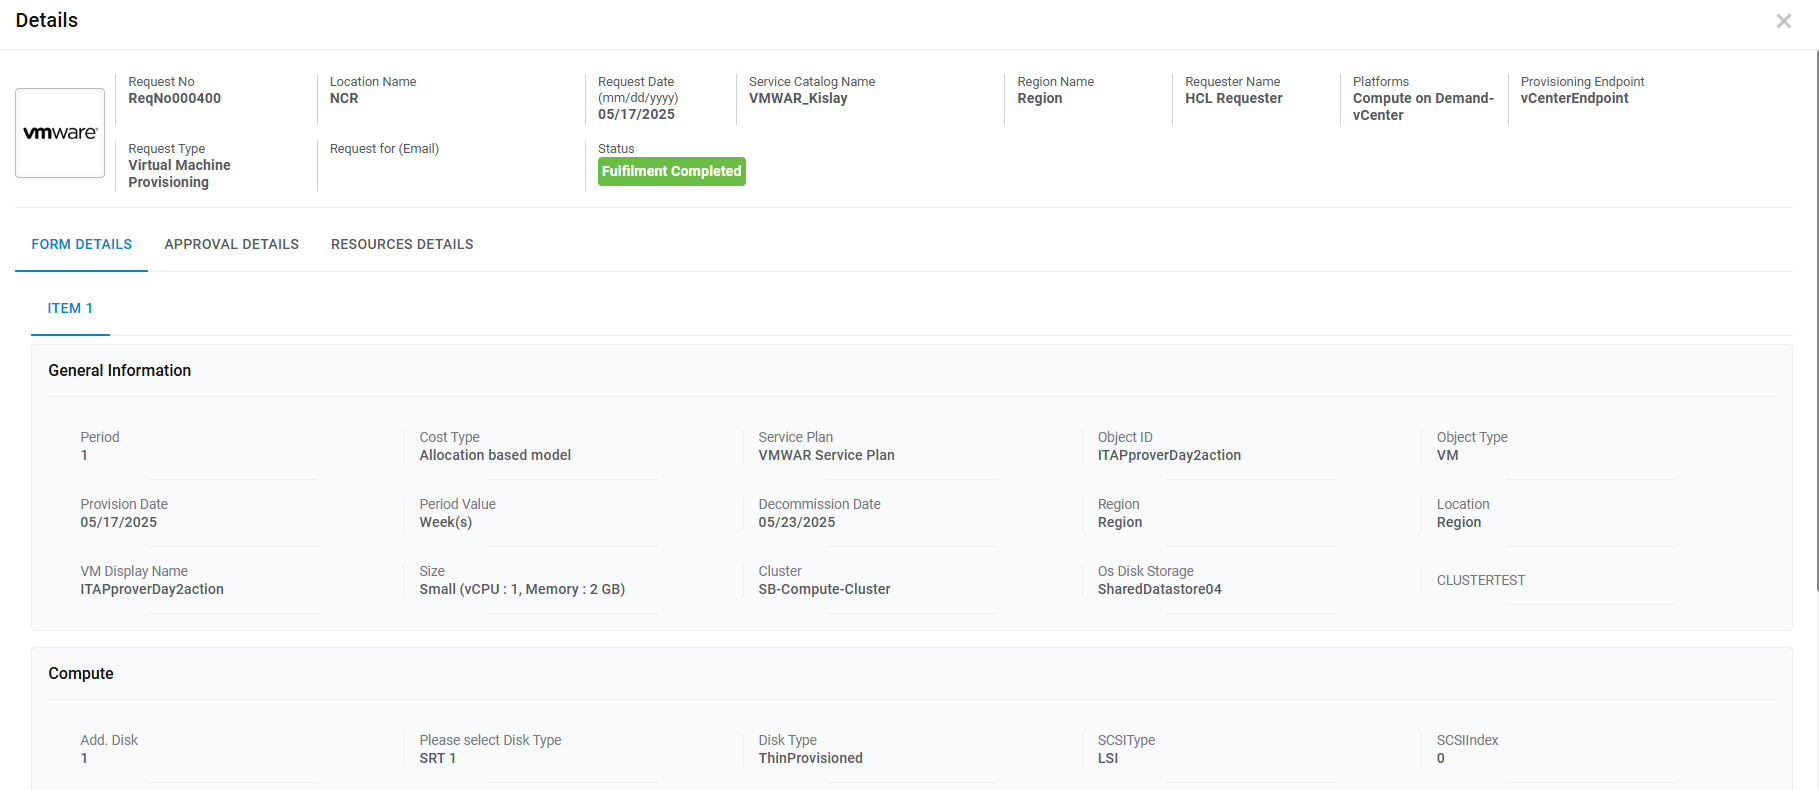
Figure 16. My Objects - Object and Health Details (Cont.) 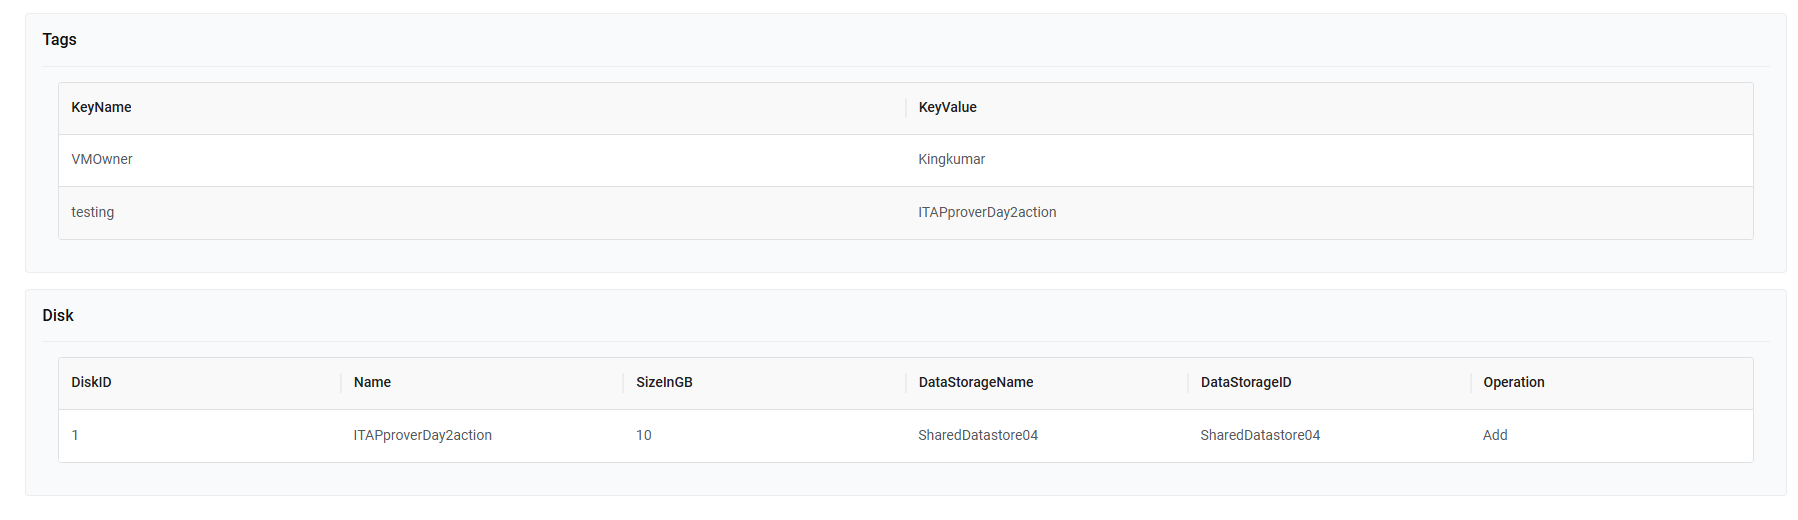
Object Order Details
This section will provide details about the Object Order Details. To view the Object Order Details, follow the steps below:
- Click Request No (ReqNo000400-1) in the Object ID column of the
grid.
Figure 17. My Objects – Object Order Details 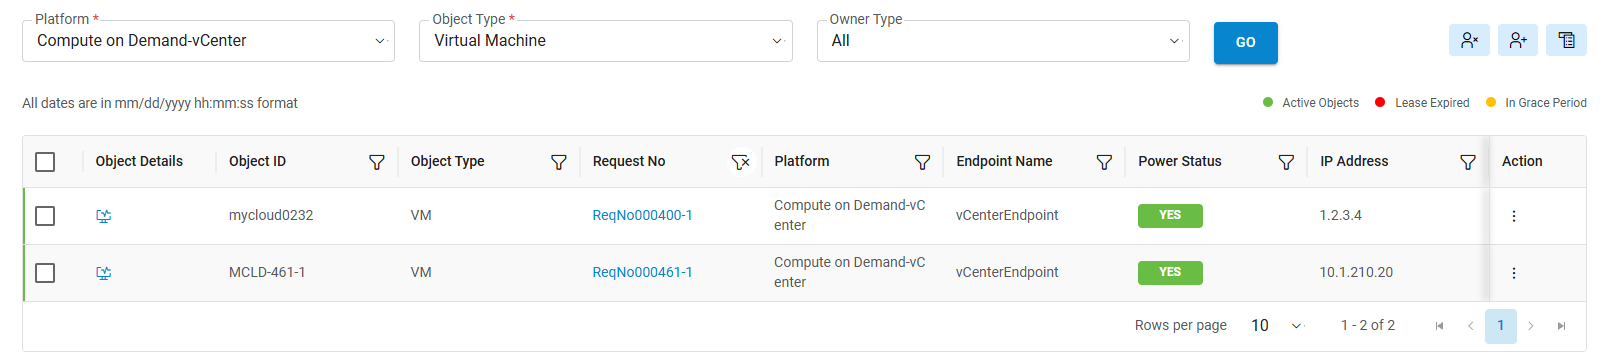
- The Cloud Control pop-up appears with the summary of object and Approval history.
- Click Close (
.png) ) to
close the pop-up window.
) to
close the pop-up window.Figure 18. My Objects – Object Order Details (Cont.) 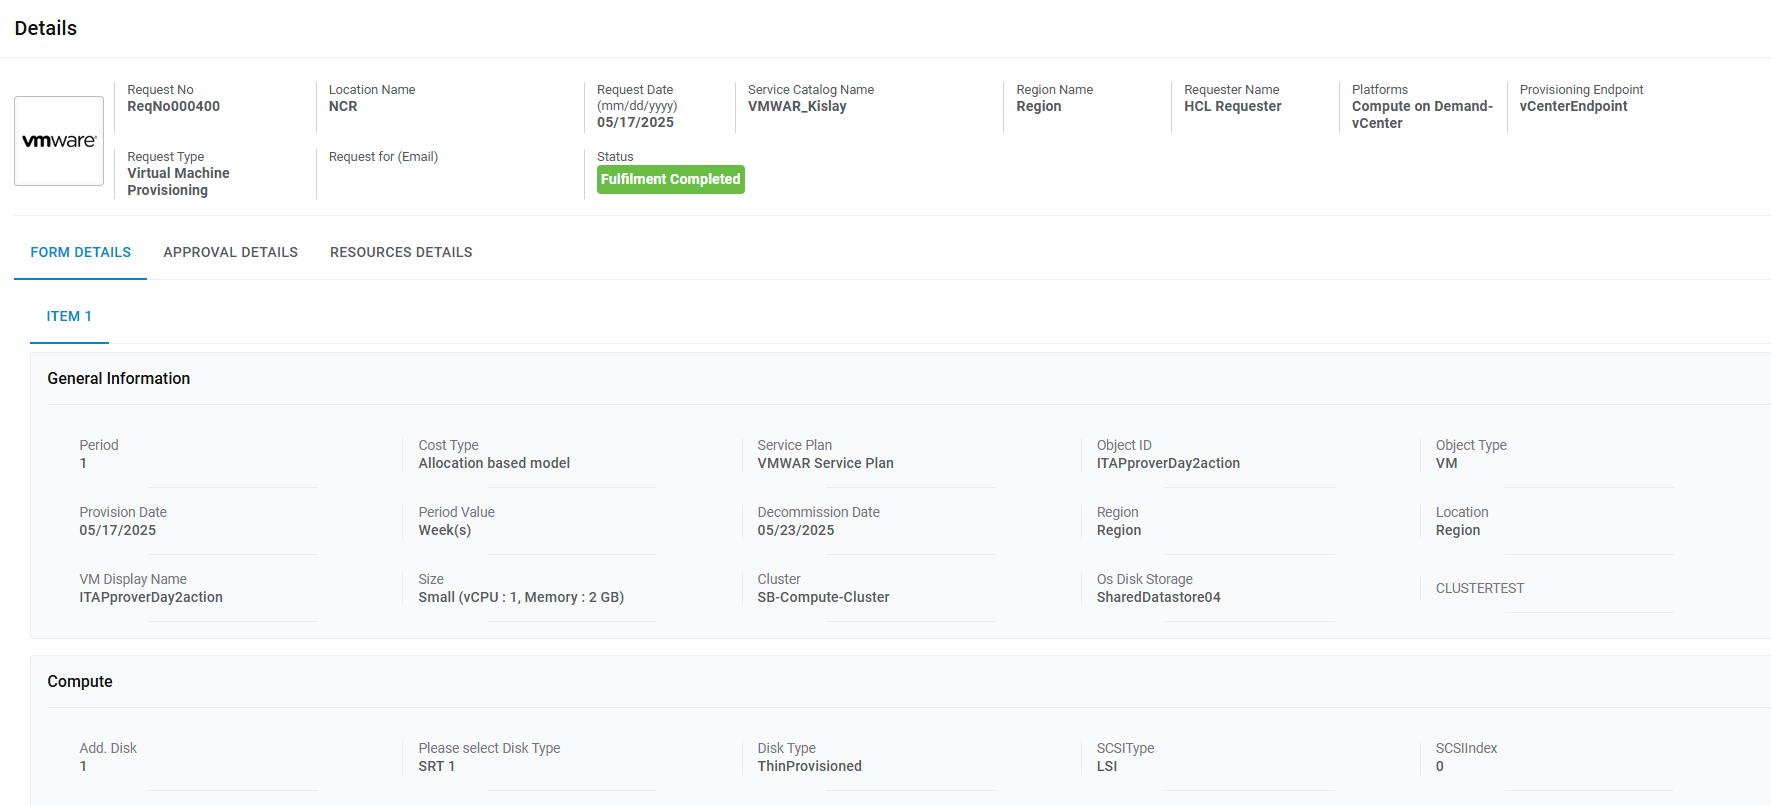
Figure 19. My Objects – Object Order Details (Cont.) 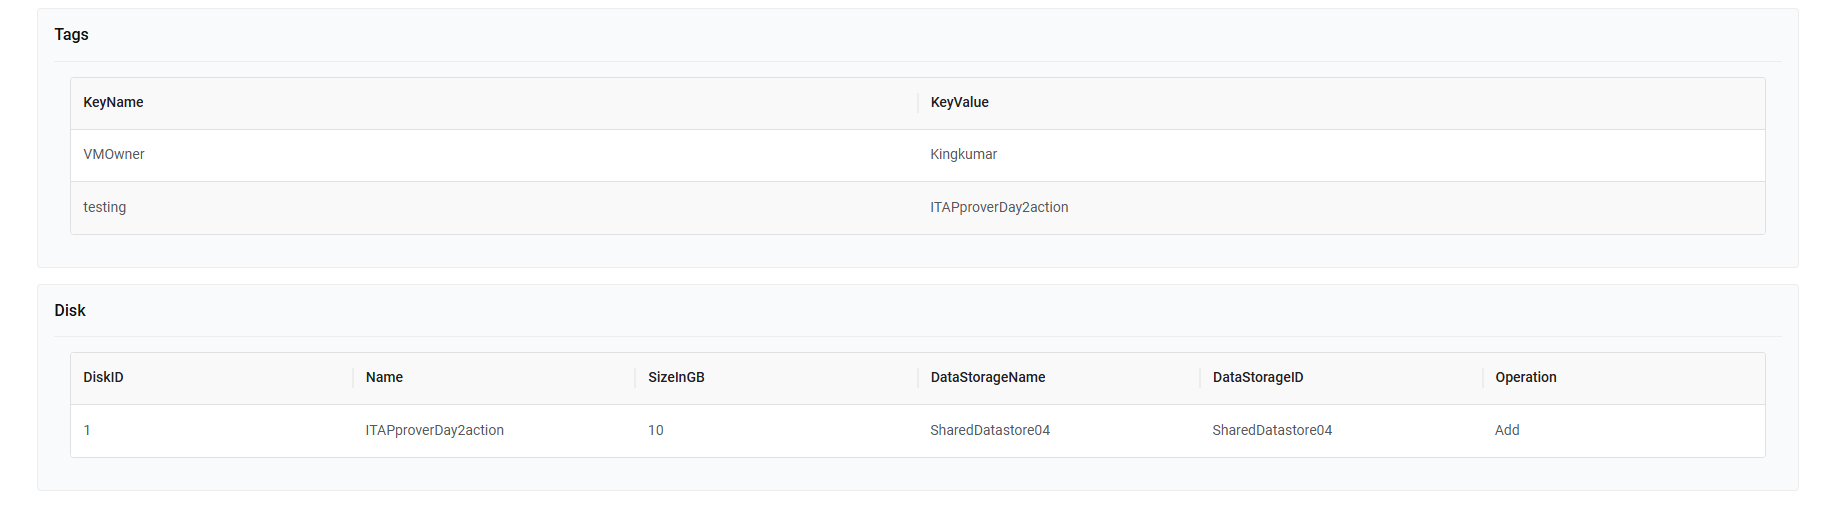
Object Actions
This section provides the details of Virtual Machine Actions.
To start with a VM, the requester needs to follow the below steps:
- Enter Server Name against which user needs to perform the action.
- Enter Resource Group Name, against which user needs to perform the action.
- Click Submit to start a VM.
- A successful message appears on the following screen.
Figure 20. Start VM 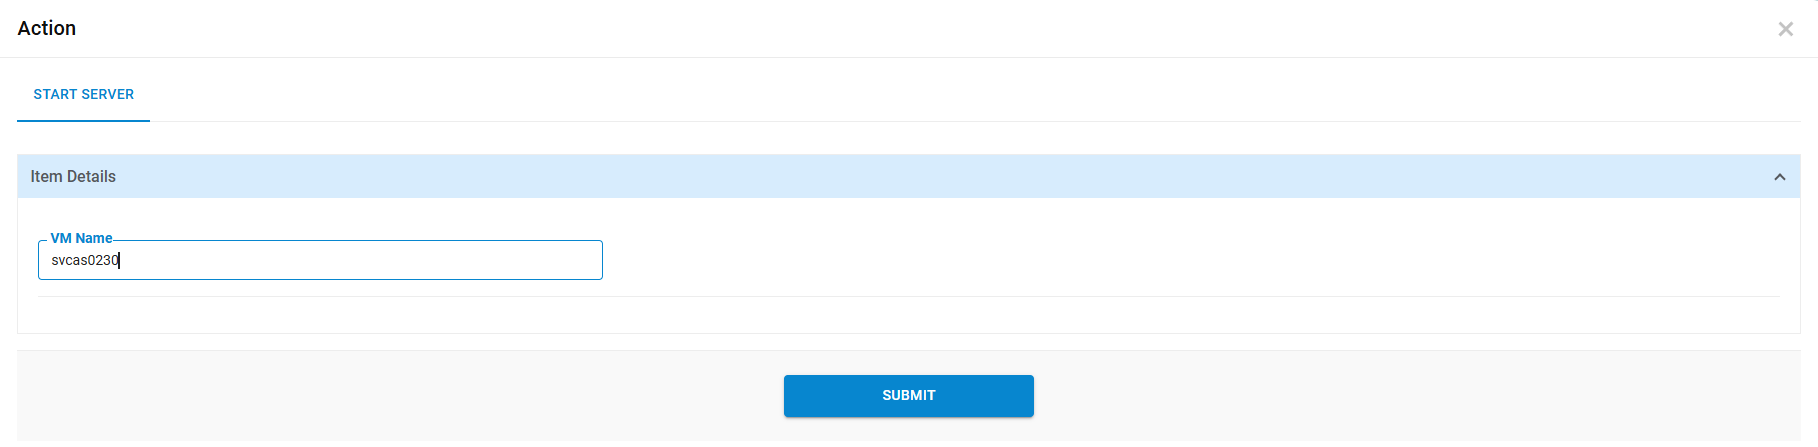
To stop a VM, requester needs to follow the below steps:
- Enter Server Name, the name of server to be displayed.
- Enter Resource Group Name, group name of resource against which user needs to perform the action.
- Click Submit to stop a VM.
- A successful message appears on the following screen.
Figure 21. Stop VM 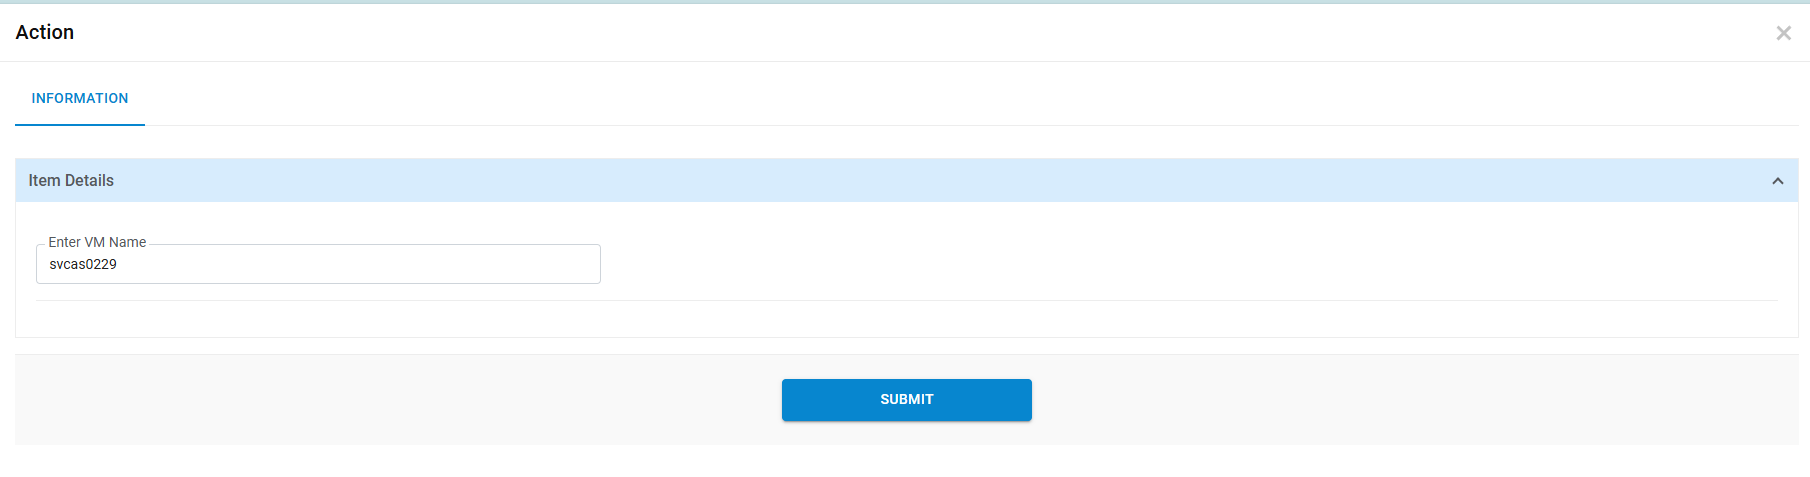
To add disk, a requester needs to follow the following steps:
- Enter Server Name, the name of server to be displayed.
- Enter Resource Group Name, group name of resource against which user needs to perform action.
- Select Storage Account Type from the list.
- Enter Disk requirement (in GB) under Add Disk.
- Click Submit to add disk.
- A successful message appears on the following screen.
Figure 22. Add Disk 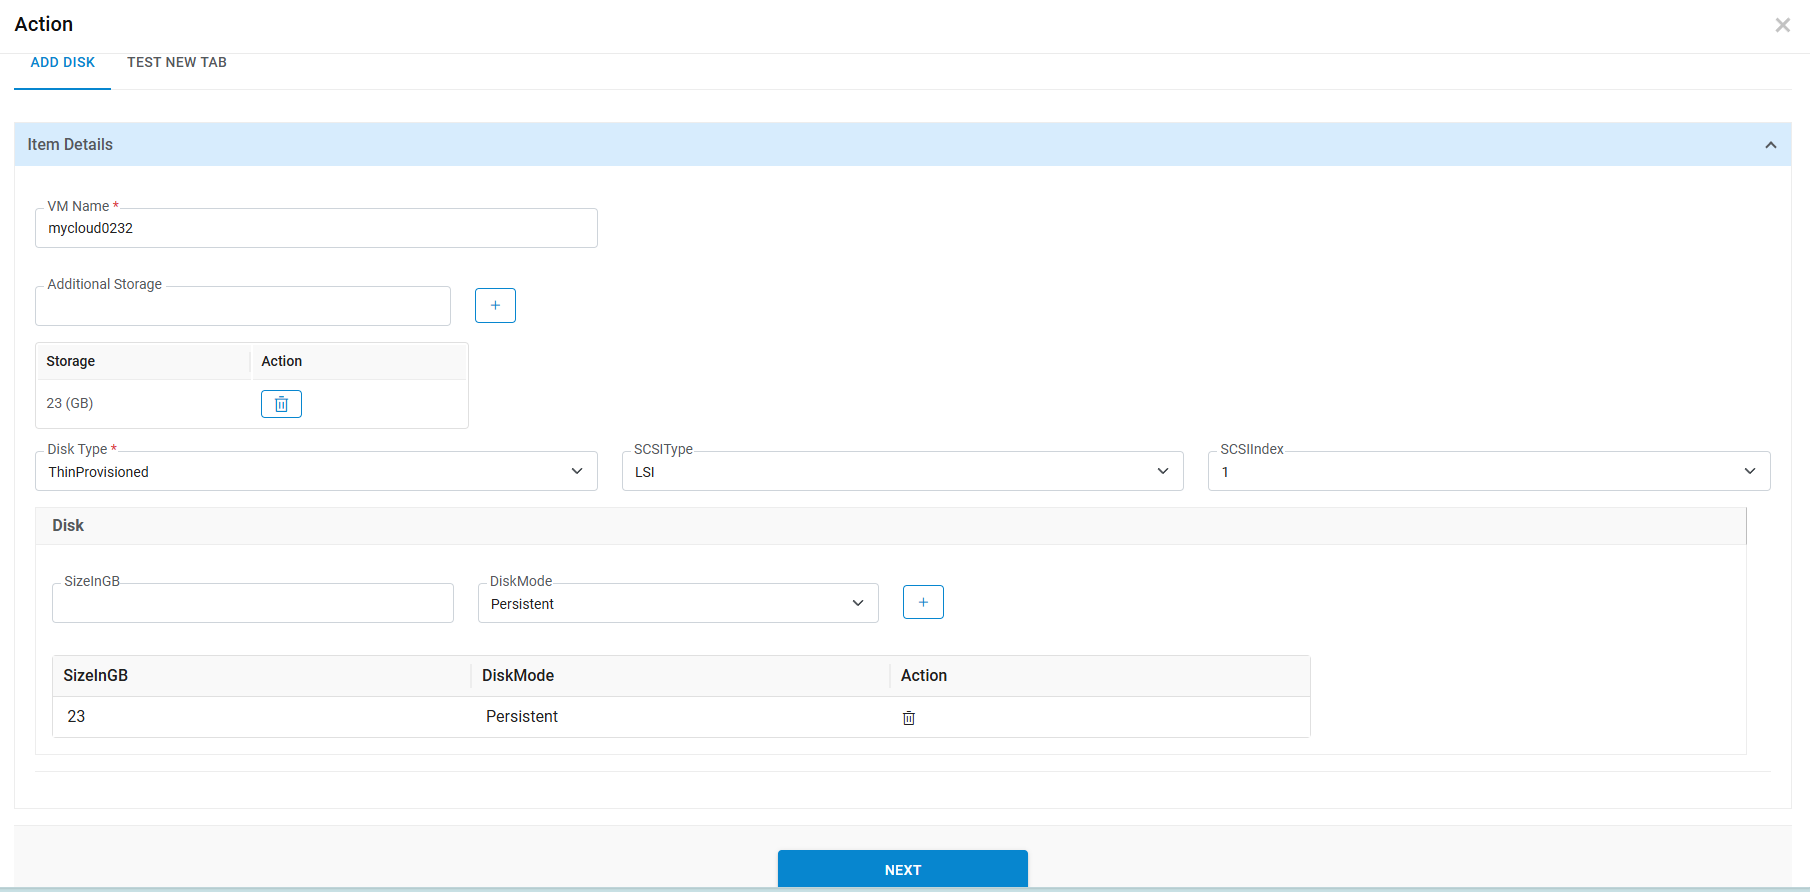
To remove the disk, a requester needs to follow the following steps:
- Enter Server Name.
- Enter Resource Group Name.
- Select Disks.
- Click Submit to remove disk.
Figure 23. Remove Disk 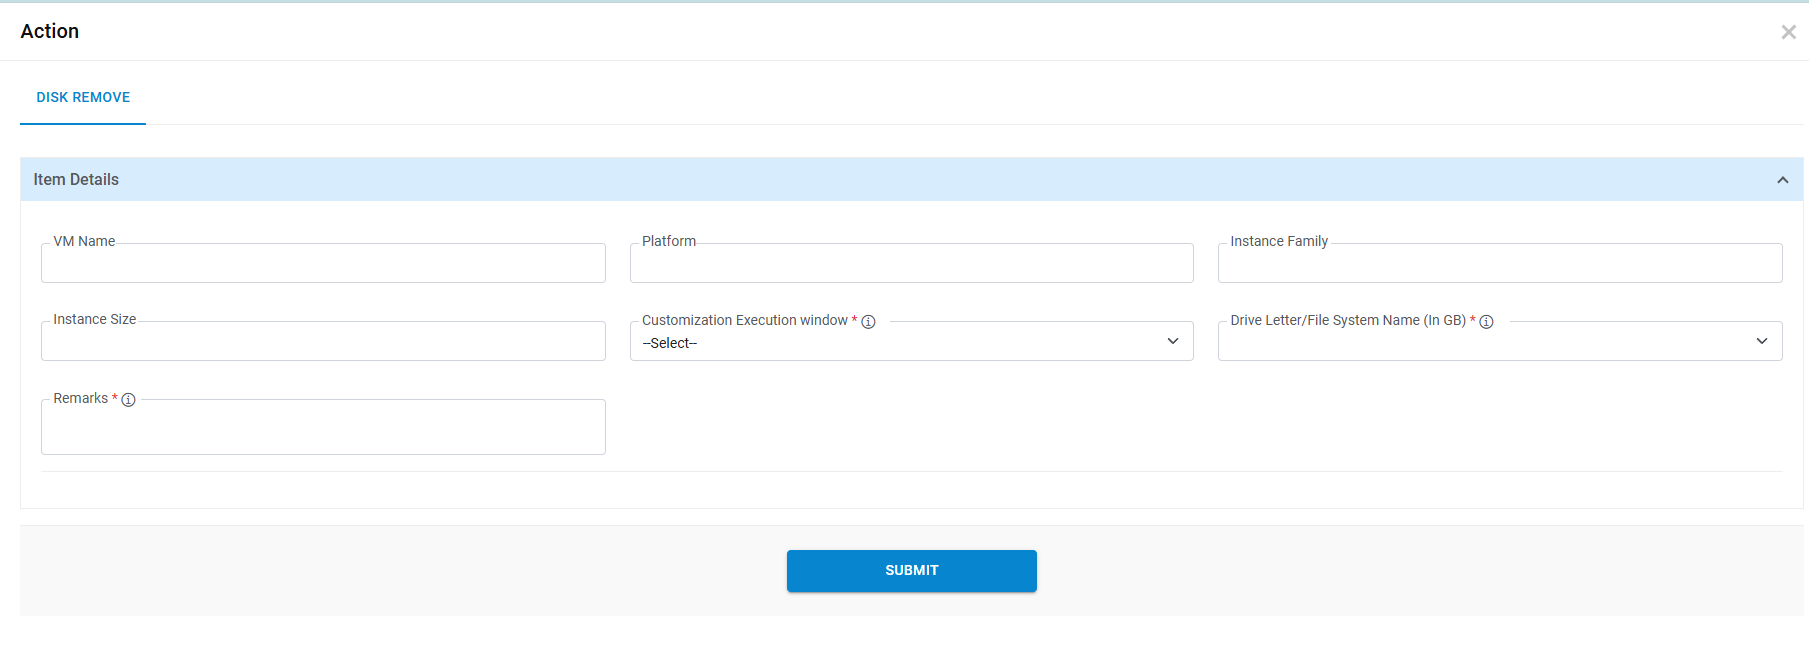
To resize a VM, requester needs to follow the below steps:
- Enter Server Name, the name of server to be displayed.
- Enter Resource Group Name, the group name of resource against which user needs to perform action.
- Select New Instance Size, size of the required instance.
- Click Submit to resize VM.
Figure 24. Resize VM 
To decommission a VM, requester needs to follow the below steps:
- Enter Server Name, the name of server to be displayed.
- Enter Resource Group Name, the group name of resource against which user needs to perform action.
- Click Submit to decommission VM.
Figure 25. Decommission VM .png)