On-Prem Relay Deployment
Enable BigFix SaaS customers to deploy, configure, and manage on-premises Relays that report to the cloud-based Top-Level Relays (TLRs), improving network efficiency and endpoint management in hybrid environments.
Overview
BigFix SaaS supports the deployment of on-prem Relays, allowing customers to create a hybrid Relay infrastructure. These Relays report back to the SaaS-hosted Top-Level Relays (TLRs), enabling optimized bandwidth usage, custom Relay selection hierarchies, and better support for geographically distributed environments.
- Deploy and configure on-prem Relays to report back to SaaS TLRs.
- Define Relay hierarchies, including leaf/child Relays within on-prem infrastructure.
- Configure Relay selection settings for endpoints using Relay Assignment settings.
- Monitor Relay-related properties on endpoints via list view of the Device
Explorer:
- Relay installed
- Relay selection
- Distance to Relay
- Relay
Relay Deployment Permissions
| Action | Who Can Perform |
| Install Relay | Admin only |
| Uninstall Relay | Admin only |
| View Relay Status | All users |
| View Relay Hierarchy | All users |
Installing a Relay
- Expand Explore from the side navigation, and then select Devices.
- Go to Device Explorer – List View. When you click a
Device Name from the table, the Device Details
page opens.
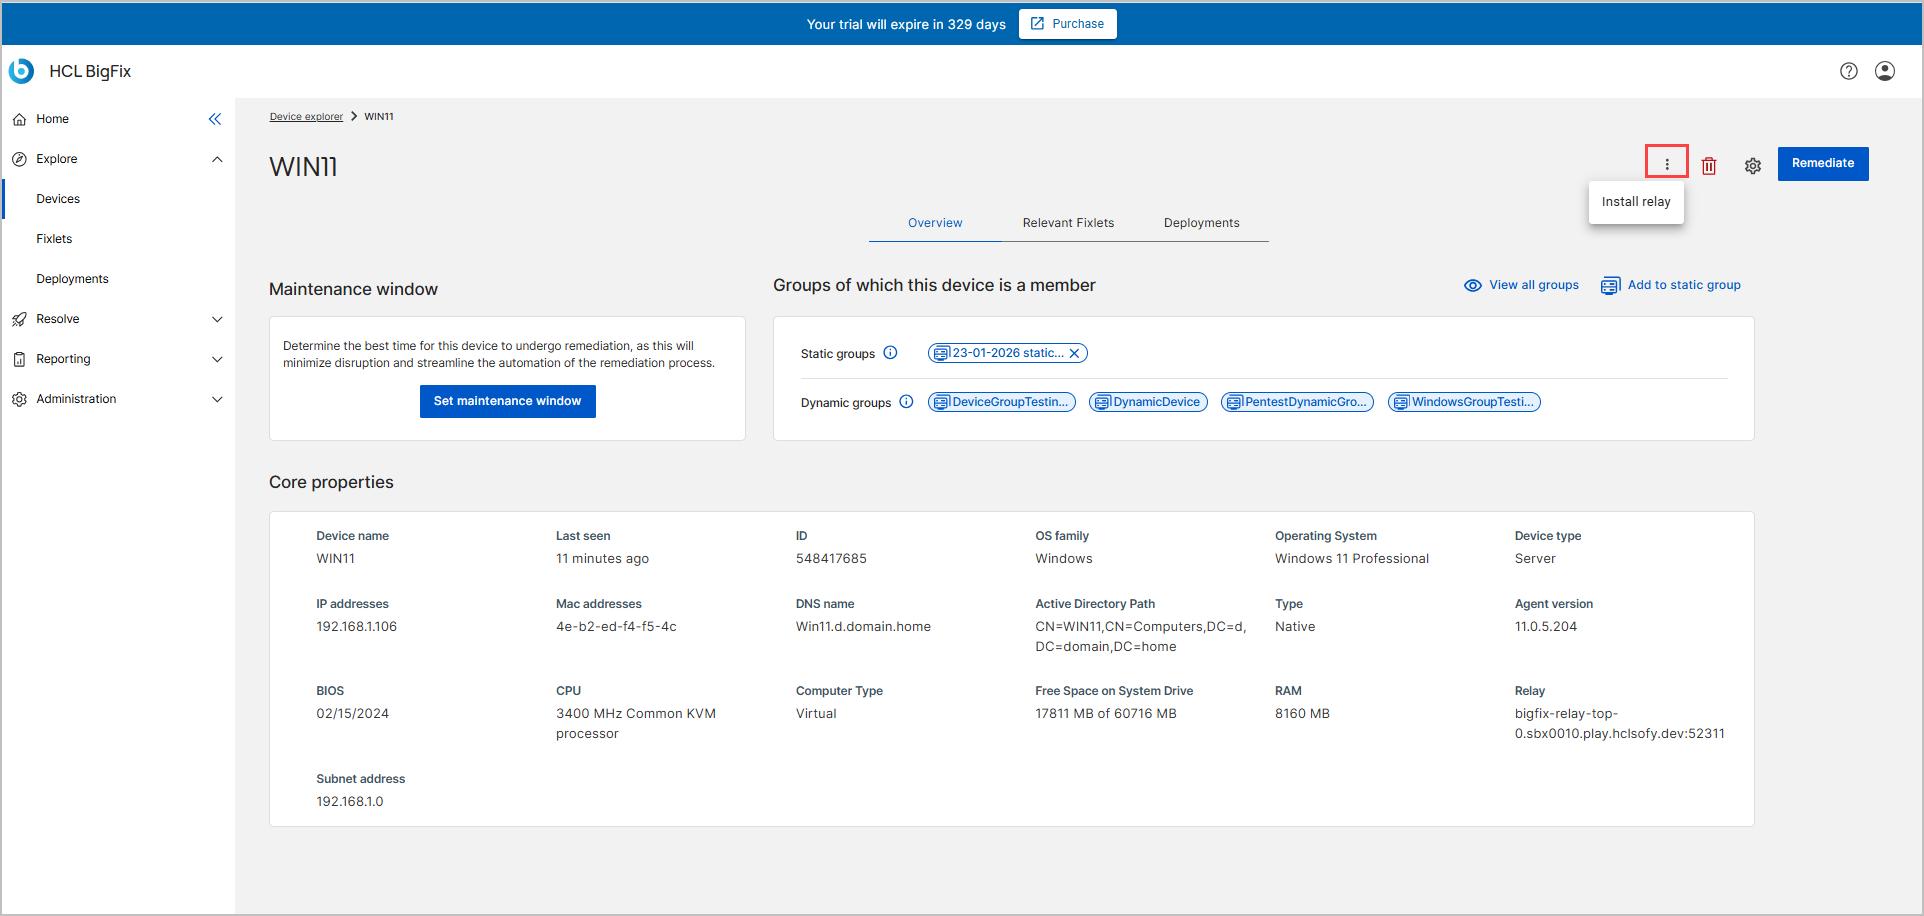
- From the Overview tab of the selected device, click
on the Install relay
 icon to open the Install Relay wizard.Note:The Install Relay and Uninstall Relay buttons are visible only for admin users.
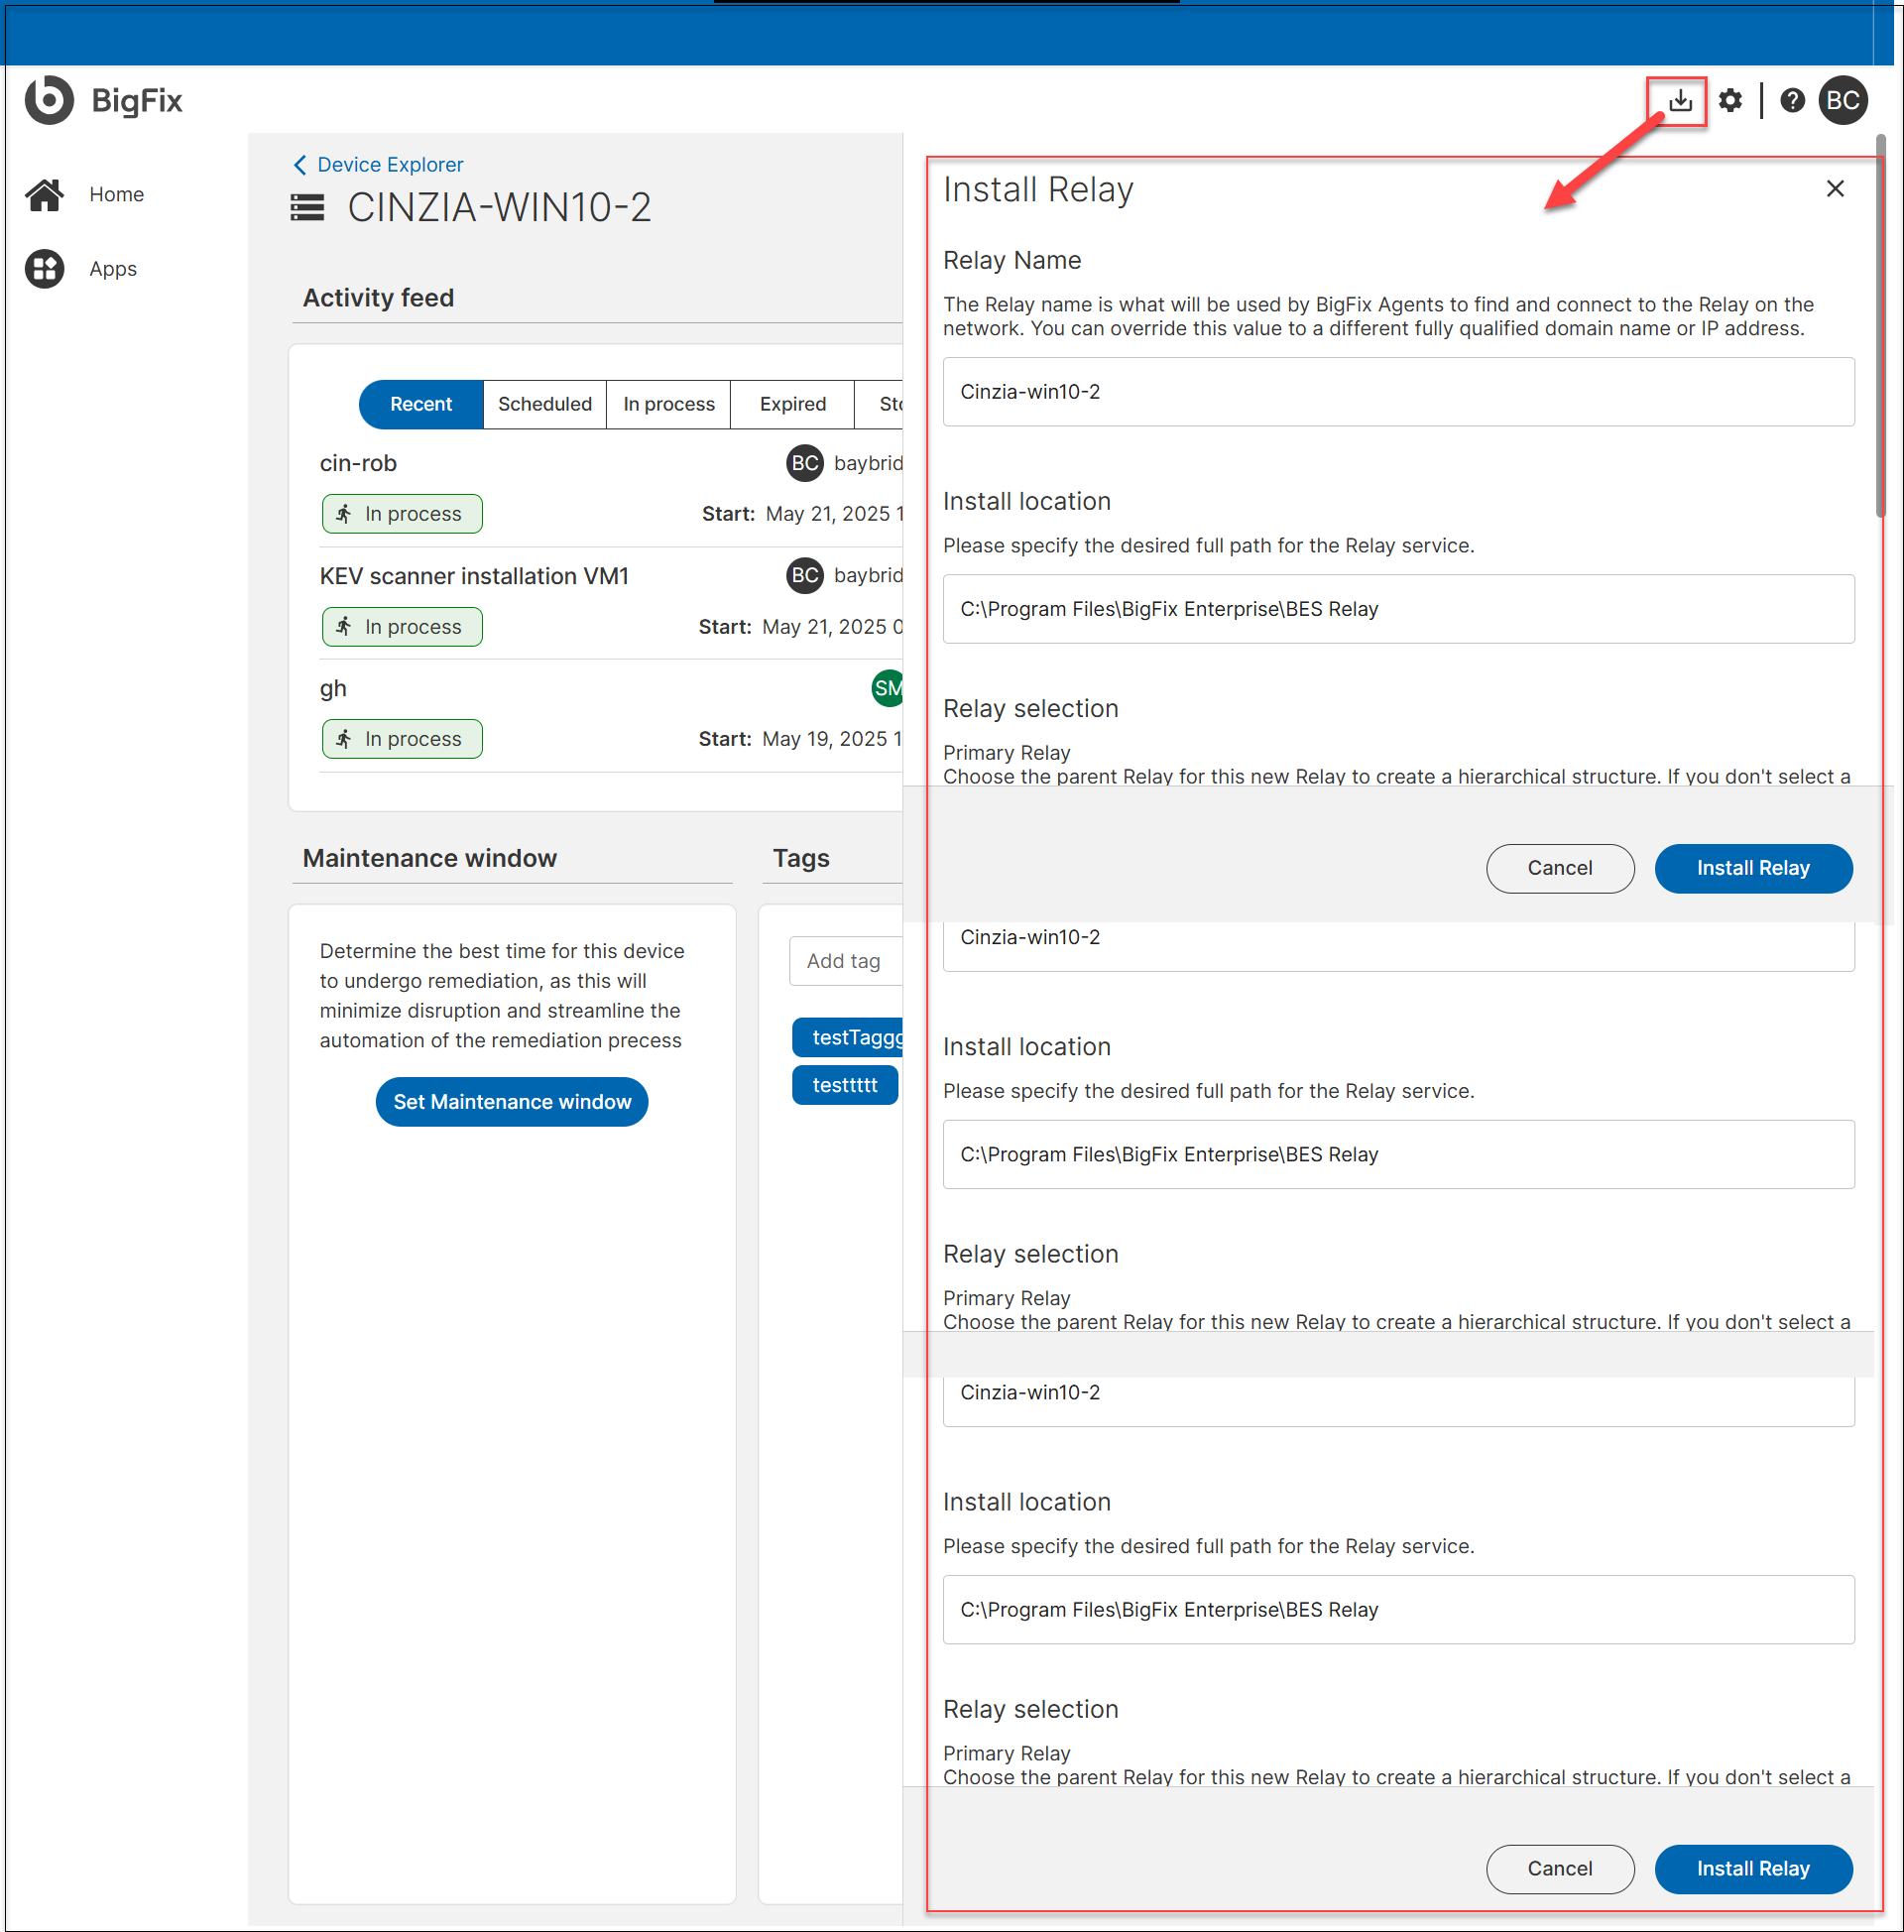
-
In the Install Relay wizard, provide the required details:
- Relay Name: Auto-suggested based on the client's host name (FQDN or IP), customizable by the user.
- Install Location:
- For Linux, it is set by default.
- For Windows, users can configure the path during installation.
- Relay Selection:
- Choose the Primary Relay (default is the SaaS Cloud Relay).
- Optionally, you can set another device as the Secondary Relay to act as a fallback if the Primary Relay becomes unavailable.
- Authentication (for internet-facing Relays): Enables protection against unauthorized use.
- Click Install Relay.
The action is listed in the Deployments tab of the selected device and in the Deployment Manager after a few minutes.
Manage an Existing Relay
For devices where a Relay is already installed, the device Overview page displays the following changes:
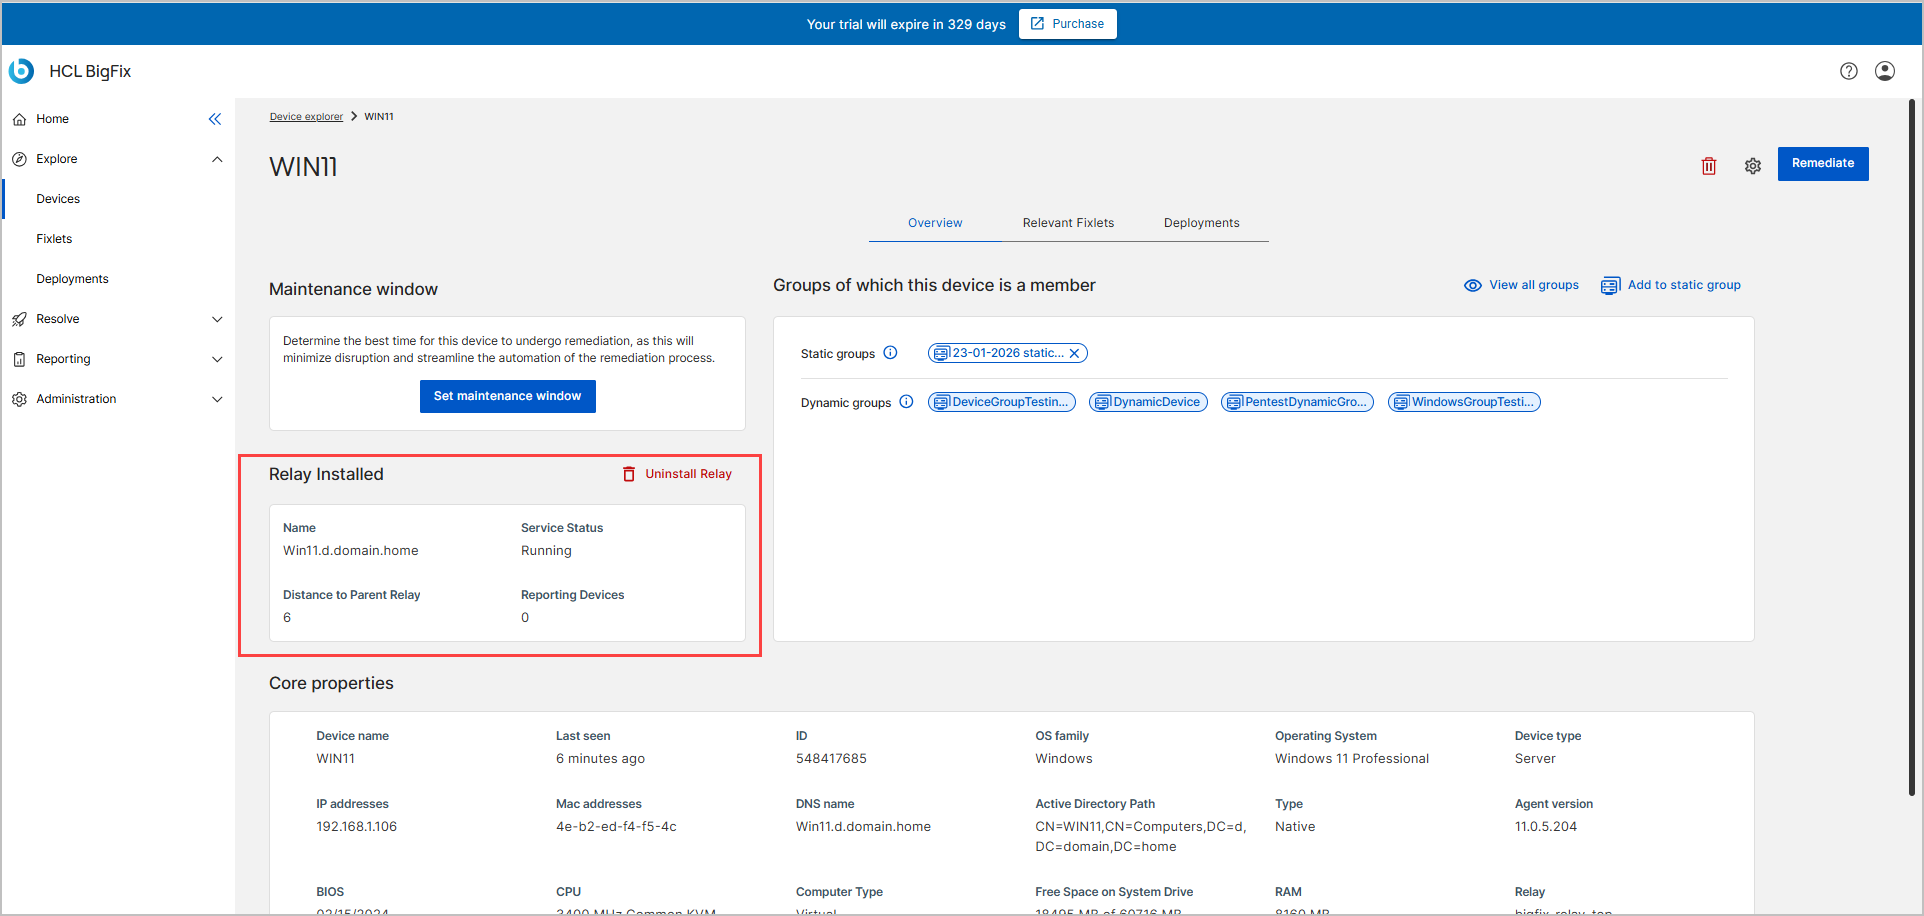
- The Install Relay button is hidden.
- A Relay Installed section is shown, which includes:
- Relay name
- Relay status
- Distance to Parent Relay
- Reporting Devices
- Uninstall Relay button is shown.
Uninstalling a Relay
- Expand Explore from the side navigation, and then select Devices.
- Go to Device Explorer – List View.
-
Click on the device which is a Relay.
- From the device Overview tab of the selected device, in the Relay Installed section, click Uninstall Relay.
The action is listed in the Deployments tab of the selected device and in the Deployment Manager after a few minutes.
Best Practices for Relay Management
-
Avoid circular hierarchies: Ensure each Relay has a single, clear parent Relay.
-
Monitor Relay load: Balance endpoint connections to prevent performance issues.
-
Use Distance to Relay to identify optimal Relay placement.
-
Deploy incrementally: Start with a single layer of child Relays and expand based on bandwidth needs and endpoint locations