Job
Through this module, admin user can manage Job through below steps:
- On the Main Menu bar, click Configurations then in sub-menu Select Job.
- The Job screen appears, and it lists down the available Jobs in a tabular view.
Figure 1. Jobs 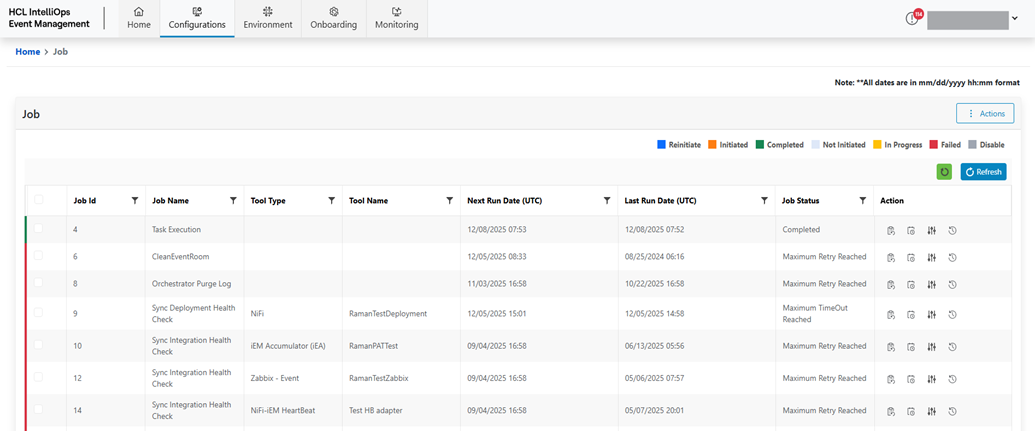
Refer to the following table to understand the fields mentioned in the above figure.
Table 1. Jobs Field Fields Description Job Id Displays the unique Id of the job. Job Name Displays the Name of the job. Tool Type Display the type of the Tool (Deployment Name or Integration Name) associated with the Job. Tool Name Display the Name of the Tool (Deployment Name or Integration Name) associated with the Job. Next Run Date Display the date on which job will execute. Last Run Date Display the date on which job was executed. Job Status Display the current state of the Job. Action Display the actions like Re-initiate, Scheduling, Job Parameters, History. - It also consists of the following actions:
- Enable Job: User can enable a job.
- Disable Job: User can disable a job.
- Refresh: User can manually refresh this job screen.
- Re-initiate: User can re-initiate a job.
- Scheduling: User can change the frequency of the job.
- Parameter: User can modify the job specific parameters.
- History: User can view the history of job.
Enable Job
To enable a Job, user needs to follow the blow steps:
- Click the Job screen.
- Then select jobs by clicking on the check box.
- Then click on the Actions button.
- Drill down drop-down will be appeared.
Figure 2. Enable Job 
- Select the Enable job option.
Figure 3. Enable Job (Cont.) 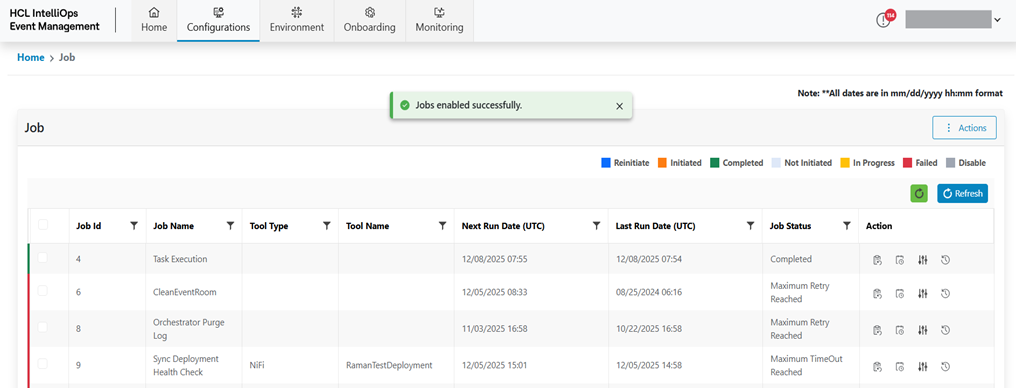
Disable Job
To disable a Job, user needs to follow the blow steps:
- Click the Job screen.
- Then select jobs by clicking on the check box.
- Then click on the Actions button.
- Drill down drop-down will be appeared.
Figure 4. Disable Job 
- Select the disabled
Job option from the following screen.
Figure 5. Disable Job (Cont.) 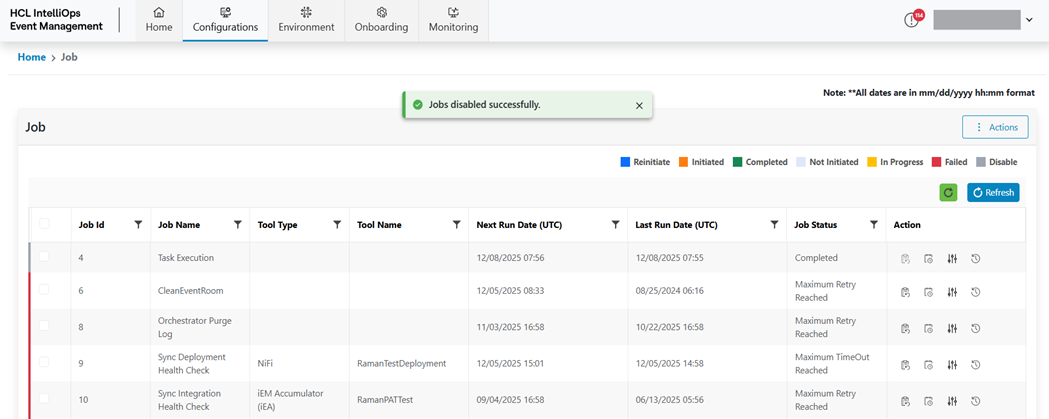
Re-initiate Job
To Re-initiate a Job, user needs to follow the blow steps:
- Click Re-initiate (
 ) corresponding to
the Job to be Re-initiated.
) corresponding to
the Job to be Re-initiated.Figure 6. Re-initiate Job 
Figure 7. Re-initiate Job (Cont.) 
Scheduling Job
To Schedule a Job, user needs to follow the blow steps:
- Click Scheduling (
 ) corresponding to
the Job to be Scheduled.
) corresponding to
the Job to be Scheduled.Figure 8. Schedule Job 
Figure 9. Schedule Job (Cont.) 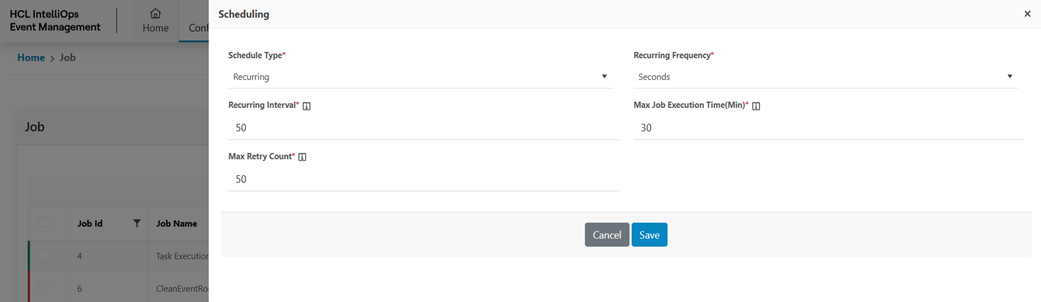
- Refer to the following table to understand the fields mentioned in the above
figure:
Table 2. Schedule Job Fields Description Schedule Type This field contains the Schedule type like One Time and Recurring Recurring Frequency This field contains the frequency of Recurring job like Days, Hours, Minutes and Seconds. Recurring Interval This field contains the Recurring Interval; it ranges from 1 to 100. Max Job Execution time This field contains the Max Job Execution Time; it ranges from 1 to 1440. Max Retry Count This field contains the Max Retry Count; it ranges from 1 to 99. Start Time This field contains the Start time. - Select Schedule Type.
- Select Recurring Frequency.
- Enter Recurring interval.
- Enter Max Job Execution Time.
- Enter Max Retry Count.
- Enter Start Time
- Click on Save button.
- The Job Schedule parameter will be saved.
Figure 10. Schedule Job (Cont.) 
Job Parameter
To Schedule a Job, user needs to follow the blow steps:
- Click Job Parameter (
 ) corresponding
to the Job to manage Job Parameter.
) corresponding
to the Job to manage Job Parameter.Figure 11. Job Parameter 
Figure 12. Job Parameter (Cont.) 
- Refer to the following table to understand the fields mentioned in the above
figure:
Table 3. Job Parameter Fields Description Name This field contains parameter name Description This field contains parameter description Value Type This field contains value data type. Value This field contains parameter value. - Modify value type if required.
- Click on Save button.
- The Job schedule parameter will be updated.
Figure 13. Job Parameter (Cont.) 
Job History
To view History of Job, users need to follow the below-mentioned steps:
- On the Job screen, click Job History button under Action column
shown below.
Figure 14. Job History 
Figure 15. Job History (Cont.) 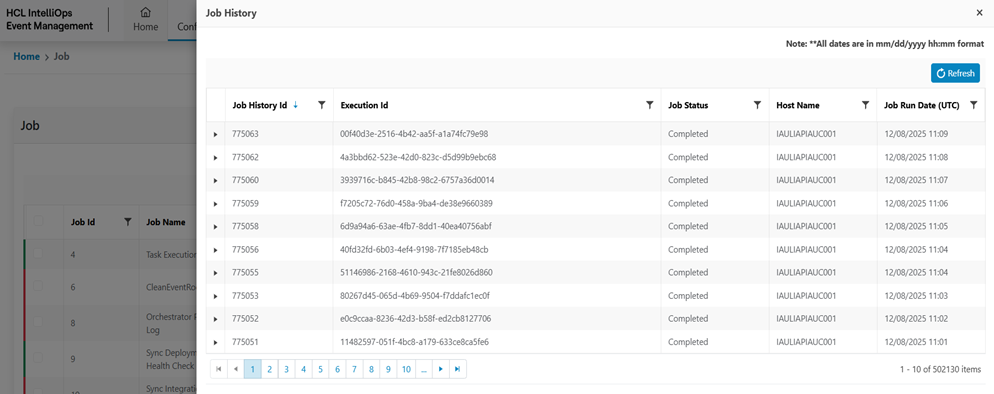
- Refer to the following table to understand the fields mentioned in the above figure:
Table 4. Job History Fields Description Execution Id This field contains the unique Execution Id Job Status This field contains the current Status of job. Host Name This field represents the Host Name of server. Job Run Date This field represents job execution time. - For manually refresh Job History click on Refresh Button.
- Users can expand Job History row for getting Job History details.
Figure 16. Job History Details 
- Refer to the following table to understand the fields mentioned in the above
figure:
Table 5. Job History Details Fields Description Step Name This field contains the Step Name Step Description This field contains the Step Description Step Status This field contains the Step Status Component Code This field contains the Component Code Job Execution Date This field contains the Job Execution Date Error Message This field contains an Error Message.