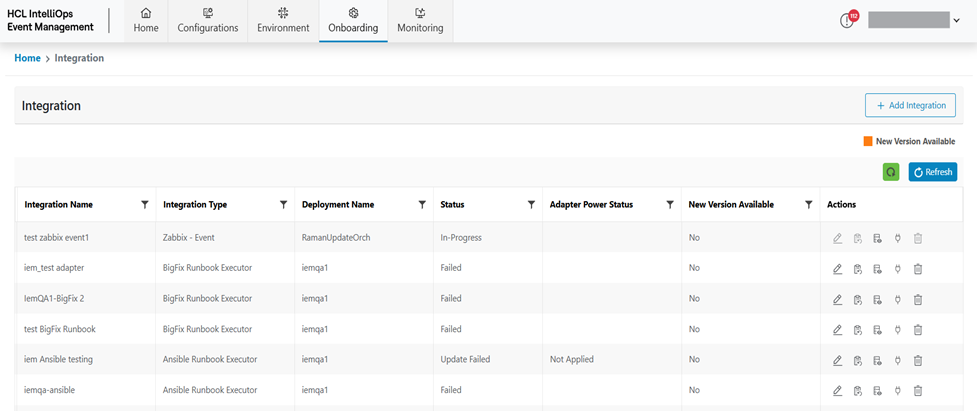
Integration
Through this module, user can onboard/update the adapters on NiFi environment. Below are the steps of onboarding:
- On the main menu bar, click Onboarding then in the sub-menu select Integration .
- The Integration screen appears, and it lists down the available
integrations in a tabular view.
Figure 1. Integration 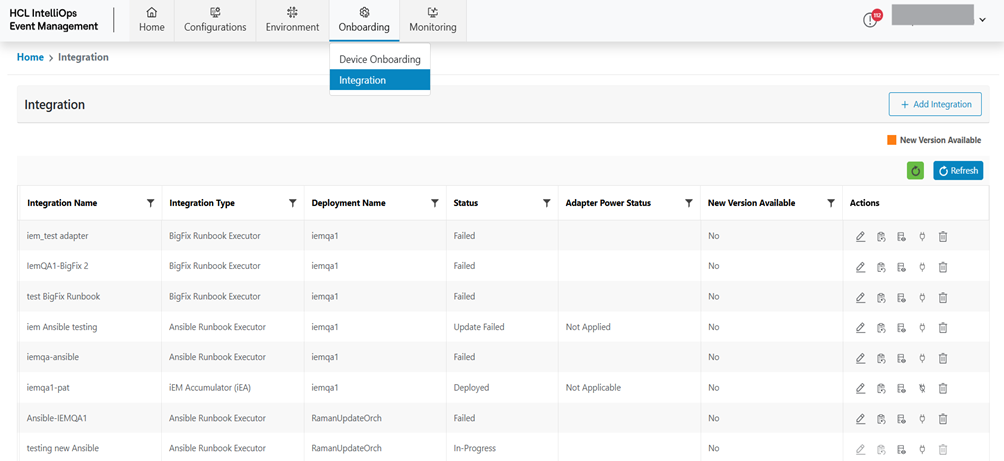
Add Integration
To add an Integration, follow the steps below:
- Click on the Integration screen and then click Add
Integration.
Figure 2. Add Integration 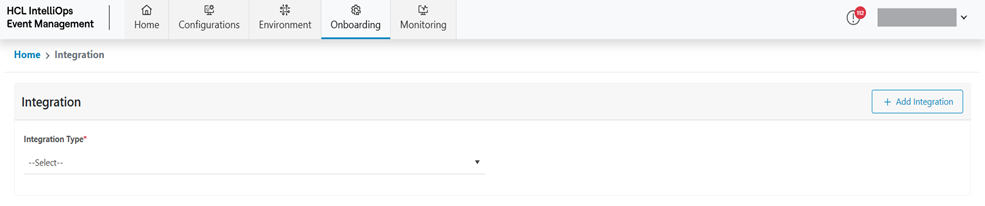
- Select the Integration Type.
Figure 3. Add Integration (Cont.)  Note:Fields for the respective Integration Type can be different as per tool configuration.
 - Refer to the table below to understand the fields mentioned in the above figure.
Table 1. Create Integration Fields Fields Description Integration Name This field contains the Integration Name for Integration. Deployment Name This field contains the Deployment name; we can select deployment from all Deployments. Zabbix FQDN This field contains the Zabbix API URL. Zabbix AuthToken This field contains the Authentication Token for API call; we can add Token as Input text or select a Secret Key. Circuit Breaker Threshold This field contains the Circuit breaker Event Threshold value. - Enter Integration Name.
- select Deployment.
- Enter Zabbix API URL.
- Enter Key Value or Select Secret Key as Zabbix Authentication Token.
- Provide Circuit Breaker Threshold value.
- Click Submit.
Figure 4. Add Integration (Cont.) 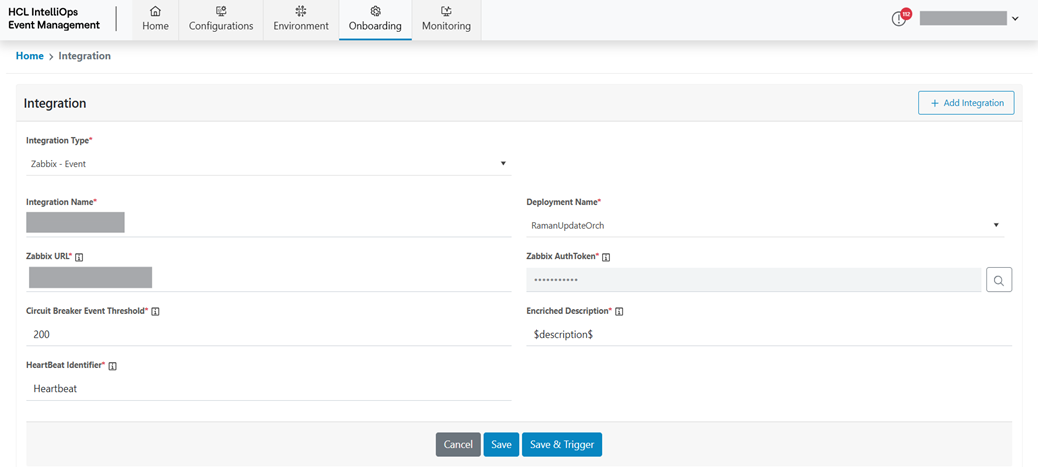 Note:All fields marked with an asterisk (*) are mandatory.
 - A success message box appears.
Figure 5. Integration Created Successfully 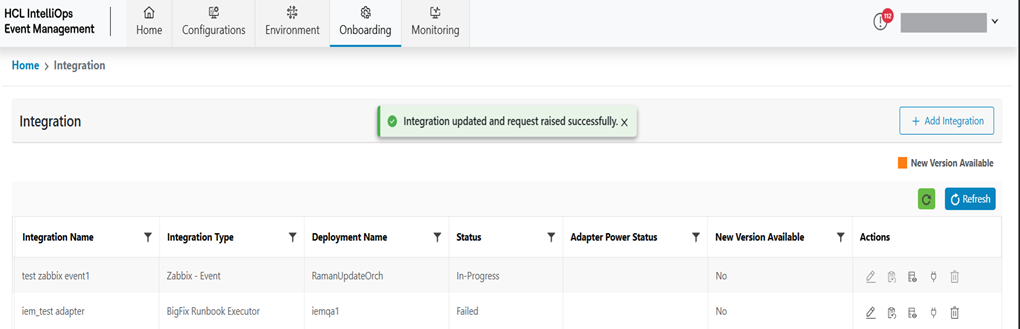
- Now the integration details have been saved, but the system has not triggered the request to NiFi.
- This integration will appear as the first record in the tabular view on Integration page.
- User can change/update by clicking on (
 ) button, if required.
 - Now Click on (
 ) button to place
a request to onboard the adapter on NiFi environment.
) button to place
a request to onboard the adapter on NiFi environment.
View Integration
This section lists all the Integrations that have been created by a user.
Refer to the table below to understand the fields mentioned in the above figure.
| Fields | Description |
|---|---|
| Integration Name | Displays the Integration Name of the Integration that has been added |
| Integration Type | Displays the Integration Type for an Integration |
| Deployment Name | Displays the Deployment Name for an Integration |
| Status | Display the Status for an Integration |
| Circuit Breaker Status | Display the Circuit Breaker Status for an Integration |
| Action | User to take actions like Edit, Trigger request, View log and Revoke circuit breaker against the listed Integration |
You can modify the details of existing Secrets by clicking on
the Edit icon .png) , request Trigger by
clicking on the Trigger request icon
, request Trigger by
clicking on the Trigger request icon , View log by clicking on View log icon
 and Revoke circuit breaker by
clicking on Revoke circuit breaker icon
and Revoke circuit breaker by
clicking on Revoke circuit breaker icon  .
.
Edit Integration
To edit/modify Integration details, user need to follow the steps below:
- On the Main screen, click Integration.
Figure 7. Edit Integration 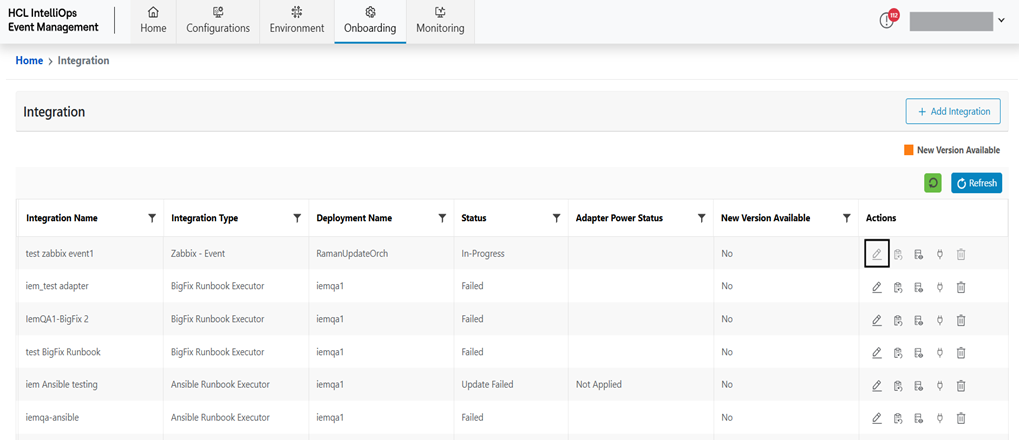
- Available Integrations appear in a tabular view.
- Click Edit (
.png) ) icon.
) icon. - Modify the details as desired and click Submit.
Figure 8. Edit Integration (Cont.) 
- A success message box appears on the screen.
Figure 9. Integration Updated Successfully 
Trigger Request
To trigger a request for Integration details, the user needs to follow the steps below:
- Click Trigger Request (
.png) ) icon on
Integration Screen.
) icon on
Integration Screen.Figure 10. Integration Trigger Request 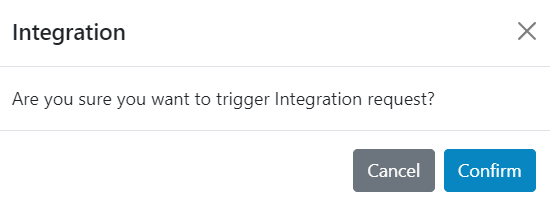
- Click Confirm and the request will be raised.
Figure 11. Integration Trigger Request (Cont.) 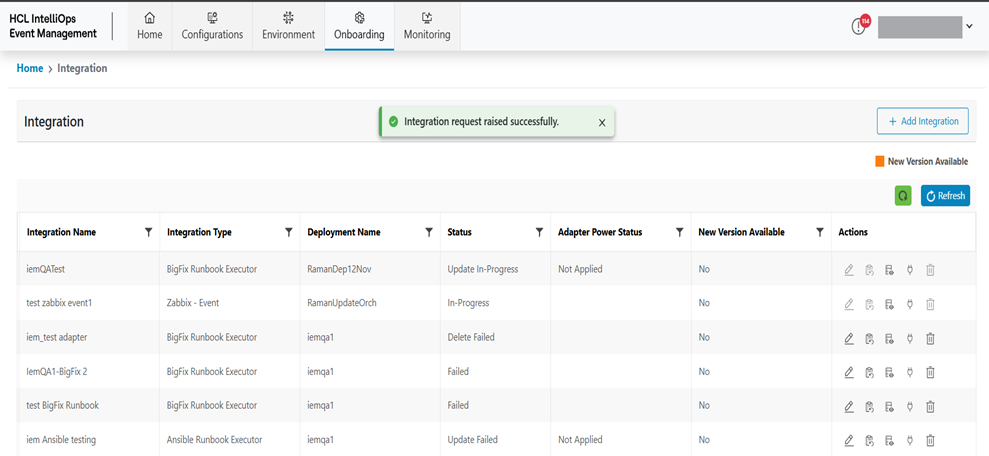
- Status will be change New to In-Progress and Trigger request button will be disable.
Figure 12. Integration Status Change 
View Log
To trigger a request for Integration details, user needs to follow the steps below:
- Click View Log (
.png) ) icon on
Integration Screen.
) icon on
Integration Screen. - Screen will be redirect to Integration Status screen.
- Available Integrations Status/Request appear in a tabular view.
Figure 13. Integration Status 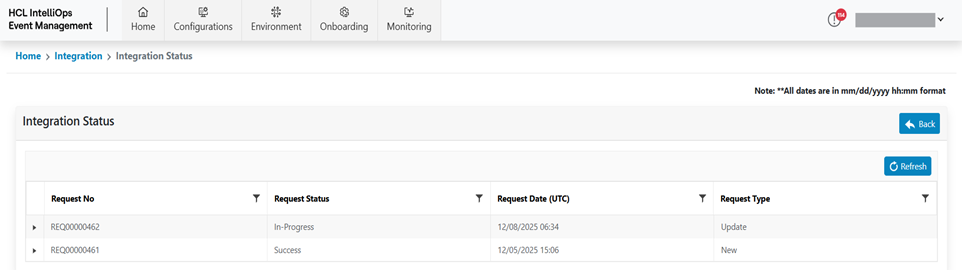
Refer to the table below to understand the fields mentioned in the above figure.
Table 3. View Integration Status Field Fields Description Request No Displays the Request No of the Integration Status/Request. Request Status Displays the Request Status Request Date Displays the Request Date Request Type Display the Status for an Integration - To return to the Integration screen, click Back.
- To refresh the list of Integration Status/Request, click Refresh.
- On expanding a Request, all the Tasks for that Request are displayed.
Figure 14. Integration Status with Task 
Refer to the following table to understand the fields mentioned in the above figure.
Table 4. View Integration Status Field Fields Description Sequence No Displays the Sequence No of the Task. Task Id Displays the Task Id of Task Request Date Displays the Name of Task Description Display the Description of Task Status Display the Status of Task Response Json Display the Response Json of Task - The Refresh button for Task is used for manual refresh of the Task for a specific Request.
Revoke Circuit Breaker
To Revoke Circuit Breaker for Integration details, users need to follow the steps below:
- Click Revoke Circuit Breaker (
.png) ) icon on
Integration Screen.
) icon on
Integration Screen.Figure 15. Revoke Circuit Breaker 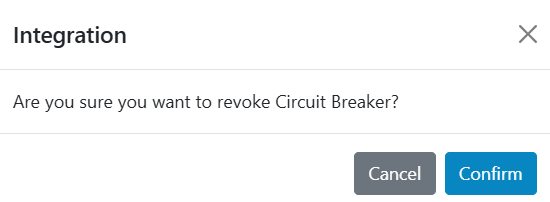
- Click Confirm to resume the process group. The following success message
appears:
Figure 16. Revoke Circuit Breaker (Cont.) 
Delete Integration
To delete the integration, the user needs to follow the steps below:
- Click Delete (
 ) corresponding to the
integration to be deleted.
) corresponding to the
integration to be deleted.Figure 17. Confirmation Pop-up 
- A confirmation message appears on the screen.
- Click Confirm. A successful message appears.
Figure 18. Success Message 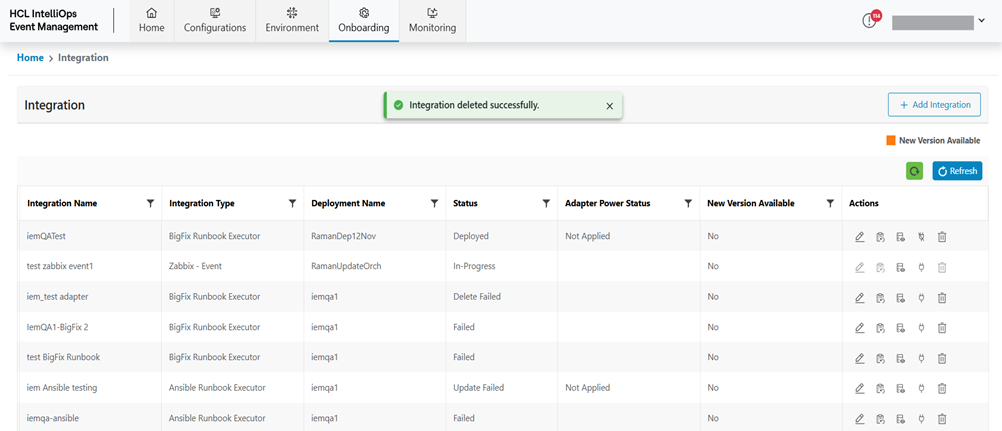
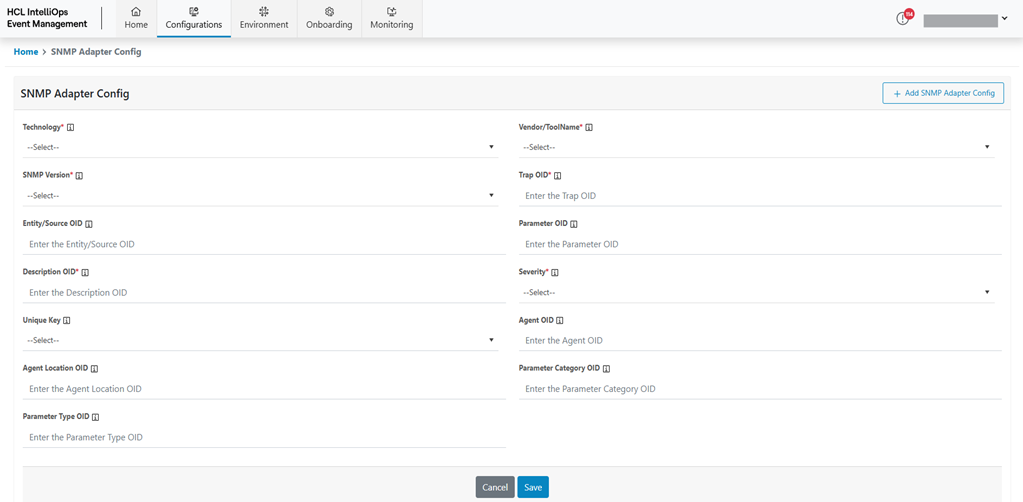
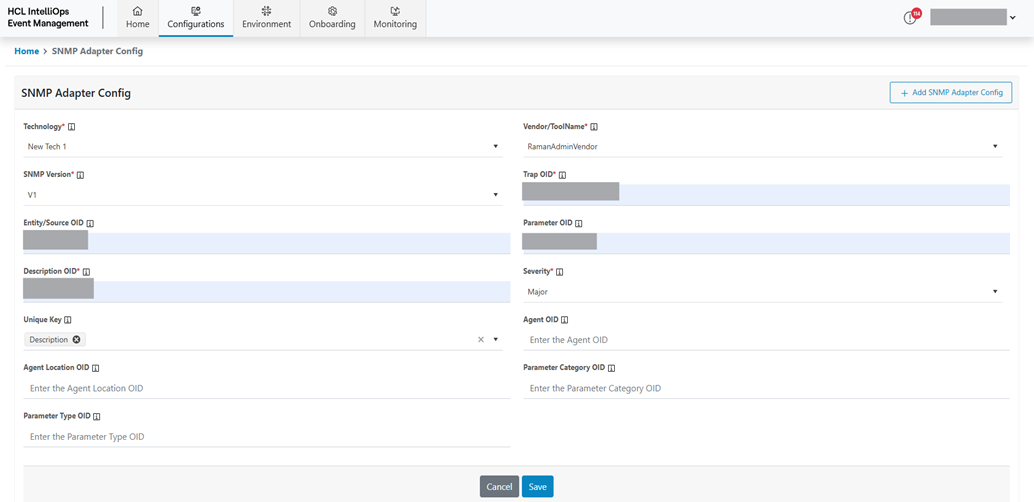
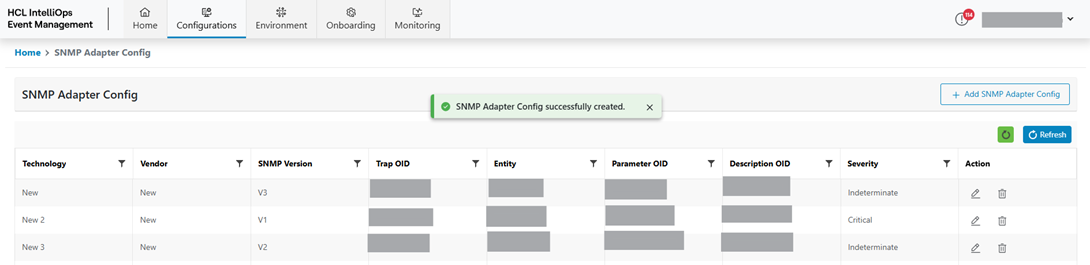
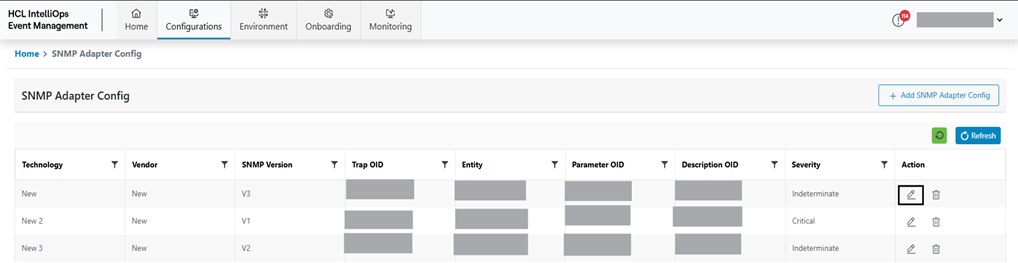
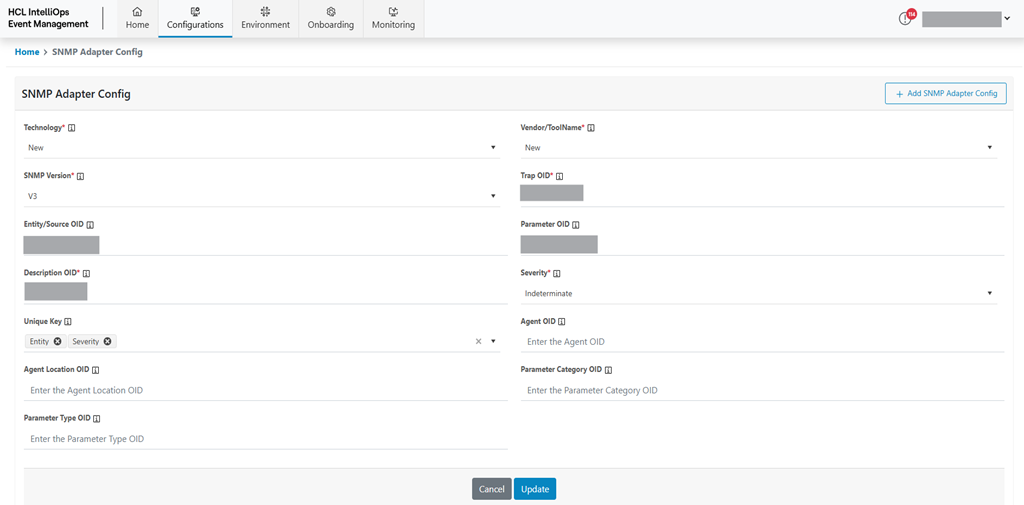
SNMP Adapter Config
Through this module, the user can onboard/update the adapters on NiFi environment. Below are the steps of onboarding.
- On the main menu bar, click Configurations then in the sub-menu select SNMP Adapter Config.
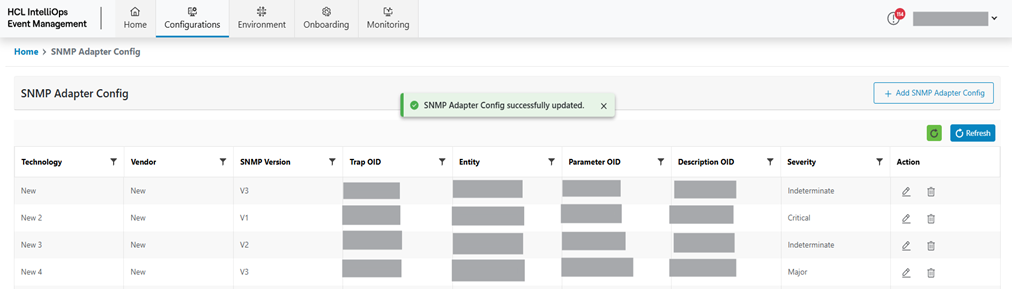
- The SNMP Adapter Config screen appears, and it lists down the available SNMP Adapter
Config in a tabular view.
Figure 19. Add SNMP Adapter Config