Deployment
Through this module, users can manage Deployments (NiFi endpoints) through below steps:
- On the Main Menu bar, click Environment then in the sub-menu select Deployment.
- The Deployment screen appears, and it lists down the available deployments in a
tabular view and user can add, update, and delete deployments.
Figure 1. Deployment 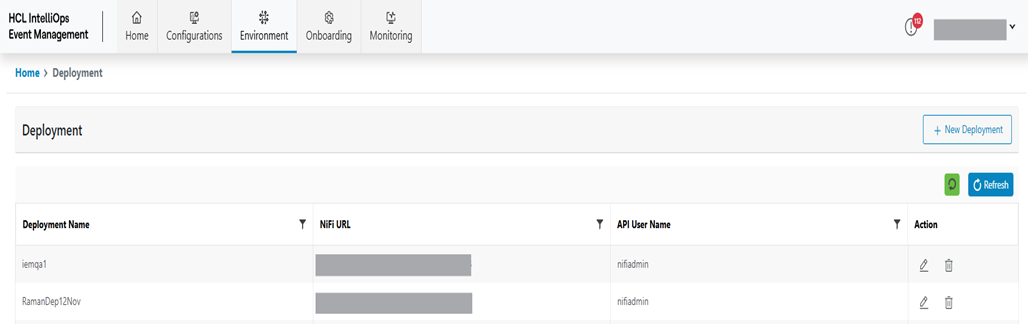
- Refer to the following table to understand the fields mentioned in the above figure:
Table 1. Deployment Fields Description Deployment Name This indicated the Name of the Deployment. NiFi URL The field indicates the NiFi URL. API Username This field indicates NiFi Username. Action User to take actions like Edit and Delete against the listed deployment. It also consists of the following actions:
Add Deployment
To add a new deployment, the user needs the following steps:
- On the Deployment screen, click the New Deployment button.
Figure 2. Add Deployment 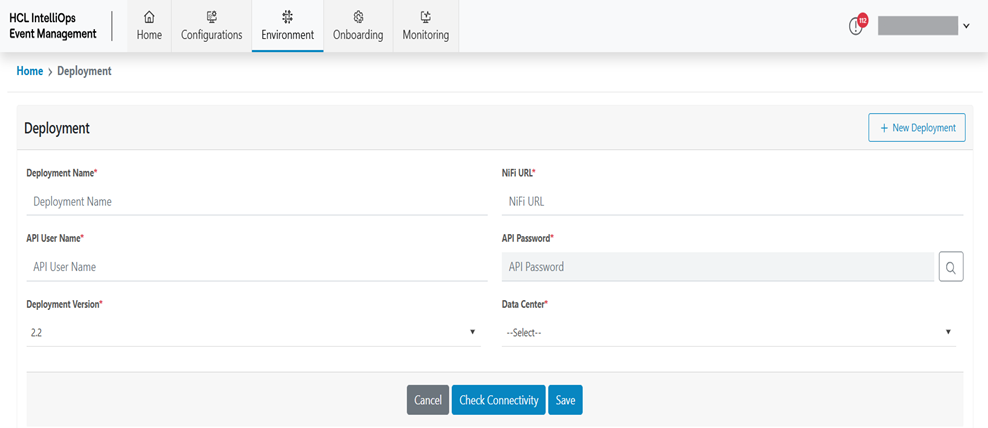
- Refer to the following table to understand the fields mentioned in the above
figure:
Table 2. Add Deployment Fields Description Deployment Name This field contains the Name of the new Deployment. NiFi URL This field contains the NiFi URL. API Username This field contains the API Username. API Password This field contains the API Password Deployment Version This field contains the current Deployment Version. Data Center This field contains the Data Center List - Enter Deployment Name.
- Enter NiFi URL.
- Enter Username.
- Select Deployment Version.
- Select Data Center.
- Enter API Password. To enter the API password, follow the below-mentioned steps:
- Click on (
 ) icon.
 - Credentials popup will open.
- Now Select the Input Type:
- Input Text – To enter the credential manually.
- Enter the secret information in Password field.
- Click on Save button.
Figure 3. API Password Input Text 
- Click on (
- Secret Manager – Select this option to select the existing secret created using Secrets Module.
- Now Click on Select button to select the Credential.
Figure 4. API Password Secret Manager 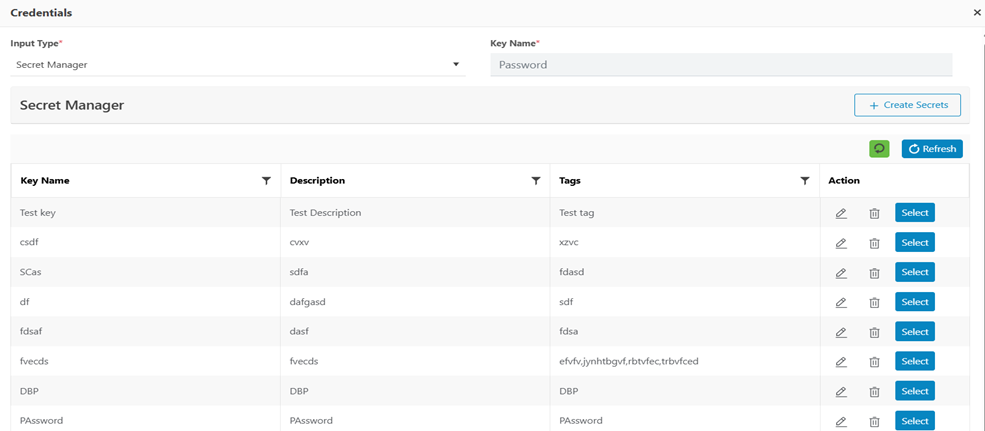
- Click on Submit.
Figure 5. Deployment Created Successfully 
- A New Deployment is successfully added and listed on the table.
Edit Deployment
To Edit/ Modify the information of an existing Deployment, user needs to follow the below steps:
- On the main screen, click Deployment.
- Available Deployment list is shown in tabular view.
Figure 6. Deployment in Tabular Form 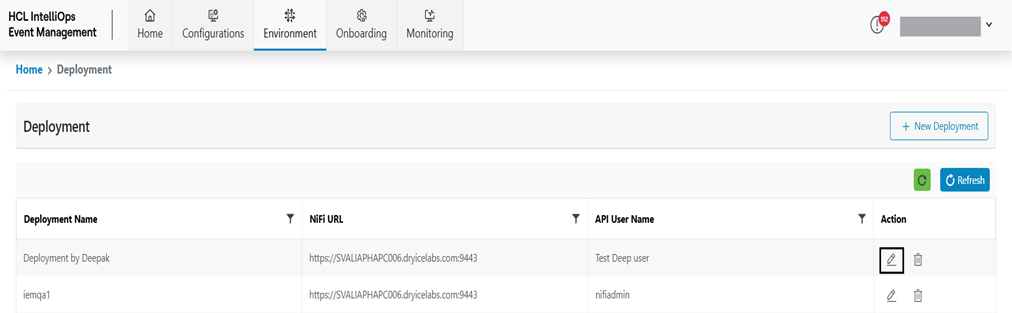
- Click Edit (
.png) )
corresponding to the Deployment to be updated.
)
corresponding to the Deployment to be updated. - Modify the details as required and click Update.
Figure 7. Edit Deployment 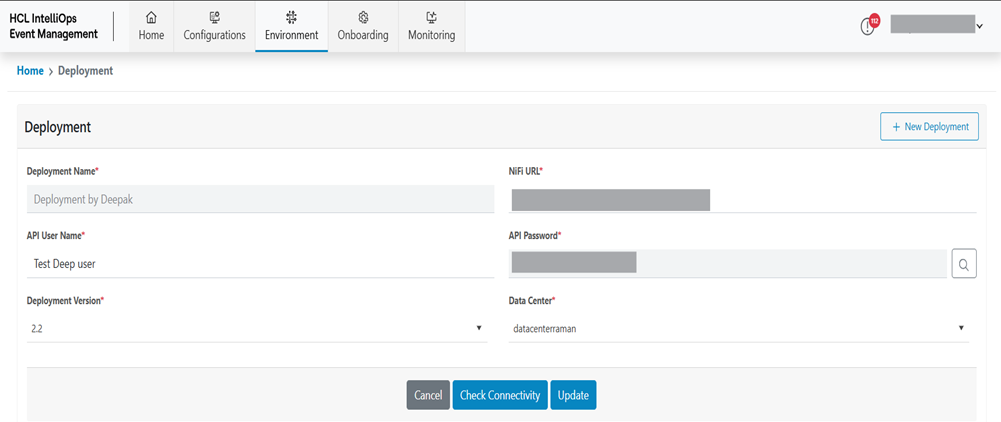
- A successful message appears on the screen.
Figure 8. Deployment Updated Successfully 
Delete Deployment
To delete an existing Deployment, user needs to follow the below steps:
- On the main screen, click Deployment.
- Available Deployment list will be shown in a tabular view.
Figure 9. Delete Deployment 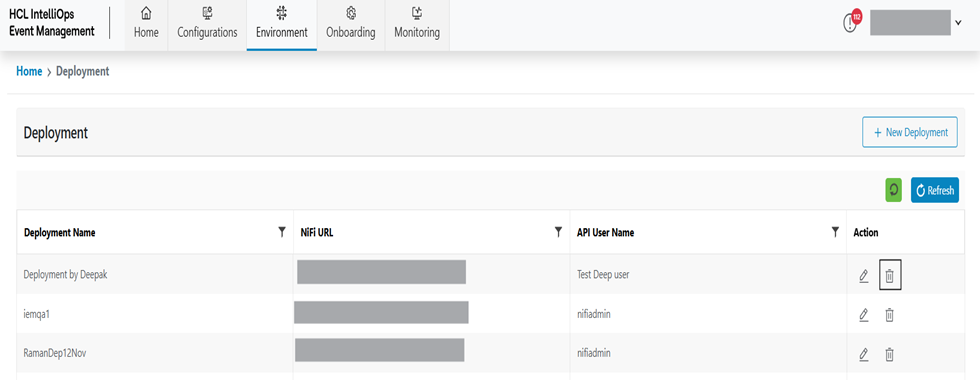
- Click Delete (
 )
corresponding to the Deployment to be deleted.
)
corresponding to the Deployment to be deleted. - A confirmation message appears on the screen.
- Click Confirm to confirm. A Success Message appears on the screen.
