This section discusses multiple actions that an HCL BigFix CLM
Admin or Provider User can perform:
View History of Jobs
Job Parameters
Scheduling
Reinitiate Jobs
To manage jobs, Admin needs to follow the following steps:
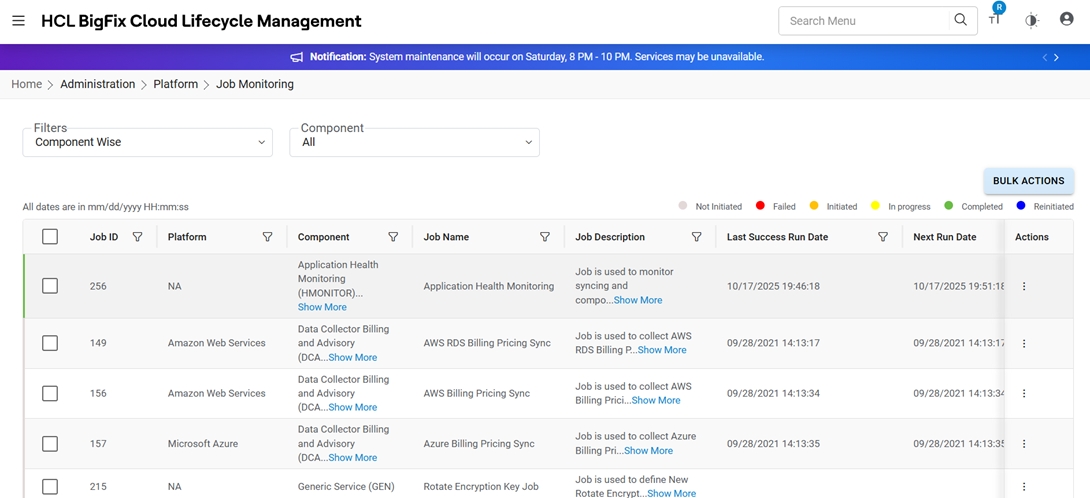
Click on Administration, then Platform, then Job Monitoring.Figure 1. Job Monitoring Home Page
Refer to the table below to understand the fields mentioned in the above
figure:
Table 1. Job Monitoring
Field
Description
Job ID
Unique ID of the job
Platform
Applicable Cloud Platform
Component
Lists all the components of HCL BigFix CLM
Job Name
Name the job
Job Description
Displays the job description
Cloud Account
Displays the name of the environment (cloud endpoint)
Organization Name
Displays the name of organization
Action
Lists the actions that are performed for respective jobs. e.g., History,
Reinitiate, Job Parameter and Scheduling.
Last Success Run Date
Displays the date and time of the successful run.
Next Run Date
Displays the next scheduled run date and timing of the job.
Active
Displays if the job is Active or not.
Status
Displays the current status of the Job.
Select Filters and Component.
Jobs are displayed in a tabular form as shown in Job Monitoring à Home Page.
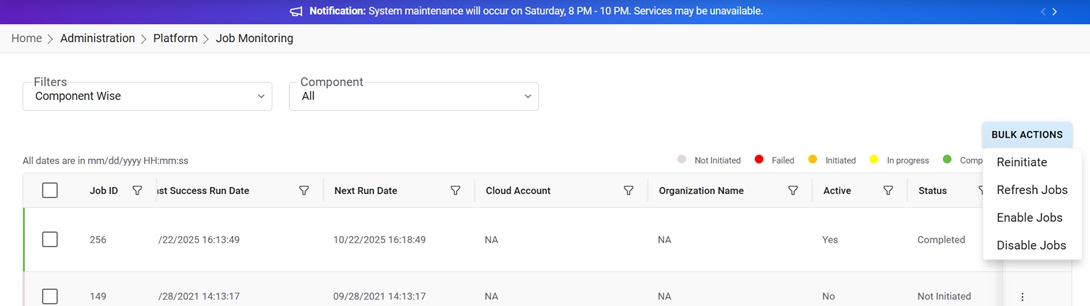
Reinitiate Job
To Restart a job, Admin user needs to check the
box adjacent to the job.
Click on Bulk Actions and select Reinitiate Job.Figure 2. Reinitiate Job
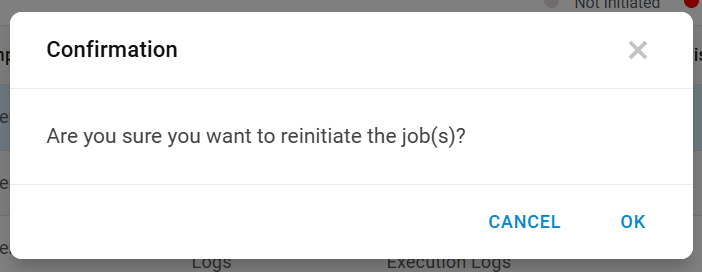
A Confirmation message appears as below.Figure 3. Job Reinitiate Confirmation Message
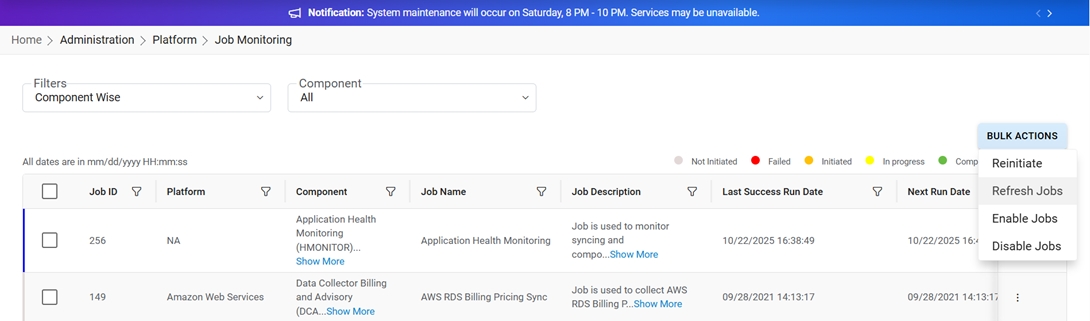
Click Ok.Figure 4. Reinitiate Job Success Message
Finally, the Status becomes Reinitiate and the color changes to blue.Figure 5. Reinitiate Job Status
Refresh Jobs
To check the status of the job, click the Bulk Actions and select
Refresh.Figure 6. Refresh Job Status
Enable Jobs
To enable a job, Admin users need to check the box adjacent to
the job.
Click the Bulk Actions and select Enable Jobs. To check if the job
is enabled, the status of Active column should be “Yes”Figure 7. Enable Job Status
Disable Jobs
To disable/deactivate any job, Admin users need to check the box
adjacent to the job.
Click the Bulk Actions and select Disable Jobs. To check if job is
disabled, the status of the Active column should be “No”.Figure 8. Disable Job Status