Creating marketing content to display on store pages
Create marketing content to fill e-Marketing Spots with images, text, or static HTML. You can specify the marketing content as default content for the e-Marketing Spot or widget, or you can create a web activity to display the content in the e-Marketing Spot or widget.
Before you begin
Procedure
- Open Commerce Lab Tools, and from the left navigation menu, click .
- Content List page opens. Click Create Content to create a new marketing content. Add New Content page opens.
-
On the Content Information provide the following
information:
Property Description Name Enter a name, for example, White Sale Home Page Ad. Content type Select one of the following options: - Asset
- Select this option to specify an image file, attachment, or URL.
- Text for store page display
- Select this option to specify text or static HTML.
- Text message for mobile device
- Select this option to specify text for display in a text message.
Associated asset If you select Asset from the Content type list, then the Associated asset table displays. If you are changing content to associate an asset with the content or to change an associated asset, consider the file size of the asset. If content includes asset files that are large, the loading time of store pages can be affected. If you must associate a large file, such as a video, to a piece of content, you might need to select to Ignore the associated asset file size limit.
Click Add to attach asset or to create URL attachment: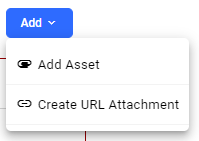
- If you select Add Asset option, Add Asset pop-up window is displayed.
- Select the radio button for Attachment or
Fileas required and select the attachment from the
list. The selected attachments is shown in the Selected
Attachment column. Note: You can select only one attachment. The new attachment will replace the existing one.
- Click Add. You are directed to the Content
Information tab and the selected attachment is shown in the
Associated Asset table.
- Click the
 Edit icon to update the attachment.
 - Click the
 Delete icon to delete the attachment.
- Click the
- To create URL attachment, select . The Create URL pop-up is shown on the screen.
- In the Path column, type the URL and click
Add. You are directed to the Content
Information tab and the selected attachment is shown in the
Associated Asset table.
- Click the
Edit icon to update the path.
- Click the
Delete icon to delete the attachment.
- Click the
Note: When you include marketing content with associated assets in an e-Marketing Spot, ensure that IT or an administrator caches the e-Marketing Spot or page. If you are IT or an administrator, you can include the e-Marketing Spot or page in the JSP DynaCache. For more information about caching marketing objects, see ../../admin/refs/rsbmarketingcachedesignconsiderations.html.If an e-Marketing Spot that includes content with associated assets is not cached and a file size limit is configured, whenever the e-Marketing Spot loads on a page, the service that checks the file size of associated assets is called. If a file size limit is configured, you are recommended to cache the e-Marketing Spots that include content with associated assets.
Text By default, the Text field editor is set to HTML mode within the Marketing tool. Enter the HTML content that you want to display as your content. This field is available in multiple languages. In your text field you can personalize your content:- To personalize the text for individual customers, you can use substitution
variables in the text. To use substitution variables, a store developer must
customize the JSP file for the store page that contains the e-Marketing Spot to
support this feature. This customization would support text entries like the
following
example:
For more information, see Adding support for personalized text in an e-Marketing Spot.Hi [FirstName], welcome back! - You can add promotion proximity messages in your content to inform shoppers how close they are to qualifying for promotions that are based on an order subtotal. For more information, see Adding promotion proximity messages for promotions
You can also enter standard rich text into the Text field. If you choose to, you must first click the following icon in the text toolbar:
 . Clicking Source takes the editor out of HTML mode
and into visual rich text editor mode. The HTML that was previously entered is
translated and displayed visually within the Text field. You
can switch back to HTML mode by clicking Source again at any
time.
. Clicking Source takes the editor out of HTML mode
and into visual rich text editor mode. The HTML that was previously entered is
translated and displayed visually within the Text field. You
can switch back to HTML mode by clicking Source again at any
time.For more information about rich text editors, see TinyMCE Editor.
- Click Next to add the content description.
-
In the Text field, enter the content description. By default the
text is shown in the United States English language. To add the
translation in the required language, after entering the text, click Add
Translation.
- Translations column pop-up on the screen. All the supported
languages are shown on the screen. Select the checkbox given in front of the required
language. The translation is in the selected language is shown on the screen.Note: This is an optional field.
- Translations column pop-up on the screen. All the supported
languages are shown on the screen. Select the checkbox given in front of the required
language. The translation is in the selected language is shown on the screen.
- Click Next to add the content action.
- Optional: Specify any required click action
that is to be associated with your marketing content.
Property Description Number of click actions You can specify the following number of click actions that are to be associated with your content. The options are: - None
- Select this option if you do not want the content to have a click action. In other words, if the customer clicks the content, nothing happens.
- Single
- Select this option if you want only a single click action to be associated with your content. If the customer clicks any area of the content only a single action occurs. If you select a single click action, you must then specify a Click action type.
- Multiple (image map)
- Note: This field is shown only if content type is selected as Asset.Select this option if you want multiple click actions to be associated with your content. To associate multiple click actions with a piece of content, you must create an image map. When you select to associate an image map, you must specify an Input option for specifying the click action areas within your image map.
Input option(available when you select Multiple (image map)
You can select to specify each individual area that is to contain a click action, or select to use HTML to specify the entire image map area. You can select only one option. You cannot define click action areas in both the Areas table and with HTML: - Specify individual areas
- Select this option to specify the individuals areas that are to contain a click action within your image map. You must enter each click action area within the Areas table.
- HTML
- Select this option to specify HTML code that defines the entire image map.
Areas(available when you select Multiple (image map)
andSpecify individual areas
Specify each individual click action area within this table. To add an area, click the Add Area button. You must specify the following properties for each individual click action area: - Shape
- You can select to create your click action area in one of following three
shapes:
- Rectangle
- Circle
- Polygon
- Coordinates
- Specify the coordinates, in pixels, for your selected shape. These coordinates
identify the size and location for the click action area. You should retrieve
this information from your developers or the supplier of your image. Enter your
coordinates relative to the upper left boundary (0,0) of your image. The
coordinates for each shape must be in the following format:
- Rectangle: Specify the upper left and lower right coordinates. Define these two coordinates in the format: X1, Y1, X2, Y2 (Where X1, Y1, is the upper left coordinate, and X2, Y2 is the lower right coordinate).
- Circle: Specify the center point for the circle and the radius. Define the center point location for your circle and radius in the format: X, Y, Radius (Where X, Y are horizontal and vertical coordinates for the center of the circle, and R is the radius of the circle).
- Polygon: You must specify at least six coordinates and you must specify an
even number of coordinates to complete the polygon shape. Use the format
X1,Y1,X2,Y2, ...Xn,Yn. Enter these coordinates in either a clockwise or counterclockwise order to ensure that the correct shape is defined.
- Hover text
- Specify the text that your customer views when they hover over the click action area. This text can be entered in multiple languages. If your store supports multiple languages, the hover text and coordinates are specific to each language.
- URL
- Displays the URL that opens when a customer clicks the click action area. This URL is specified in the URL field after the options for defining the Click action type. To set the URL for a click action area, select an entry in the Areas table. The URL specific to an area displays in the URL entry field. You can manually enter the URL or use the Click Action selection widget.
- Target - The location where the URL page is to display when it opens. Example: _blank, _parent, _self, _top.
- Alternate Text - The alternate text for the click action area.
- There are also five addition customizable fields (Field 1 to Field 5) available by default for your usage:
Click action type The following are the available click action types: - Predefined click action
- If you select this option, you must select the predefined click action from the list that
displays. Options are:
- Display catalog entry
- This click action redirects the Add Catalog Entry window to select the catalog entry.
- Enter the catalog entry name in the Search field or browse for the
appropriate catalog entry to display.
- Select the radio button in front of the catalog entry and click Add.
- The catalog entry is added to the Selected Catalog Entry column.
- Click the
 Delete icon from the
Actions menu to delete the
selected catalog entry.
Delete icon from the
Actions menu to delete the
selected catalog entry. - Select the Content Behaviour from the drop-down menu.
- Display category
- This click action redirects the Add Category window to select the catalog entry.
- Enter the category name in the
Search field or browse for
the appropriate category.
- Select the radio button in front of the category and click Add.
- The category is added to the Selected Category column.
- Click the
Delete icon from the
Actions menu to delete the
selected catalog entry.
- Select the Content Behaviour from the drop-down menu.
- Add to shopping cart
- This click action redirects the Add Catalog Entry window to select the catalog entry.
- Enter the catalog entry name in the
Search field or browse for
the appropriate catalog entry to display.
- Select the radio button in front of the catalog entry and click Add.
- The catalog entry is added to the Selected Catalog Entry column.
- Click the
Delete icon from the
Actions menu to delete the
selected catalog entry.
- Select the Content Behaviour from the drop-down menu.
- Add to wish list
- (For consumer-direct-type stores only). This click action redirects the customer's browser to the wish list page and adds a SKU you specify to the customer's wish list.
- Enter the catalog entry name in the
Search field or browse for
the appropriate catalog entry to display.
- Select the radio button in front of the catalog entry and click Add.
- The catalog entry is added to the Selected Catalog Entry column.
- Click the
Delete icon from the
Actions menu to delete the
selected catalog entry.
- Select the Content Behaviour from the drop-down menu.
- Predefined click action for a promotion
- If you select this option, you must select the predefined click action from the list that
displays. Options are:
- Display promotion description
- This click action redirects the customer's browser to the Promotion Details display page. The promotion details that are displayed on this page are the Customer viewable short description text and the Customer viewable long description text, as defined for the promotion. This click action applies to promotions with any redemption method.
- Add coupon to customer's coupon wallet
- This click action redirects the customer's browser to the shopping cart page and displays the coupon in the coupon wallet. This click action applies only to promotions for which the redemption method is Coupon promotion.
- Add to shopping cart and apply promotion
- This click action redirects the customer's browser to the shopping cart page, adds the specified SKU to the customer's shopping cart, and applies the promotion to the customer's order. This click action applies only to promotions for which the redemption method is Requires promotion codes. Ensure that the promotion has only one promotion code defined. If it has more than one, then you cannot activate any Web activities that reference the promotion.
- Selecting this option displays a field in which you must specify the code of the SKU that you
want to add to the customer's shopping cart.
- Click Add, the Add catalog entry window displays.
- Search or browse for the appropriate catalog entry. Select the radio button in front of the SKUs.
- All the selected items are added to the Selected Catalog Entry column.
- Click Add. The selected catalog entries are added to the Product SKU table.
- Click the
Delete icon from the
Actions menu to delete the
selected catalog entry.
- Custom URL as click action
- Select this option if you want to redirect the customer's browser to a custom URL when the
customer clicks the content. Selecting this option displays a field
in which you must type the custom URL.
If this URL directs a customer to a site outside of your store, HCL Commerce must be configured to allow redirects. You must configure HCL Commerce to allow redirects to the site before the redirect works properly. For more information, see Enabling URL redirect filtering.
You can define a language-specific custom URL by including language variable tokens in the URL. Before you can use a language variable token in the URL, an IT developer must first add support for language variable tokens by applying the interim fix for APAR . By using language variable tags in a click action custom URL, a different URL can display for each language that your store supports. When a developer adds this support, the following tokens are available for use in a click action custom URL:#language#- When you include the token
#language#, the token is replaced by the language for the shopper that is viewing the marketing content. The language value that replaces the token is typically the first 2 characters of the locale, such asenfor English orfrfor French. This value corresponds to the LANGUAGE.LANGUAGE database column for the language.For instance, the following URL includes this token:
When a shopper views the marketing content in English, the following URL displays:#language#/aurora/return-policy
If a shopper views the same marketing content in French, however, the following URL displays:en/aurora/return-policyfr/aurora/return-policy #langId#- When you include the token
#langId#, the token is replaced by the ID of the language for the shopper that is viewing the marketing content. This value, such as-1for English or-2for French, corresponds to the LANGUAGE.LANGUAGE_ID database column for the language.For instance, the following URL includes this token:
When a shopper views the marketing content in English, the following URL displays:SearchDisplay?searchTerm=dress&storeId=10001&catalogId=10001&langId=#langId#
If a shopper views the same marketing content in French, however, the following URL displays:SearchDisplay?searchTerm=dress&storeId=10001&catalogId=10001&langID=-1SearchDisplay?searchTerm=dress&storeId=10001&catalogId=10001&langId=-2
Support for adding the
#language#and#langId#language variable tokens in a custom URL is provided by default.
Note: The Predefined click action for a promotion option is not available for an image map.URL This URL is the URL that a click action opens for the customer. If you are specifying a custom URL, you should obtain this custom URL from your developers to ensure that it leads the customer to the correct store page. This URL must be specified for each click action area you specify in the Areas table. The URL field displays the URL for only the selected click action area in the Areas table. HTML Specify the HTML source code that defines your image map. If you choose to specify HTML code, you should receive this source code from your developers. Before you save your content, ensure that the map name for your image map associates the image map with an image. Verify with your developers that the map name is set as an image content identifier, orcontentId. This identifier is required to associate your image map with an image. This map name must not be a number. This map name must be set in the HTML code in the following format:
The<map name="[contentId]">contentIdsubstitution variable are replaced with the unique ID of the content at store front. For more information, see ../../admin/concepts/csbimagemapcode.html.Content Behavior In the Content behavior field, specify whether the content behavior is static or dynamic. This option helps determine how to cache an e-Marketing Spot at the storefront. If the content behavior is dynamic, then the e-Marketing Spot cannot be cached at the storefront. Select one of the following options:
- Static
- Select this option if the content displays the same results to all customers.
- Dynamic
- Select this option if the content changes based on the customer.
For example:
- The content displays the customer name in the text with substitution
variables defined in the e-Marketing Spot. For example:
Hi [FirstName], welcome back! - The content displays the additional amount of money a customer
must spend to qualify for an order level promotion with the promotion
proximity tag. The following marketing content text snippet provides
an example of the content details text with a promotion proximity
tag:
You are only [CartValueThreshold:200 USD,MinimumCartValue:50] away from free shipping.
- The content displays the customer name in the text with substitution
variables defined in the e-Marketing Spot. For example:
-
Click Finish. The newly created content is listed on the
Content List page.
Note:
- To preview marketing content for the Ruby store, go to the Page Composer tool. See Preview Store Pages for more information.