Runbook Execution
To execute the runbook for a ticket, perform the following steps:
- On the Open-Tickets tab, click the Un-Assigned tab to filter tickets based on user allocation or identify the ticket to be executed from the Tickets tab.
- To initiate ticket execution in the iAutomate queue, first, collect the necessary ticket
data from the IT Service Management (ITSM) tool. The following
table describes the execution status for each activity:
Table 5 – Ticket Execution Status
Runbook Execution Status Description Data Collected The data is collected from the ITSM tool. Picked for Recommendation iAutomate recommends the relevant runbook. Move to Parsing On successful recommendation, the system moves the ticket to parsing. Picked for Parsing The system starts parsing the ticket and extracts the required parameters for the runbook. Picked for InProgress This status indicates that iAutomate has started working on the ticket. Move to Assignation Decision The ticket moves for assignments in either auto or manual mode. If auto-mode is enabled for the selected ticket and the confidence score of the runbook is above the threshold, then the ticket is executed automatically. If auto mode is disabled, then the ticket moves for execution manually. Marked for Execution This status indicates that iAutomate has marked in progress and started working on the ticket. Execution Successful and Marked for Closure This status indicates that iAutomate has completed working on the ticket and has marked it for closure. Marked for Release This status means that iAutomate has completed working on the ticket. Figure 1. Open Ticket 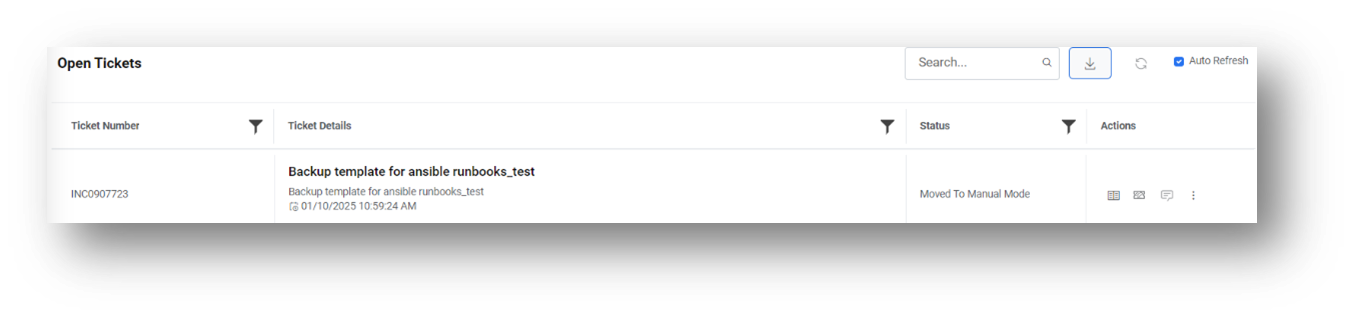
- For a condition where multiple runbooks above a defined threshold are available against a ticket, a Select Runbook button appears in the Runbook column. However, if the appropriate runbook is not configured, the Release button is enabled so the ticket can be released from the iAutomate queue.
- Click Runbook.
Figure 2. Select Runbook and Release Options 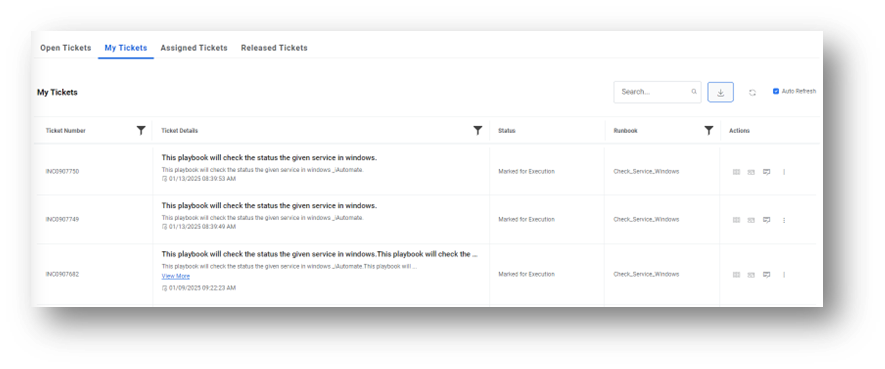
- A pop-up window displays the summary and description of the tickets and the list of
runbooks in descending order of confidence score.
Figure 3. Summary and Description Options 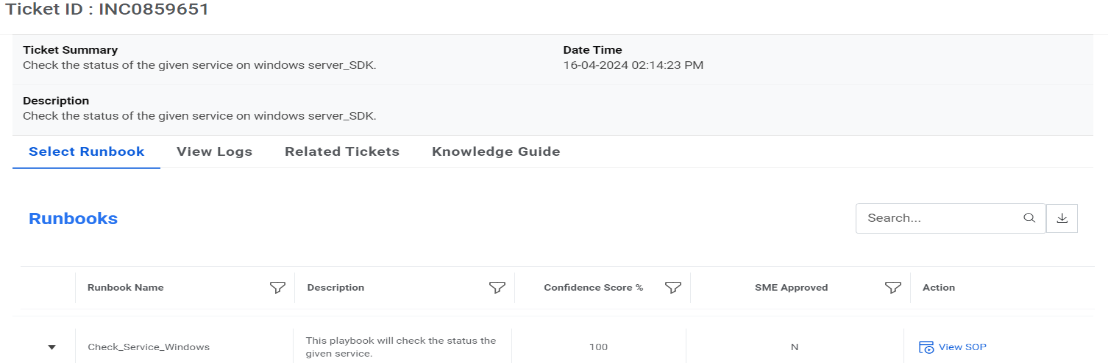
- In addition to the confidence score, the SME Approved column displays the result of SME validation against the runbooks. Both parameters help the user to identify the runbook for execution.
- After the runbook is identified, click Runbook Name
to expand the selected row.
Figure 4. Select Runbook 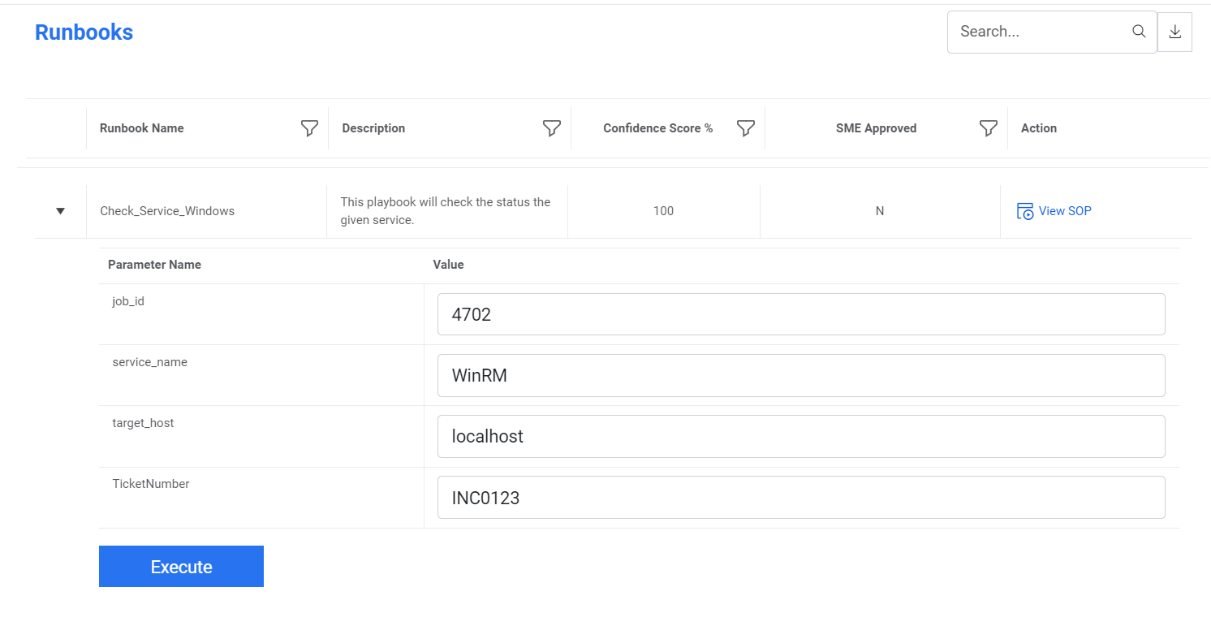
- This displays the runbook description
and parameters for the selected runbook. These parameter
values are retrieved from the ticket. The user may select the runbook with the highest
confidence score or the one recommended by the SME.Note:If the values are available, then they are referenced from the ticket description,or the default values are provided. The user can either retain these values or change them.
- Click Execute to start runbook execution for the selected ticket.
- On successful initialization of the execution, a confirmation dialogue
box appears.
Figure 5. Runbook Initiation Confirmation 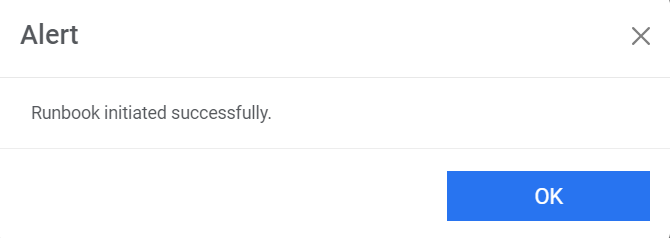
- Simultaneously, the following updates happen in the Open Tickets tab:
- In the Tickets and Assigned tabs, the ticket is marked as Owned By, replacing the Select Runbook button with text specifying the runbook that is being initiated for execution. The username appears next to Owned by under the tab.
- If the user selects Assigned in the Open Tickets tab, then the same
ticket is added in the Tickets and In-Process tabs under the My Tickets
tab.
Figure 6. Runbook Execution 
- The Logs grid displays the ticket status as Initiated
Figure 7. Runbook Execution 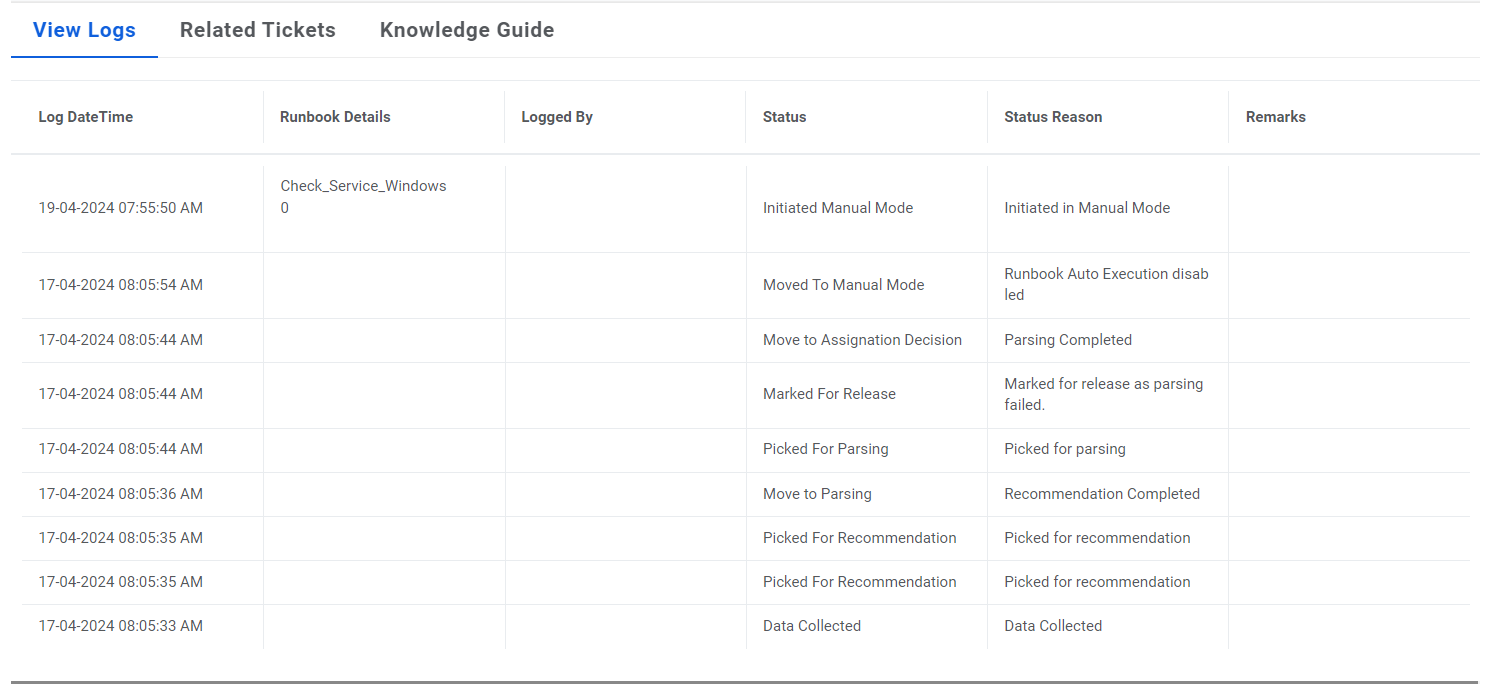
- The Assigned Ticket remains unavailable for allocation by another user unless the Owned by user releases the ticket from their queue.