

All Reports
The All Reports page is a central location to view, manage, and organize all reports available in BigFix UI. From this page, you can apply filters, export data, generate a report offline, delete reports, assign tags, and manage report visibility. You can also mark reports as favorites to find them quickly.
The All Reports page lists every report you create in BigFix UI. Because all of your reports are collected in one place, you can view, manage, and organize them without switching between apps.
To open the All Reports page, expand Reporting from the side navigation, and then select All reports.
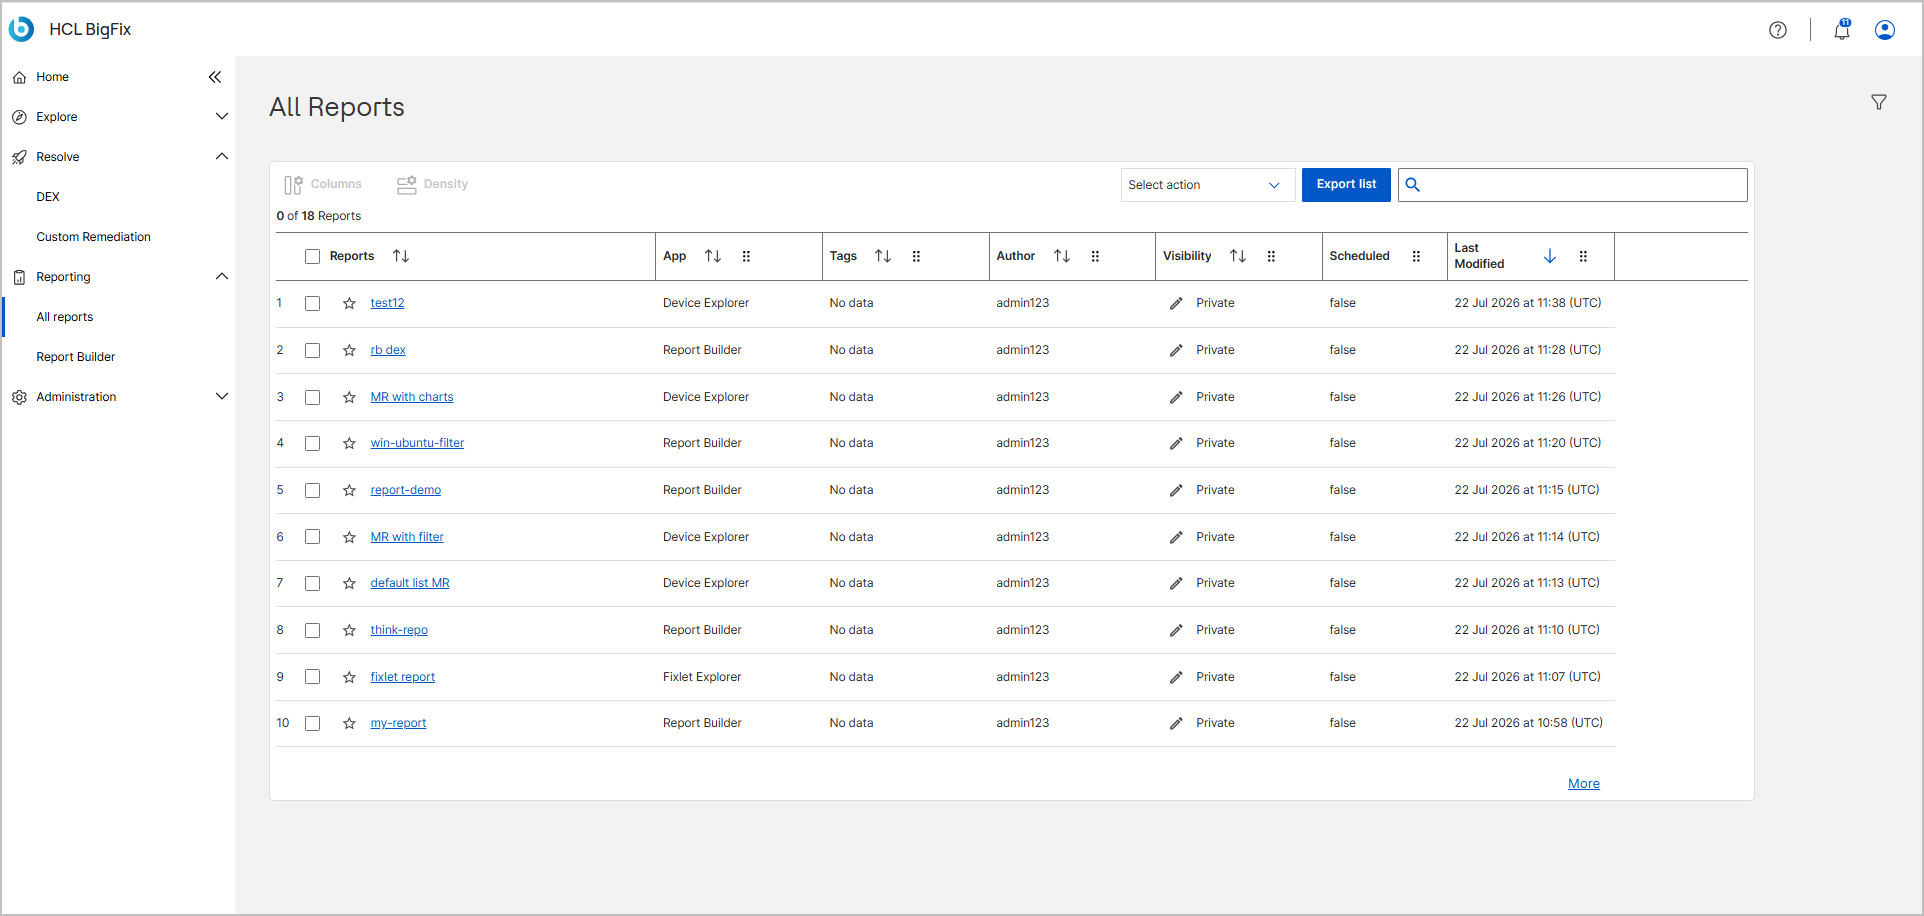
Reports table
The reports table lists your reports and their details. It contains the following columns:
| Column | Description |
|---|---|
| Favorites | A star control on each row. Select the star to mark or clear a report as a favorite. |
| Reports | The title of the report. Select the name to open the report. |
| App | The application associated with the report, such as Device Explorer, Analyses, or Report Builder. |
| Tags | The tags applied to the report. Shows the tag name, a count link (for example, 2 tags) if more than one tag is applied, or No data if no tag is applied. Select a count link to open a drawer where you can view the tags and remove them. To assign tags, see Assigning tags to reports. |
| Author | The user who created the report. |
| Visibility | Indicates whether the report is Public or Private. Select the edit icon next to the value to change the report's visibility. |
| Scheduled | Shows whether the report is scheduled to run automatically. |
| Last Modified | The date and time the report was last updated. |
Toolbar controls
The toolbar above the table provides the following controls:
| Control | Description |
|---|---|
| Search | Enter a report name or keyword to filter the list. The list updates as you type. |
| Select action | Choose an action to run on the selected reports: Delete to remove the reports, or Assign Tags to open the Assign Tags dialog. Both actions are available only when at least one report is selected. |
| Export list | Download the report data for offline use or external sharing. For the full procedure, see Exporting reports. |
| Columns | Show or hide columns in the reports table. |
| Density | Adjust the row spacing of the table between compact and comfortable. |
| Filter | Open the filter panel to narrow the reports shown. For the filter properties, see Filtering reports. |
About report tags
Tags are custom labels that you assign to reports to group and find them quickly. You assign tags to a report after the report is created; you cannot add tags while creating a report in the Report Builder, scheduled reports, or scripted reports.
Assigned tags appear in the Tags column. When a report has one tag, the tag name appears. When a report has more than one tag, a count link appears, such as 2 tags. Select the count link to open a drawer that shows each tag as a chip. To remove a tag, select the X on its chip.
Assigning tags to reports
Assign one or more tags to reports so that you can group and locate them from the All Reports page. You can create new tags or apply existing ones, and you can assign tags to several reports at once.
To assign tags to reports:
- On the All Reports page, select one or more reports.
- Select Select action > Assign Tags.
The Assign Tags dialog opens and shows the tags already assigned to the selected reports. When you select more than one report, the dialog shows the combined set of tags from all of the selected reports.

- To create a tag, enter a name in the Select tags box, and then
select Add.
The new tag is created and added to the list of selected tags.
- To apply existing tags, enter text in the Select tags box to
filter the Tags with '<text>' suggestion list, select the check
box for each tag you want, and then select Apply.

- To remove a tag from the selection, select the X on its chip. To clear all selected tags, select Reset tags.
- Select Assign.
A confirmation message appears, for example Tag(s) Assigned - 2 tags has been assigned to 1 report. The assigned tags appear in the Tags column.
The following table describes the controls in the Assign Tags dialog.
| Control | Description |
|---|---|
| Select tags | Enter text to create a tag or to filter the suggestion list of existing tags. Select the X in the box to clear the text. |
| Add | Create a tag from the text you entered and add it to the selected tags. |
| Tag chips | The tags currently selected. Select the X on a chip to remove that tag from the selection. |
| Tags with '<text>' | The suggestion list of existing tags that match your text. Select a check box to include a tag, and then select Apply. |
| Reset tags | Clear all selected tags from the dialog. |
| Assign | Assign the selected tags to the selected reports. |
| Cancel | Close the dialog without changing the assigned tags. |
Filtering reports
Use the Filter icon to open the Filter data panel and narrow the reports shown on the All Reports page. You build one or more conditions on report properties, and the list shows only the reports that match.
The available filter properties are:
- Favorites
- Report Name
- App
- Tags
- Author
- Visibility
- Last Modified
To filter reports:
- Select the Filter icon to open the Filter data panel.
- Under Select top level filter condition, select Single condition to use one filter block, or Multiple condition (Criteria: OR) to combine several blocks so that a report matches when it meets any block.
- In Filter block 1, select Single condition to set one condition, or Multiple condition (Criteria: AND) to require a report to meet every condition in the block.
- For each condition, select a Property, select an Operator (for example, Contains), and enter a Value.
- To add another filter block, select Add Block. To delete a block, select Remove block.
- Select Apply.
To clear every condition, select Remove all. For more about filtering across BigFix UI, see Filtering Data.
Exporting reports
Use Export list to download report data for offline use or external sharing. You can export the data in either of the following formats:
- CSV - A lightweight, text-based format suitable for data processing.
- Excel - A spreadsheet format suitable for analysis and visualization.
The file is saved to your local system. For the full procedure, see Exporting Data.
Working with a report
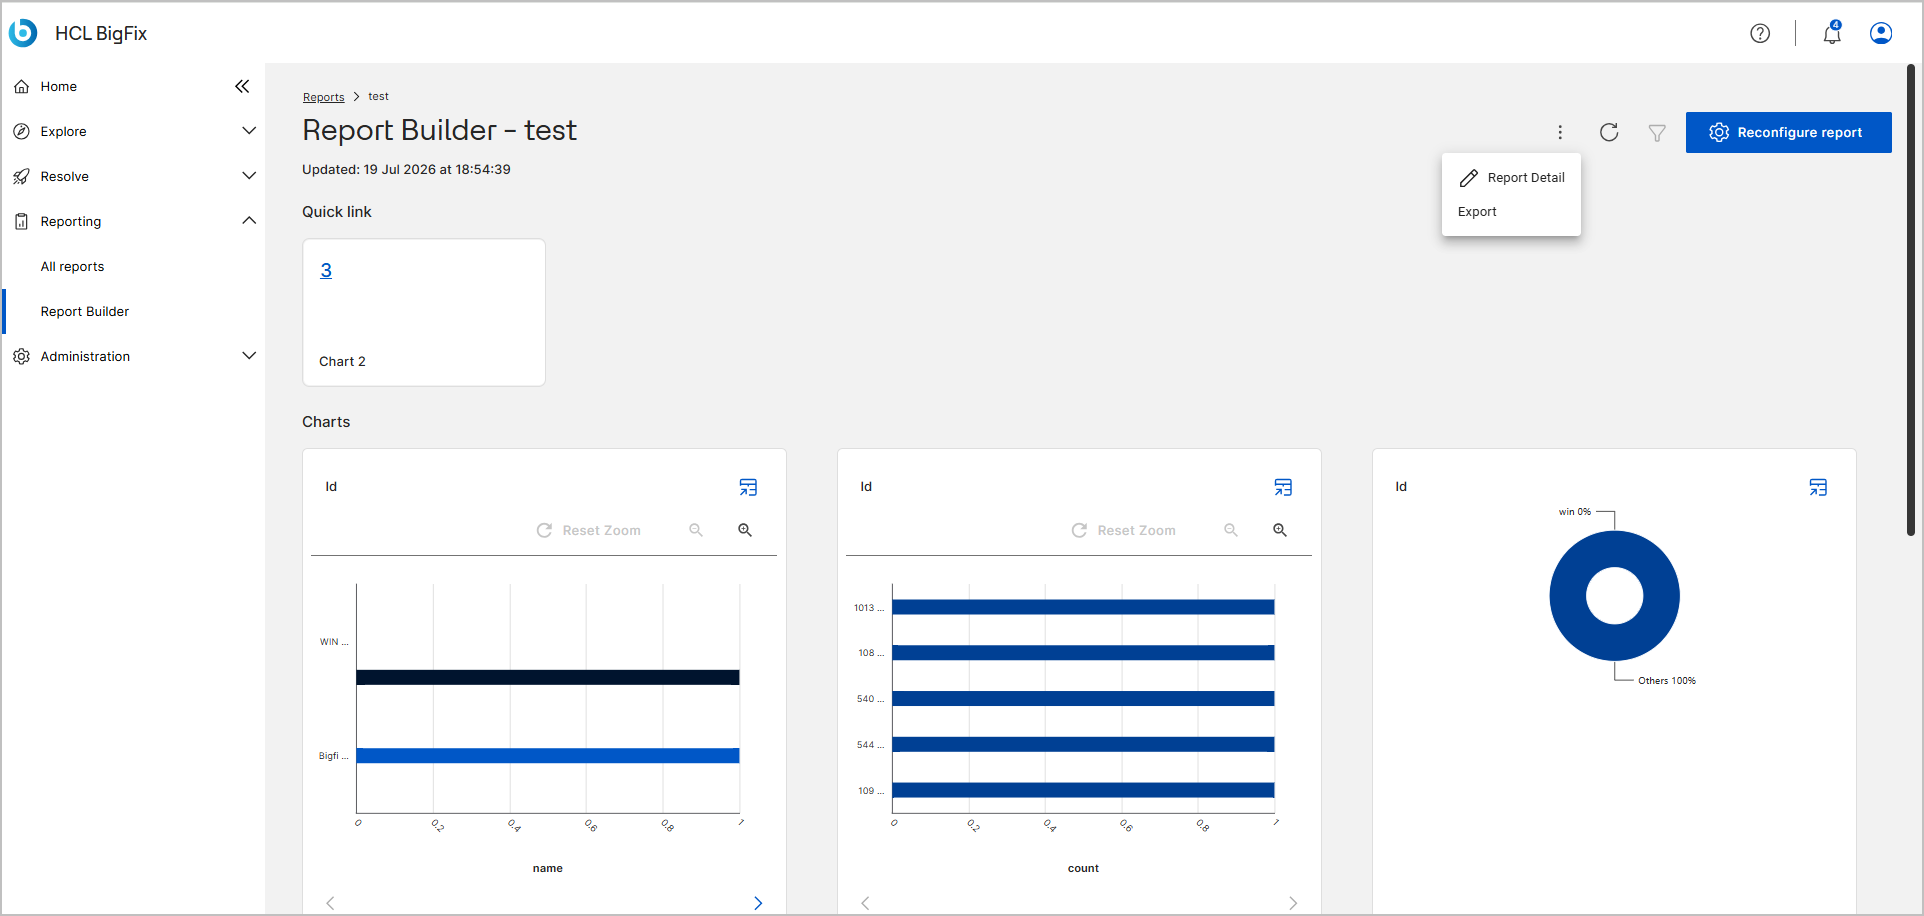
When you select a report name on the All Reports page, the report opens on its own page. The page header shows the report name, prefixed by the app that built it (for example, Report Builder - test), and the date and time the report was last updated. The page presents the report's Quick link cards and Charts.
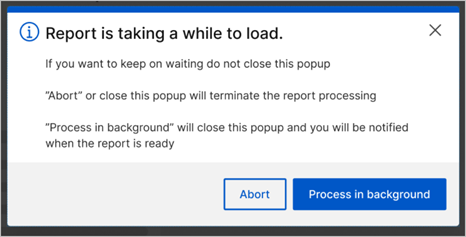
If a report takes more than three seconds to load, the Report is taking a while to load message appears. Choose how to proceed:
- To keep waiting, leave the message open.
- Select Process in background to close the message and keep working. BigFix UI notifies you when the report is ready.
- Select Abort to stop processing the report. Closing the message also stops processing.
From the report page, you can edit the report's details, export it, refresh its data, and reconfigure it. The page header provides the following controls:
| Control | Description |
|---|---|
| More options icon | Opens a menu with two actions:
|
| Refresh | Reloads the report with the latest data. |
| Reconfigure report | Opens the report in its builder so that you can change its configuration. For the steps, see Reconfigure a report. |
Editing report details
Use the Report details panel to change a report's name, description, visibility, and tags.
To edit a report's details:
- On the All Reports page, select the report name to open the report.
- Select the more options icon, and then select Report Detail.
The Report details panel slides in from the right.
- Edit any of the following: Report Name, Description, or Visibility (Public or Private).
- To add a tag, enter text in Select tags, and then select Add. To clear the tags you added, select Reset tags.
- Select Update to save your changes, or Cancel to close the panel without saving.
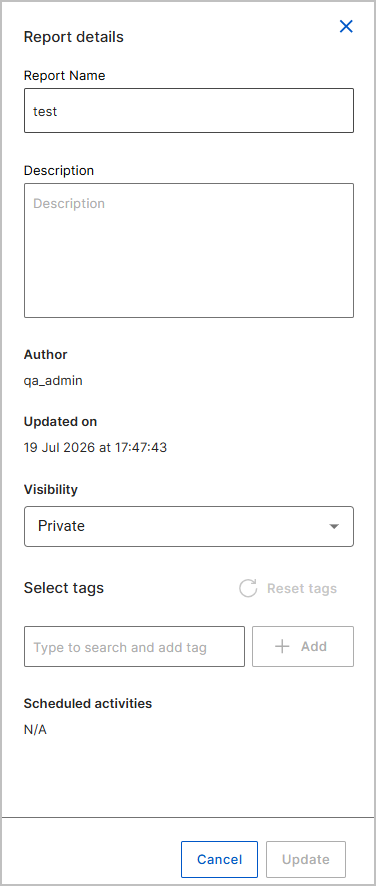
The following table describes the fields in the Report details panel.
| Field | Description |
|---|---|
| Report Name | The report's title. Editable. |
| Description | Optional text that describes the report. Editable. |
| Author | The user who created the report. Read-only. |
| Updated on | The date and time the report was last updated. Read-only. |
| Visibility | Sets whether the report is Public or Private. Editable from the dropdown. |
| Select tags | Adds tags to the report. Enter text to search for an existing tag, and then select Add. Select Reset tags to clear the tags you added. |
| Scheduled activities | Any scheduled runs for the report, or N/A if none are scheduled. Read-only. |