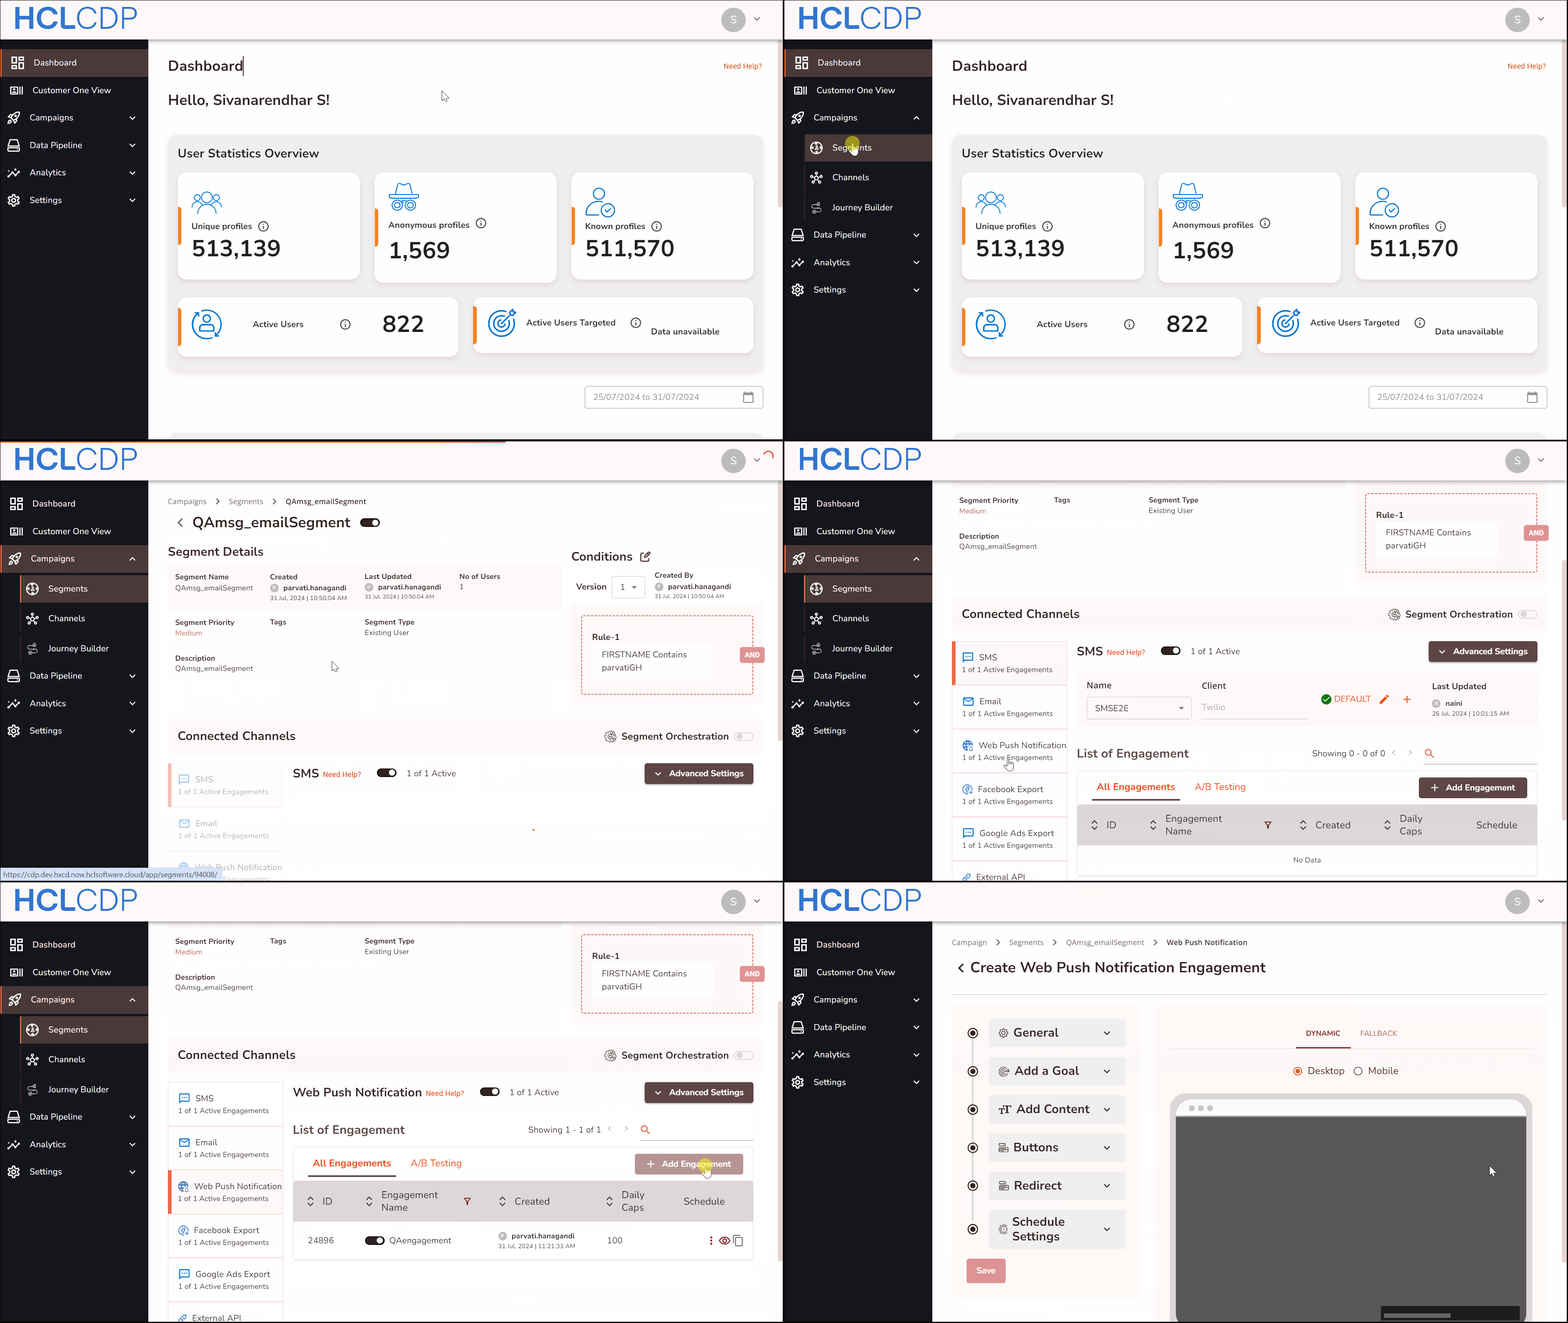
Add a Web Push Notification
This page explains how to create a Web Push Notification for Android using HCL CDP Marketing Automation Platform.
Create a Web Push Notification Engagement from Segments
To create a web push notification engagement from segments, follow the steps below:
- Navigate to .
- Select the Segment Name, and on the left panel, click Web Push Notification.
- Click Add Engagement.

Create a Web Push Notification Engagement from Channels
To create a web push notification engagement from channels, follow the steps below:
- Navigate to .
- On the left panel, click Web Push Notification.
- Click Add Engagement, and select Segment Name from the list.
- Click Confirm And Proceed To the Next Step.

Configure Engagement Details
In the Create Email Engagements screen, update the following details:
Add General Details
- Engagement Name (mandatory): Enter a name for the Engagement. It should range from 6-25 characters.
- Select Label (mandatory): Choose a product label from the list. For more information about product labels, refer here.
- Language (mandatory): Select a language in which you prefer to code the Engagement.
Add a Goal
Goal Type: Select a goal type from the drop-down list. For more information about Conversion Goals, refer Campaign Channels.
Add Content
- Notification Title (mandatory): Enter the notification title message of the engagement. The recommended max length is 32 characters.
- Notification Message (mandatory): Enter a brief message explaining the purpose of the engagement. It should be at least 6 characters and upto 42 characters.
- Icon (mandatory): Upload an icon to represent the logo of your website or profile that will be displayed in your web push notification. The icon image supports JPG or PNG file formats, with (192*192) pixel dimension and a maximum 1 MB size.
- Notification Image: Upload an image that indicates the purpose of the web push engagement. The notification image only supports JPG or PNG file formats, with an Aspect Ratio of : (recommended resolutions are x, x80).
- Fallback: You can use the fallback feature provided by HCL CDP. For more
information about Fallback, click here.Note: When a recommended size is specified, there is no strict length constraint for the message. However, exceeding the recommended length may result in the message being trimmed during delivery, leading to data loss, or in some cases, the message may not be delivered at all. HCL CDP strongly recommends adhering to the recommended length.
Buttons Icon
Use an icon for the button in your web push engagement by either importing it via a URL or uploading it from the HCL CDP Image Media Repository. Ensure the icon image is in JPG, PNG, or WEBP format, with dimensions of 32x32 pixels and a maximum file size of 1 MB.
- Text: Enter the text you want to mention beside the icon on the button.
- On Click Action: Select an action to be performed when the button is clicked.
- Fallback: You can use the fallback feature provided by HCL CDP. For more about Fallback, click here.
Redirect URL (mandatory)
Provide the URL of the webpage to which the web push notification will get directed.
Schedule Settings
Schedule: Schedule an engagement to send at a later time or trigger it immediately once the engagement goal is achieved. For more information about Engagement Scheduling, refer Campaign Channels
Save
Click Save to save the Engagement.
Fallback
This feature in the HCL CDP Marketing Automation platform is designed for Web Push Notification engagements. If a user does not receive the engagement, a fallback message is sent to ensure every segment member receives the engagement. To learn more about Personalization Failure, click here.