Component Setup
After creating the database, perform the following steps to set up the Web UI components.
- The Component Selection view lists the components, and their corresponding parameters based on the selected component.
- The following types of components are deployed in
iAutomate:
- Web Component - It includes the user interface that enables the configuration, management, and resolution of tickets.
-
Service Component - This is further divided into three categories:
- Application Component - This includes essential services that work together to achieve the core functionality of iAutomate.
- Ansible CLI Wrapper Component – This includes wrapper service that works with Ansible CLI.
- Advanced AI Component - This includes features like Solution Creation; Natural Language Processing (NLP) based assisted services, and so on.
Figure 1. Component Setup 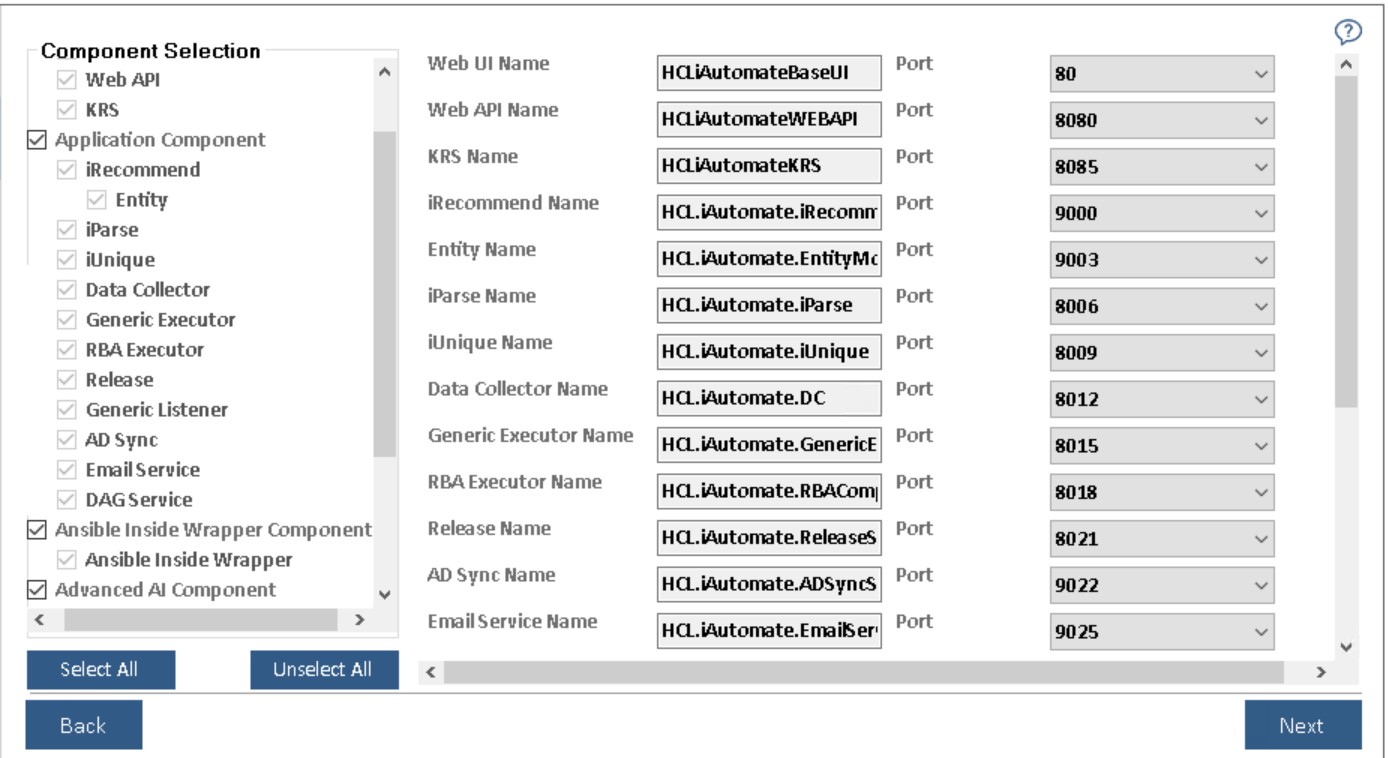 Note:The administrator can add or remove components based on their environment as decided during the planning phase.
The following table lists the components available on different servers.
Table 1. iAutomate Components Server Type Components Description Web Component Web UI Web User Interface for Admin, Configuration, Operations Console, Dashboards and Knowledge Analysis and Search functionalities Web API It is an API in the iAutomate web module that can be accessed using the HTTP protocol. KRS The Key Rotation Service component which serves the purpose of providing additional security through rotation of keys on a periodic basis. Application Component iRecommend It leverages Natural Language Processing and is responsible for recommending the best suited runbook for resolving the issue based on the ticket description iParse It serves the purpose of analyzing the ticket description and summary for extracting relevant parameters to be passed to configurable runbooks iUnique It helps in clustering the ticket data (incident, service requests, change requests) into different categories for identification of automation opportunities Data Collector It is responsible for collecting ticket information from the ITSM tool Generic Executor It is used for data processing at the DB layer for enabling backend processes. RBA Executor It helps in triggering the identified runbook for automatic resolution using an underlying RBA tool Release It is used to release the ticket in case an appropriate runbook is not recommended OR runbook execution for a ticket fails. In the latter case, the ticket is released and assigned to a human agent. Generic Listener Ticket passes through multiple stages during the resolution lifecycle using iAutomate. Generic Listener module is responsible for ensuring the ticket is moved to the next stage based on the current outcome. Its job is to identify the status of the present stage and based on success / failure, move the ticket to the consequent stage in the lifecycle AD Sync It is responsible for fetching LDAP user from LDAP Server. Email Service It is responsible for sending mail notifications to user DAG Service It is responsible for executing Network Related Use cases. Assignation Services It is used to assign tickets to the group fetched from Gen AI Studio. Ansible CLI Wrapper Component Ansible CLI Wrapper It is responsible for triggering Ansible CLI Tool Advanced AI Component Advanced Knowledge It returns a list of relevant documents for a query that have been crawled from different repositories like SNOW KB, Web URL, Satori repository, and internal files and folders. iKnowledge It returns a list of relevant results from Google for a query, if no relevant documents exist in the organization’s repository. Knowledge rating It enables users to provide feedback as a rating for the document search corresponding to the ticket summary. iScrape It helps in automated runbook creation for ticket categories for which runbooks don’t exist by exploring various internal and external data sources for relevant executable code snippets and scripts. - Select the components as planned for the server configuration.
- Select the Web Component, Application Component, Ansible CLI Wrapper Component or Advanced AI Component check boxes to install all the components listed under the servers simultaneously or select a single component to install it individually.
- After component selection, their corresponding details are auto filled and enables user to select the Port for each component.
- On selecting Advance AI Components, user must provide the MongoDB and Solr database details else the setup will display the Server Configuration page.
- To continue with the installation, click Next. This enables the Configure MongoDB and Solr tab on the left navigation pane. Type the following details to set up the MongoDB and Solr databases:
- On the Configure MongoDB page:
- Type the MongoDB Server Name (including the port details).
- In the User ID and Password fields, type username and password to access the server.
- Select the Version Type.
- Select the HA mode.
- Based on the selected “Version Type” and HA mode (selected / unselected), please follow the below steps:
-
Table 2. MongoDB Configuration Parameters Version Type HA Mode Number of Servers Required* CA File Required PEM File Required Community Enabled At least 3 Not Required Community Disabled 1 Not Required Enterprise Enabled At least 3 Depends** Required Enterprise Disabled 1 Depends** Required Note:* - As per the best practices, number of servers required should be odd in numbers. Provide the list of all MongoDB instances as comma separated pairs of hostname and port.** -. CA File is only required if and only if MongoDB installation mandates use of CA file
- On the Configure Solr page:
- Type the Solr Server.
- In the User ID and Password fields, type user ID and password to access the server.
- The default port is auto filled in the PORT field next to each component.
- Click Next.
Figure 2. Configure Mongo DB and Solr 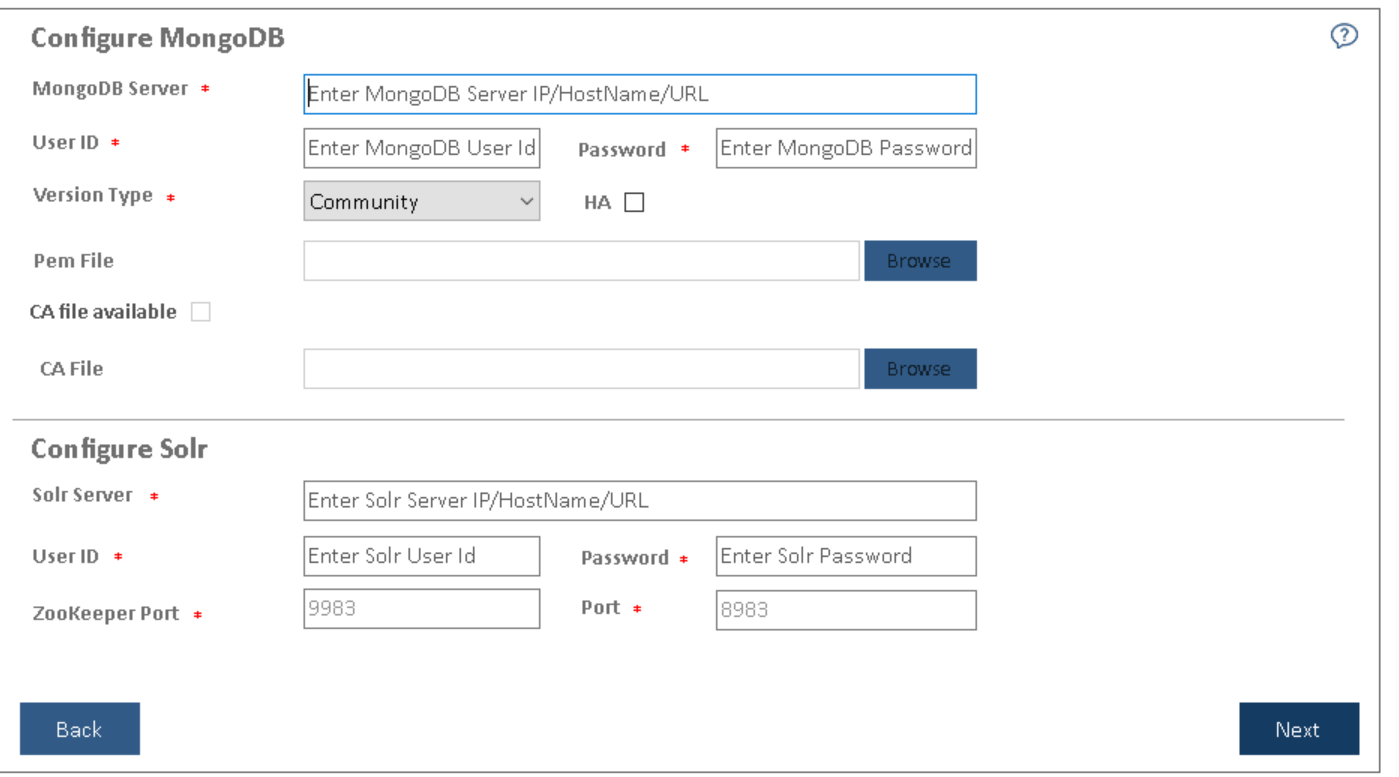
- User will be prompted to check the connection status. Click Yes to
proceed with checking the connection status or No to continue with the
Installation.
Figure 3. Check Mongo DB and Solr Connection Status 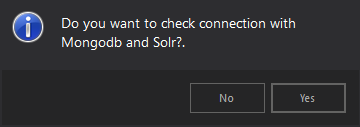
-
The Server Configuration page appears on the screen.
Note:
All fields marked with an asterisk (*) are mandatory.