View Scheduler
- The user can view the scheduled solution by clicking the view icon on the
scheduler page.
Figure 1. View Solutions 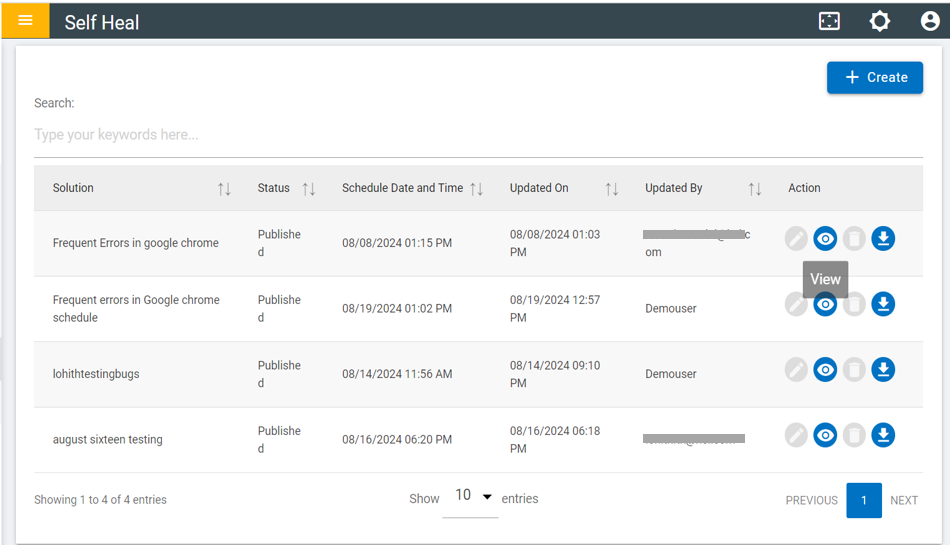
- After clicking the view icon, the View Scheduler page will appear.
Figure 2. View Scheduler 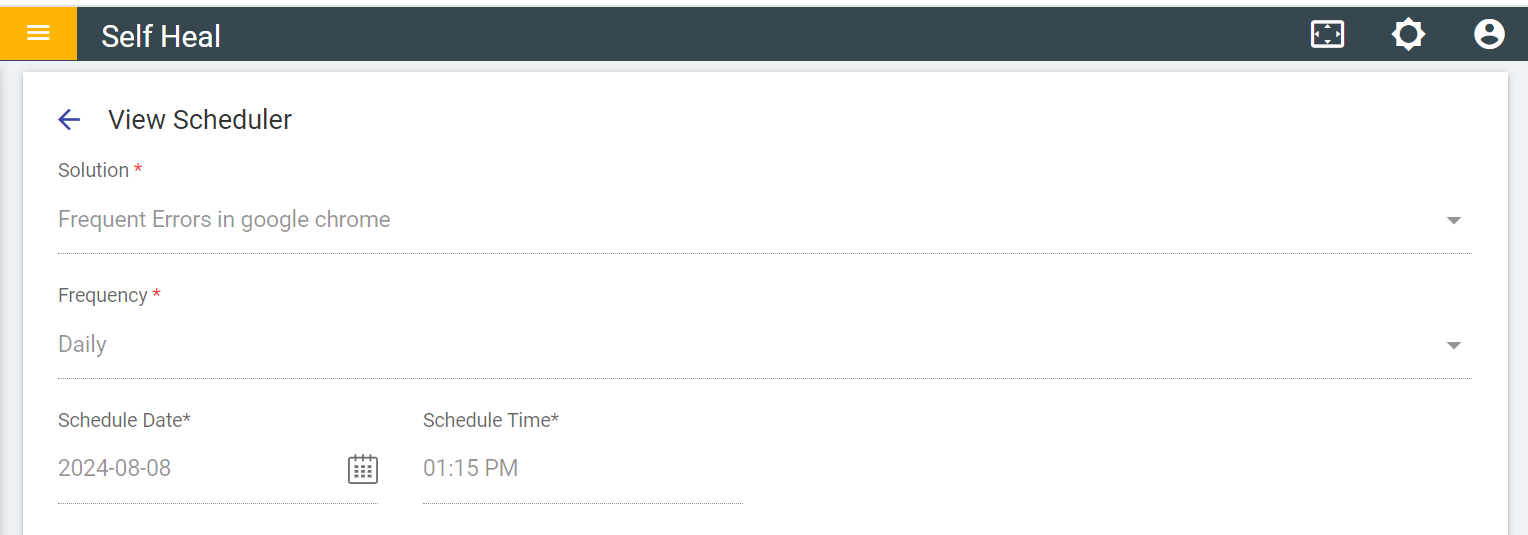
- The user cannot delete a scheduled solution without first unpublishing it.
- Click the unpublish icon to unpublish the scheduled solution.
Figure 3. Unpublish Solution 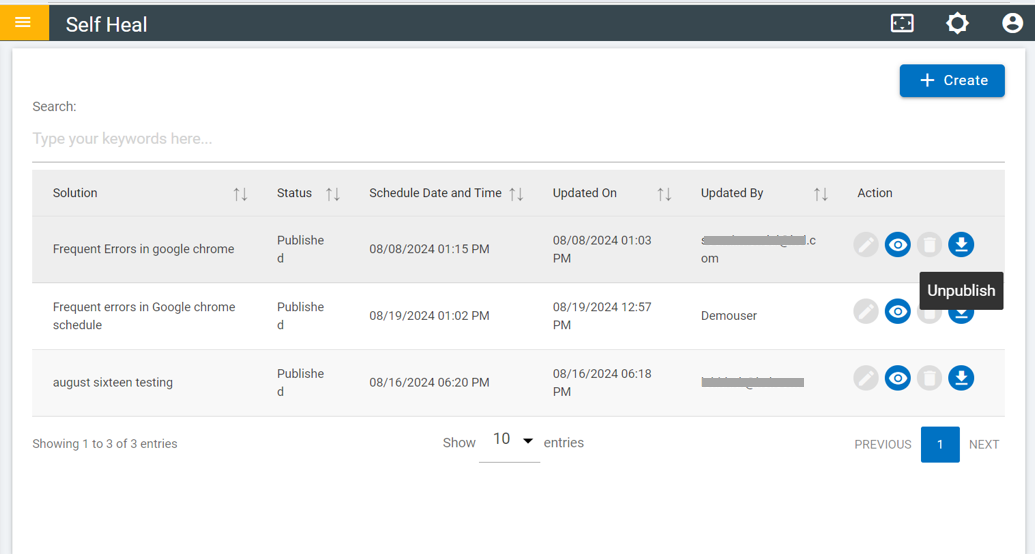
- After clicking the unpublish icon, a message will appear confirming that the
scheduled solution has been unpublished successfully.
Figure 4. Success Message 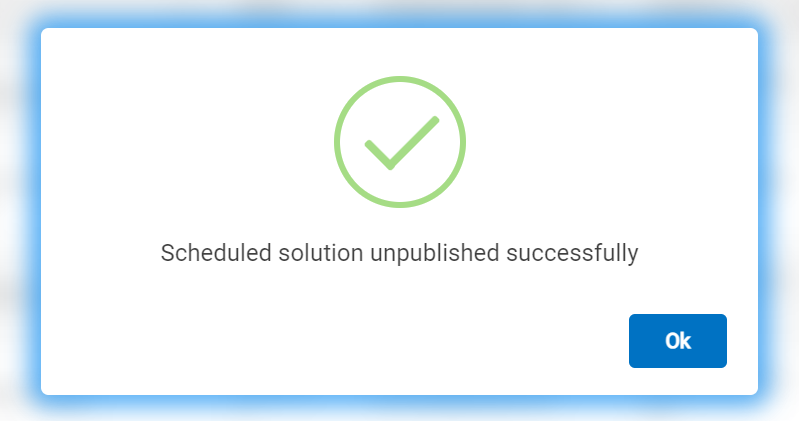
- After clicking "OK," the scheduled solution will Enable options for
"Publish" and "Delete" icons under the Actions column.
Figure 5. Enable Delete and Publish Icons 
- Click the delete icon to remove the unpublished solution.
Figure 6. Delete Solution 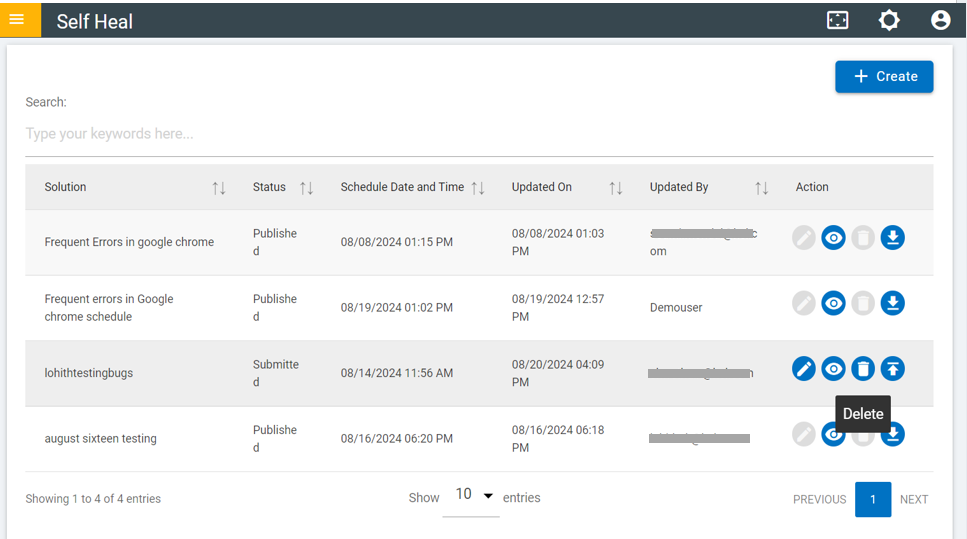
- Click OK to delete or click Cancel to cancel the delete action. On
clicking on the OK, the selected Scheduled solution is deleted from the list.
Figure 7. Confirmation Message 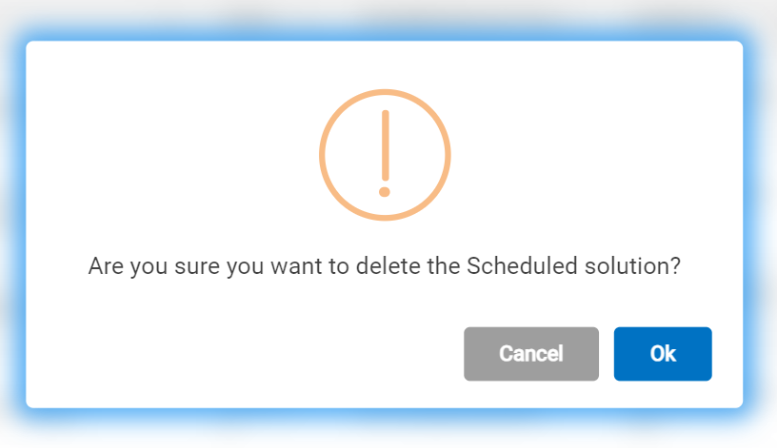
Figure 8. Success Message 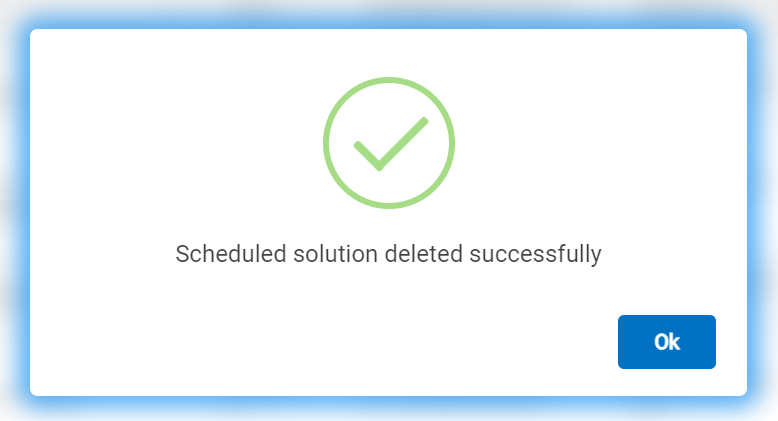
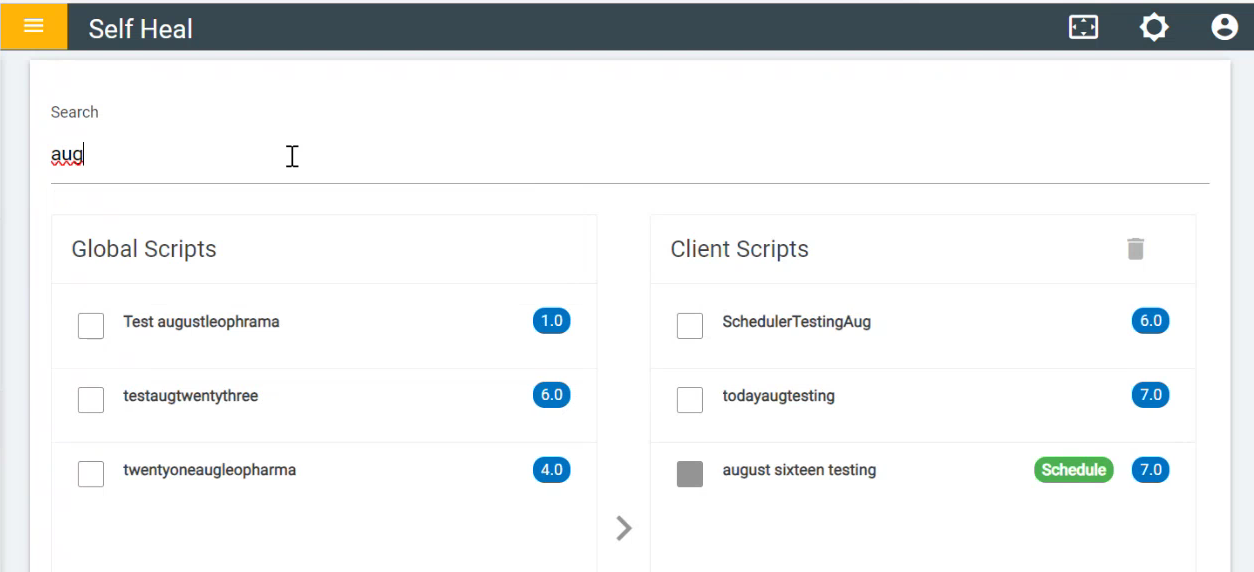
- If a solution is published in the scheduler sections, we cannot delete it from the
client scripts section because the checkbox is greyed out, and the solution will be marked
with a schedule tag.
Figure 9. Schedule tag on published solutions