Use case 1: HubSpot - Create Contacts API
This page talks about integrating HubSpot CRM to streamline customer engagement by syncing contact data effectively.
HubSpot CRM is a powerful tool businesses use for sales and marketing to ensure optimal customer interactions. It offers a range of APIs that facilitate data synchronization across platforms, enabling businesses to engage customers with relevant and timely information.
In this use case, we demonstrate how to:
- Configure HCL CDP's External API to integrate with HubSpot's Create Contact API.
- Pass contact data to HubSpot by setting up the integration at the global level payload, as the payload values remain consistent across all engagements.
Prerequisites
Make sure the following things are in place, before you proceed to configure and test the integration:
- API Documentation/Reference: Access the API documentation for HubSpot's Create Contact API here. This provides details on the endpoint, payload structure, and other configuration requirements.
- Valid Authorization Scheme and Keys:
- Ensure you have the necessary authorization credentials (keys, tokens, or passwords) based on your account type (free/paid) or your internal API implementation.
- Consult with your POC from the external vendor or your tech team to obtain and configure the appropriate authorization mechanism.
- API URL and Payload:
- Obtain the specific API endpoint URL and required payload structure from the HubSpot team after setting up your account.
- Ensure the payload matches the API documentation for successful configuration.
Configuring Hubspot - Create Contacts API
To configure HubSpot, follow the steps below:
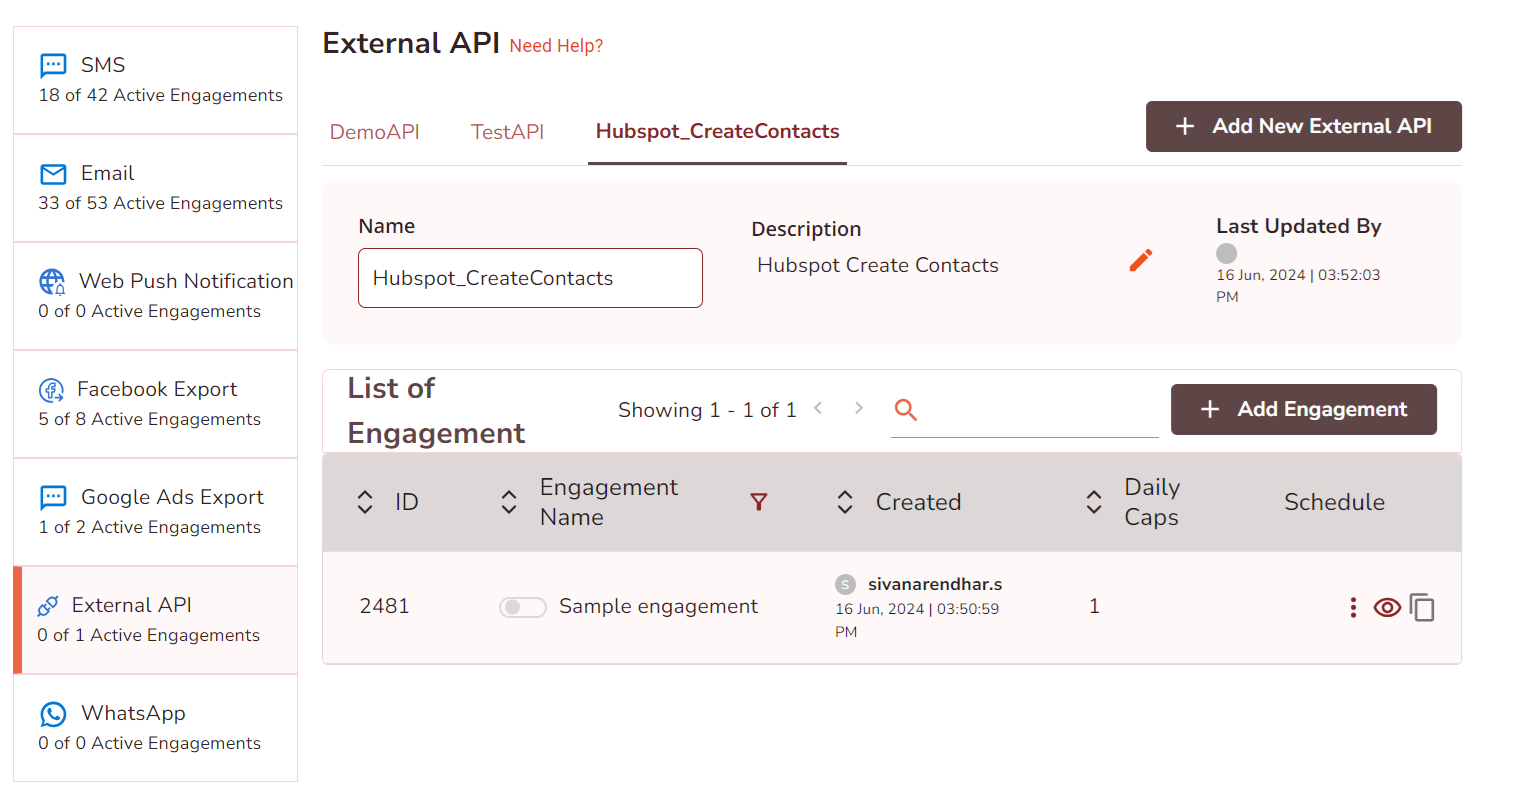
- Navigate to .
- Click +Add New External API , and Add Basic Details:
- Name: Enter the name for the configuration as Hubspot_CreateContacts.
- Description: Enter the description of your API.
- Channel: Select the email channel to communicate with your audience.
- Add External API Details
- HTTP Method: Here we select POST as the HTTP Method as the API is a post request to add contacts emails in the Hubspot database.
- URL: Paste the following API URL https://api.hubspot.com/crm/v3/objects/contacts. this API
URL is from the API reference doc.
- You can add parameters by creating variables at the end of the URL and declaring
value inside {{value}} double curly braces. Since the Hubspot API does not
contain any additional parameters, the window to configure the parameter will
not appear.
-
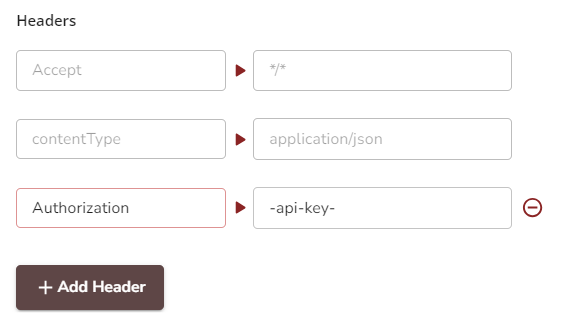
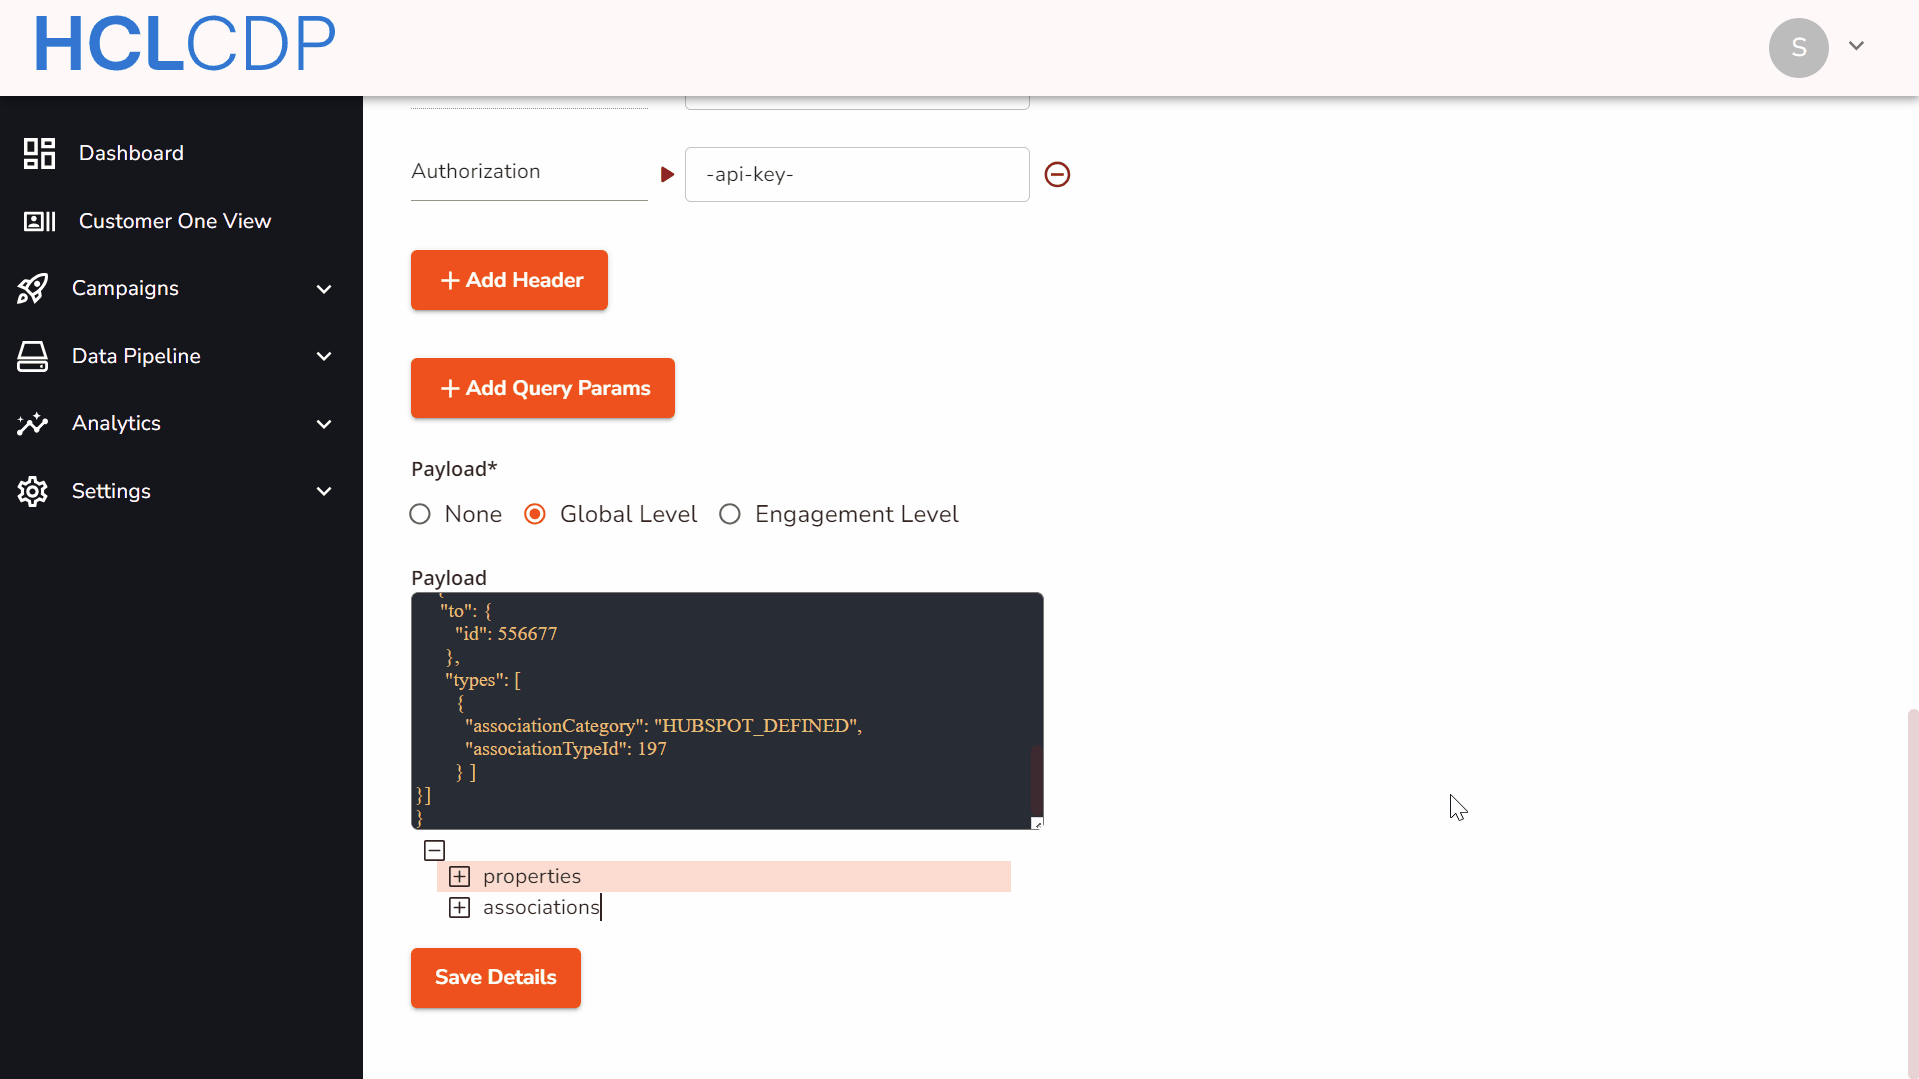
Headers: Add Headers to provide the metadata about the request. Here we add the authorization and API key in the headers to authenticate the API. The API key will be provided by the Hubspot team.
- Payload: Paste the payload in the black code edit screen as shown
below. Here we set the payload at the global level as the API contains
the value which remains the same for all the engagements.
(Payload from the API reference doc)
{
  "properties": {
    "email": "example@hubspot.com",
    "firstname": "Jane",
    "lastname": "Doe",
    "phone": "(555) 555-5555",
    "company": "HubSpot",
    "website": "hubspot.com",
    "lifecyclestage": "marketingqualifiedlead"
  },
"associations": [
    {
     "to": {
        "id": 123456
      },
      "types": [
        {
          "associationCategory": "HUBSPOT_DEFINED",
          "associationTypeId": 279
        } ]
    },
    {
     "to": {
        "id": 556677
      },
      "types": [
        {
          "associationCategory": "HUBSPOT_DEFINED",
          "associationTypeId": 197
        } ]
}]
}
( Payload from the API reference doc)
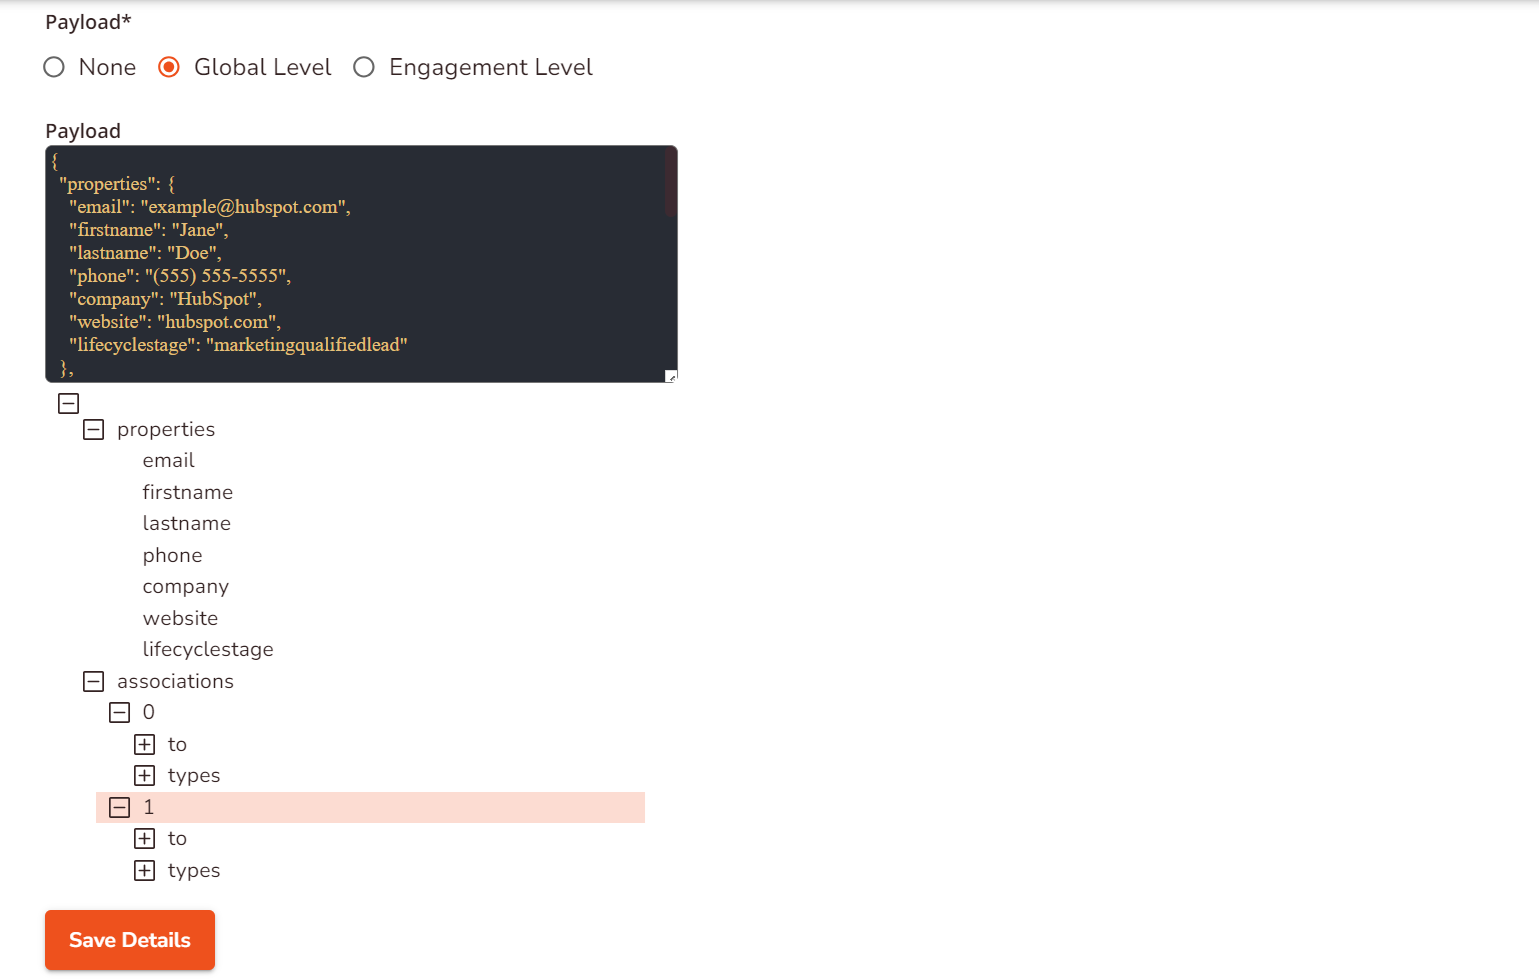
Click the Payload value and enter the values and display names in the given fields as shown below. The display name will be shown on the UI as the variable alias when you're creating engagements for the configured API.
- Default Value: The default value will be assigned to the parameter if the value is not provided by the user, or in the case of Macro when the system fails to replace it with a value.
- Optional Field: You can set the field to be optional or to be
mandatory by using the optional field and by assigning a condition to
the optional field. Here we set the field as mandatory. For more about
optional and its conditions, click External API.
-
- After configuring all the fields, click Save Details.
Create engagement in Hubspot Create Contacts API
You can create engagement for Hubspot create contacts API either from Segments or Channels.
Create an Engagement from Segments
To create an engagement from segments, follow the steps below:
- Navigate to .
- Select the Segment Name, and on the left panel, click External API.
- Click +Add Engagement.
Create an Engagement from Channels
To create an engagement from segments, follow the steps below:
- Navigate to .
- On the left panel, click External API.
- Click Add Engagement, and select Segment Name from the list.
- Click Confirm And Proceed To the Next Step.
Add General details
- Engagement Name (mandatory): Enter a name for the Engagement. It should range between 6-25 characters.
- API(mandatory): Select the API as "Hubspot Create Contact".
- Label (mandatory): Choose a product label from the list. For more information about product labels, refer here.
Add a Goal
Goal Type: Select a goal type from the list. You can set it to none if the goal is not decided yet.
Configure Parameters
URL path parameters: This will be updated automatically based on the URL you configured while adding the external API. The parameters will be displayed here as you configured in the payload at a global level.

Schedule Settings
You can schedule an engagement to trigger immediately or to send later by configuring the Time and Date. Here we have selected the schedule as immediate.
Save
Click Save.