
IVR v.5 Fixlets and Tasks
Learn about the Fixlets and Tasks that install and uninstall the BigFix IVR Retriever for IVR v.5.
About this task
The BigFix Insights for Vulnerability Remediation site provides two Tasks:
- Download BigFix IVR Retriever v5.0.0.0: installs the IVR Retriever service on the target computer.
- Uninstall BigFix IVR Retriever v5: removes the IVR Retriever service and its components from the target computer.
Important:
Before you run either Task, close
all Command Prompt windows, files, folders, and applications on the target
computer. Open handles cause file-locking conflicts.
Before you begin
About this task
Procedure
-
Enable the BigFix Integrated Vulnerability
Remediation site.
In the BigFix Console, open the BigFix License Overview dashboard, and then, in the Compliance/Lifecycle panel, select Enable for the BigFix Integrated Vulnerability Remediation site. See License Overview dashboard.
Figure 1. BigFix License Overview dashboard 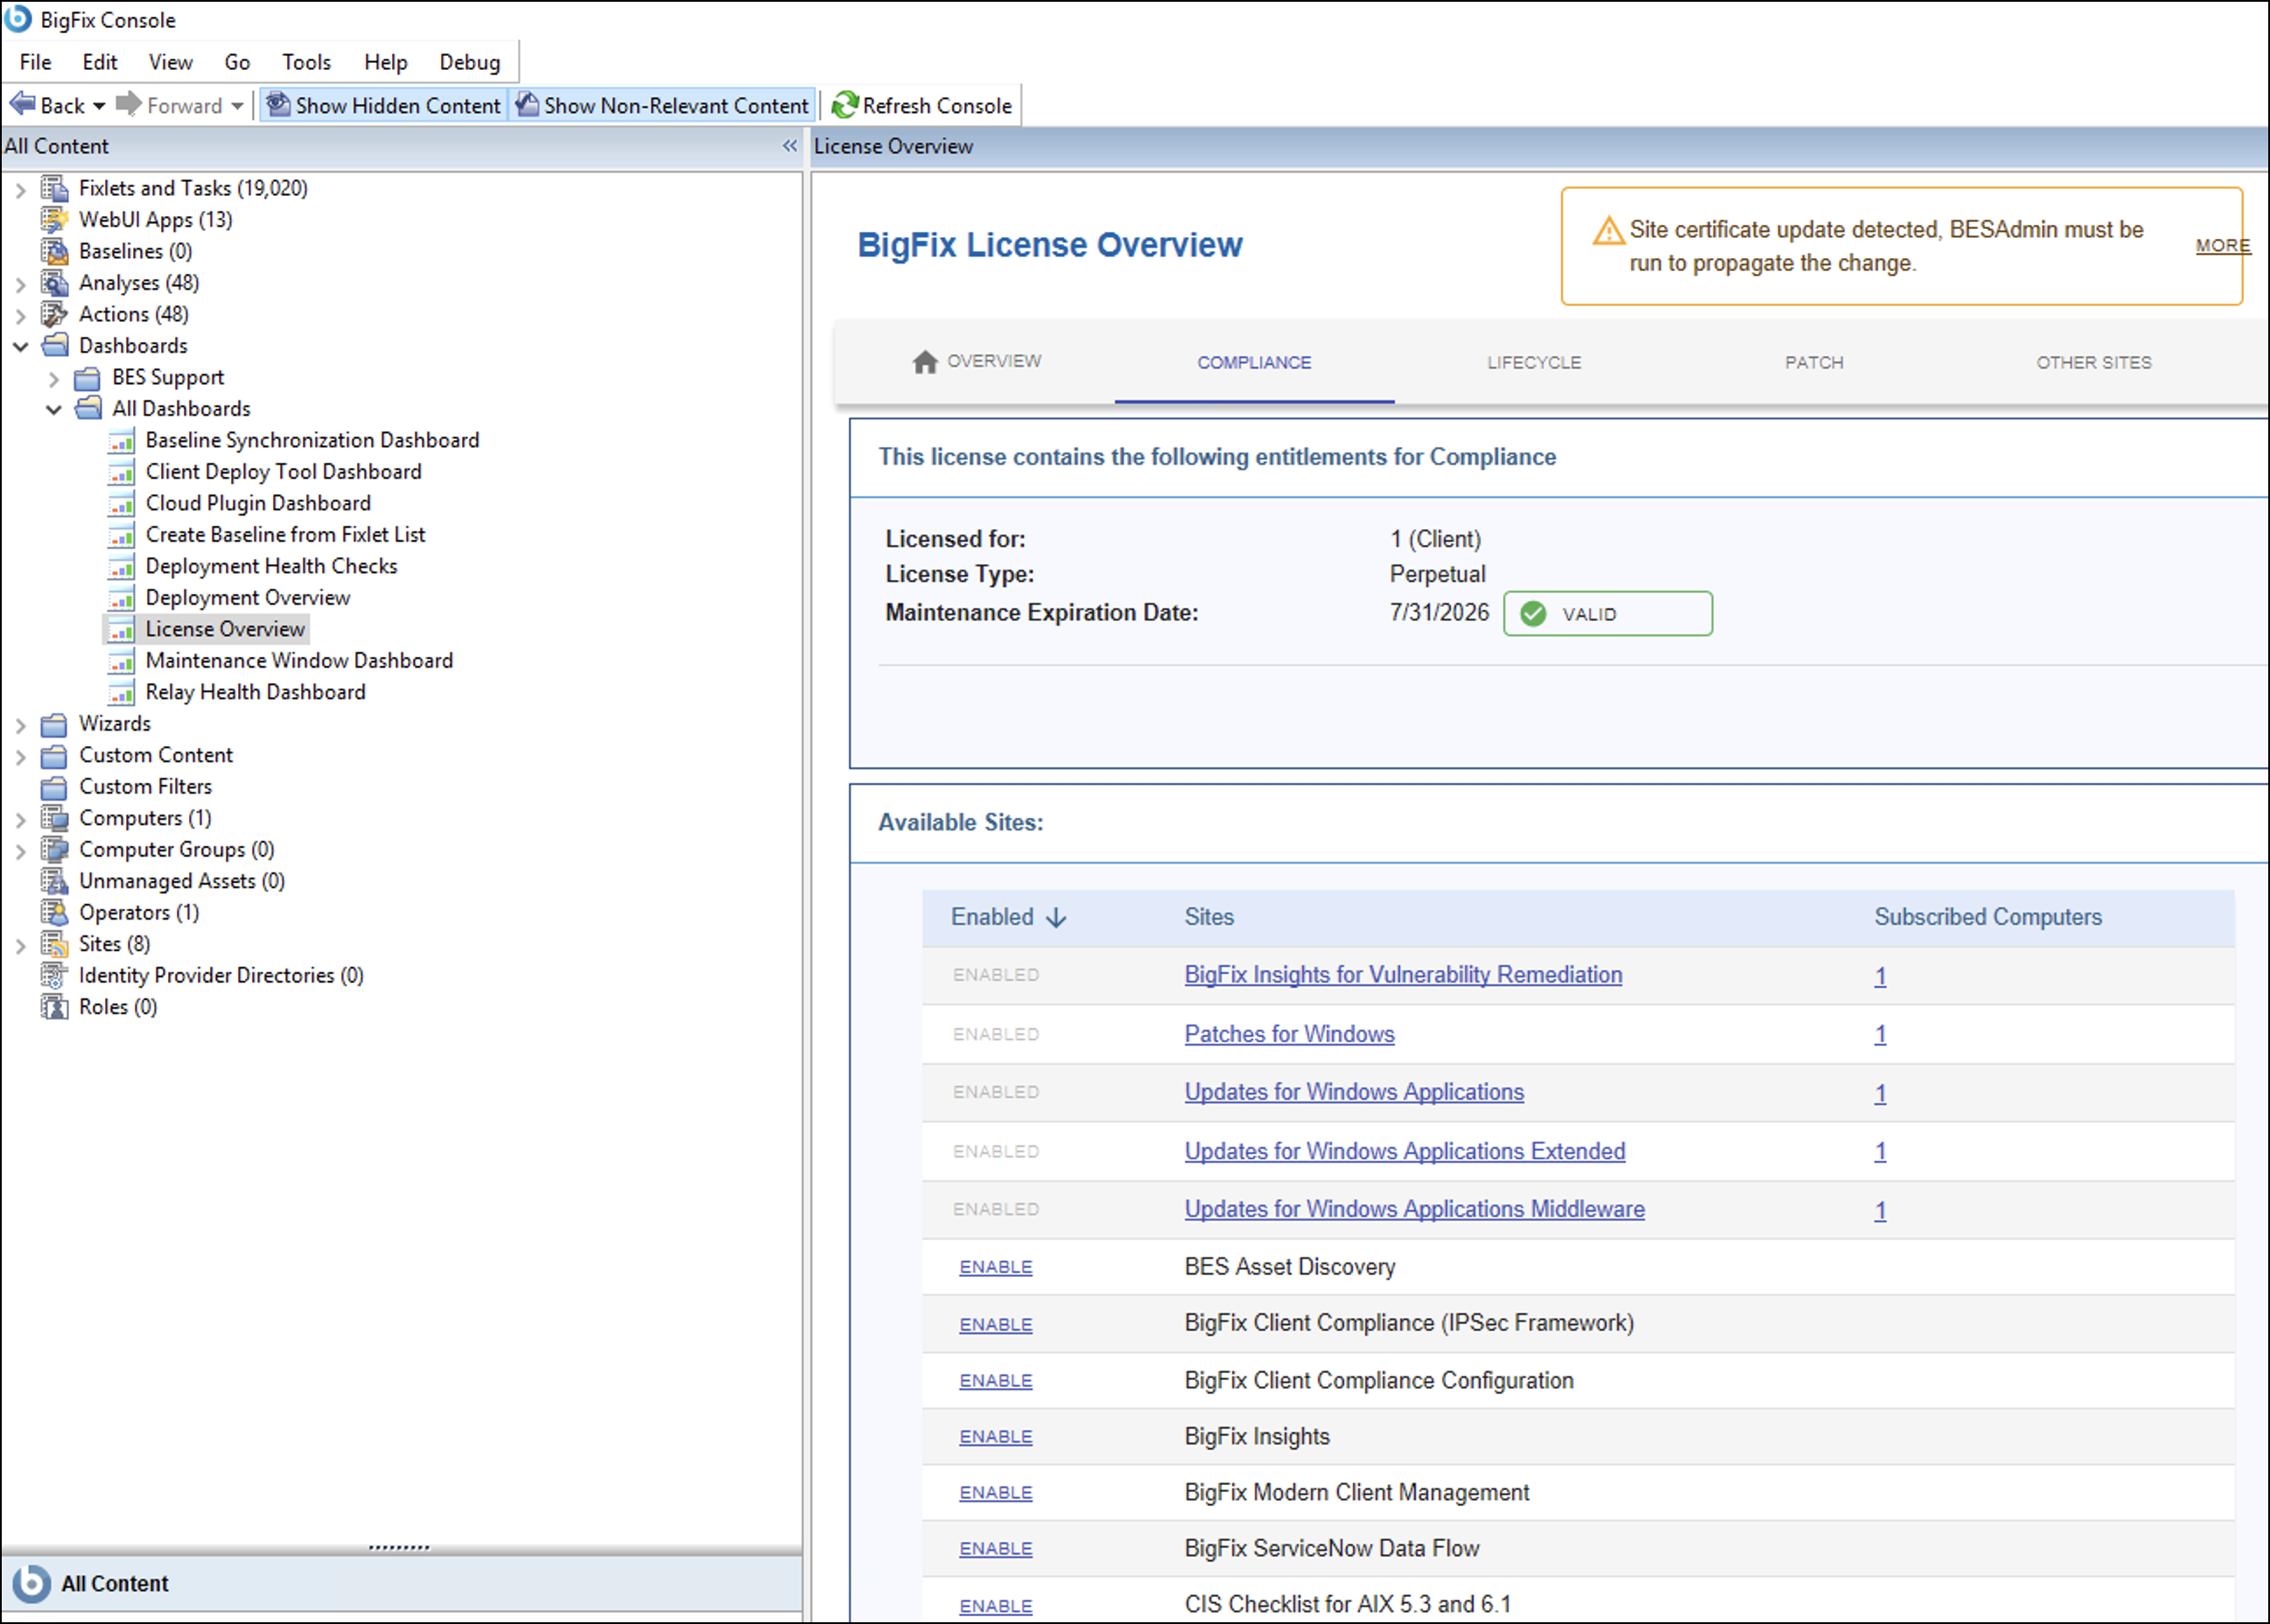
-
Subscribe computers to the site.
We recommend that you subscribe All computers. See Restricting Computers (site Computer Subscriptions tab).
-
Confirm that the site is gathered.
Under Sites > External Sites, check that the site version is greater than 0. Until the version is greater than 0, IVR doesn't appear in the BigFix UI.
-
Activate the IVR Vulnerability Scanner Host ID
analysis globally.
IVR uses this analysis to collect the asset data that correlates scanner assets with BigFix devices. Until you activate it, IVR can't match Tenable findings to your devices.
-
Click Activate, and make sure that it is
activated globally.
Figure 2. BigFix Console Analyses list for the BigFix Insights for Vulnerability Remediation site, with the IVR Vulnerability Scanner Host ID analysis selected, status Not Activated, and the Activate button highlighted 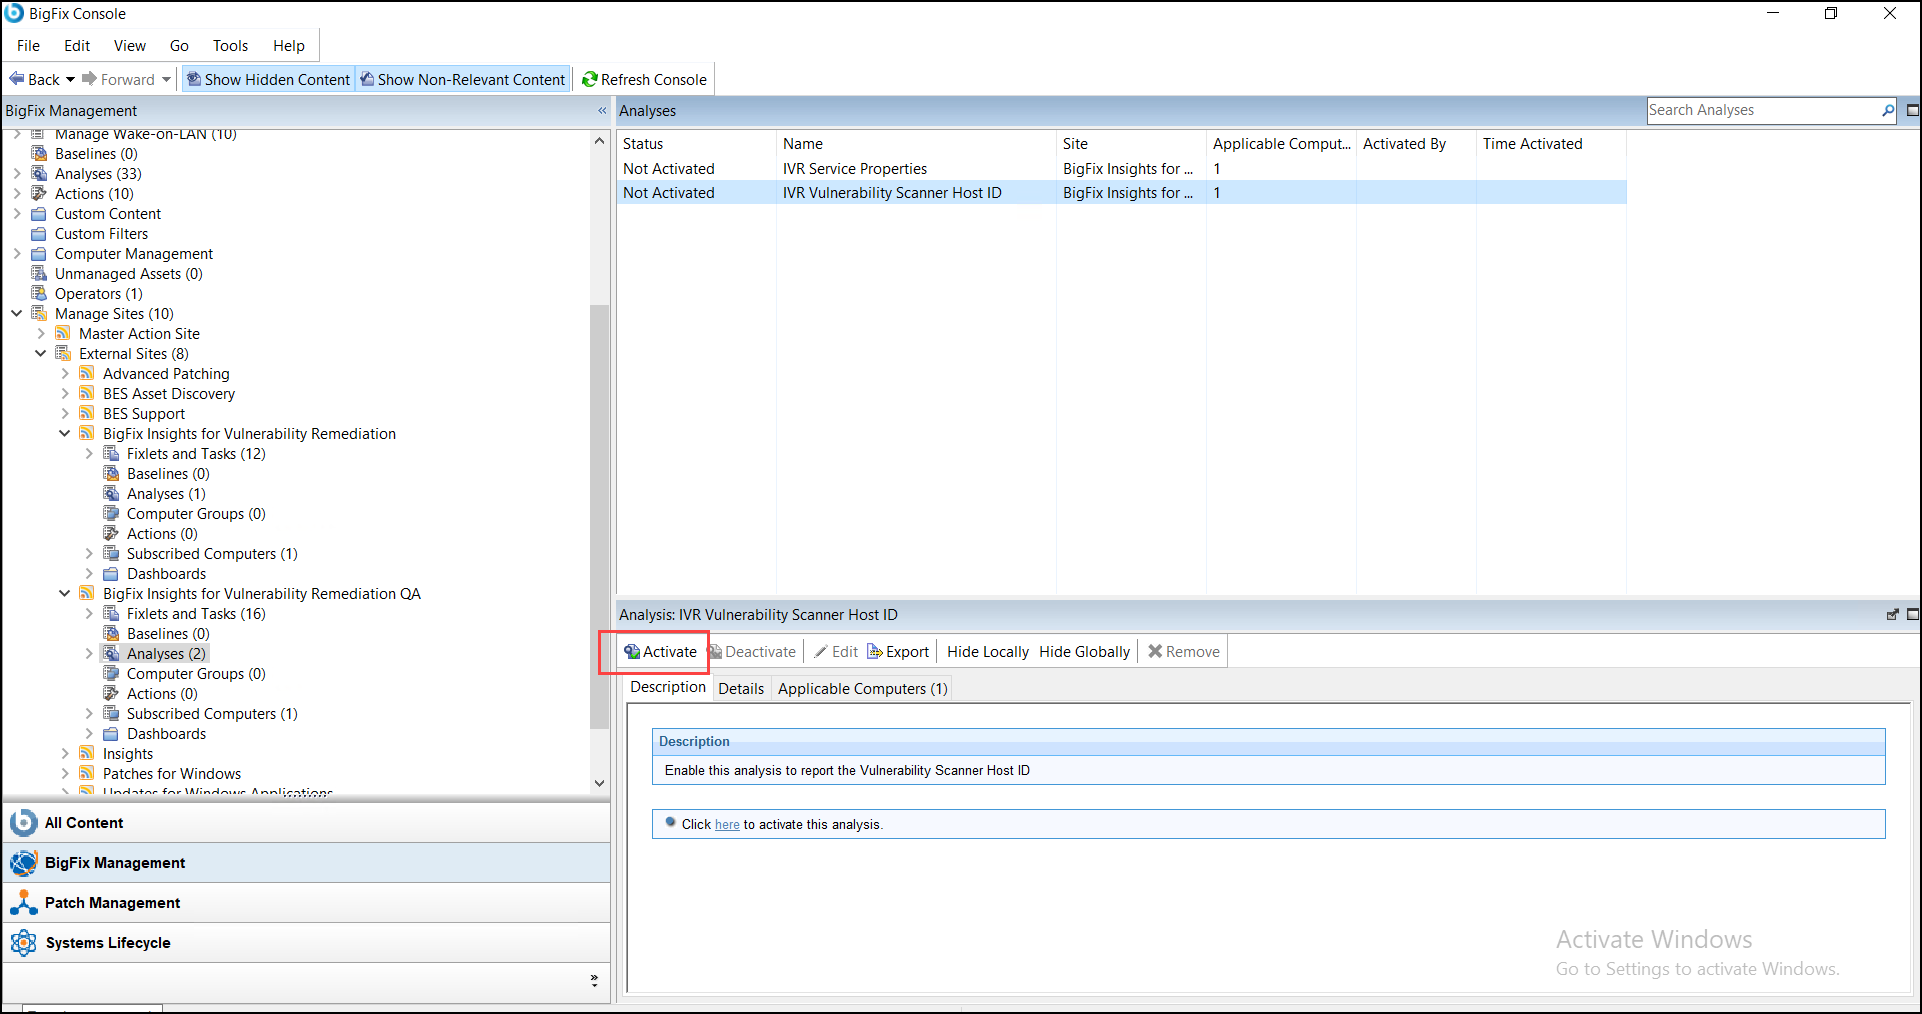
-
Click Activate, and make sure that it is
activated globally.
- Confirm that the target computer (the IVR host) runs the BigFix Client, is subscribed to the site, and meets the system requirements.
Install the BigFix IVR Retriever
About this task
Procedure
-
In the BigFix Console, go to BigFix Insights for
Vulnerability Remediation > Fixlets and
Tasks, and then select Download BigFix IVR
Retriever v5.0.0.0.
Figure 3. BigFix Console showing the BigFix Insights for Vulnerability Remediation site, Fixlets and Tasks list, with Download BigFix IVR Retriever v5.0.0.0 selected 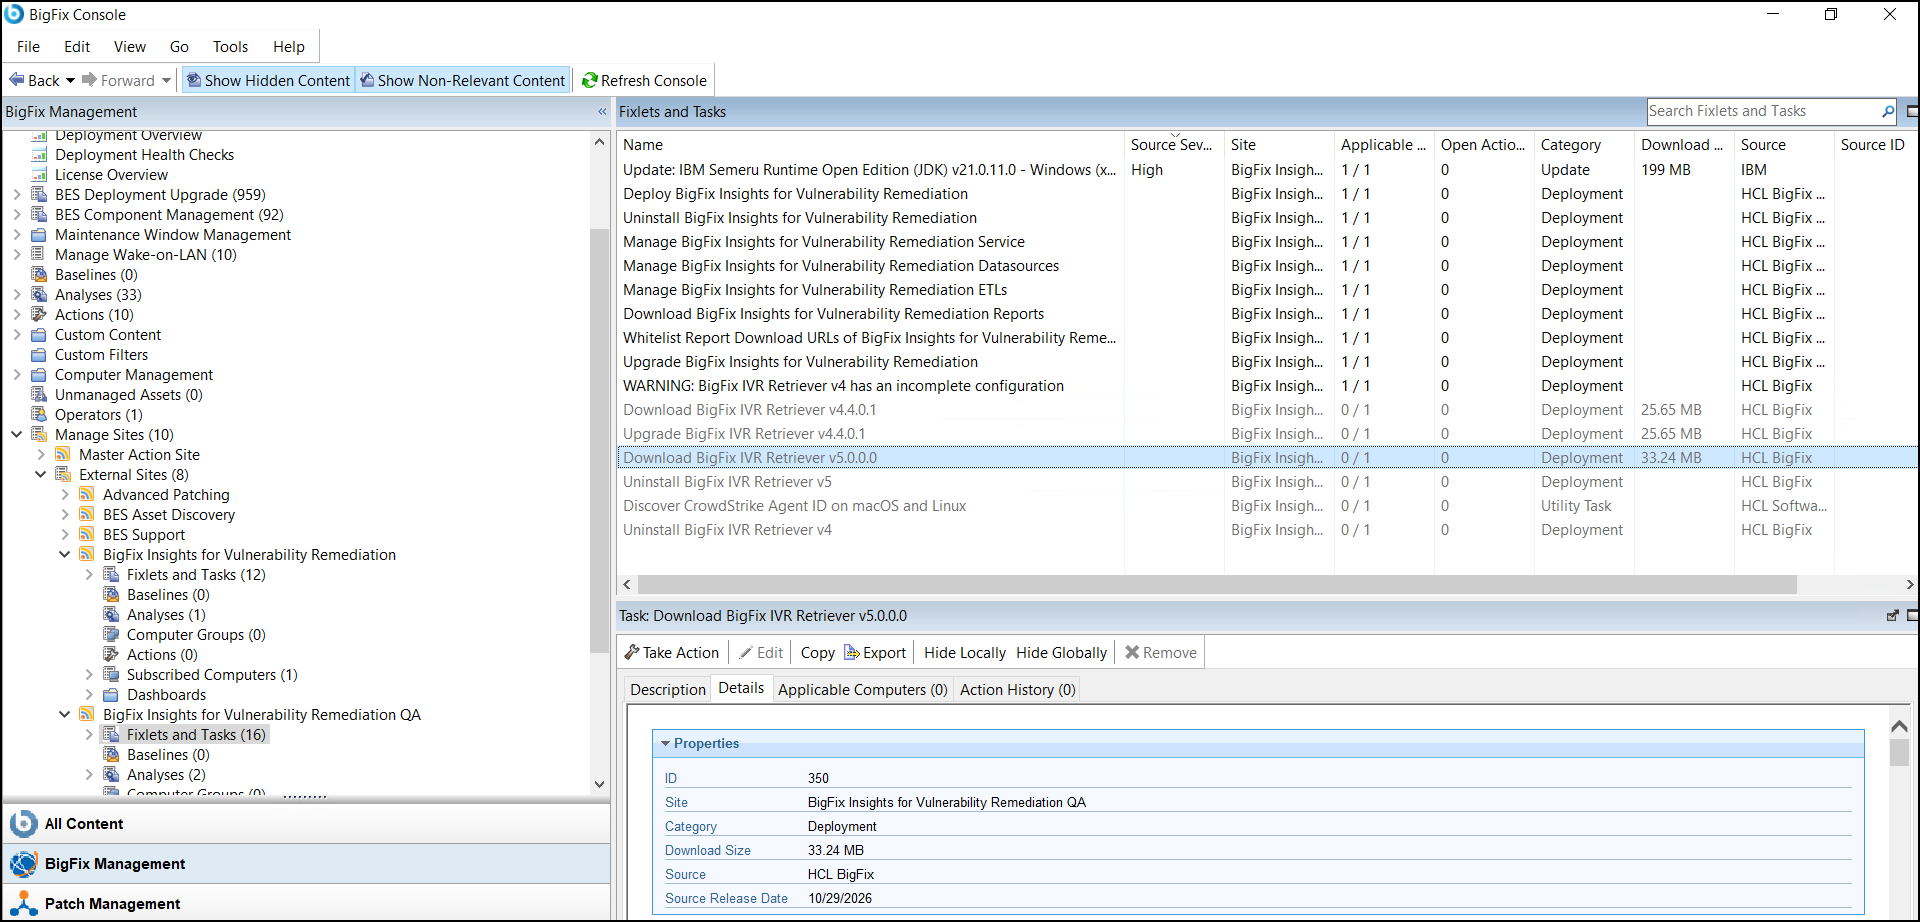
-
On the Description tab, under
Deployment Options, set the following
fields.
Field Description Vulnerability Management Platform Select Tenable. IVR v.5 supports Tenable only. Installation Path for BigFix IVR Retriever The folder where the IVR Retriever is installed. The default is C:\Program Files (x86)\BigFix Enterprise\BESIvrRetriever. -
Under Configure IVR User Credentials, enter a
Username, a Password,
and the same password again in Confirm Password.
Important:Record the IVR user credentials in your password vault. You enter them as the IVR Admin Username and IVR Admin Password when you register IVR with the BigFix UI.
Figure 4. Download BigFix IVR Retriever v5.0.0.0 Description tab showing Deployment Options and Configure IVR User Credentials 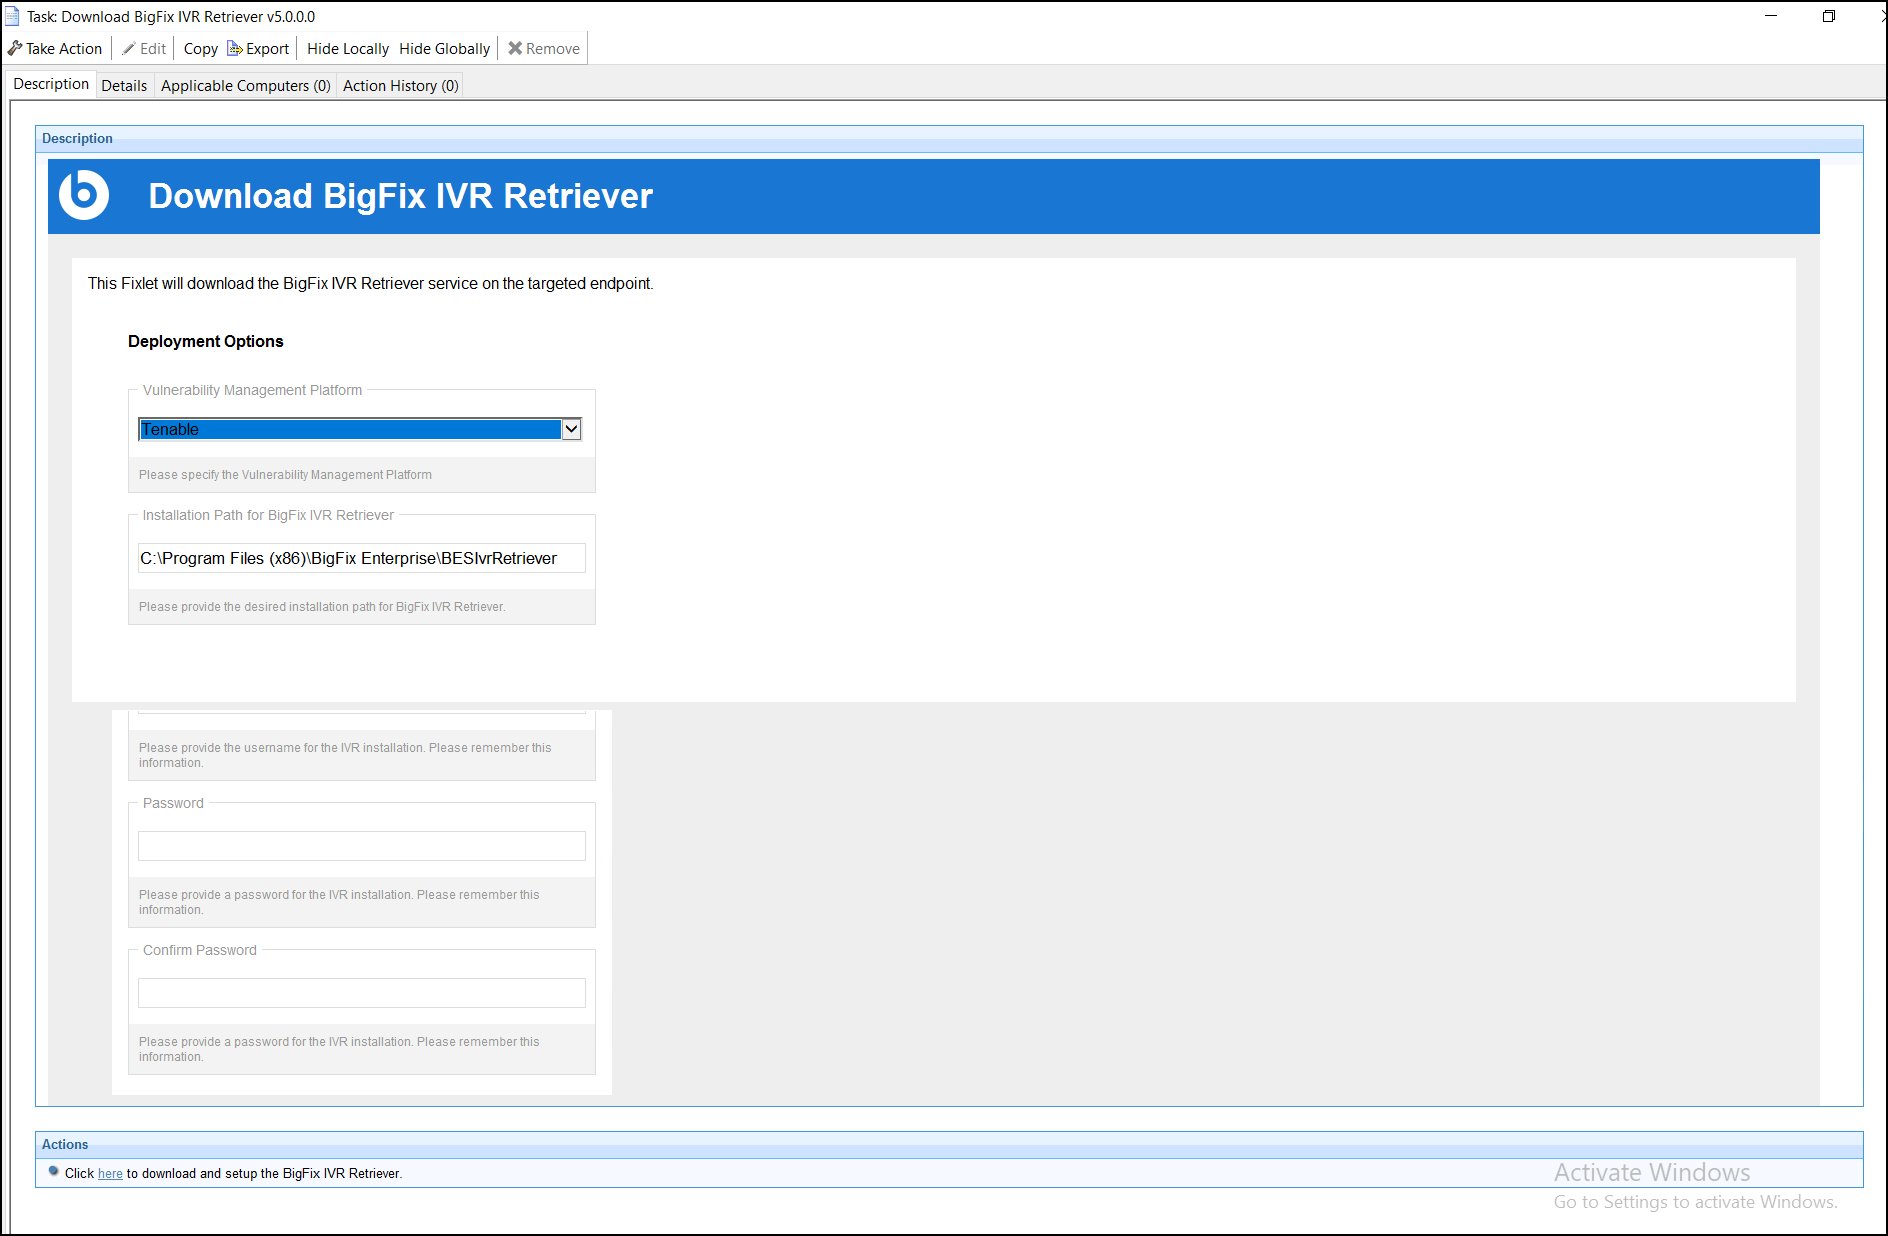
-
Click Take Action.
Note:It can take 2-3 minutes for the target computer to appear in the Applicable Computers list.
-
On the Target tab of the Take
Action dialog box, select the computer where you want to
install IVR, and then click OK.
Figure 5. Take Action dialog box, Target tab, with one applicable computer selected 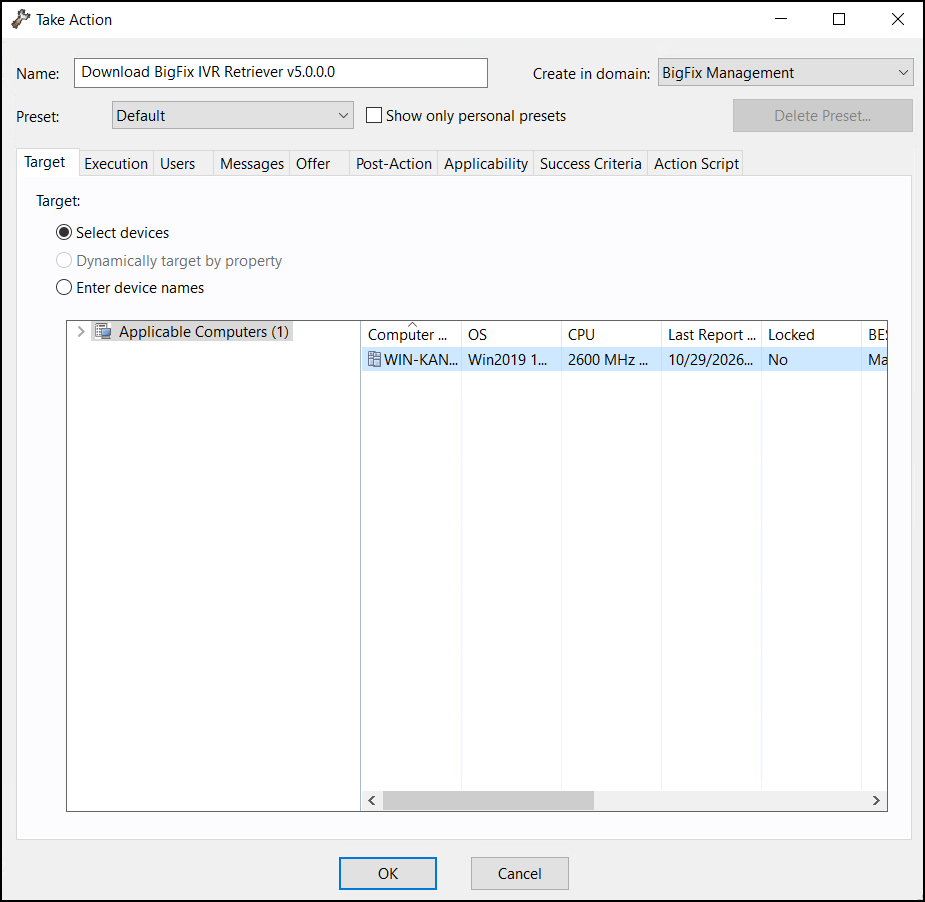
- Wait for the action status to change to Completed.
Results
- On the action Summary tab, the status shows
100.00% Completed, and the download status shows
Complete.
Figure 6. Action Summary tab showing 100.00% Completed and the download file status Complete 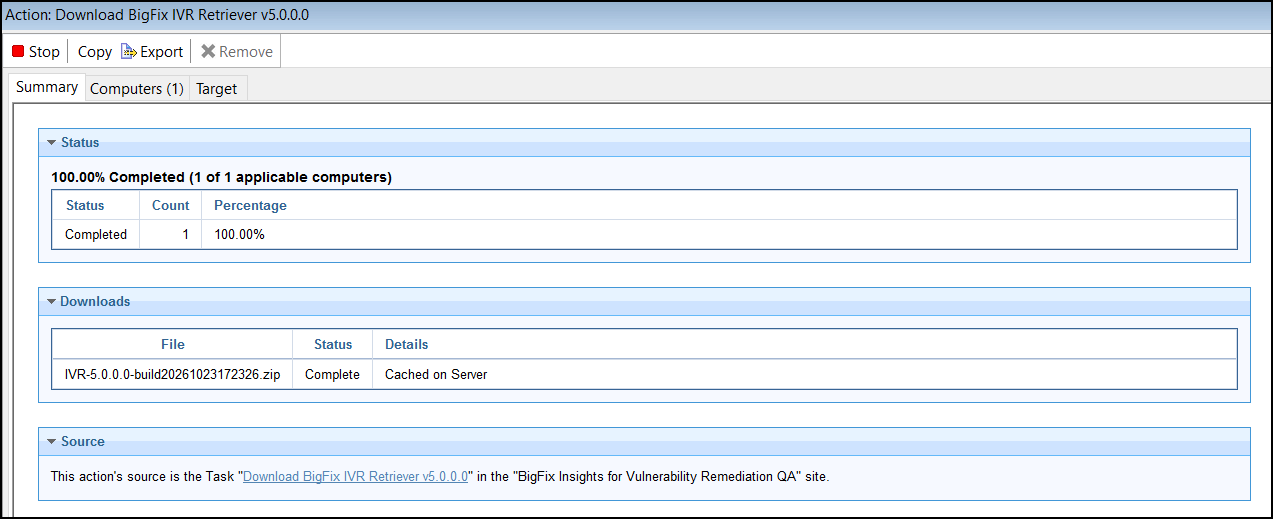
- The BESIvrRetriever folder exists in the installation path that you set.
- The BES IVR Retriever Service appears in Windows Services with status Running, and starts automatically. You don't need to start it manually.
What to do next
Uninstall the BigFix IVR Retriever
About this task
CAUTION:
Uninstallation can't be
undone. Back up your BigFix IVR Retriever installation and its configuration
before you start. Without a valid backup, you can't recover the previous
installation or configuration.
Procedure
-
In the BigFix Console, go to BigFix Insights for Vulnerability
Remediation > Fixlets and Tasks,
and then select Uninstall BigFix IVR Retriever
v5.
Figure 7. Uninstall BigFix IVR Retriever v5 Descripxtion tab showing the backup warning and the Actions box 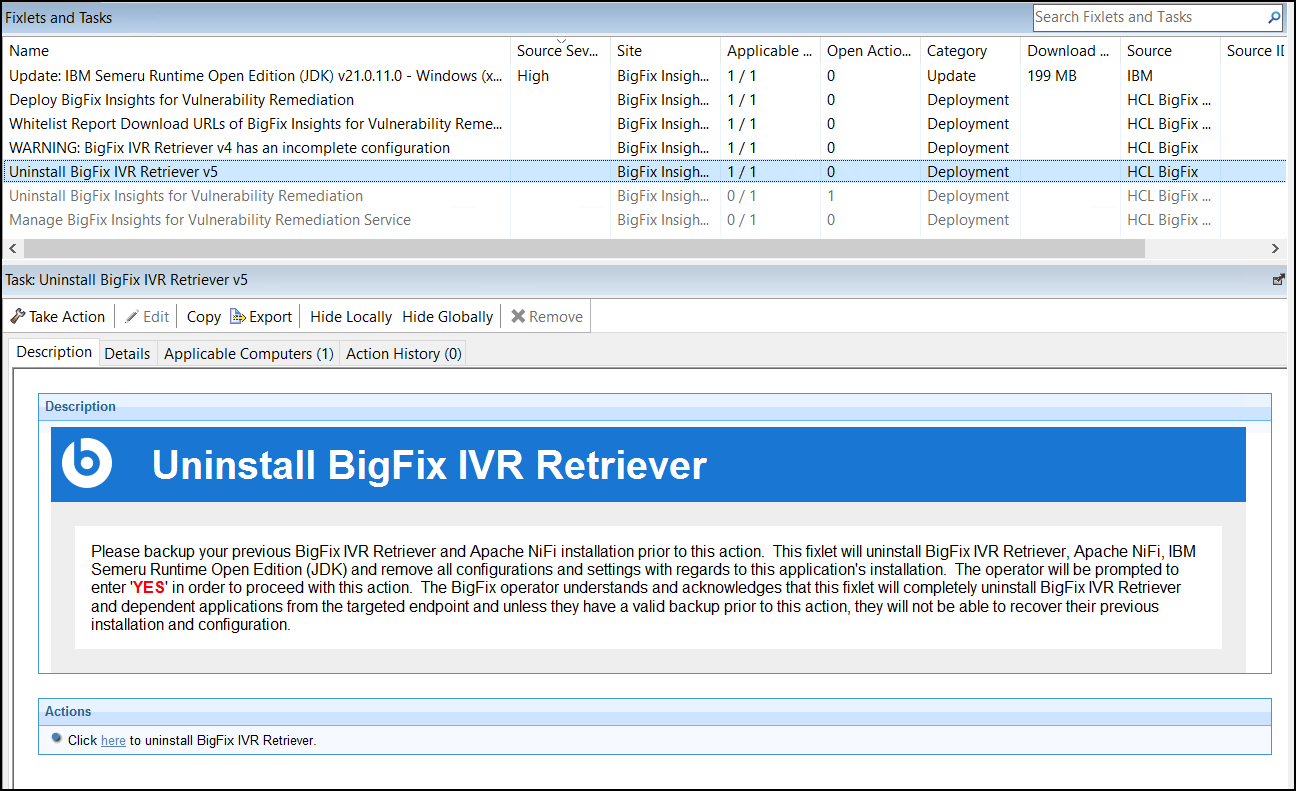
- Review the Description, and then click Take Action, or click here in the Actions box.
- Select the computer where IVR is installed, and then click OK.
- When you are prompted, type YES, and then click OK.
- Wait for the action status to change to Completed.
Results
- The BESIvrRetriever folder is removed from the installation path.
- The BES IVR Retriever Service is removed from Windows Services.