Add an SSP
This page explains how to add an SSP on the HCL CDP platform.
HCL CDP allows you to add an SMS vendor directly on the platform, reducing integration time and enabling faster campaign launches. This feature lets marketers configure external API based SMS vendors simply by entering authorization keys.
Pre-requisites
Make sure the following things are in place:
- The vendor's API that works with HTTP POST Method and JSON payload.
- The authentication mechanism and credentials should be a static key and not a refresh key.
Configuration procedures
- To set up an SMS vendor, map two configuration values: "To" and "Message Body." These two fields vary at the engagement level.
- Assign authorization keys, senderID (if present), sender number, and other essential global constants in the appropriate places in the API. Configure these usually in the URL parameters or header parameters.
- To configure a field at the engagement level, enter the variable name in curly braces {{variable_name}}. You may also provide an alias as the display name.
- A default value is optional but recommended when the value does not change frequently. This value displays for those parameters when creating engagements. You may also assign a Macro value to fields by type.
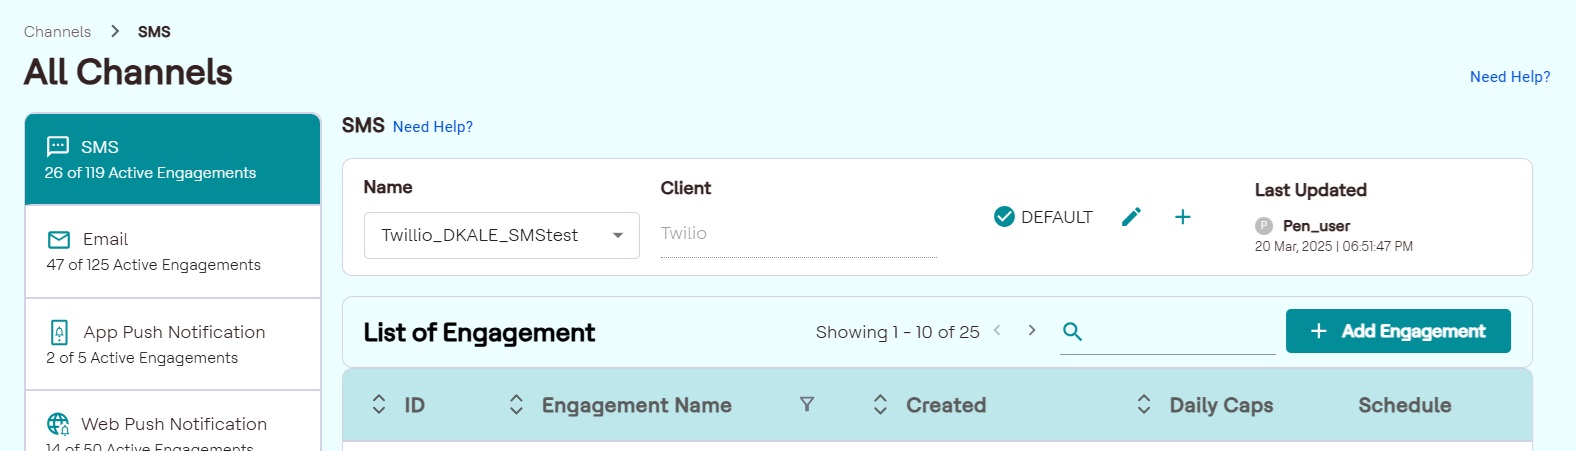
Setup new SMS client
- Navigate to Channels > SMS.
- Click the "+" icon in the top row of the window.
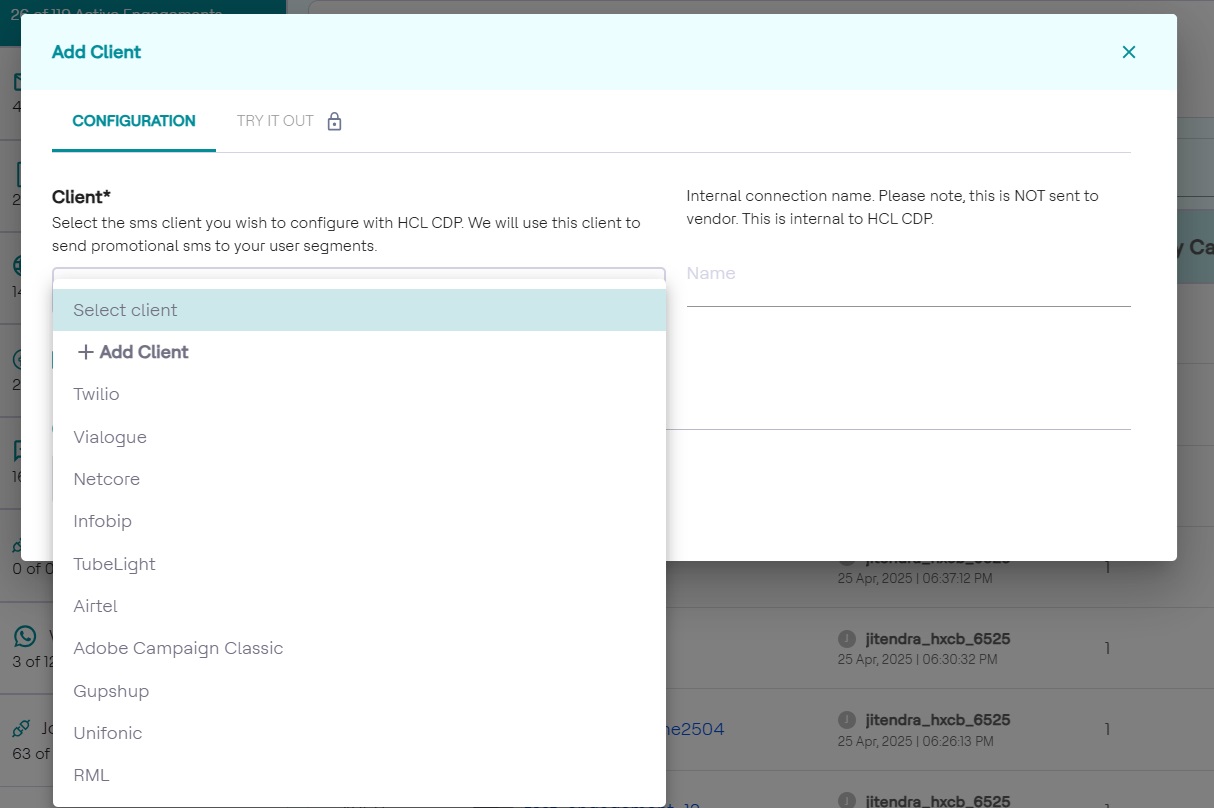
- In the Client* drop-down list, select + Add client from the list of clients.
- In the Name of Client field, enter the name of the custom client.
- In the Name of Configuration field, enter the name your configuration
in the given input box.
Configure SMS client using External API
To configure the custom SMS client, follow the steps below:
- In the BASIC DETAILS section, in the Name textbox, enter name of the configuration, and in the Description field, enter the description for the new SMS client.
- In the API Details section, set up the Vendor API in the same way as
you set up an External API with a global
payload.
HTTP Method: Select the HTTP method as POST
API URL: Provide the API URL.

- Click +detect from URL. As a result, the following window will be
displayed as shown below.
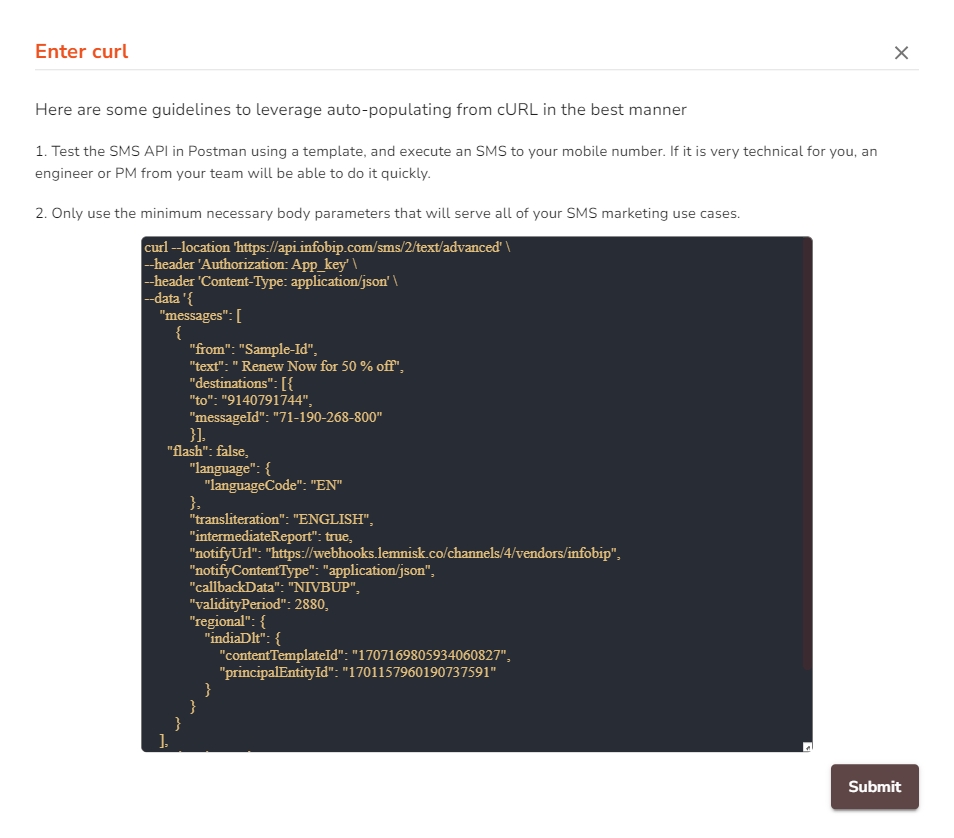
- In the Enter Curl textbox, include the curl command to automatically fetch headers and payload from an API and populate them into relevant fields. This command assumes that you have an API endpoint to retrieve the data in JSON format and that the API requires an authorization token.
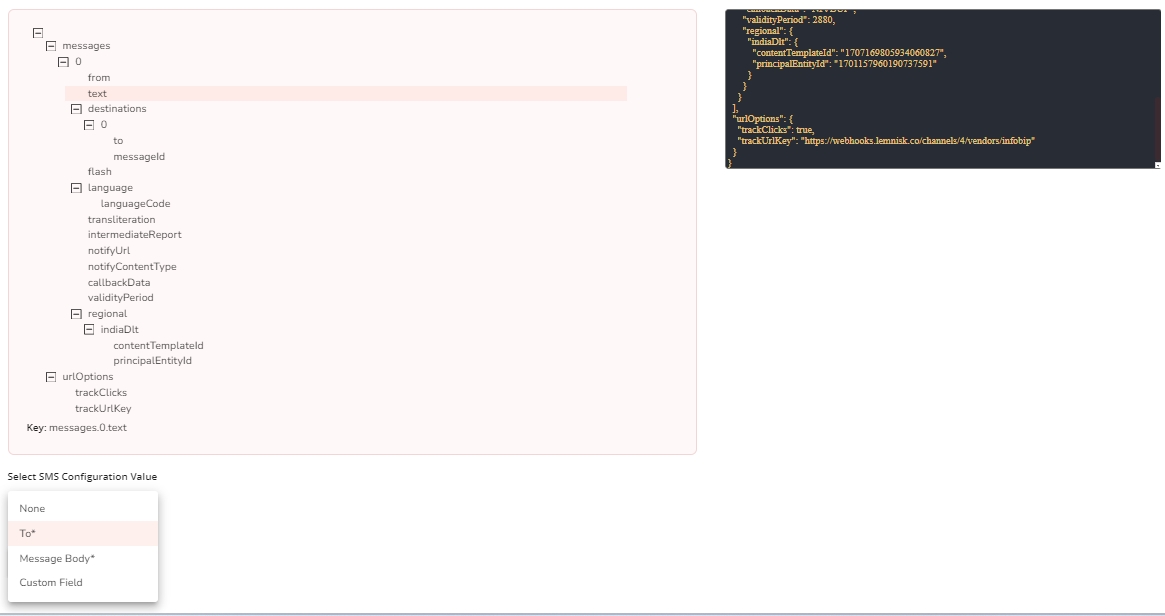
- Now, select the SMS Configuration fields and map the mandatory values To*
and Message Body* to the appropriate keys in the API Body.
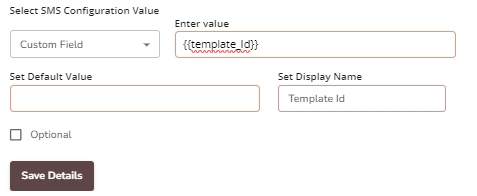
- In the Custom Field, add custom values by assigning variables in
curly braces {{Example}} and mapping it to the Curl. For example, the vendor
expects the Template ID to be passed in the API request. This shall be a
mandatory field, configured with the 'Custom Field' mapping.
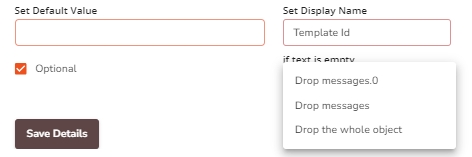
- Select the Optional field checkbox to assign the variable to be
optional and apply conditions from the following. Click here to learn more about optional
fields.
Test API
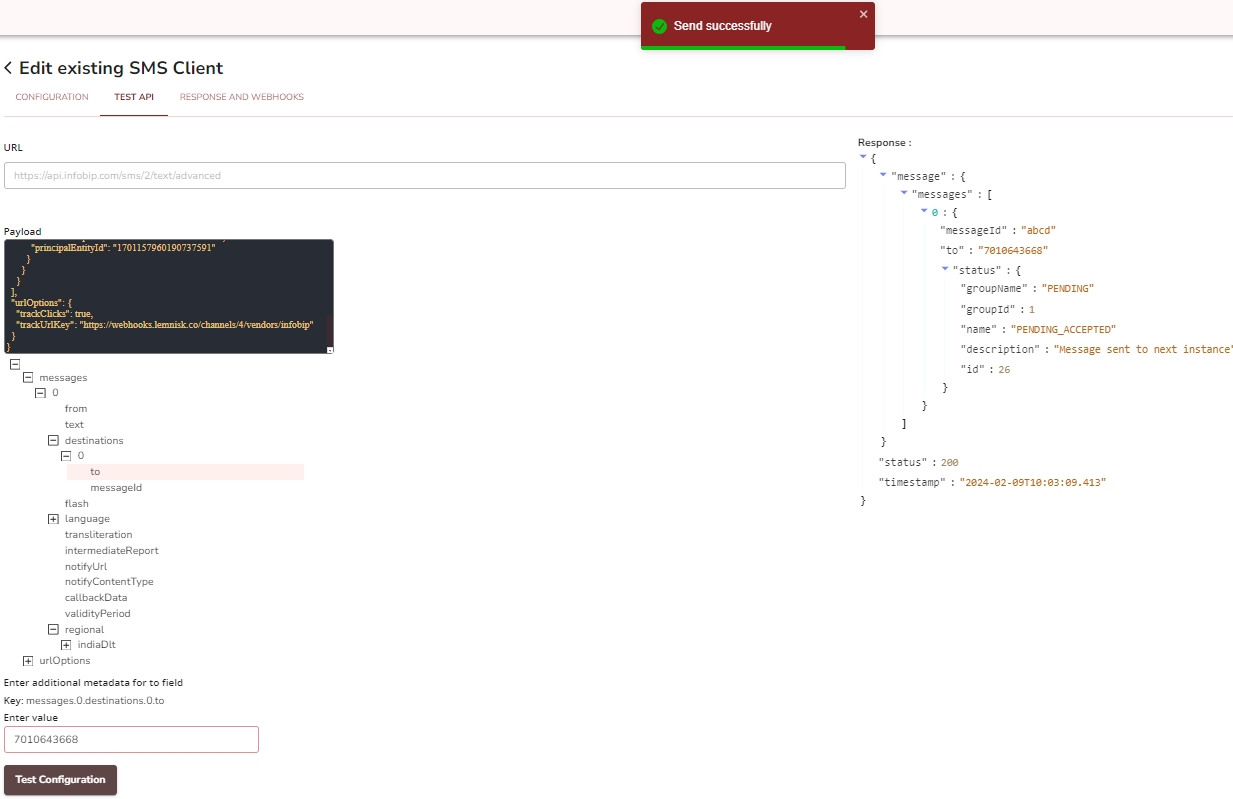
- Navigate to the Test API tab.
- Assign values to the payload and click Test Configuration.
- On successful configuration, you will receive the confirmation as shown below.
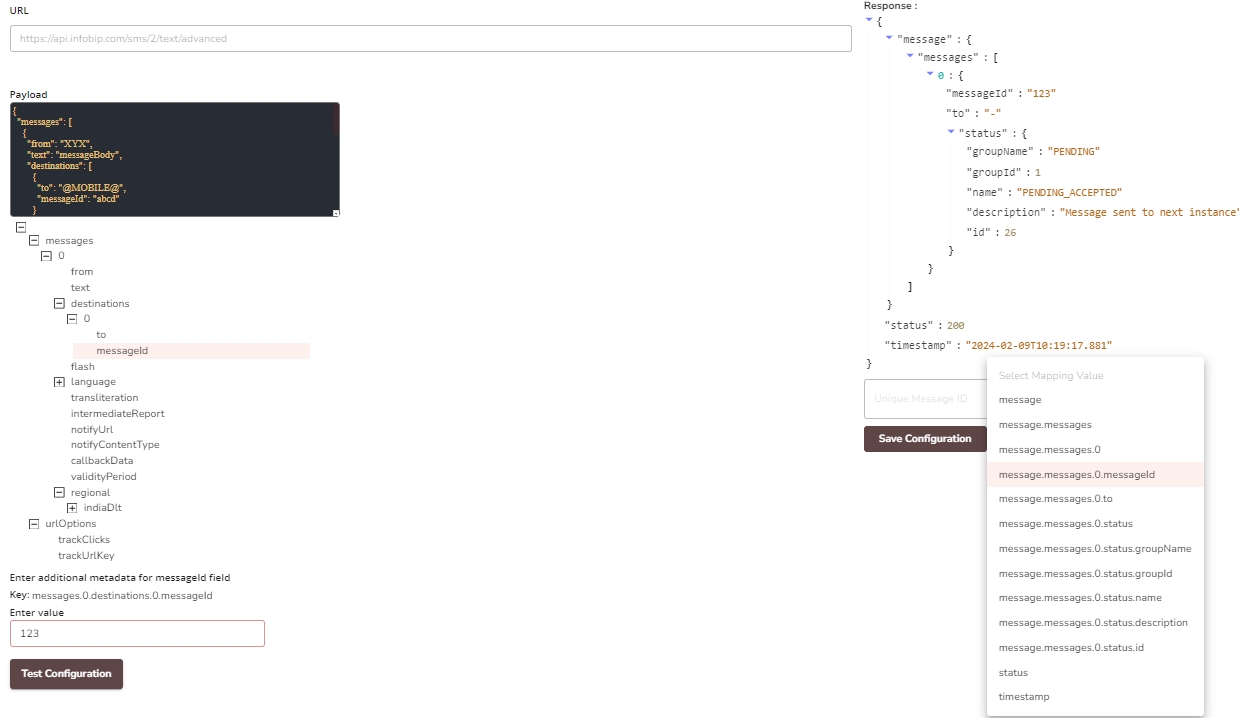
Response and Webhooks
The response and Webhooks screen is where you map the relevant path of the response body to the internal "MessageID" identifier. This mapping allows HCL CDP to identify each message trigger and track delivery reports.
- Navigate to Response and Webhooks, and enter values to the payload.
- Click Test Configuration. On successful validation, you will receive the confirmation.
- Select the mapping key to map the Unique message ID.