Facebook Export Channel
This page explains how to configure and use the Facebook Export Channel in the Customer Data Platform (CDP). It provides step-by-step instructions for exporting audience data to Facebook, including setting up the integration, selecting audiences, and managing the data synchronization process.
The Facebook Export Channel enables clients to create segments on the HCL CDP UI and export them in real-time to their respective business managers.
Set up Facebook Export Channel
Set up through Access Token
To enable Facebook Export as a channel, please provide the following details to HCL CDP:
- Access Token
- Ad Account ID
Follow below steps to generate and manage access tokens:
Access Token
To generate the System User's Access Token, you need a Business Type App.
If you already have a Business Type App, proceed directly to the steps for generating the System User's Access Token. Otherwise, follow the instructions below to create an app first.
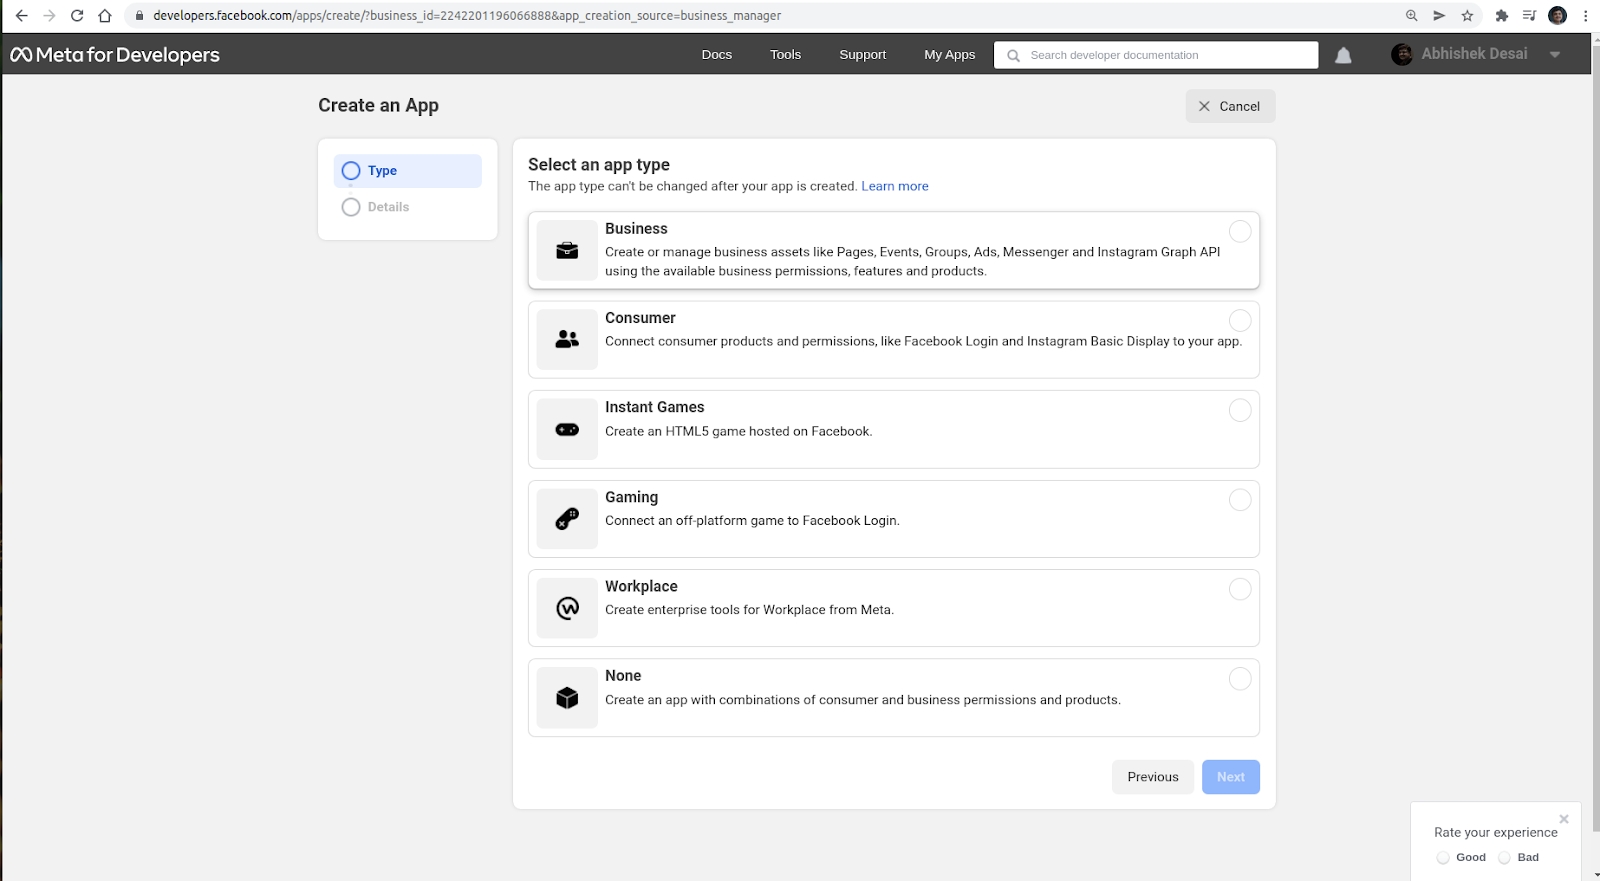
Create an APP
- On the Facebook Business Manager, navigate to .
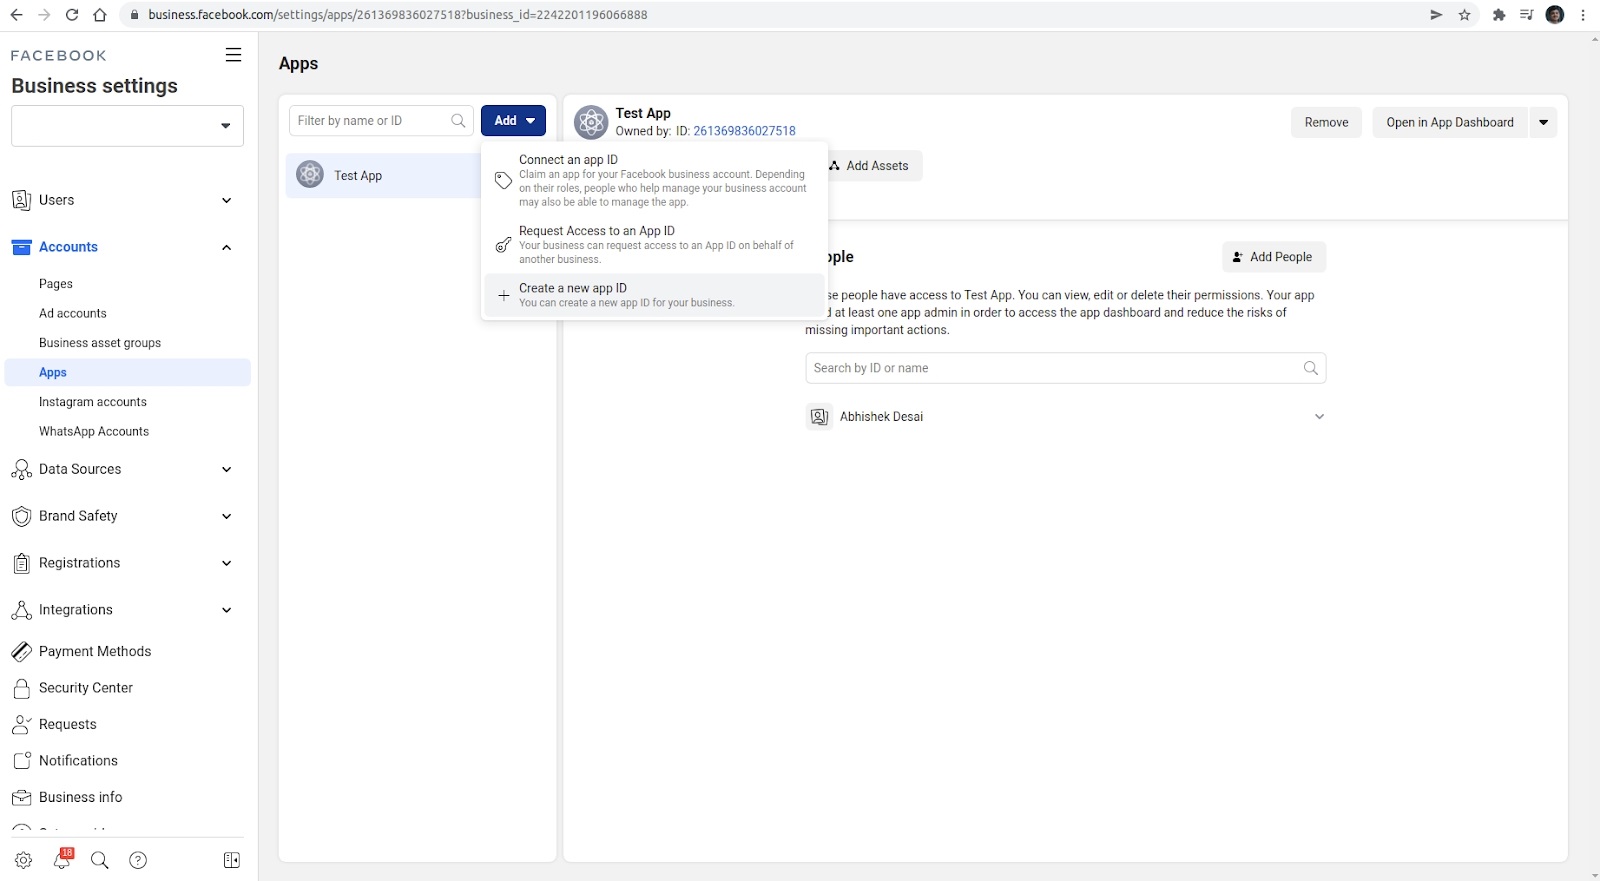
- Select Business as the App Type, and click Next.
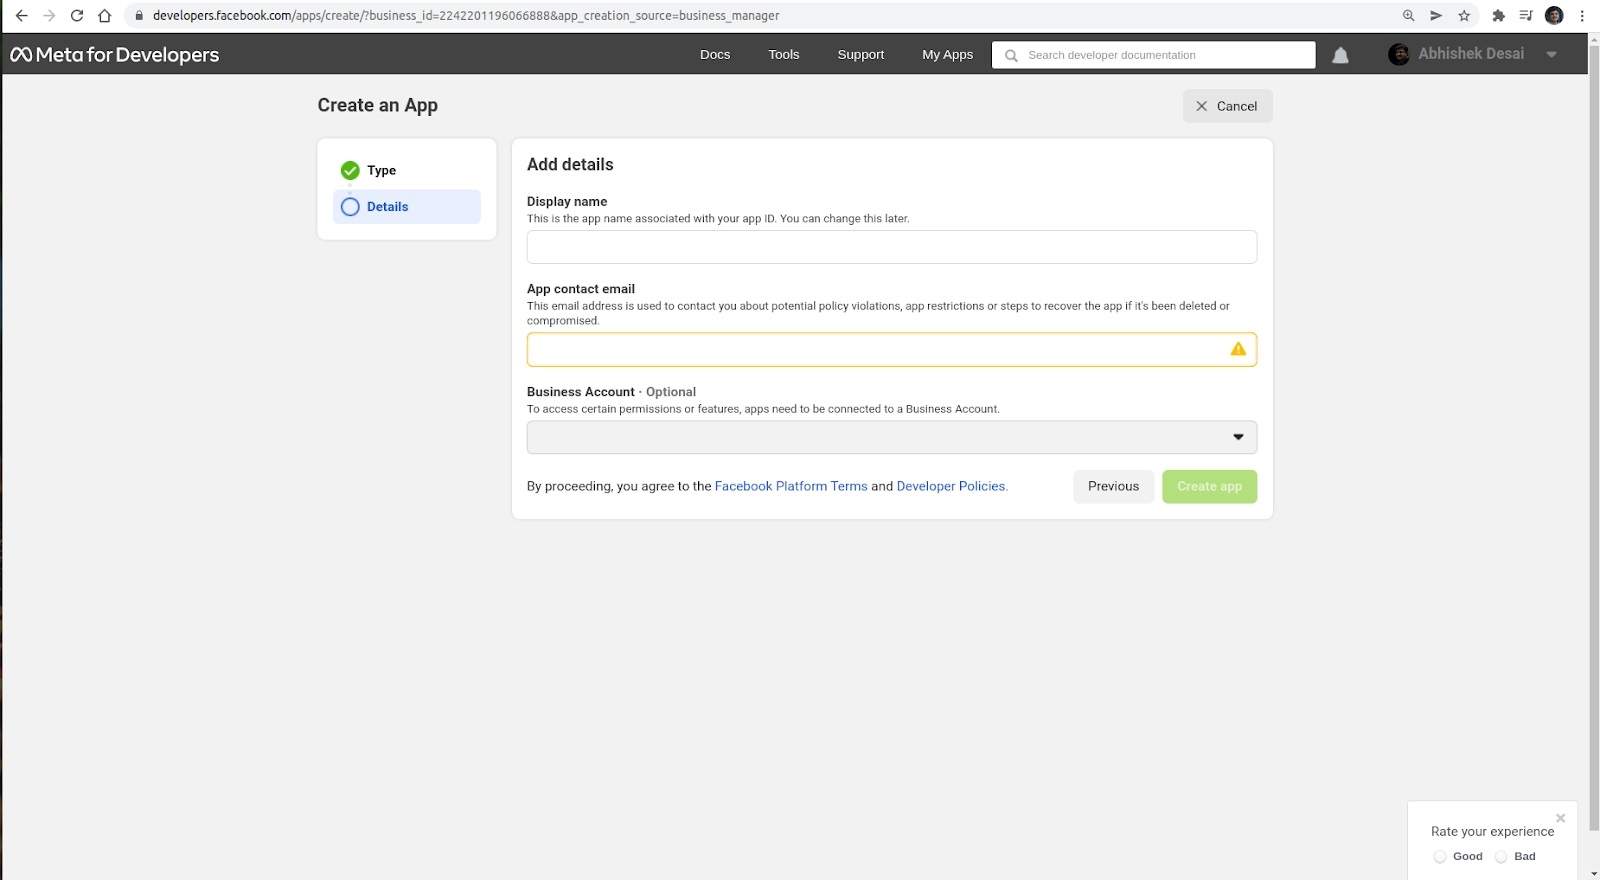
- Provide the appropriate DisplayName, and App
contact email, and click Create App.
The next step is to create a System User. If you already have one, skip directly to the generate access token.
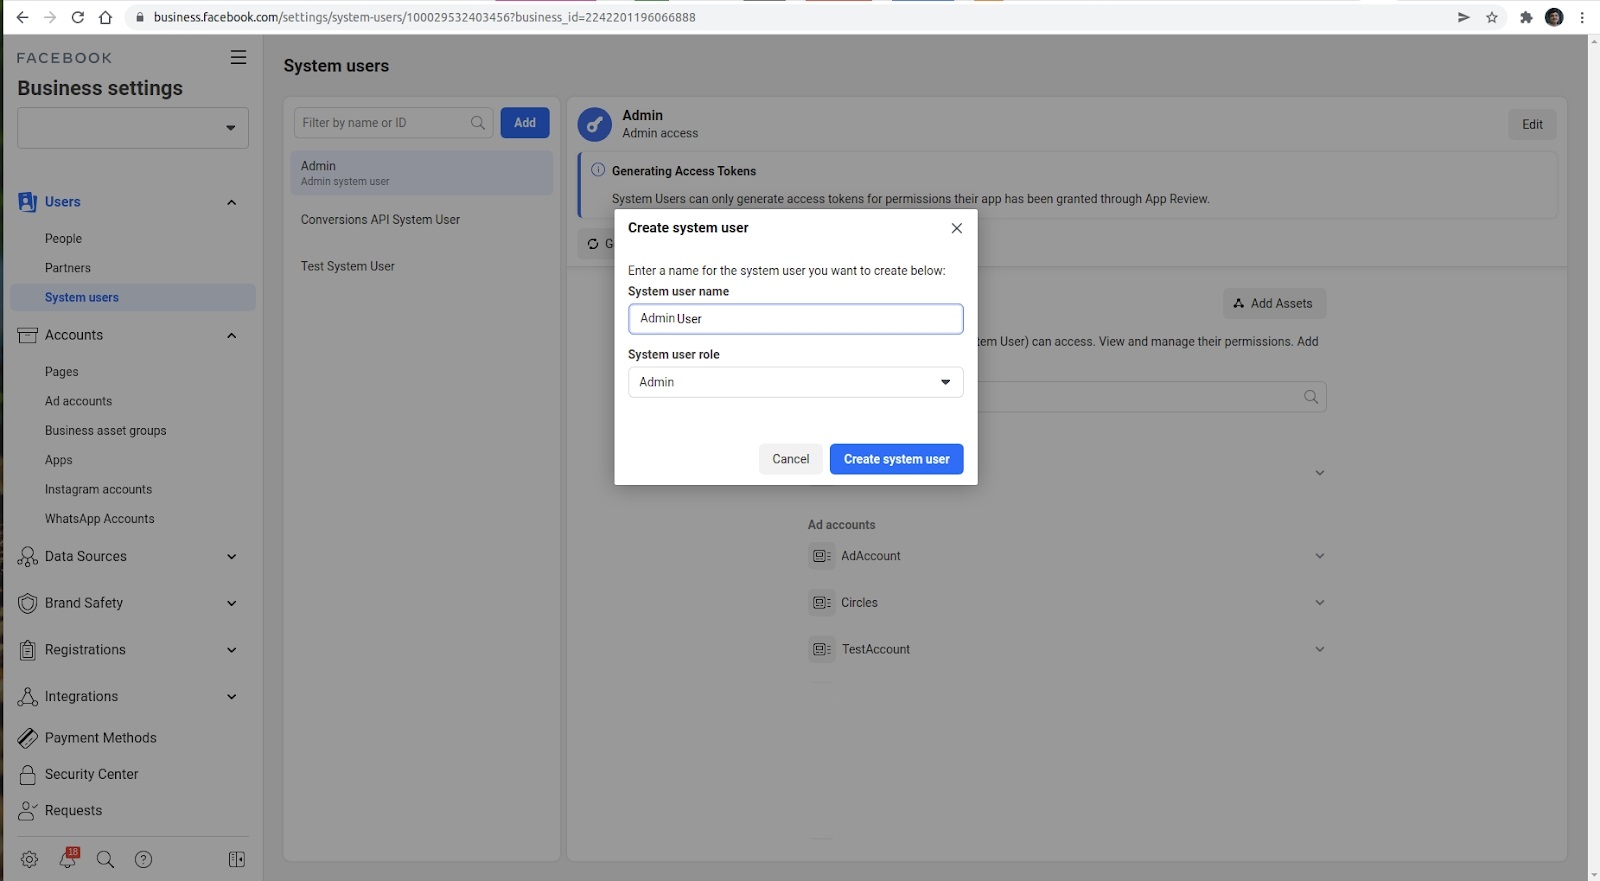
Generate System User’s Access Token:
- On the Facebook Business Settings page, click , type the appropriate name, and select
Admin as the user role.
Generate Access Token
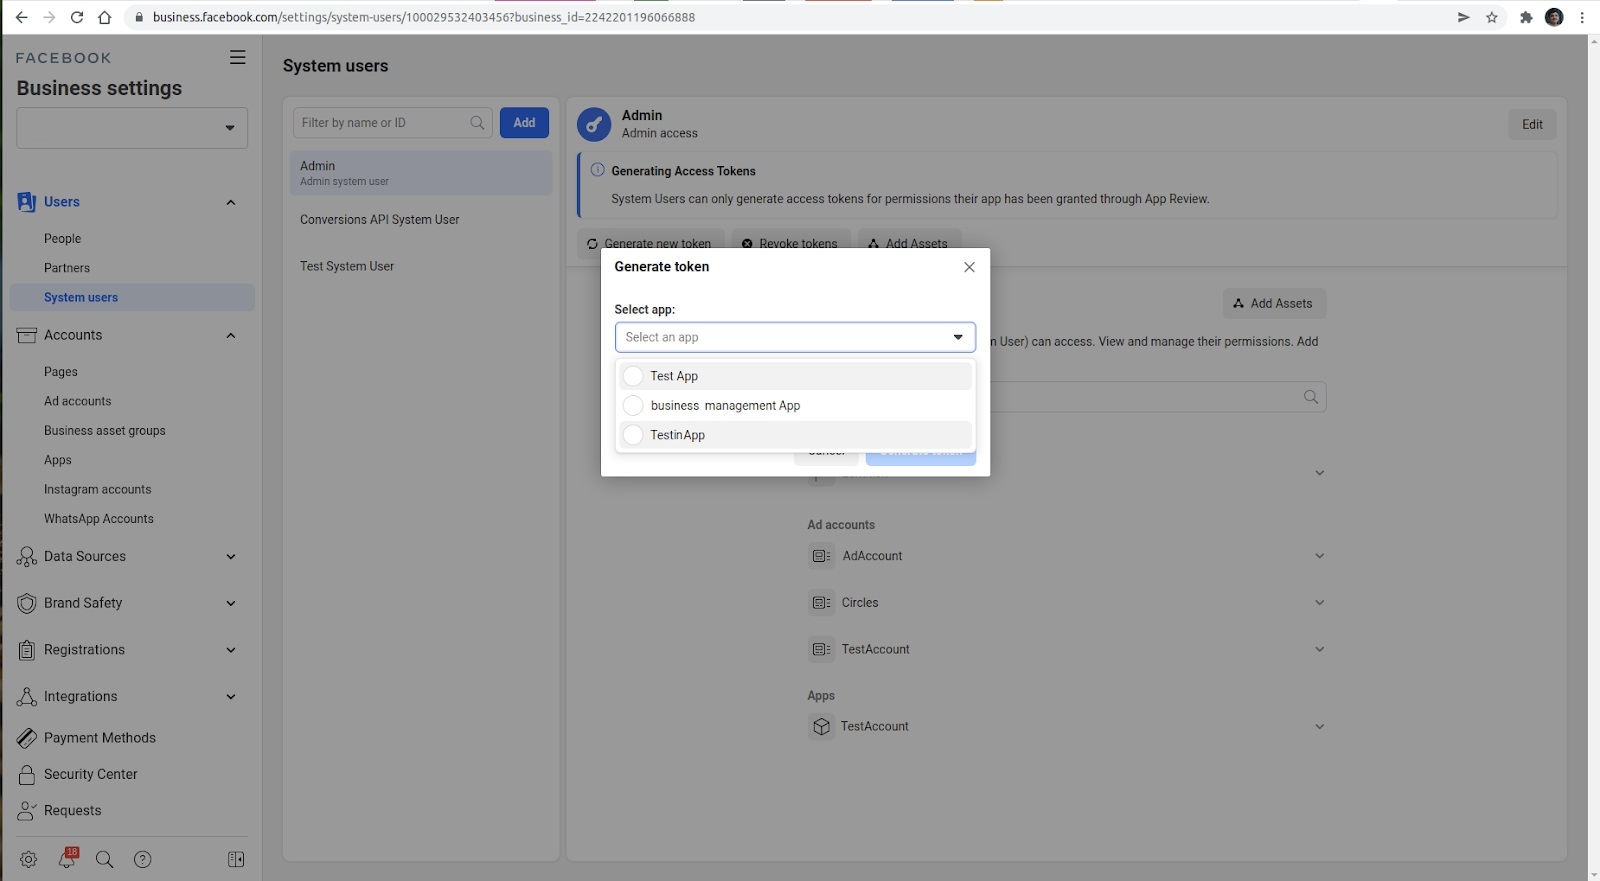
- Navigate to System Users tab, click Admin System User >
Generate new token, and select Business App from the
drop-down list.
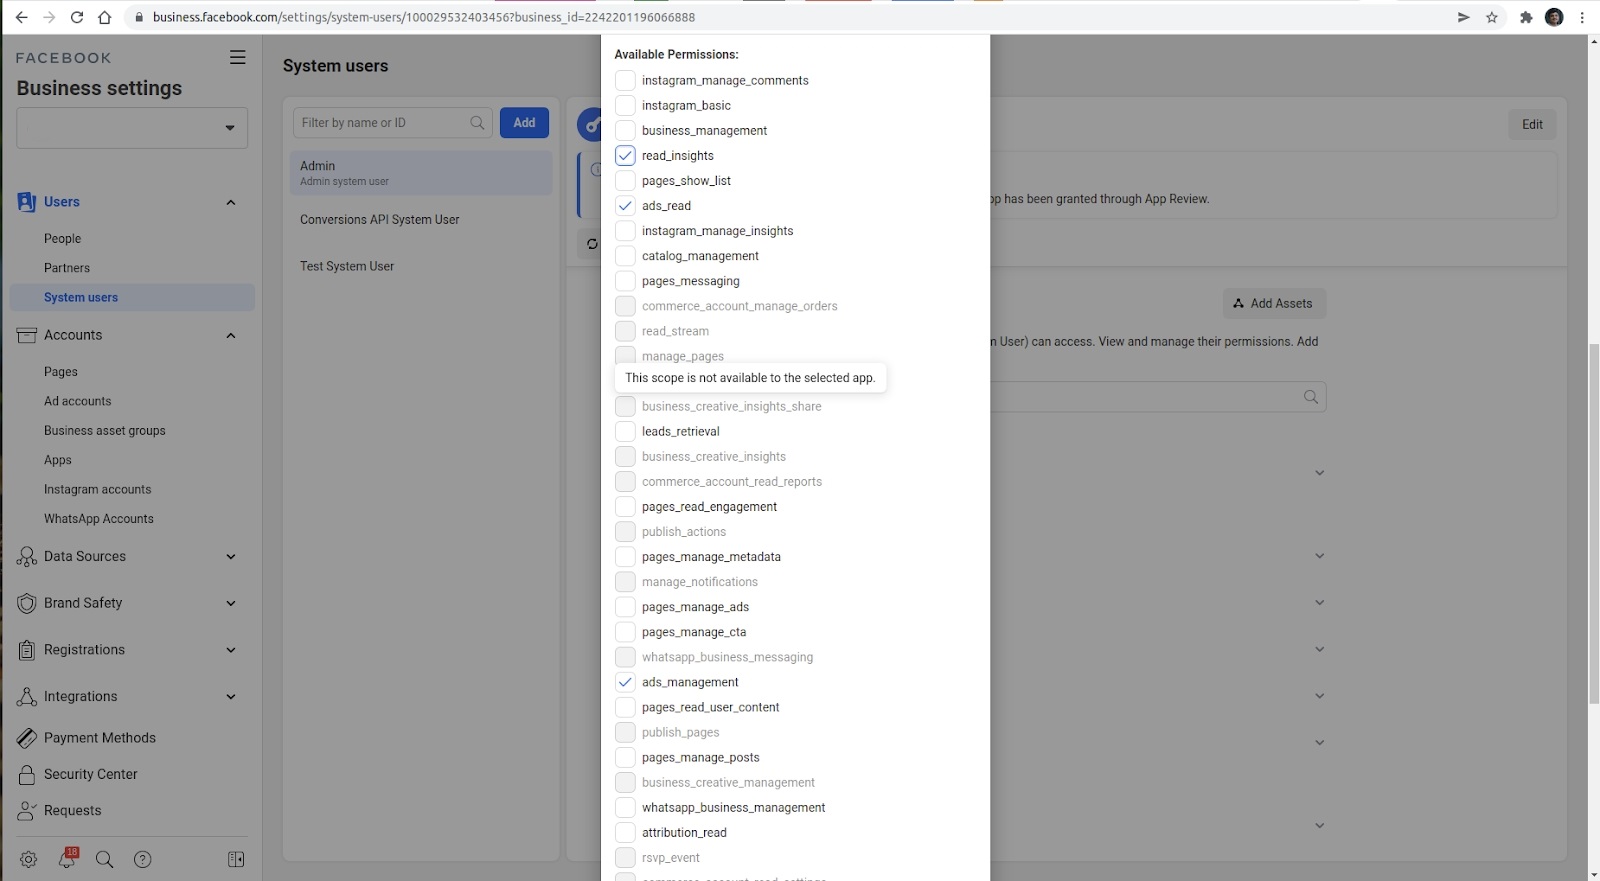
- Select read_insights, ads_read, and ads_management from the list
of Available Permissions, and then click Generate
AccessToken.
- Copy the Access Token displayed in the dialog box and share it
with the HCL CDP team.Tip: Make sure to save the token after generating it, as it will not be visible in the UI later.
Add Ad Account ID
- Select .
- Select the Ad Account and share the associated account ID.
Set up through Partner Access
Pre-requisites
- It is a must to have a Business Manager. If you don't have one, then visit create a Business Manager.
Share Facebook Business Partner Information
- Contact Name
- Contact Email
- Partner Business ID. For more information about business ID, refer find your business ID.
Accept Partner Request
After receiving this information, HCL CDP will send a Partner Request. You need to accept the request and further share the Ad Account asset with HCL CDP.
Share Ad Account Assets with HCL CDP
- After you accept the Partner Request, you should see HCL CDP listed among your partners. Click the Partner, then select Share Assets.
- Under Asset Type, choose Ad accounts, and select the specific asset to share.
- Under Full Control, enable Manage Ad Account and click Save Changes.
Facebook Channel Setup at HCL CDP
To set up Facebook notifications, you'll first need to create an engagement.
- Navigate to HCL CDP
> Activate drop-down> Channels. The Channel Summary tab
opens by default.
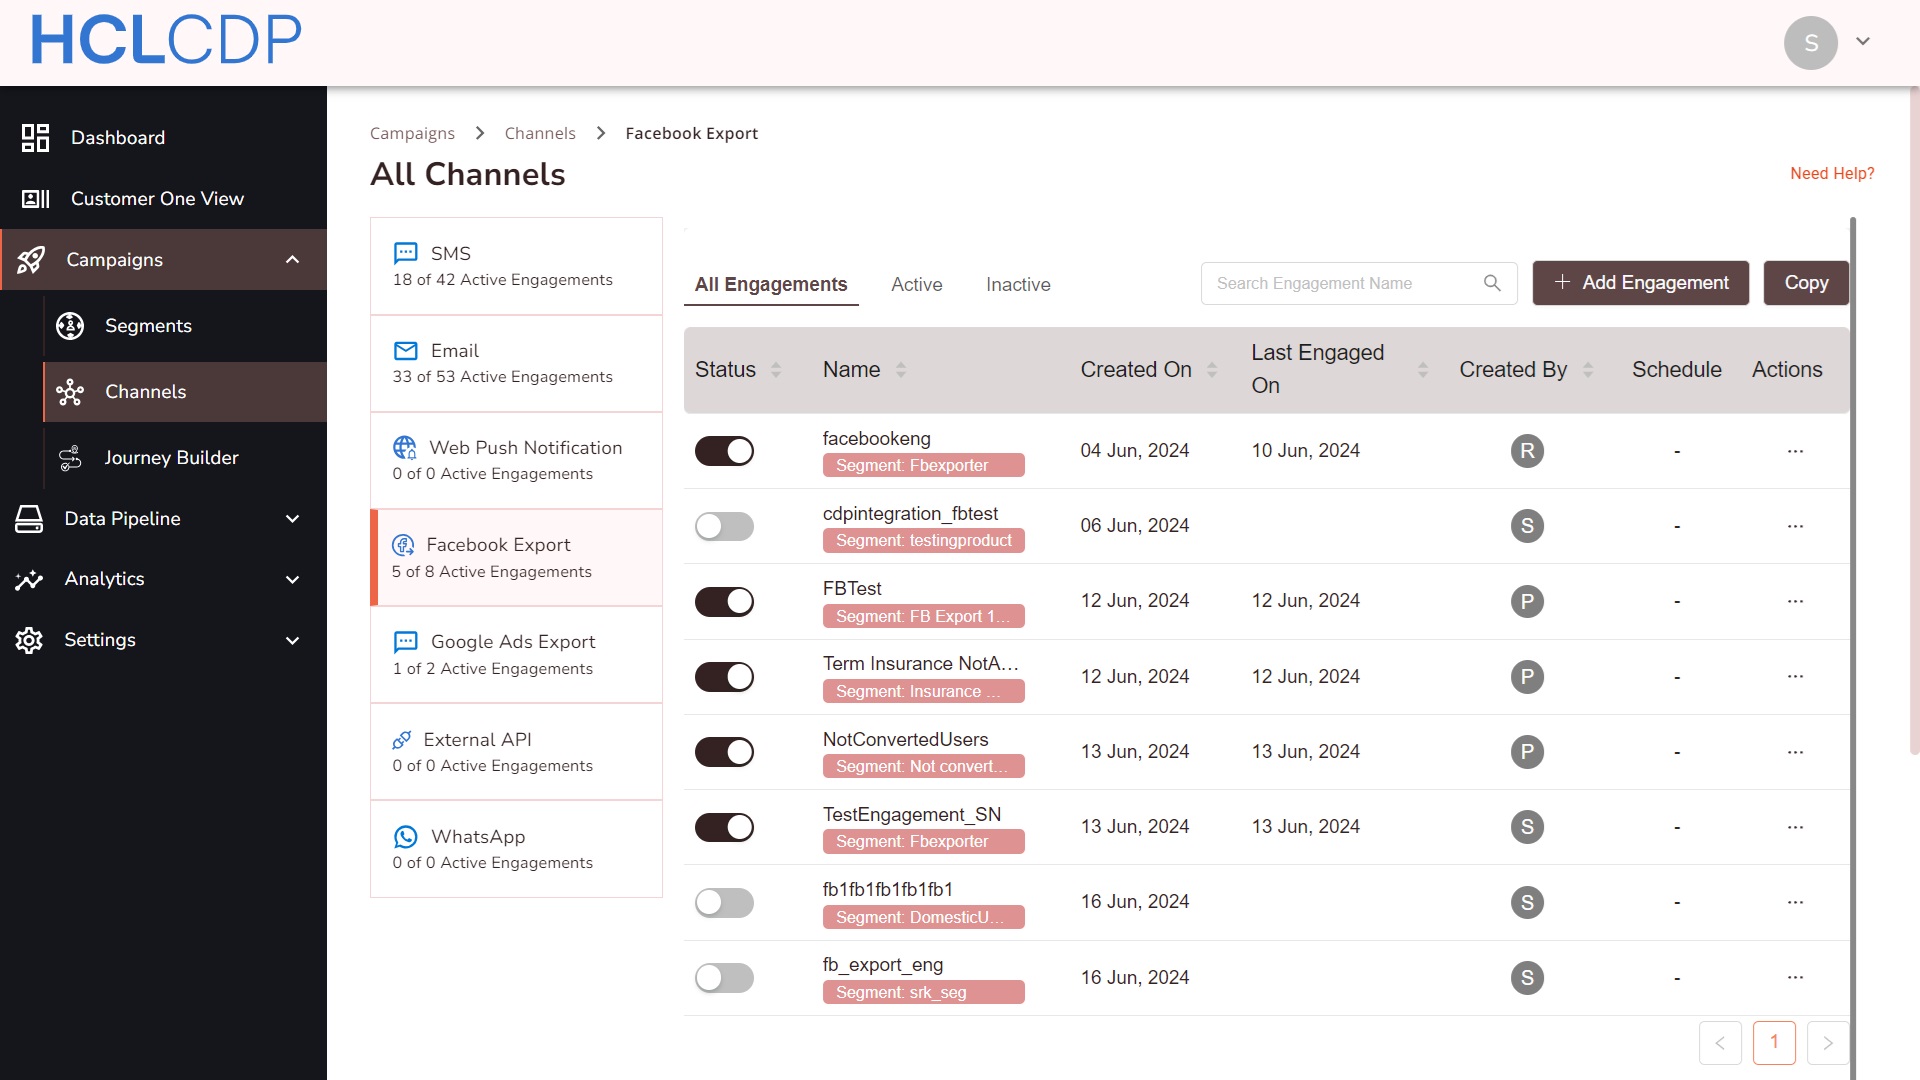
- Click Facebook Export tab or click icon in the Facebook Export tab in the dashboard.
- Then, click +Add Engagement. A Create an Engagement pop-up appears.
- Now, select a segment from the Select Segment drop-down.
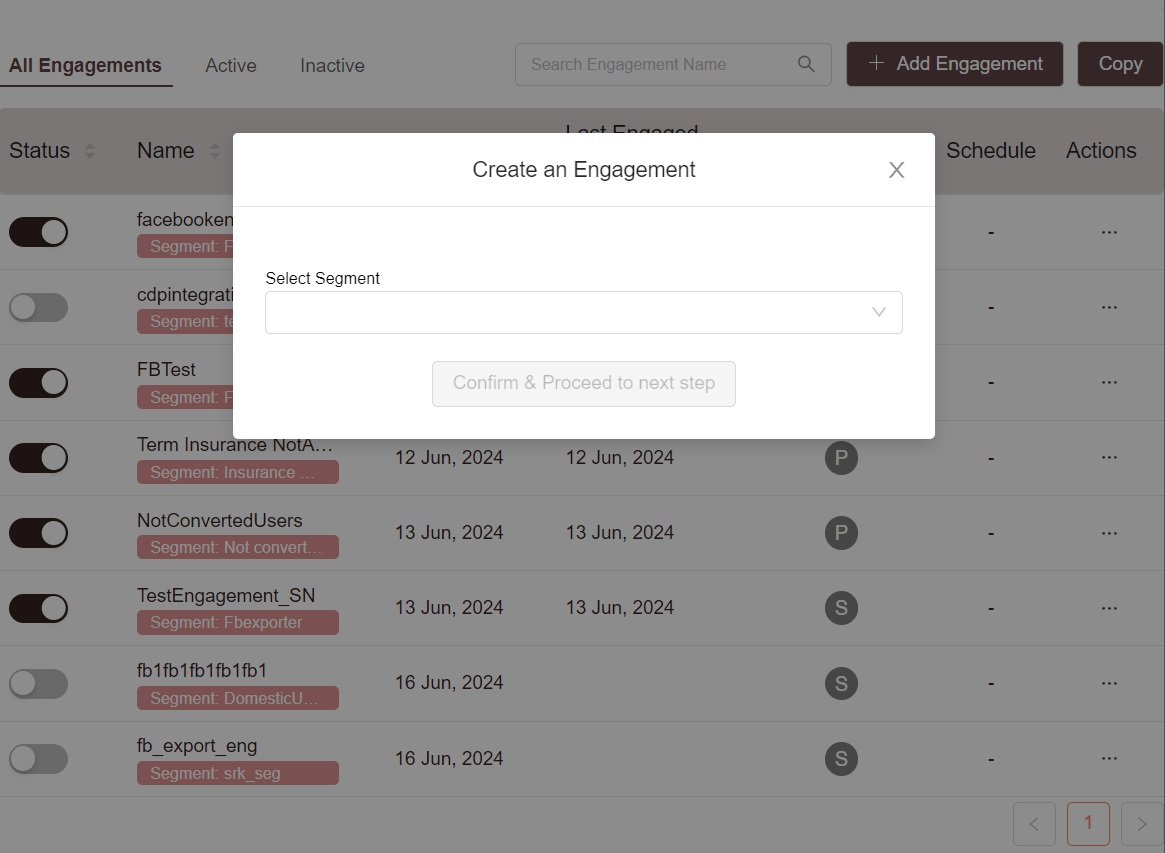
- Click Confirm and proceed to the next step.
- In the General Settings section, enter engagement name in the Engagement Name text box.
- Check the box and choose one of the export options to specify your
export.
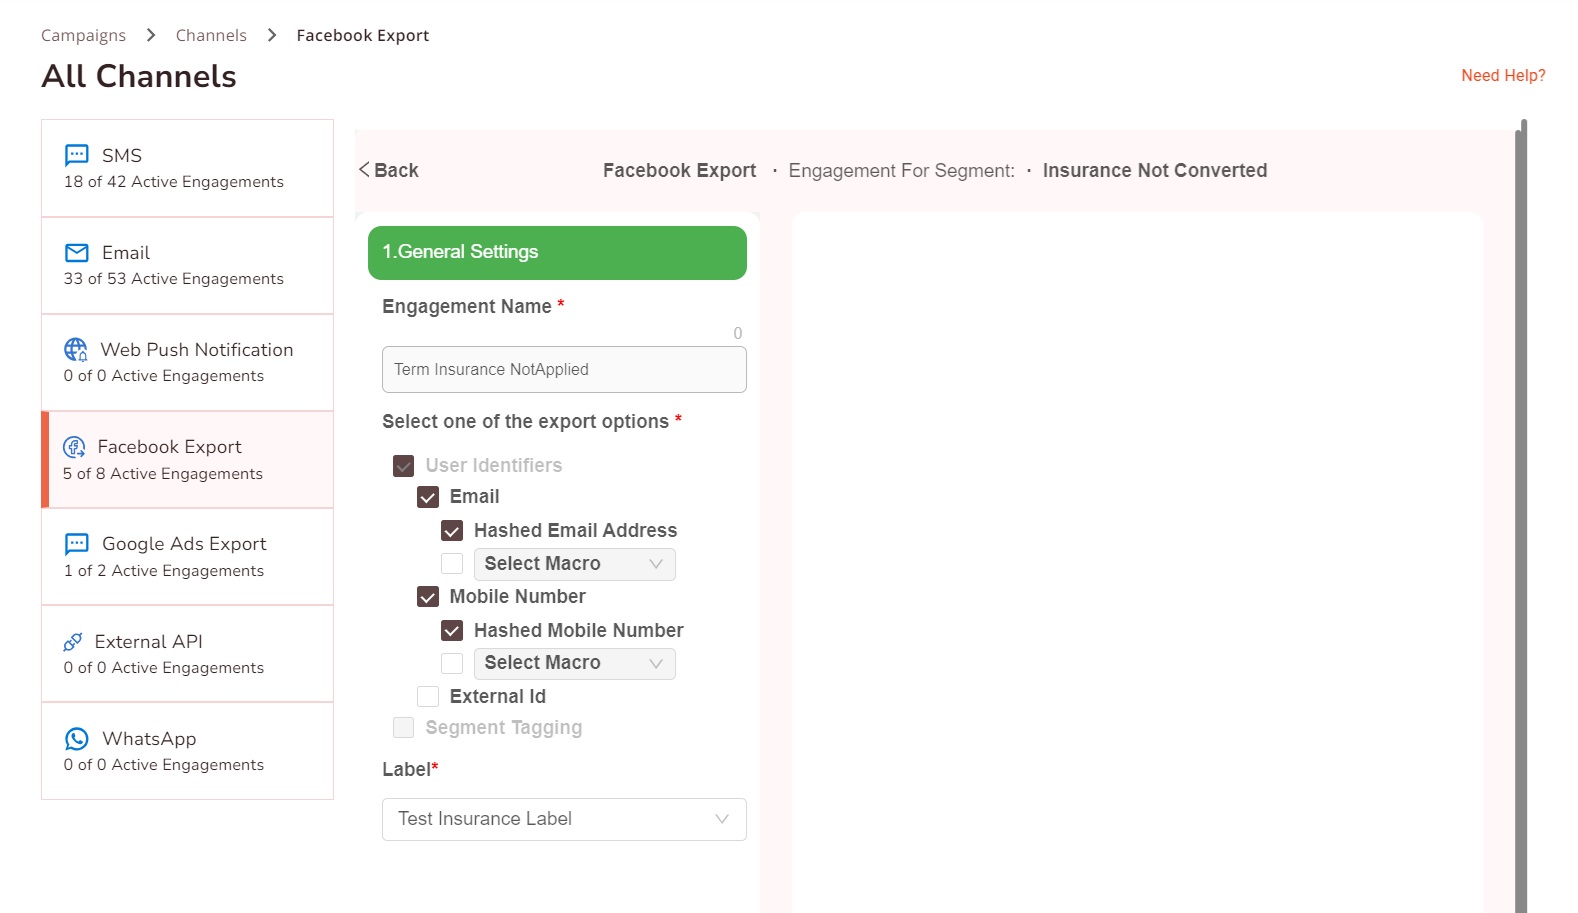
- In the Select Label drop-down list, select the desired label.
- Click Save to complete your engagement, which will now appear under the Facebook Export tab.
- In the Status column, you can activate or deactivate the engagement at any time using the toggle switch.
To simplify tasks further, you can use macros in HCL CDP to automate repetitive actions.
- The Exported Audience will carry the same name as the Engagement Name.
- Once the user moves out of the segment, then user will be automatically removed from the audience.
- You can also set an Expiry (TTL) to remove users from the audience.
External ID
Facebook External ID (external_id) is a unique identifier that
represents a user from other systems. Using External ID helps you create varied
custom audiences on Facebook and improve match rates across channels. For more
information about External ID benefits, refer here.
HCL CDP allows you to
export HCL CDP User
ID (viz_cookie_id) as a unique identifier for each user to
Facebook as Facebook's external_id. Alternatively, you can
select a custom variable to use as your own user identifier.
A Facebook Pixel ID is required to enable external ID use cases effectively.
To export External ID to Facebook via HCL CDP, follow the steps below:
- Under User Identifiers, select the External ID checkbox, when creating a Facebook Export engagement.
- Check the HCL CDP User ID checkbox to send the unique user ID to Facebook.
- If you want to send your own user ID stored in the user profile, choose the appropriate variable from the Select Macro drop-down.
Journey Builder Support
Facebook Export can only be used as the final node in the user journey.
Supported Audience Exports
The Journey Builder supports exporting User Identifiers, as Segment Tagging requires the user to return to the website.