Using dev containers
DevOps Code (Code) enables you to work with a Starter dev container and preconfigured dev containers.
Starter dev container
The Starter dev container offers a basic environment suitable for simple tasks such as editing text and cloning Git repositories. It also provides the DevOps Code extension which provides useful commands for integrating with other DevOps tools, such as DevOps Plan. This dev container is available to all users by default.
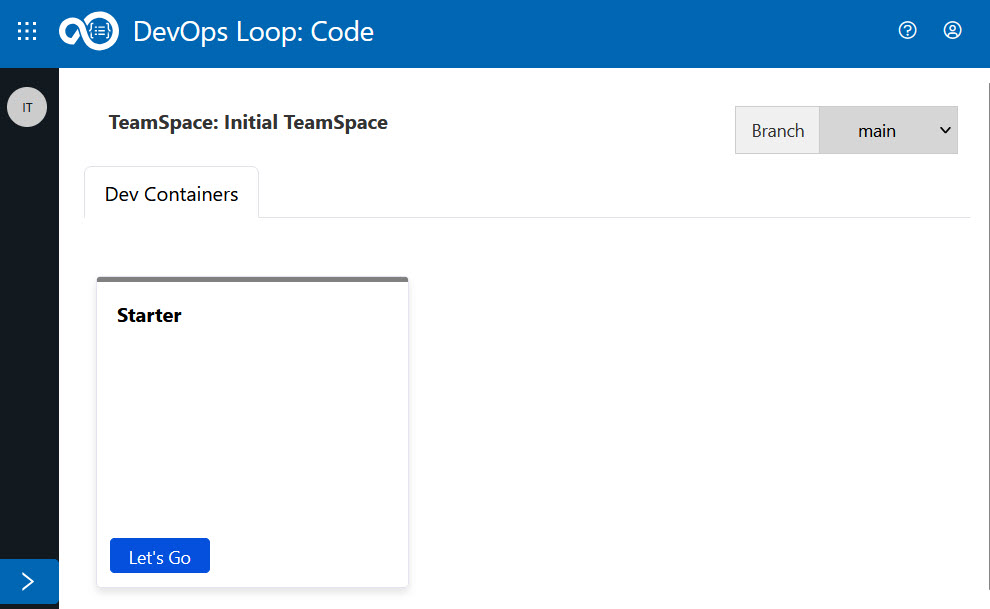
To launch the starter container, go to the Code landing page and click the Let’s Go button on the Starter container tile.
Preconfigured dev container
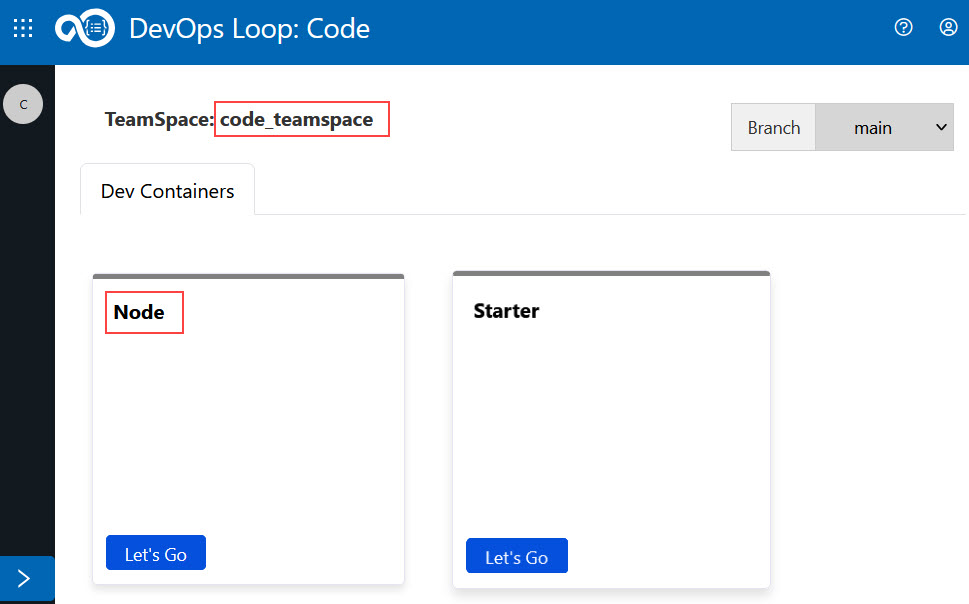
Preconfigured dev container provides customized development environments tailored to specific project requirements, such as Node.js, C++, Java, etc. This container is added through a teamspace created and managed by an administrator.
To access a preconfigured dev container, switch to the teamspace assigned to you by your administrator. Then, select the relevant dev container from the available options. For example, to work in a Node.js environment, click the Let's Go button on the Node dev container tile.
Note: If no teamspace appears, it likely means you are not yet added to one yet. Contact your team admin to request access.
For example only: The image below shows how dev containers appear after switching to an admin-assigned teamspace such as code-teamspace. In this case, you can see a preconfigured Node dev container alongside the default Starter container.
This setup is just an example. The actual teamspace name and available containers might vary.
Dev container status
When a dev container starts, its tile turns green to indicate that the container is running.
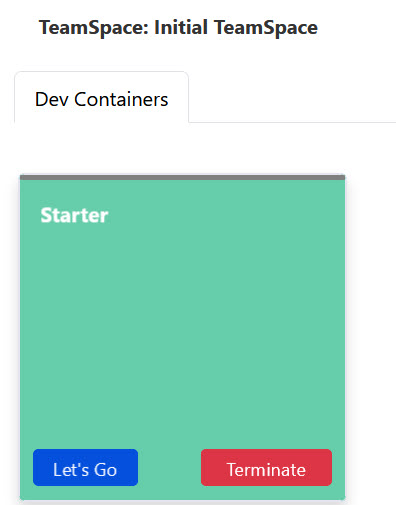
To stop a running container, click the Terminate button on the dev container tile. This action opens the Terminate Dev Container dialog.

When you terminate a dev container, all files and unsaved work are deleted. Therefore, you must push your changes to a remote source control repository, such as a Git repository, before termination.