Creating Plan items with DevOps Code
The DevOps Code extension allows integration with HCL DevOps Plan (Plan), enabling you to create and manage work items directly from your development environment in the browser IDE.
About this task
You can follow these steps to configure DevOps Code extension in the DevOps Code (Code) browser IDE, and create work items in HCL DevOps Plan (Plan).
Procedure
-
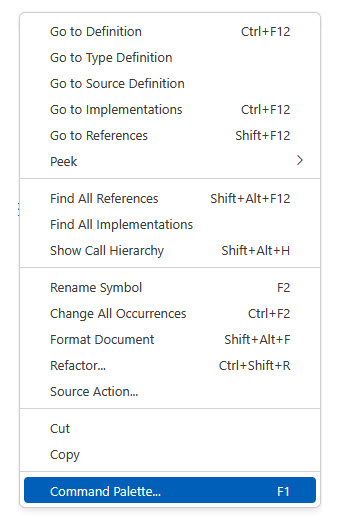
Open the Command Palette.
Right-click to open the context menu and select Command Palette in the editor.
-
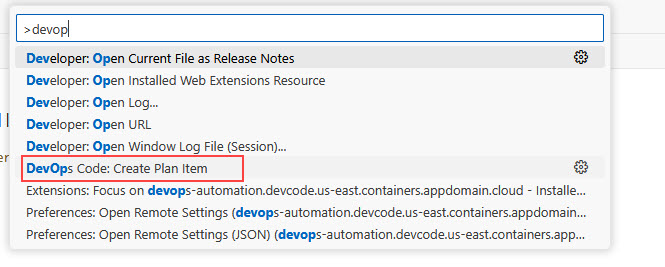
Access the DevOps Code Command.
- Choose the DevOps Code command from the list of available
commands.
 The Create Plan Item window is
displayed.
The Create Plan Item window is
displayed.
- Click the Configure settings button to integrate DevOps Code with
Plan for the
first time.
The Settings window is displayed to add the Personal Access Token, Plan Server URL, and Team Space ID.
You can add these fields by navigating to the Plan platform, which is detailed in the next step.
- Choose the DevOps Code command from the list of available
commands.
-
Perform the following steps to get configuration details from Plan:
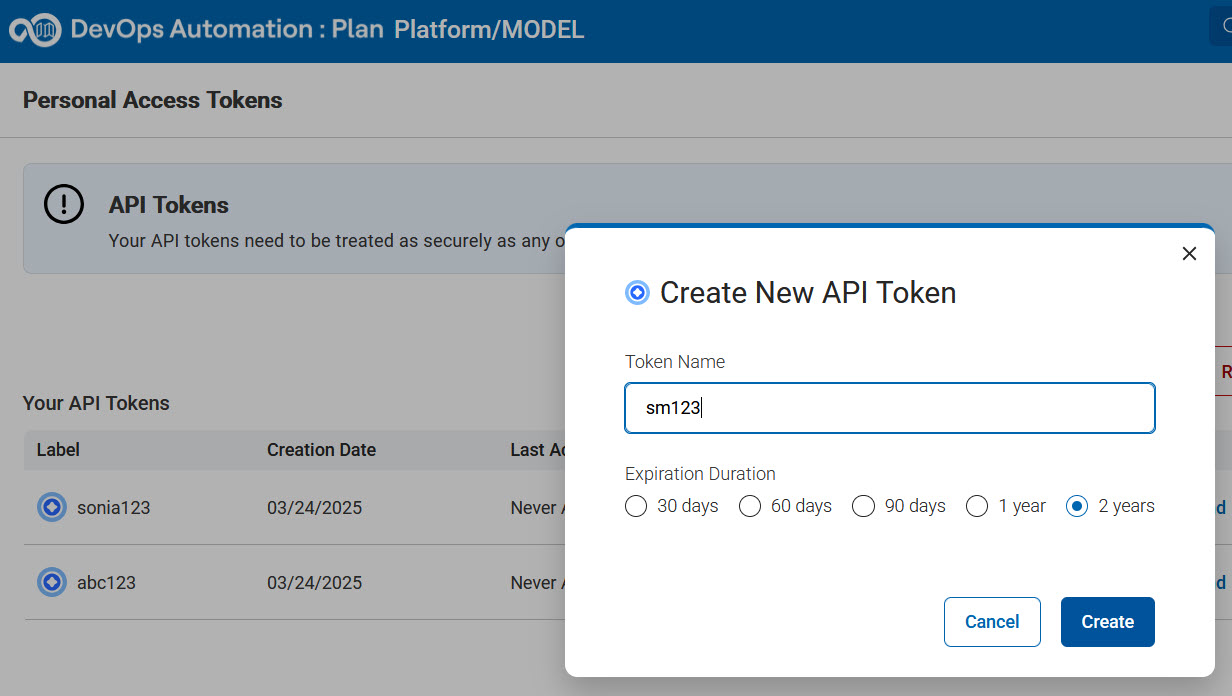
- Click the Plan button in the HCL DevOps Loop switcher to navigate to the Plan page.
- Go to the Settings section of Plan,
and enter the Personal Access Token (or API tokens) in the
Create New API Token dialog.
-
Perform the following steps to enter the configuration details:
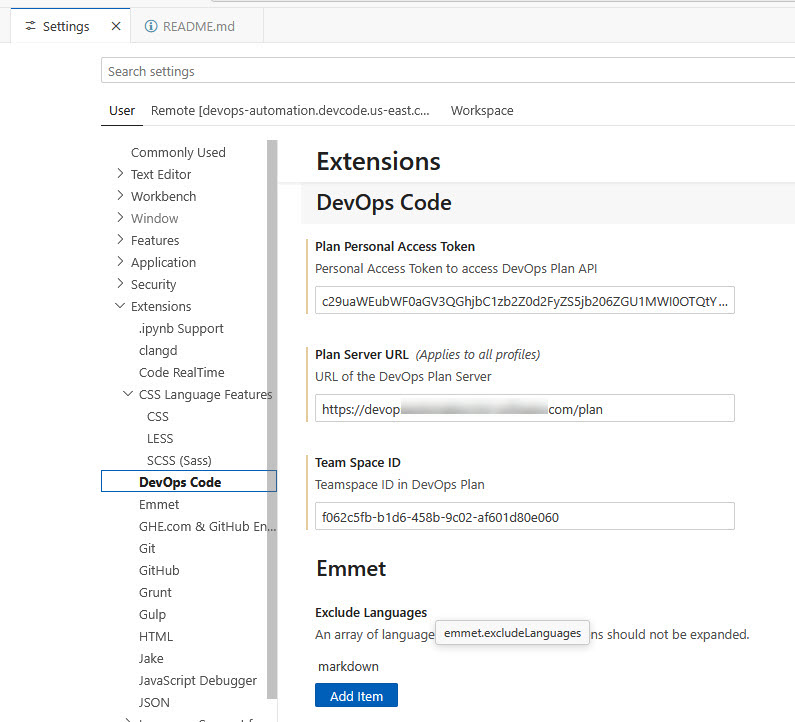
- Navigate back to the Code application window from the switcher.
- Update the configuration details in the Settings window of Code.Note: To find the team space ID to use, open a work item in Plan and look in the browser address bar for the text between the words "repos" and "databases". For example, 'f062c5fb-b1d6-458b-9c02-af601d80e060' in https://<DevOpsLoopURL>/plan/#/ccmweb/view/repos/f062c5fb-b1d6-458b-9c02-af601d80e060/databases/MODEL/records/WorkItem/MODEL00000179
-
Create a work item:
- Select the DevOps Code command from Command Palette.
The Create Plan Item window is displayed again.
- Fill in the required fields such as Application Project, Component, Type, Title, and Description.
- Click the Create button to create your work item in Plan.
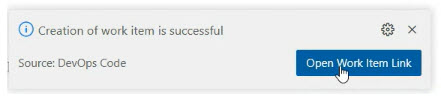
A prompt is displayed at the end of the IDE to indicate that the work item has been created successfully.
- Select the DevOps Code command from Command Palette.
-
Click Open Work Item Link to view the work item on the Plan page.
A dialog is displayed to open the Plan web page.
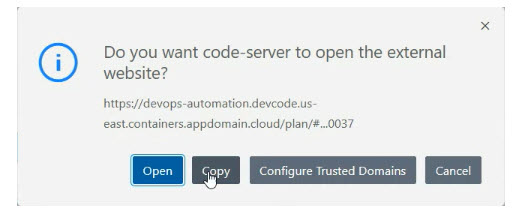
- Click Open to navigate to the work item page on the Plan web page.
Results
- At most one Plan application can be used. If you have multiple applications, the first one will be used.
- The Plan application must use the Agile business flow. Other flows are currently not supported.
- Your Plan project(s) must have at least one component.