Completing the Options Page

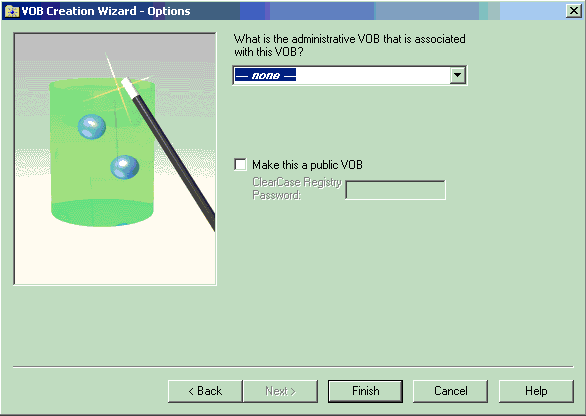
Because in UCM, the PVOB acts as administrative VOB for its components, you select none from the list.
On this page of the wizard, you can also specify if you want to create a public VOB. Select this option to make the VOB accessible to other individuals so that they can add files and other artifacts to source control. In the context of the tutorial, you are creating a private PVOB.
This page is the last of the wizard. Before you click the Finish button, you can still modify any of your previous selections by moving around in the wizard's pages using the Previous and Next buttons to access the pages that contain the options you want to change. Clicking Cancel aborts the operation.


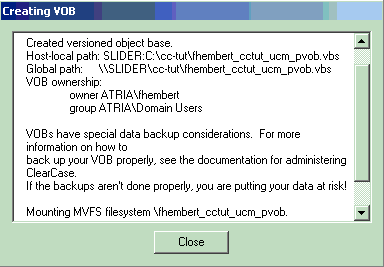
Notice the last line indicating that DevOps Code ClearCase® automatically mounts the PVOB.
Try it!
Complete the Options page as follows:
- Select none from the project VOB list. In UCM, the PVOB acts as an administrative VOB.
- Make sure the option Make this a public VOB is cleared. In a real development environment, you would make a public VOB to allow the project team members to access the VOB.
- Click Finish.
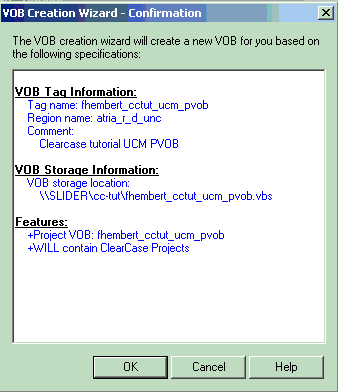
- DevOps Code ClearCase® opens a confirmation dialog box which lists your VOB specifications. Click OK to close it.
- DevOps Code ClearCase® displays progress information, and when the VOB is created, DevOps Code ClearCase® opens a summary dialog box. If any errors were incurred during the VOB creation process, they are listed here. Click Close to close the dialog box.
Where Am I?
You finished creating the UCM project VOB on your computer in the cc-tut shared folder. Your next task will be that of creating a component for storing the project's baseline.