Creating page-specific e-Marketing Spots for the E-Marketing Spot widget
If you add an E-Marketing Spot widget to a layout
and choose page-specific e-Marketing Spots, each page
to which the layout is assigned has its own generated e-Marketing
Spot. For each page, you must use the Marketing tool to create the
e-Marketing Spot and populate it with default content, or web activities,
or both.
Before you begin
About this task
Procedure
- Add the E-Marketing Spot widget to a slot in your layout.
The properties view for the E-Marketing Spot widget is displayed.
- In the Widget Properties section, set the properties.
- In the Widget Content section, complete these steps:
- Click Save and Preview.The Store Preview Options window opens. The default Store URL is the first page to which you assigned the layout that contains the E-Marketing Spot widget.
- If the start date for the layout is in the future, complete
these steps:
- Expand Options.
- Select Specify date and time, and then specify the start date for the layout.
- Click Launch Store Preview.
- At the top of the preview window, click Show
Page Information.A Show Information button is displayed in the location of the slot that contains the page-specific e-Marketing Spot.
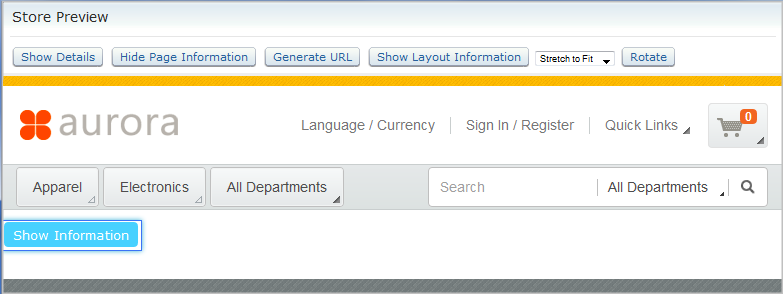
- Click Show Information.In the Widget Information window, the name of the page-specific e-Marketing Spot is displayed in the Widget Content section of the page.
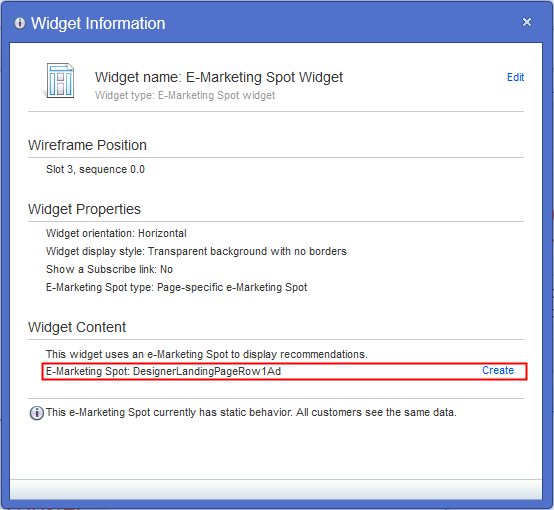
- To the right of the e-Marketing Spot name, click Create.

 Tip: If you are
working in an extended site, you might be prompted to select a store.
If you want the e-Marketing Spot to be shared across all extended
site stores, select the storefront asset store.
Tip: If you are
working in an extended site, you might be prompted to select a store.
If you want the e-Marketing Spot to be shared across all extended
site stores, select the storefront asset store.The properties view for the new page-specific e-Marketing Spot is displayed. In the Name field, the generated e-Marketing Spot name is prefilled.
- Complete the properties for the e-Marketing Spot.In the Default title content and Default content fields, you can specify a default title and default content.
- Save and close the e-Marketing Spot.
- Optional: Create a web activity for this e-Marketing Spot. Do not forget to activate the web activity.
- To verify that the information in the E-Marketing Spot
widget is displayed as expected on the page:
- Begin the process of populating the E-Marketing Spot
widget on the next page to which the layout is assigned:
- Repeat steps 7 through 14 for the remaining pages to which the layout is assigned.