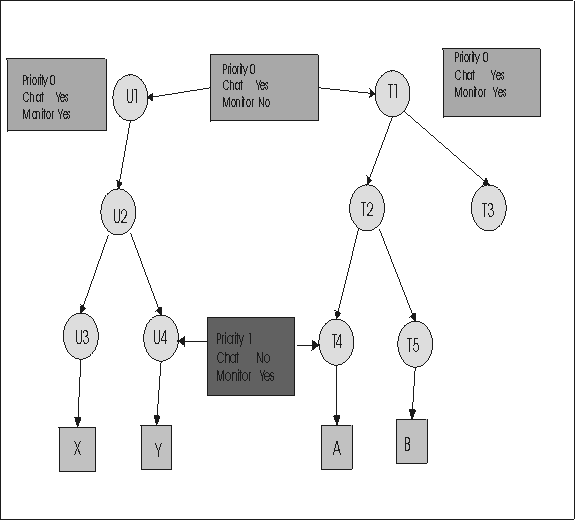
Example 2: Higher priority permissions
When groups U4 and T4 are created, the default template is accepted as the standard set of permissions. Create a relationship in Manage Permissions between U4 and T4 and select a higher priority No for Chat and higher priority Yes for Monitor.
Create the Permissions link
- Click .
- Select T4
- Click Manage Permissions.
- The Manage Permissions screen is displayed.
- Click the Group Browser button if not selected.
- Click the selector button next to user group then select U4. Group list must be expanded.
- Click the selector button.
- Click the selector button next to target group then T4. Group list must be expanded.
- Click the selector button.
- The set of permissions and their selected values, which are derived from the combination of standard policies that are defined for U4 and T4 is displayed.
- Click the Enabled check box to make all of the policies available.
- Set priority 1 for Chat and select No, set priority 1 for Monitor, and select Yes. Set Guidance, Active, and File transfer to No.
- Click Submit.
TVT instruction:example2.eps The example2.cdr file needs to be converted to an example2.gif and an example2.eps once it has been translated.