Creating an API scan using a Postman collection
If you have a Postman Collection of requests to your web API, you can import it and use it as the basis for a scan by using the API scan configuration wizard or the REST API.
Before you begin
- Backup your site before scanning.
- If you have not yet done so, Create an application for your scans.
- Verify with ASoC that you have permission to scan the domain (see Verifying a domain), or you can authorize domains without verification using Domain management.
- If your site is not available on the Internet, and an AppScan Presence does not yet exist on the server: Creating the AppScan Presence.
- If scanning a live production site, refer first to What changes should I make when scanning a live production site?
- If the web API requires authorization, the authorization request must include valid
credentials (API Key, Basic Auth., OAuth 2 refresh token, or other fixed token and
passwords). The authorization request must be one of the first requests in the collection.
By default, AppScan examines the first seven requests for the authorization request.Limitation:Authentication methods that require a user to be present, such as OAuth2 with Prompt User, are not supported. However, you can use OAuth2 with an offline grant type that uses a refresh token (also known as a service token).
About this task
Procedure
- On the Application page, click Create scan, then click Create scan under DAST Dynamic Analysis.
- In the Create scan: DAST dialog, choose API scan to begin the configuration process.
- Select the API explore method, Postman collection.
-
Click Select Postman collection to add your Postman
collection.
Note:Postman collection version 2.0 and later is supported.
-
In Postman collection files area upload the following files:
- Postman Collection file: Browse and upload the Postman collection JSON file. The file extension must be .json
- Linked files (Optional): If the collection includes links to
other files, you must include them all in a single ZIP file and select
it here. The following conditions apply:
- File paths must be relative to the collection, and not absolute
- Files must be located within the Postman Collection folder (can be a subfolder), not outside it
- Path must be identical to the path used in Postman
- Postman Environment file (Optional): If your collection uses environment variables, you must browse and add the Postman Environment JSON file.
- Postman Globals file (Optional): If your collection uses global variables, you must browse and add the Postman Globals JSON file.
Note:AppScan on Cloud limits file uploads to 2GB. -
In the Domains to test section, you must add all verified/allowed domains you want
included in the scan. Both these formats are valid:
https://demo.testfire.net/demo.testfire.net
Important:Domains not listed will not be scanned. - If your collection includes login credentials, ensure it is one of the first requests in the collection. By default, AppScan examines the first seven requests for the authorization request.
- Configure the other scan options as required such as authentication, test policies and other advanced settings. For more information see, Creating an API scan.
-
Click Scan to run the scan to detect any vulnerabilities in your
web API.
Note:
- Once you add a Postman Collection to a configuration, you cannot export it as a SCANT (template) file, as the collection cannot be included in a template.
-
Currently only one Postman collection can be imported per scan.
What to do next
- You can view the status of the scan on the Scans and sessions page.
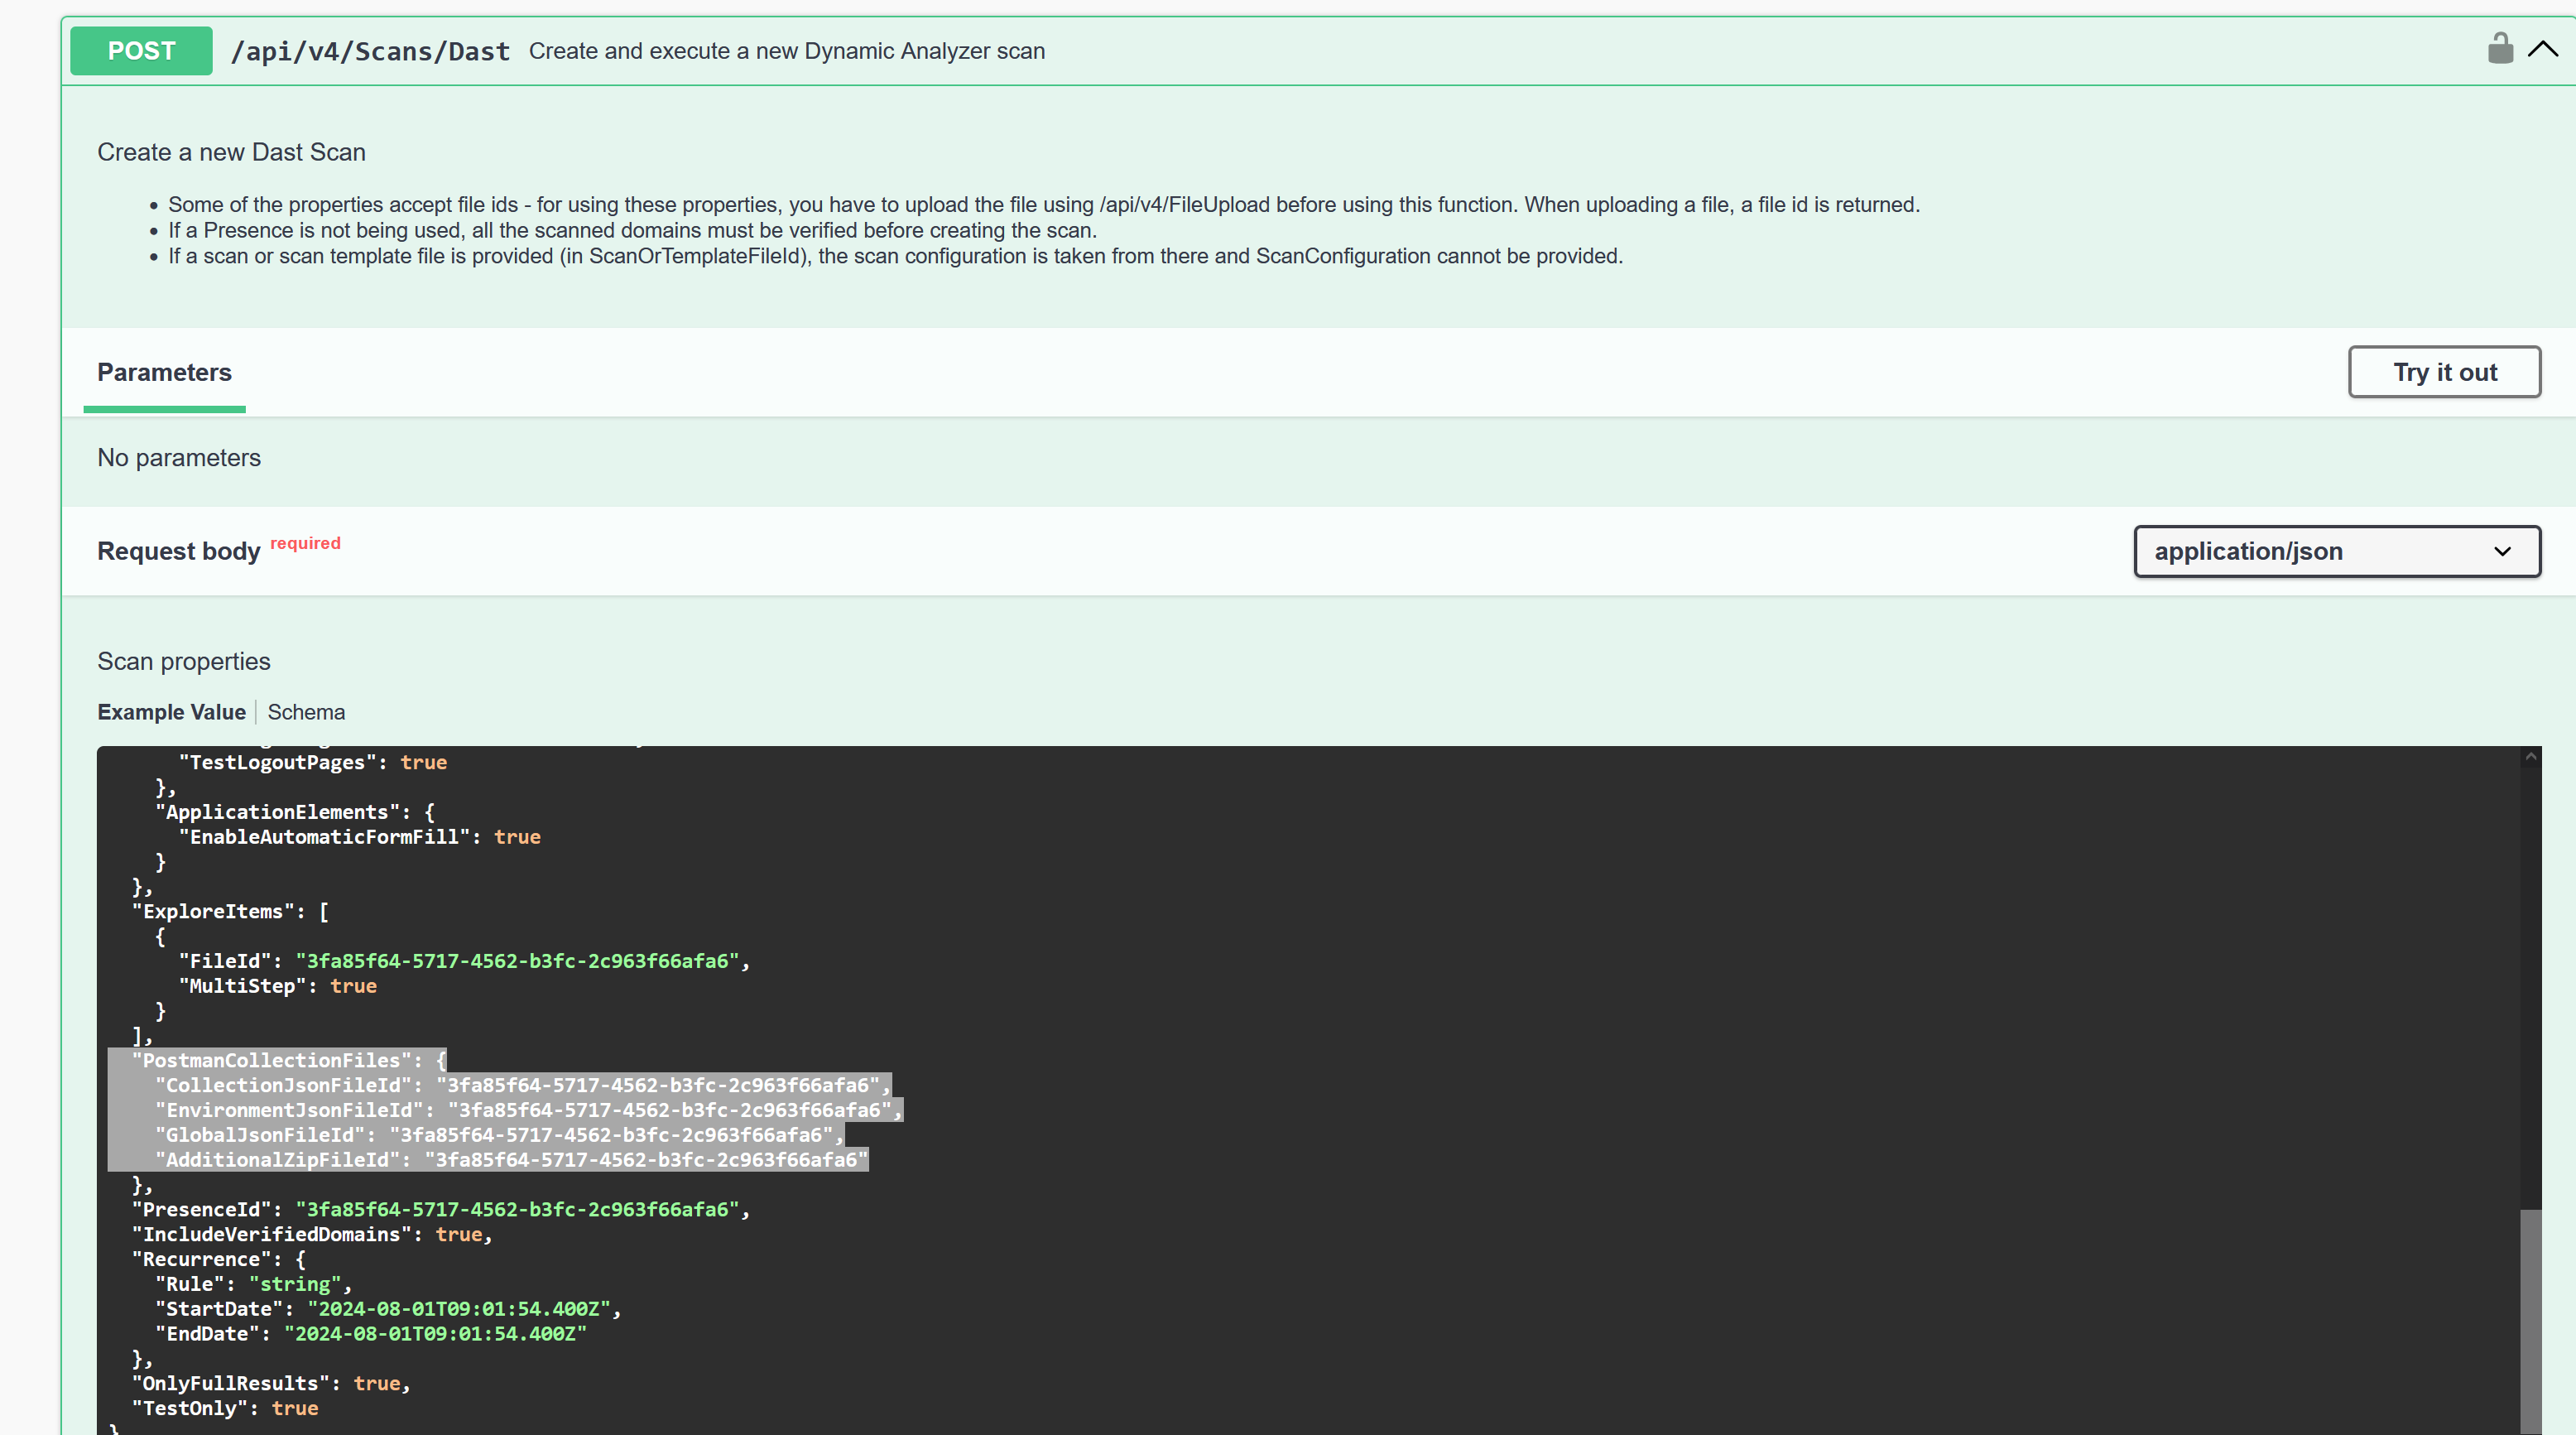
Using REST API
You can use the Postman collection through the REST API.
Procedure
-
Upload a Postman collection file using the REST API.
Note:AppScan on Cloud limits file uploads to 2GB.
-
With the REST API, you can initiate a scan without the need for a .scan file as
follows: