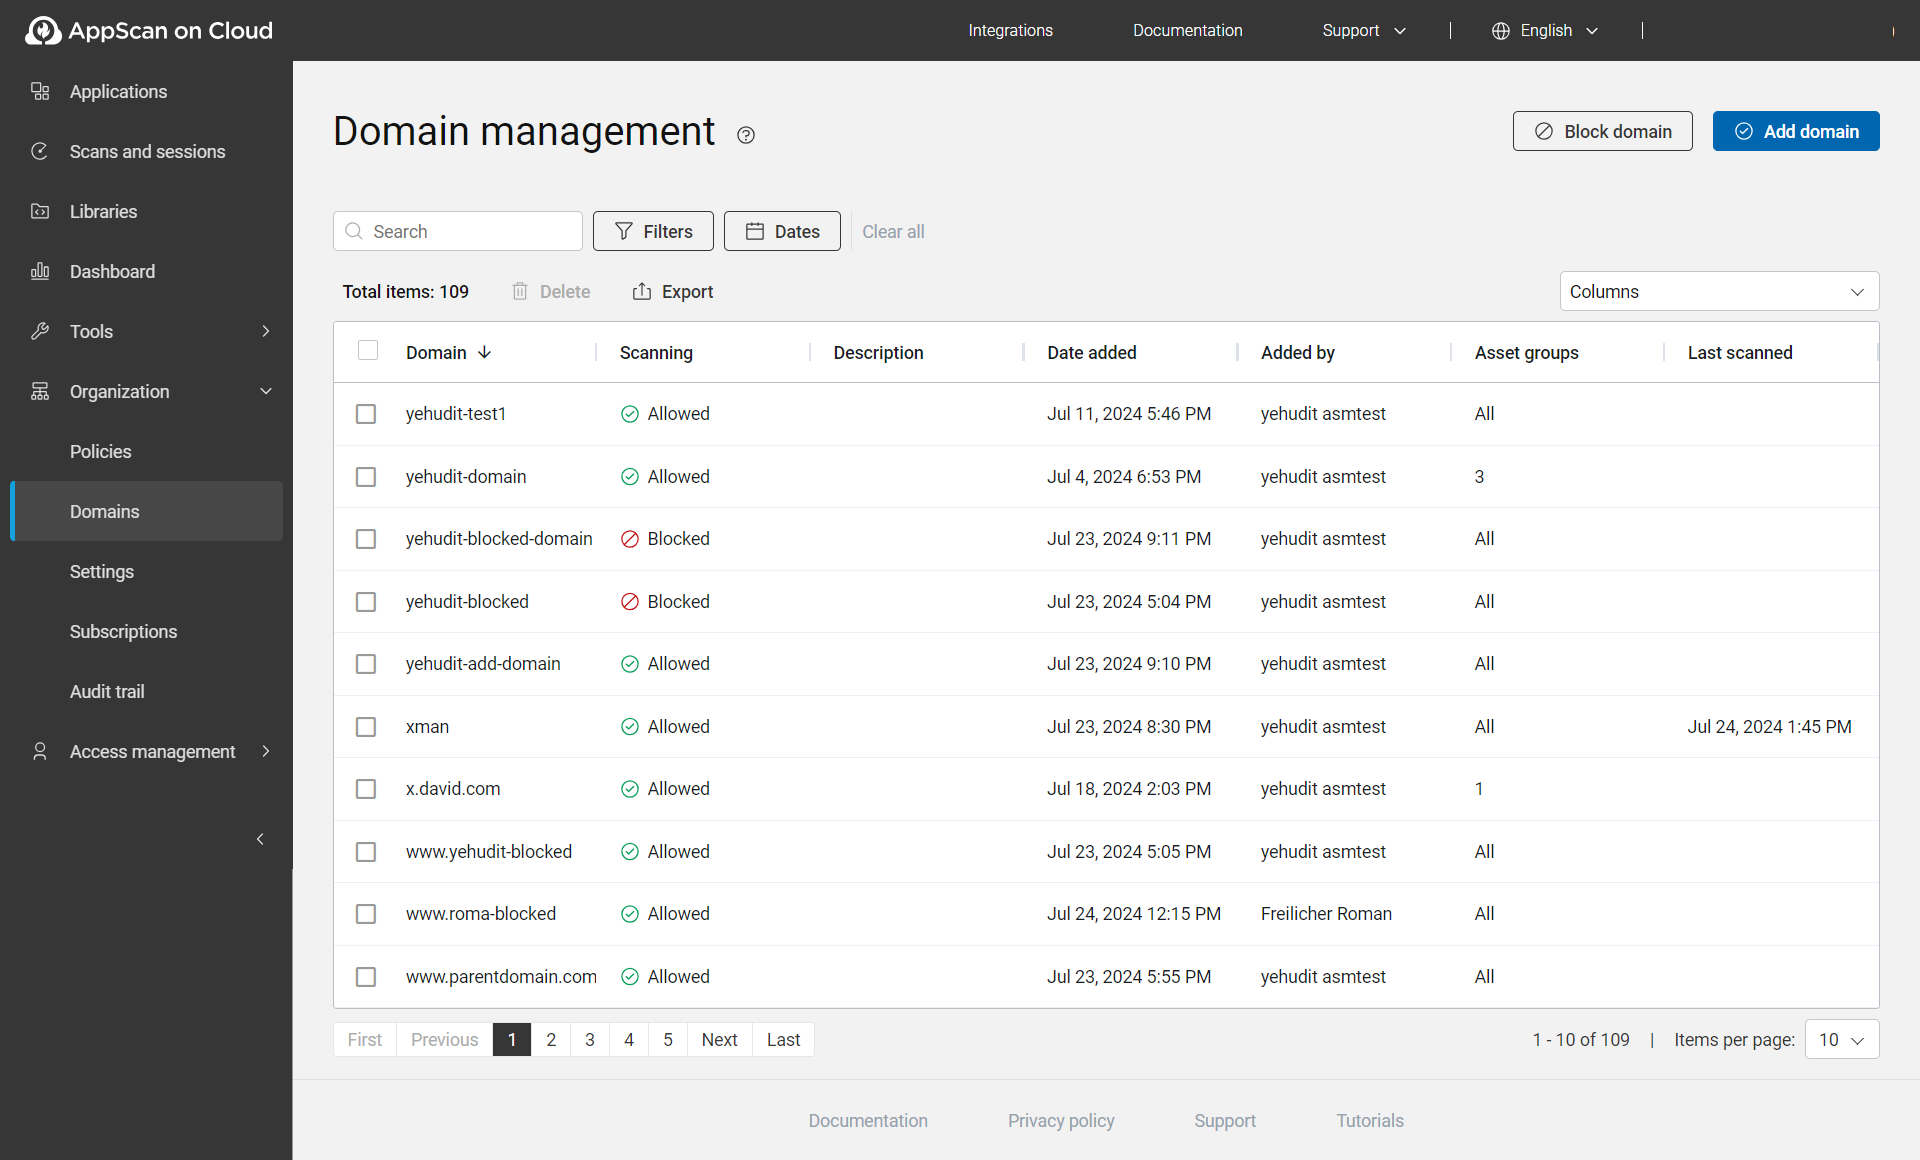
Domain management
Domain management allows organizations to manage their domains, control permissions for various asset groups, and authorize domains without verification. This feature is available for Silver, Gold, Platinum, and Per-application subscriptions.
| Item or option | Description |
|---|---|
| Add domain | Click to add a domain to the allowed list. |
| Block domain | Click to block a domain. |
| Search | Search all table content for strings. |
| Filters | To filter the list of domains displayed, click Filters
and filter by: Scanning or Asset groups or both. To remove all applied filters, click Clear all. |
| Dates | Select a date range for the list by Last scanned or Date
added. To remove all applied filters, click Clear all. |
Columns
|
|
| Domain name | Name of the domain or IP address added to either allow or block for scanning. By default, the table is sorted based on Domain name in descending order, displaying subdomains under the parent domain. |
| Scanning | Indicates whether scanning is allowed or blocked for the domain. |
| Description | Description of the domain. |
| Date added | Date when the domain was added. |
| Added by | Name of the user who added this domain to the list. |
| Asset groups | Indicates the number of asset groups assigned to the domain. If "All" is displayed, it means the domain is assigned to all asset groups in your organization; if a number is shown, it means only specific asset groups are assigned to the domain. |
| Last scanned | Date when the domain was last scanned. The date is not populated for existing organizations, until a new scan is run. |
| Export | Export the full or filtered table as a CSV or JSON file. Only users with the appropriate permissions can export. |
| Delete | Delete the selected domains from the list. Once deleted, these domains cannot be scanned anymore, and any scheduled scans using these domains will fail. Only users with the appropriate permissions can delete a domain. To resume scanning, the domain must be re-added to the allowed list. |
Domain details panel
To view further details for a domain, click on the domain name.
The details pane duplicates and expands upon information in the main domains view.
| Tab | Field | Description |
|---|---|---|
| Details | Added by | Name of the user who added this domain to the list. |
| Date added | Date when the domain was added. | |
| Description | Click the pencil to add or edit the description of the domain. Only users with permissions to edit can modify the description. | |
| Last scanned | Date when the domain was last scanned. | |
| Scanning | Displays if the domain is allowed or blocked for scanning. | |
| Asset groups | All asset groups | Domain is assigned to all the asset groups of your organization. |
| Specific asset groups | Domain is assigned to specific asset groups of your organization. | |
|
Note:
Changing the asset groups associated with a domain
will cause scheduled scans using this domain to fail. |
||
| Settings | Delete domain | Users with the appropriate permissions can delete a domain. Once deleted, these domains cannot be scanned anymore, and any scheduled scans using these domains will fail. To resume scanning, the domain must be re-added to the allowed list. |
Add a domain to allowed list
To allow a domain and its subdomain in the DAST scan, you can add them to the allowed list.
- Click Add domain.
- In the Add domain dialog box:
- Select the type: Domain or IP Address
- Based on the type of domain selected:
- Enter a domain name or FQDN (Fully Qualified Domain Name). This includes all subdomains by default. Or,
- IP address: Enter an IP address (IPv4 or IPv6).
- Optionally, add a description to easily identify your domain and click Next.
- Define who can view and manage this domain based on asset groups:
- All asset groups: Select to allow all members of all asset groups to scan this domain based on their individual permissions.
- Specific asset groups: Select to allow all members of specific asset groups to scan this domain based on their individual permissions.
- Click Add domain. The domain is added to the allowed
list, and you can run a DAST scan. Note:
- All subdomains under the added domain are also allowed for scanning but is not scanned by default. To scan subdomains, you must explicitly add them to the 'Domains to test' list in ASoC when you submit a scan or include them in the scan template file.
- All domains for private site scanning (PSS) must be explicitly added to the allowed list, even if the scan is conducted on a private site.
- A subdomain is added only if it belongs to different asset groups than its parent domain.
- If a subdomain shares the same asset groups as its parent, the subdomain is removed to avoid duplicates.
Block a domain
To block a domain and its subdomain in the DAST scan, you can add them to the blocked list.
- Click Block domain.
- In the Block domain dialog box:
- Select the type of domain: Domain or IP Address.
- Based on the type of domain selected:
- Enter a domain name or FQDN (Fully Qualified Domain Name). Or,
- IP address: Enter an IP address (IPv4 or IPv6).
- Optionally, add a description to easily identify your domain.
- If you want to block all subdomains under this domain, select the Block all subdomains of this domain checkbox.
- Click Block domain. Once blocked, this domain cannot be scanned anymore, and any scheduled scans using these domains will fail.