REST API
The built-in REST API interface provides you with a way to visualize RESTful web services. The API documentation is built using Swagger, where you can test API operations and instantly view the results to help you scan your applications faster.
Before you begin
About this task
Learn how to use the interactive framework by following this example to import an application inventory by using the /api/v4/Apps/ImportFile REST API.
Procedure
-
Go to your Swagger page and bookmark it for future reference:
- North America data center users: https://cloud.appscan.com/swagger/index.html
- Western Europe data center users: https://eu.cloud.appscan.com/swagger/index.htmlNote:To access the previous version (v2), select "API v2" from the "Select a definition" drop-down menu.
-
Log in to Swagger with your HCL
ID.
-
Expand the Account API and click POST
api/v4/Account/ApiKeyLogin to expand the operation
details.
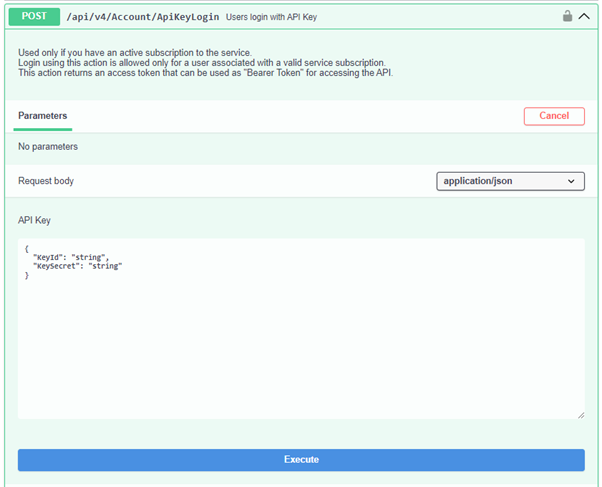
-
Copy the
"Token"value from the Response Body.
-
Expand the Account API and click POST
api/v4/Account/ApiKeyLogin to expand the operation
details.
-
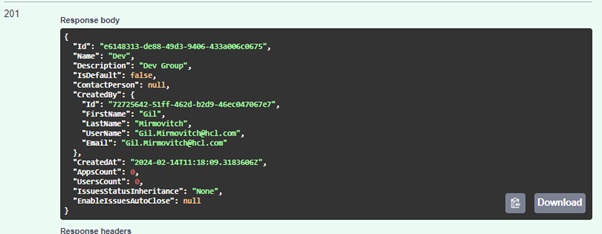
Create an asset group:
-
Replace the
"string"parameters with a name and description for the asset group. Keep the quotation marks.
-
Make note of the ID in the Response Body
section; you'll need to use that ID in the next API.
-
Replace the
-
Import an application inventory file:
-
Click Execute.
A successful import appears as follows:

-
Click Execute.
Example
- Make sure you are logged in to Swagger using the API: api/v4/Account/ApiKeyLogin.
- Upload the scan file using the API: api/v4/FileUpload and
save the FileId for later. For example,
"FileId": "274bd3a7-a231-41d0-80f6-d22d684af50d" - Expand the Scans API and click POST
/api/v4/Scans/Dast. Update the following parameters to
generate only the reports without running the scan.
- ScanOrTemplateFileId:: Update the
FileId you copied in step 2.
"ScanOrTemplateFileId": "274bd3a7-a231-41d0-80f6-d22d684af50d" - TestOperation: Set this to
ReportOnly
"TestOperation":
                                        "ReportOnly"
Note:Make sure you have mapped the AppID, ScanName, and other required parameters to run the API POST /api/v4/Scans/Dast. - ScanOrTemplateFileId:: Update the
FileId you copied in step 2.
Authenticate using a direct API Key
Authenticate API requests by sending your API Key ID and Secret in a custom HTTP header. The Direct API Key method skips exchanging your key for a session token. This simplifies automation scripts and CI/CD integrations because you no longer need to manage token lifecycles or expiration. Key benefits include:
- Simplified automation: No need to write logic for "Login," "Get Token," or "Refresh Token."
- Stateless-like experience: Send the key with every request; the system manages the session in the background.
- Reduced complexity: Ideal for simple scripts, one-off tasks, or integrations where maintaining session state is difficult.
Technical specification:
To use this feature, include the following header in your HTTP requests:
- Header name:
X-Api-Key - Header value format: The value must consist of your Key ID and Key Secret
separated by a colon (:).
KeyID:KeySecret - Example: If your credentials are:
Key ID: b0977ee5-c9df-0c8a-5909-184c690cbfa5Key Secret: UnKUn7HupAX9MFviJqYHRy6w7Fk50anSlheQJxQhTiuxThe header should look like this:X-Api-Key: b0977ee5-c9df-0c8a-5909-184c690cbfa5:UnKUn7HupAX9MFviJqYHRy6w7Fk50anSlheQJxQhTiux
- cURL
curl -X GET "https://cloud.appscan.com/api/v4/Scans" \ -H "Accept: application/json" \ -H "X-Api-Key: <Your_Key_ID>:<Your_Key_Secret>" - Python (Requests
library)
import requests

url = "https://cloud.appscan.com/api/v4/Scans"
key_id = "your_key_id"
key_secret = "your_key_secret"

# Construct the header value
header_value = f"{key_id}:{key_secret}"

headers = {
    "Accept": "application/json",
    "X-Api-Key": header_value
}

response = requests.get(url, headers=headers)

if response.status_code == 200:
    print("Success:", response.json())
else:
    print("Error:", response.status_code, response.text)
-
Expiration & refresh: The system maintains a 30-minute session for performance, but you do not need to track it. If the session expires, your key is revalidated and a new session is created automatically.
-
Revocation: If you delete your API Key in the AppScan portal, access is immediately revoked. Any active sessions using that key are terminated, and subsequent requests return 401 Unauthorized.
-
Permissions: Requests authenticated with this method inherit the same permissions as the user account that owns the API Key.
-
401 Unauthorized: Verify that your Key ID and Secret are correct and that the key has not been revoked or deleted.
-
Format error: Make sure there are no spaces between the Key ID, the colon, and the Key Secret (for example, ID:Secret, not ID : Secret).