Swagger UI Use - Authorization
Viewing all the available API endpoints and information on their required input and/or parameters does not require authorization. But if you wish to try out any of the available API requests using the Swagger UI, you must first authenticate yourself to the API service. This requires you to provide the current product license key and a valid UI account username and password.
- In the available API instances that are currently running, select an active API
instance like the one that is displayed in the following image:
Figure 1. API Saved List 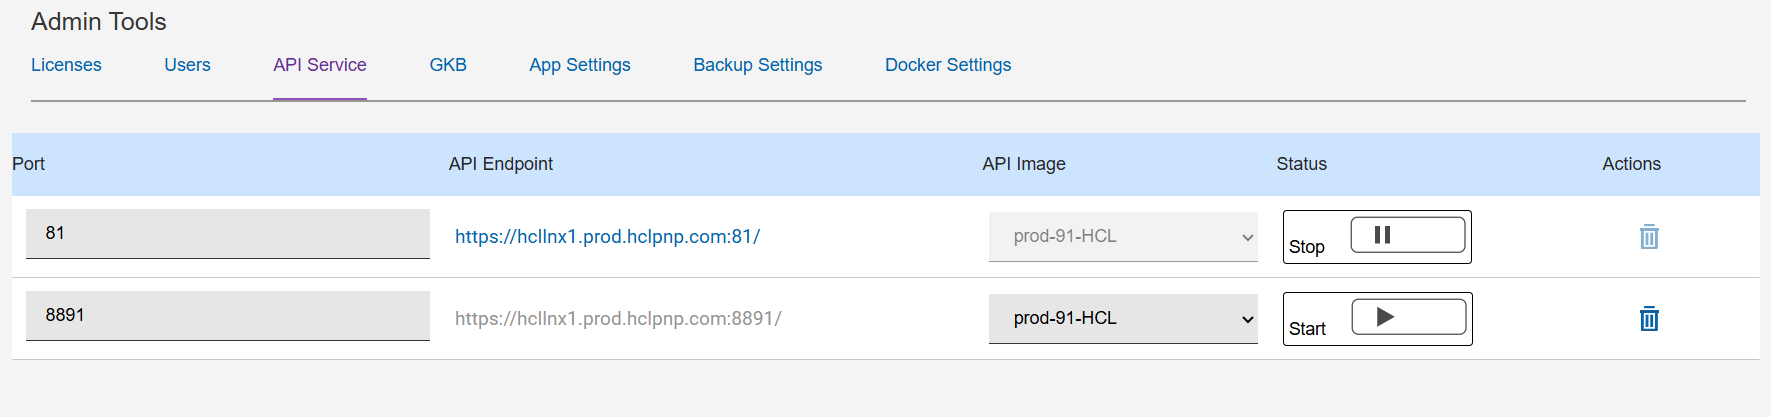
Figure 2. API Swagger Authorization Access 
- To authenticate, select Authorize.
Figure 3. Swagger API Access Authorization Window 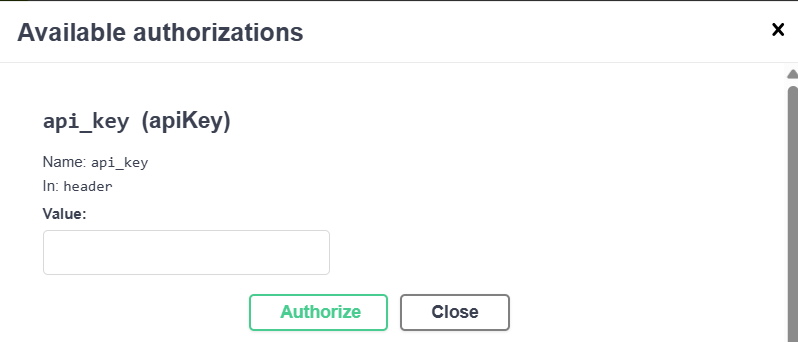
- Enter your product license key in the api_key (apiKey)field.
- Select Authorize to confirm the license. Note:The Authorize button will change to Logout once entered.Note:The api_key_parm field is currently not used or supported in the V9.1 release.
- In the basicauth section, enter a valid username and password.Note:Username and password must be the same that is used for accessing the V9.1 Web UI.
Figure 4. Authorize Using User Credentials 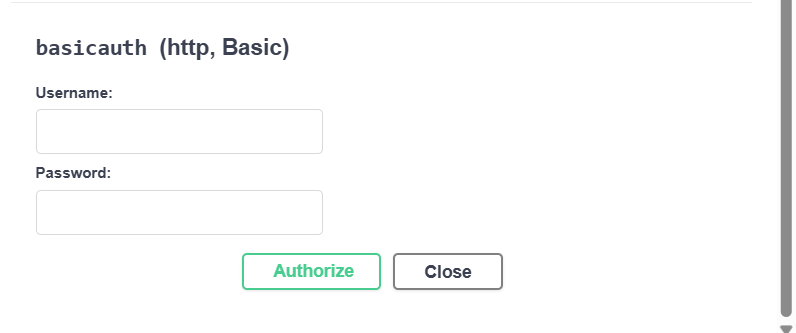
- SelectAuthorize.
If the credentials you entered have been verified successfully, the Authorize button will change to Logout.
- Select X or the Close button to close the Authorization request window.
If the authentication has been entered successfully, all the reports and utilities shown in the Swagger UI including the Custom SQL post capability will now be available to the user.
- To execute a report available under the Asset reports section, select the GET button next to your selected report (eg: /productinventory) to expand the report parameters and query section.
- Select the Try It Out button on the right-hand side.
Figure 5. Swagger UI Try-It-Out 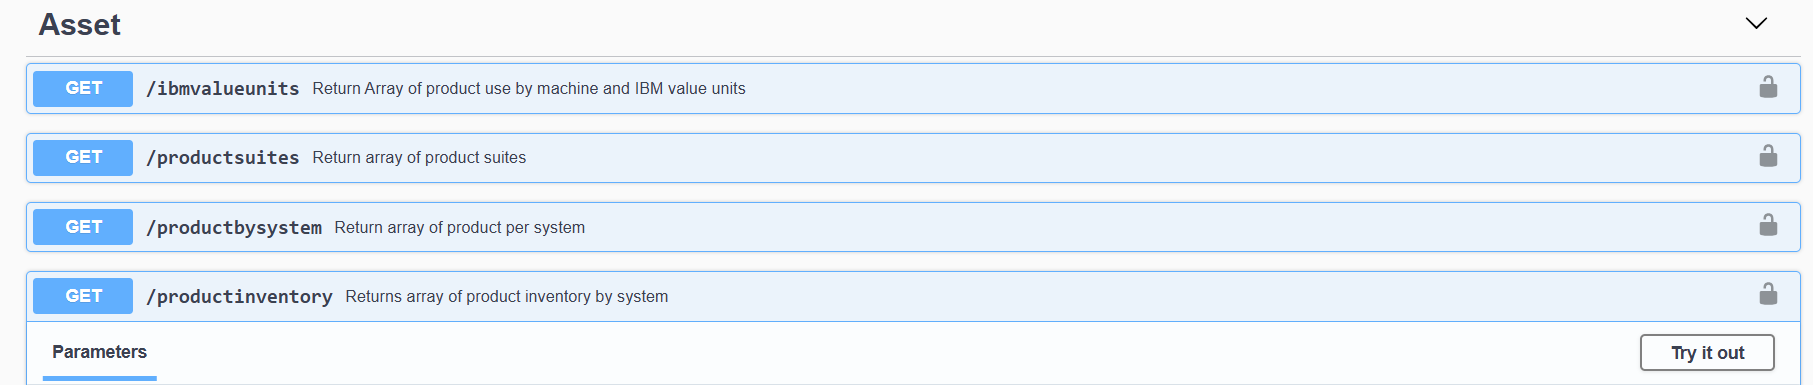
- In the Repository section, enter the name of a loaded repository you wish to execute the report against. Optionally enter any of the available filters, such as System, Vendor, or Product, to limit output results.
- Next, select the Execute button to perform the query.
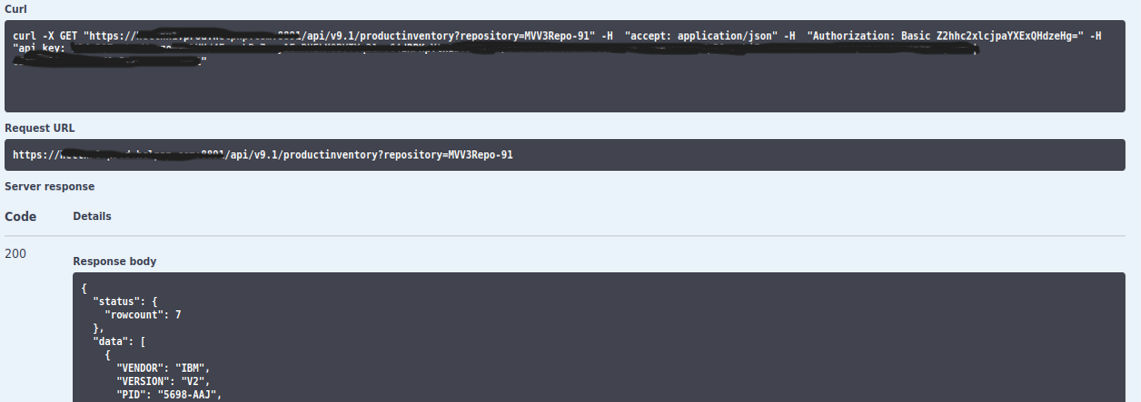
- Under the Responses heading will be three sections.
- Curl – this is mainly useful for your API developer(s) as it provides the option to remotely execute the report request from outside of Swagger (i.e., from z/OS)
- Request URL – this is the URL with the API endpoint and parameters used for the report request.
- Server response – this provides the API server’s response to the
user. A valid response code is 200, and the details will contain the
JSON-formatted data results of the report.
Some of the other possible server non-successful response codes are also displayed in the following image for reference.
The same process can be repeated for any of the other Swagger API endpoints that are available. Some require more parameters for the report to be executed. These input parameters will be shown in the Parameters section. Fields marked as * required and must be provided while other parameters that are optional can be set or left empty.