AD Sync
To change the configuration of AD Sync from HTTP to HTTPS, please follow the below steps:
- Press Win+R and type services.msc.
Figure 1. Hosting AD Sync from HTTP to HTTPS .png)
- Click OK to open Windows Services.
Figure 2. Hosting AD Sync from HTTP to HTTPS (cont.) .png)
- Search for HCL.iAutomate.ADSyncService and right-click on it.
- Click Properties.
Figure 3. Hosting AD Sync from HTTP to HTTPS (cont.) 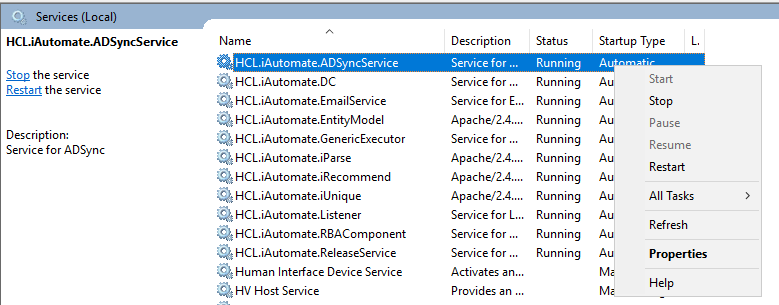
- Copy the value mentioned in ‘Path to executable’ as shown in the image below.
Figure 4. Hosting AD Sync from HTTP to HTTPS (cont.) 
- Open File Explorer and paste the copied path and press Enter to open the desired folder.
- Search for HCL.iAutomate.Service.AD.exe config file and open it in a Notepad.
Figure 5. Hosting AD Sync from HTTP to HTTPS (cont.) 
- Within the HCL.iAutomate.Service.AD.exe config file, find the key
‘ServiceHostURL’ and change its value from HTTP to HTTPS.
Figure 6. Hosting AD Sync from HTTP to HTTPS (cont.) 
- Within the HCL.iAutomate.Service.AD.exe config file, find the key
‘securityMode_Service’ and change its value from 2 to 3.
Figure 7. Hosting AD Sync from HTTP to HTTPS (cont.) 
- Within the HCL.iAutomate.Service.AD.exe config file, find the key
‘IsSelfSigned_Service’ and change its value from N to Y.
Figure 8. Hosting AD Sync from HTTP to HTTPS (cont.) .png)
- Change the security mode="TransportWithMessageCredential" under <binding> tag
Figure 9. Hosting AD Sync from HTTP to HTTPS (cont.) .png)
- Save the file for changes to be reflected.
- Open the command prompt as administrator and run the following
command:
netsh http add sslcert ipport=<ip>:<port on which service is running> appid={8c00e29d-1a3e-439b-a449-7e26b64b9d27} certhash="<Thumbprint of the certificate>"Note:Replace the < Thumbprint of the certificate> with the GUID identified earlier. - Select HCL.iAutomate.ADSyncService service and click Restart to restart the
service.
Figure 10. Hosting AD Sync from HTTP to HTTPS (cont.) 