Solution
- Open iAutomate Web URL and login with Organization Admin credentials.
- Go to Actions and click Manage Data Sources then click on Create Data Source button.
Figure 1. Create Data Source 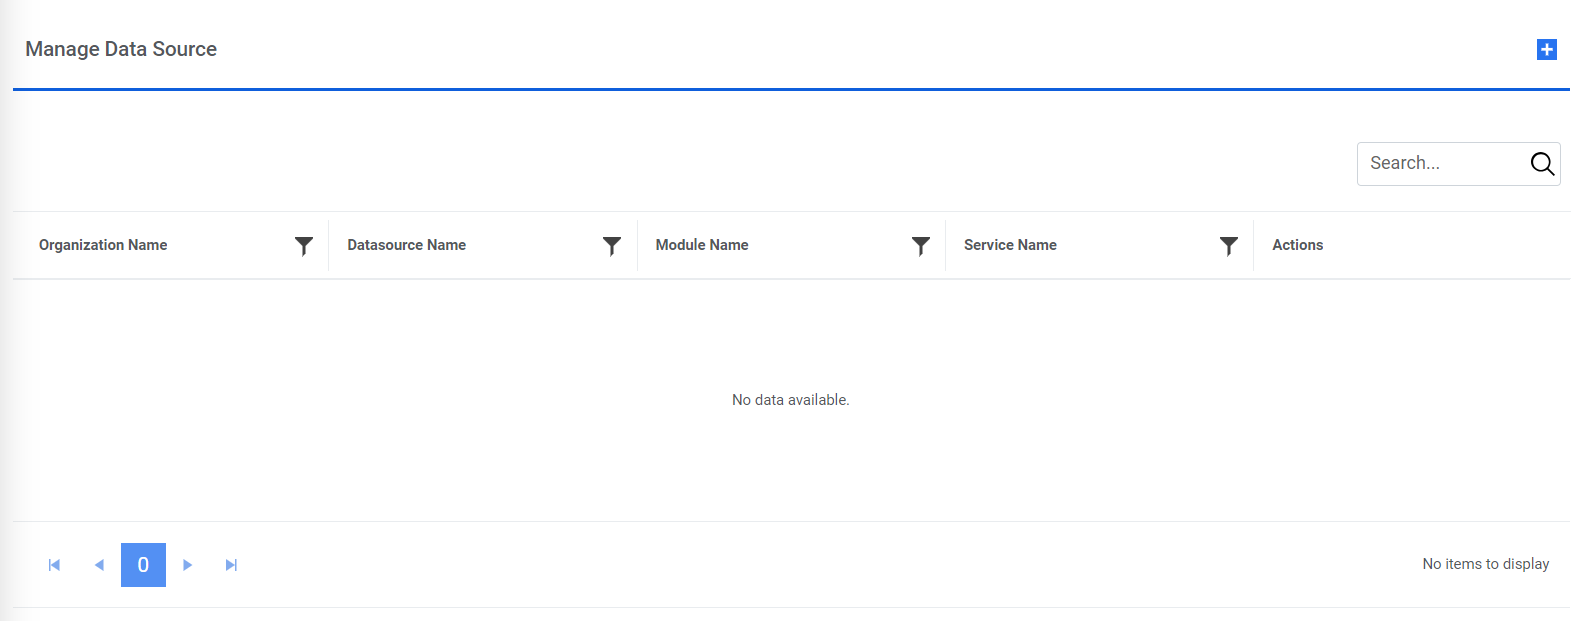
- The Create Data Source page appears.
- On the Organization tab, type in the details as per your requirement. Refer to the Lab Exercise 1 for Organization and ITSM Module information.
- Click Next.
Figure 2. Create Data Source (Cont.) 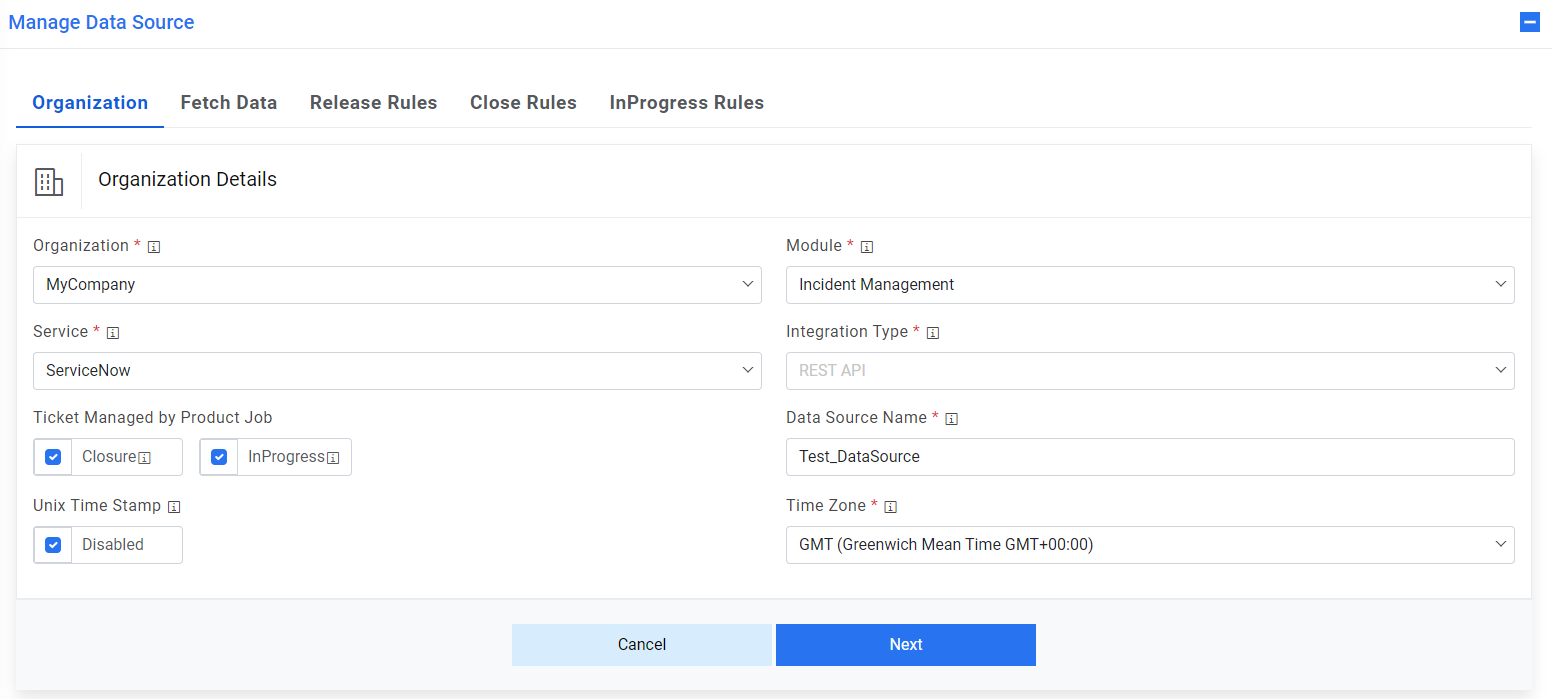
- The data source could be named Test_DataSource.
- Timestamp here indicate that date is in APOC format or not.
- On the Fetch Data Configuration tab, type in the details as per your requirement. It includes multiple sections.
Connection Details
Sample information that can be populated –
Authentication Type, User ID, and Password need to be provided by ITSM team. In case you are attending the classroom-based training, the instructor will provide you with the details.
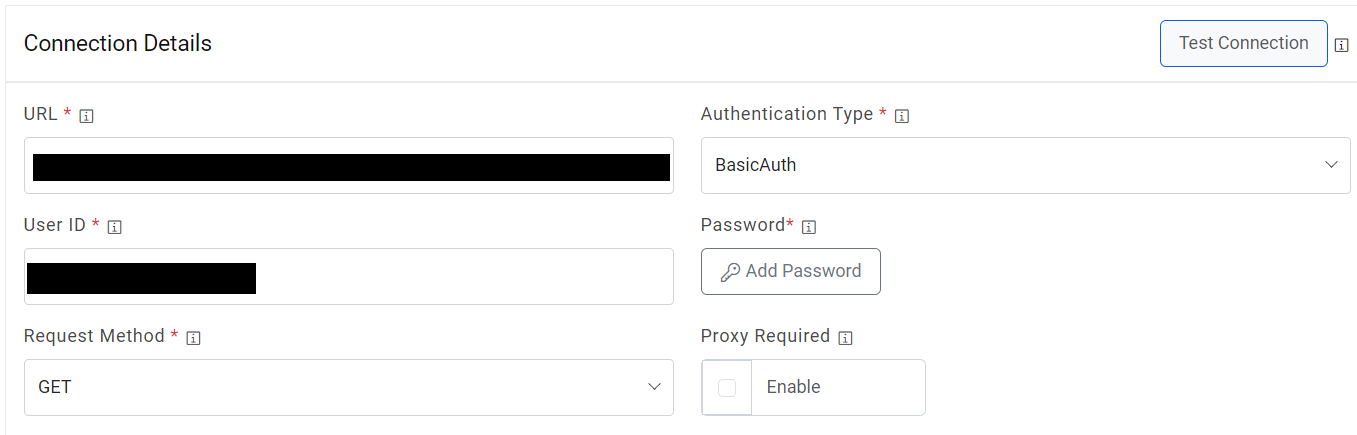
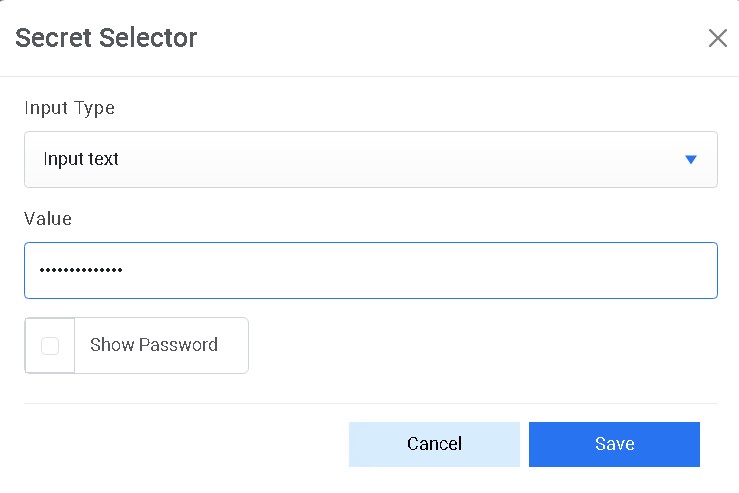
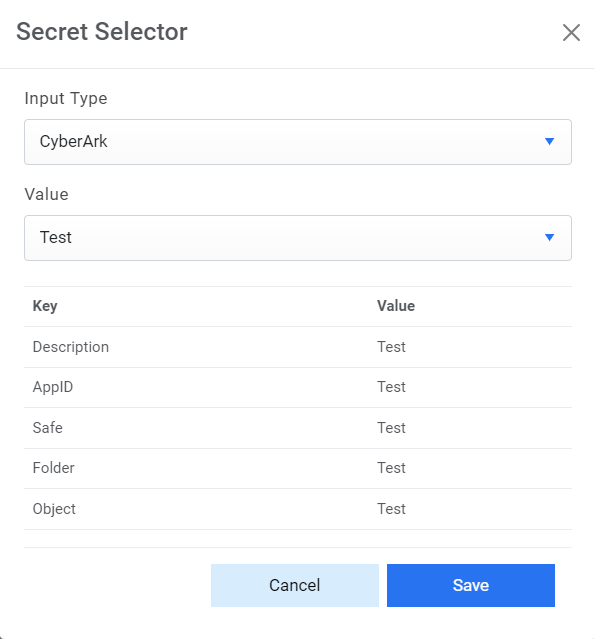
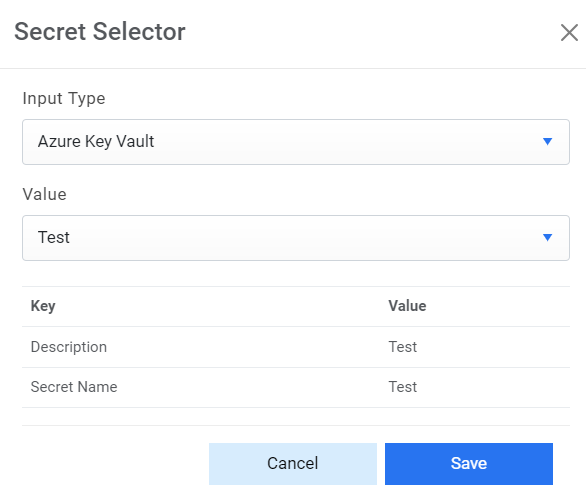
- Password: For password, click on icon next to it. If the password is available in plaintext, then select Input type as Input Text and enter the password in Value field. Else if it is available in Azure Key Vault then select Input Type as Azure Key Vault and then select any of the configured details from the value field. Else if it is available in any Key Vault such as CyberArk then select Input Type as CyberArk and then select any of the configured details from the value field. Else if it is available in Internal Secret Manager then select Input Type as Internal Secret Manager and then select any of the configured details from the value field.

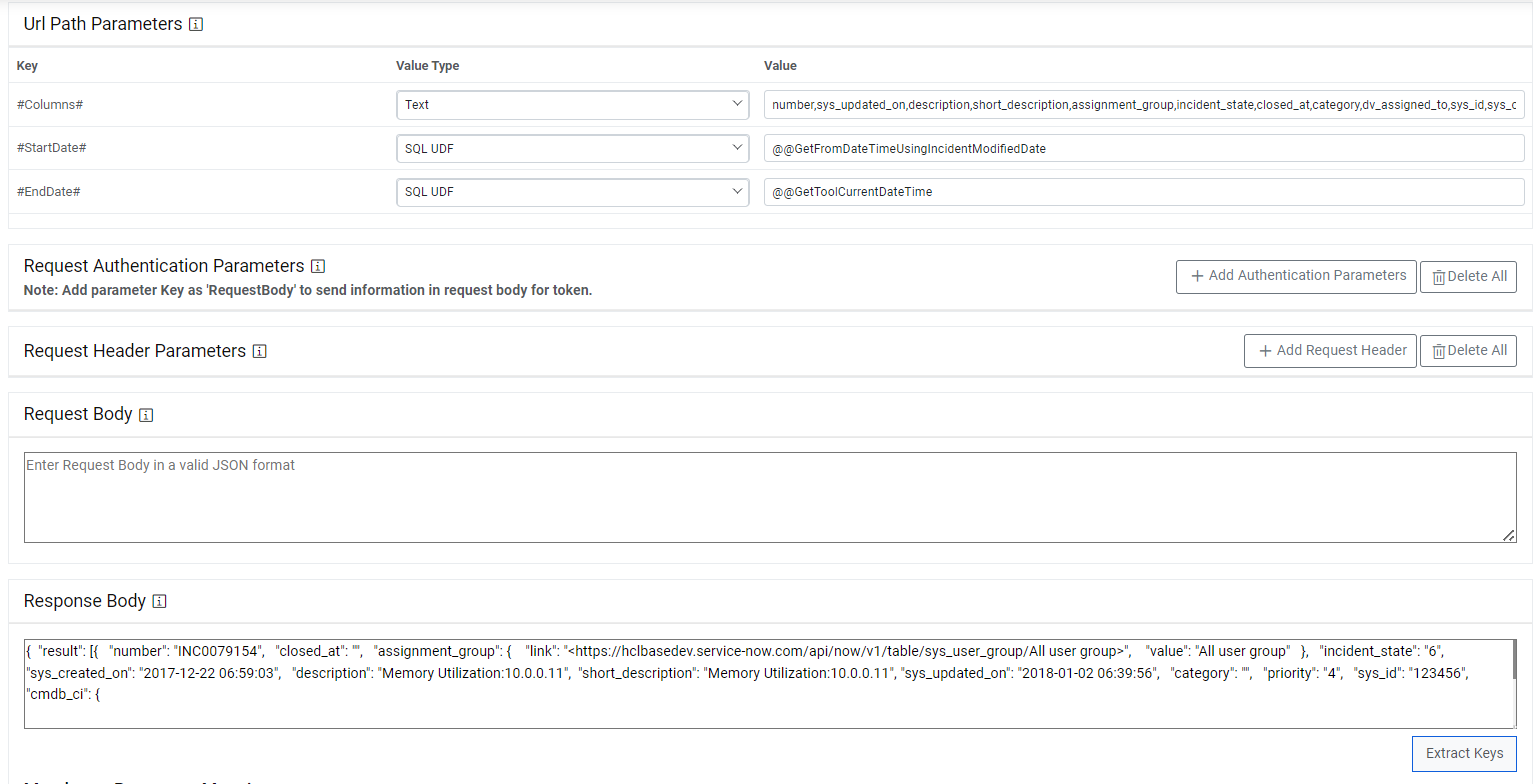
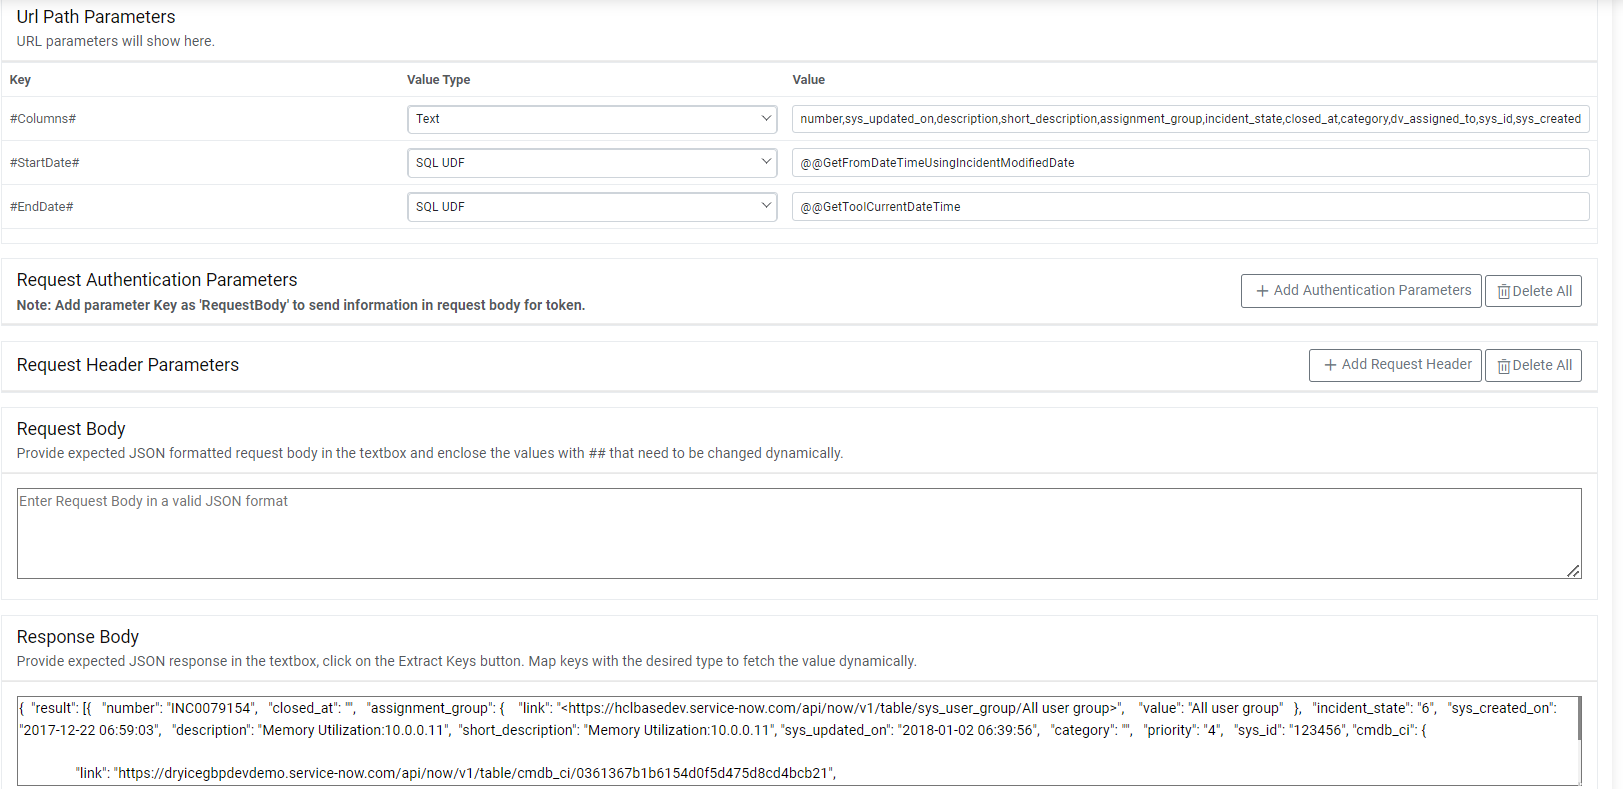
- Request Authentication Parameters and Request Header Parameters. See below the sample information:
Key: #Columns#
ValueType: Text
Value:
 number,sys_updated_on,short_description,description,assignment_group,incident_state,closed_at,category,dv_assigned_to,sys_id

Key: #StartDate#
ValueType: SQL UDF
VALUE: @@GetFromDateTimeUsingIncidentModifiedDate (applicable for ITSM Tool: SNOW)

Key: #EndDate#
ValueType: SQL UDF
VALUE: @@GetToolCurrentDateTime (applicable for ITSM Tool: SNOW)

Response Body:

{  "result": [{   "number": "INC0079154",   "closed_at": "",   "assignment_group": {    "link": "<https://sample.service-now.com/api/now/v1/table/sys_user_group/All user group>",    "value": "All user group"   },   "incident_state": "6",   "sys_created_on": "2017-12-22 06:59:03",   "description": "Memory Utilization:xx.x.x.xx", "short_description": "Memory Utilization:xx.x.x.xx",  "sys_updated_on": "2018-01-02 06:39:56",   "category": "",   "priority": "4",   "sys_id": "123456"  }] }
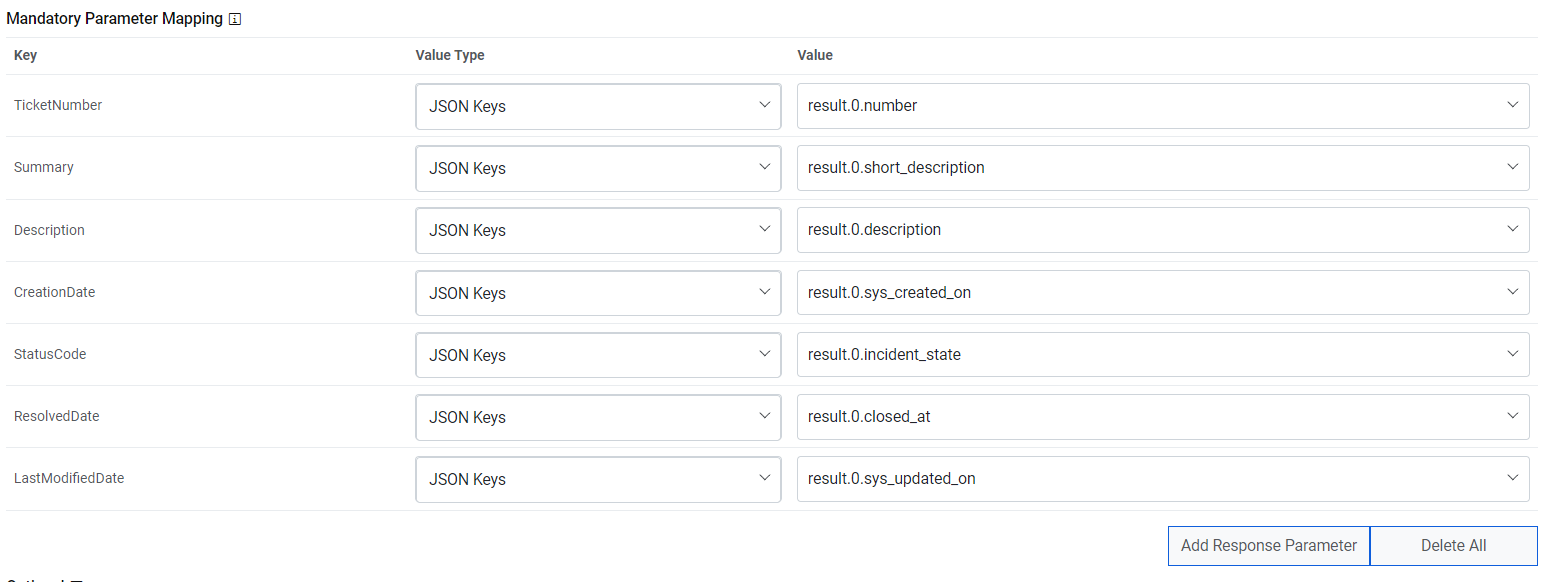
- Mandatory Parameter Mapping
This section maps the mandatory columns required for iAutomate with the fields available in response received. The field values are the same as the ones available in JSON added in Response Body section. Refer to below table for sample information:
Sample Mandatory Parameter Mapping
| TicketNumber | JSON.Keys | result.0.number |
| Summary | JSON.Keys | result.0.short_description |
| Description | JSON.Keys | result.0.description |
| CreatedDate | JSON.Keys | result.0.sys_created_on |
| StatusCode | JSON.Keys | result.0.incident_state |
| ResolvedDate | JSON.Keys | result.0.closed_at |
| LastModifiedDate | JSON.Keys | result.0.sys_updated_on |
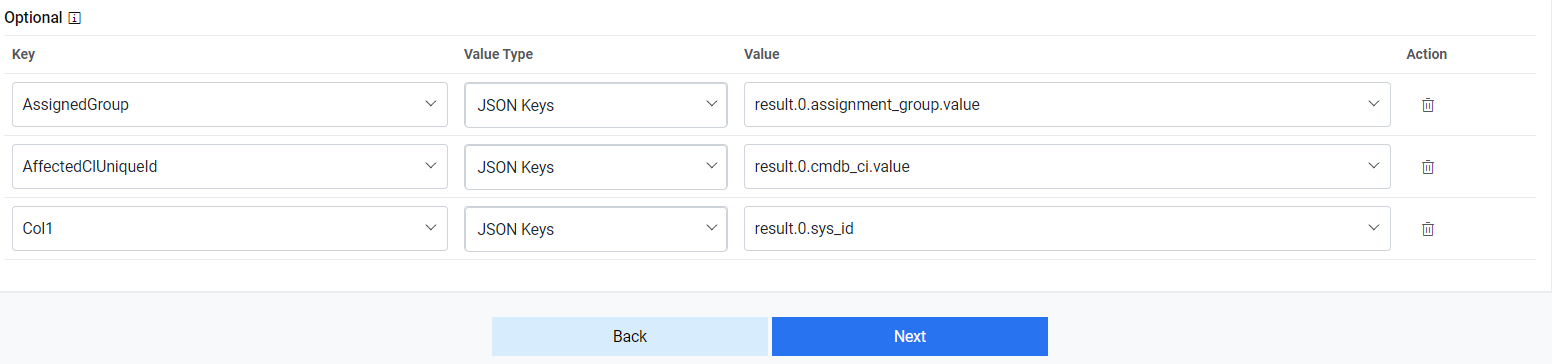
- Optional
This section is an extension to Mandatory Parameter Mapping section. You can create additional columns in Automate database if extra parameters are to be mapped. Refer to table below for sample information:
Sample Extended Mandatory Parameter Mapping
| AssignedGroup | JSON.Keys | result.0.assignment_group.value |
| Col1 | JSON.Keys | result.0.sys_id |
- Click Next after populating all the sections in Fetch Data Configuration tab.
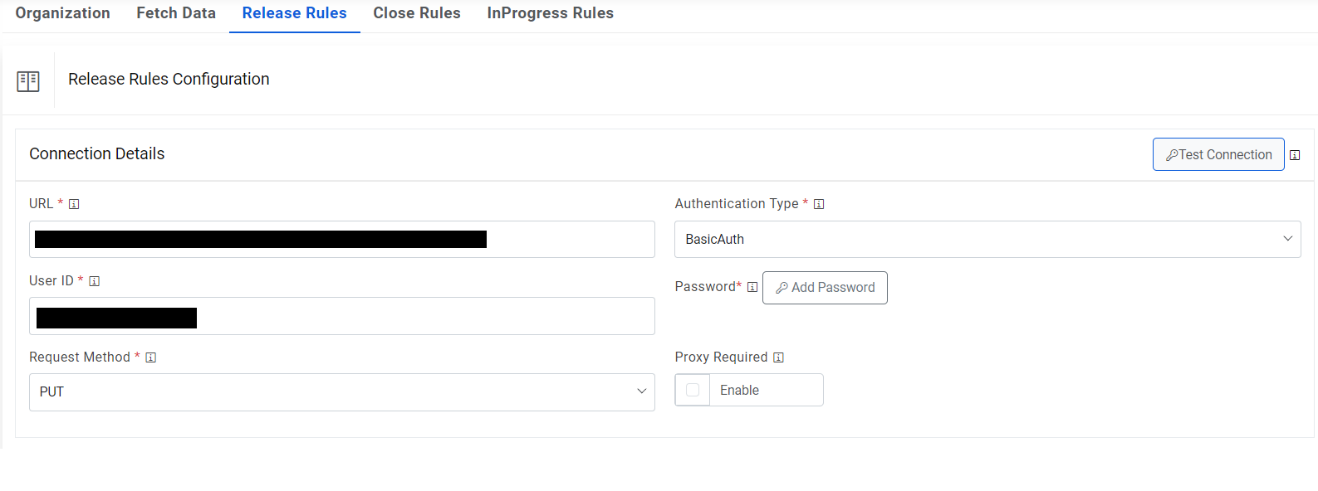
- On the Release Rules Configuration tab, type in the details as per your requirement.
- ITSM (PUT) details have to be entered as shown in the screenshot below. See below the
sample information:
- URL: https://sample.service-now.com/api/now/table/incident/#incident#
- AuthenticationType, UserId, Password, RequestMethod have to be provided by ITSM team. Please get in touch with lab instructor for the information.
- ITSM (PUT) details have to be entered as shown in the screenshot below. See below the
sample information:
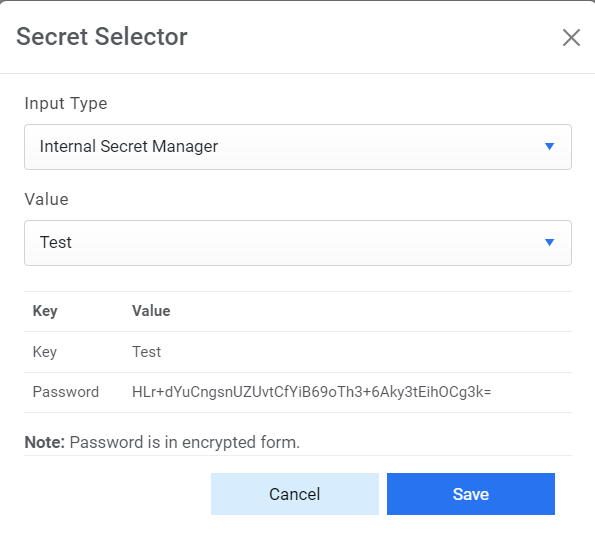
- Password- For password, click on icon next to it. If the password is available in plaintext, then select Input type as Input Text and enter the password in Value field. Else if it is available in Azure Key Vault then select Input Type as Azure Key Vault and then select any of the configured details from the value field. Else if it is available in any Key Vault such as CyberArk then select Input Type as CyberArk and then select any of the configured details from the value field. Else if it is available in Internal Secret Manager then select Input Type as Internal Secret Manager and then select any of the configured details from the value field.
.jpg)
.png)
.png)
It also has other fields. Request Payload should be populated in following fields:
- Considering that sample information has been populated as in Release Rules Configuration, URL Path parameters sample value can be referenced from the table below:
| Incident | Table.Columns | Col1 |
- For sample Request Body, refer to following section:
RequestBody
{ "assignment_group" : "#AssignmentGroup#","work_notes" : "#work_notes#" }- Sample request can be captured in following fields:
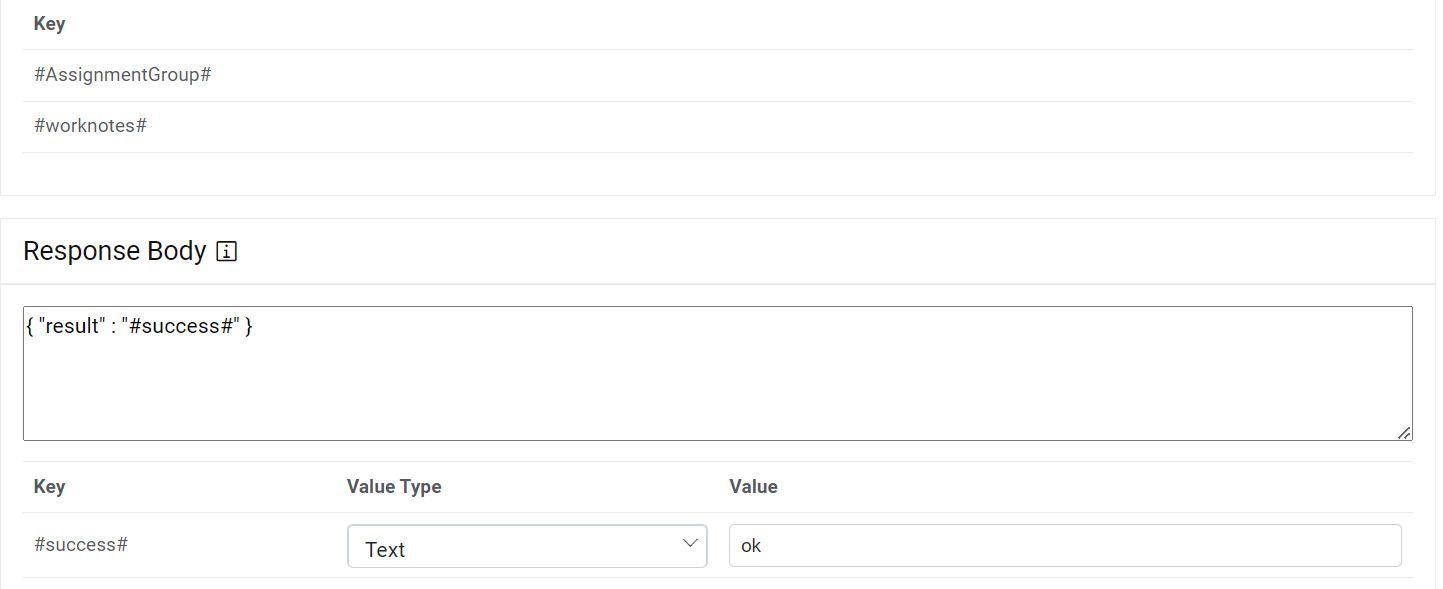
- For sample Response Body, refer to following section:
Response Body
{ "result" : "#success#" }- Response Key value mapping can be done as per below table:
| #success# | Text | OK |
- Click Submit to create the data source.
- To view the data source and related information, go to Actions and click Manage Data Sources.
- Ensure that the newly created data source is visible in the list.

- To manage the entry criteria, click gear icon in Action column against the data source.
.png)
- The Manage Entry Criteria popup appears.

- Define entry criteria on this screen. For example, if you want to pull tickets for iAutomate Group Assigned group only, then you can save the same filter condition as shown in above screen.