Secure Gateway
Secure gateway provides an intermediate connection between the gateway client and BigFix AEX through which users can query the clients which would be installed on customer sites on an encrypted connection. This is required for connecting with applications which reside on premise or are not exposed to the internet and need to communicate with a BigFix AEX tenant through APIs. The gateway also has a server for serving updates to client apps and uploading new client builds.
- The secure gateway client should be downloaded and installed on the relay server which will host the gateway.
- To download the Gateway Client, go to your tenant’s integration page and open the
connector for gateway and click on Download Client Application. After that, the download
page for the Gateway Client will open in a new tab and you can download the latest build of
the client.
Figure 1. Secure Gateway Connector in Global Admin .png)
- Open the configuration page for the secure gateway, click on generate new key and then
click on Download Gateway Application to download the client. Copy the newly generated key.
Figure 2. Secure Gateway Configuration Page 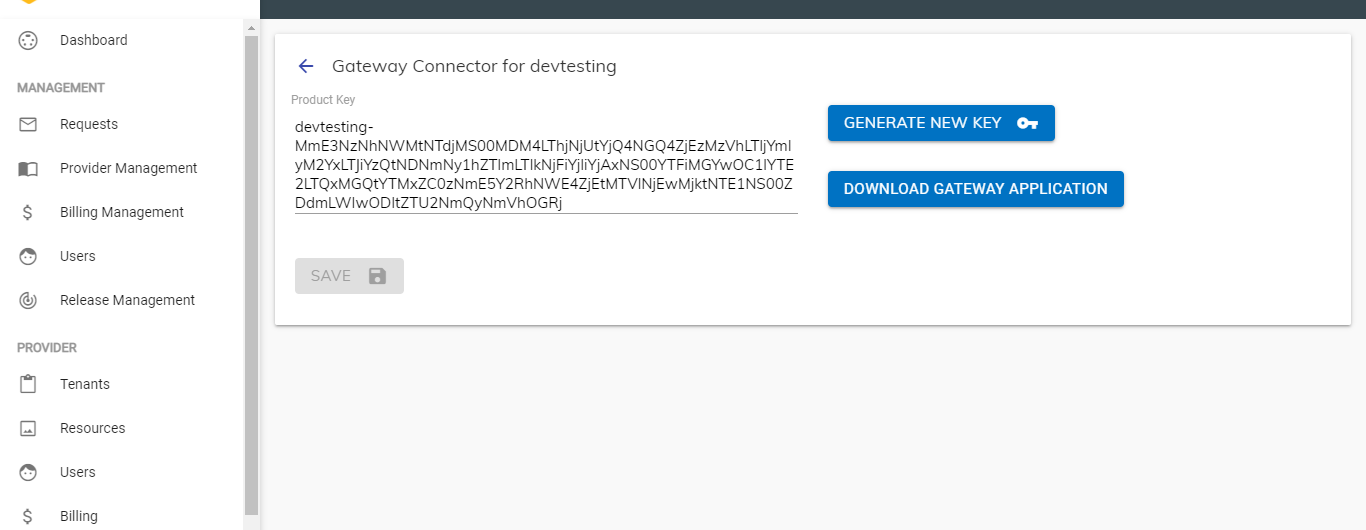
- On clicking the download button mentioned in the previous point, you will be
redirected to the download page, which will provide the link for the latest stable
executable installer for Windows. (Only applicable for Windows machine)
Figure 3. Secure Gateway Download Page 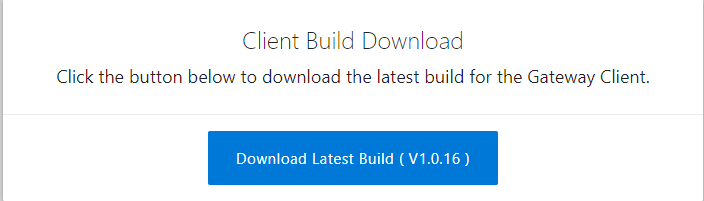
- Open the downloaded executable and it will install the application in your system.
When the installation is finished, the app will start up and will show the following page:
Figure 4. Installed Secure Gateway Main Page 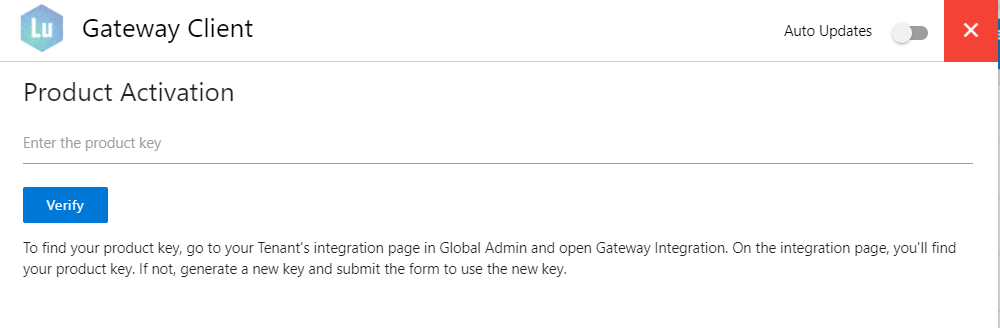
- Paste the key generated in step 3 in the product key input to activate the application. Once the key is entered, click on the Verify button to activate the client. On activation, you’ll see the following screen.
- The endpoint table will show all the endpoints that will be added to the application.
Figure 5. Secure Gateway Main Page after Activation 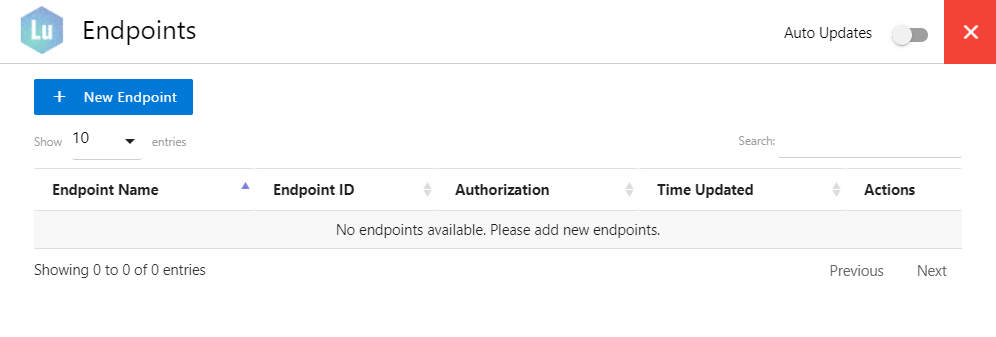
- To add a new end point or an application to connect with, click on New Endpoint on the
top of the screen to open the endpoint form.
Figure 6. Secure Gateway New Endpoint 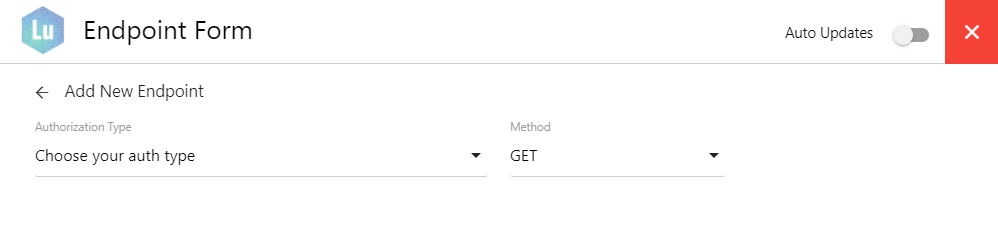
- Based on the application, API, and access type, you can choose the Authorization type
for the endpoint from the dropdown. The currently supported auth types are SCCM, Basic Auth,
API Key and Bearer Token. As for the API method, GET, POST, PUT and DELETE methods are
available. After the credentials are entered, click on Add Endpoint to add it.
Figure 7. Secure Gateway Endpoint Configuration 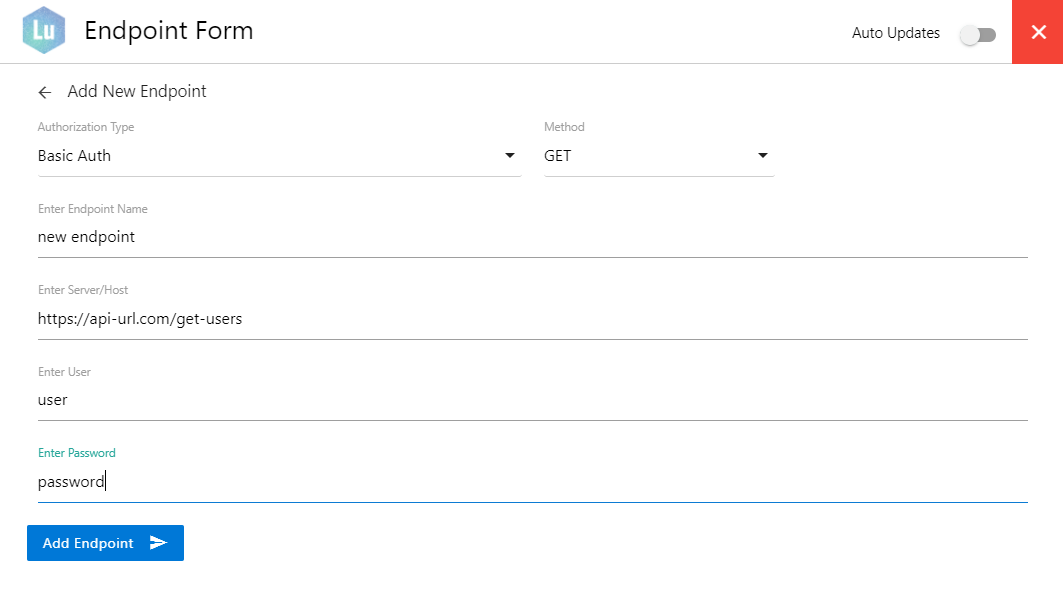
- The endpoint table will look like follows an endpoint has been added. The table also
shows the unique Endpoint ID created for the endpoint which will be used to relay requests
to the client since the endpoint credentials are not meant to be leave the customer
environment.
Figure 8. Secure Gateway Endpoint Successfully Added 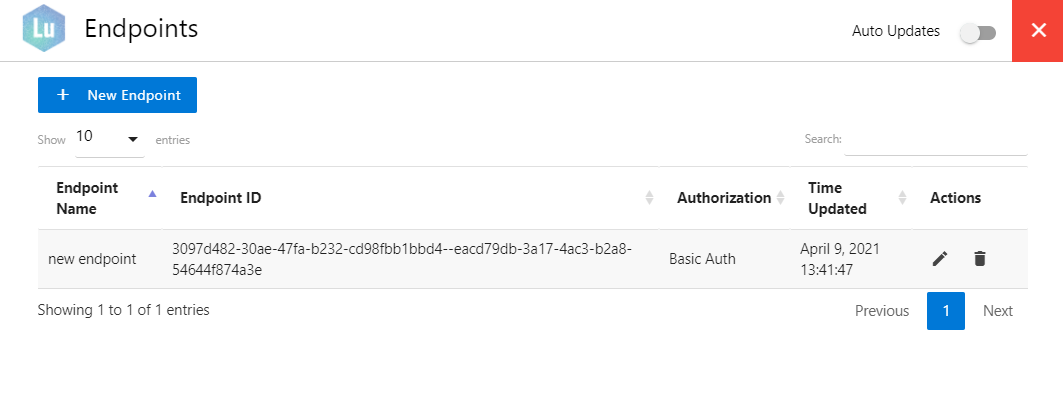
- You can also edit the endpoint details or delete the endpoint itself using the two
icons under the Actions column for each added endpoint.
Figure 9. Secure Gateway Endpoint Edit Details 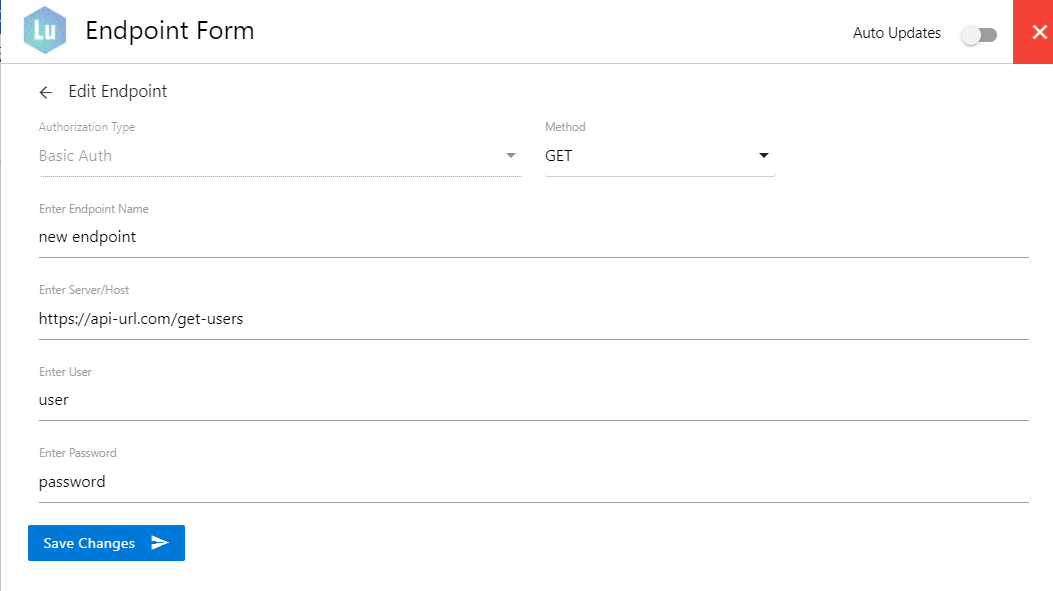
Figure 10. Secure Gateway Endpoint Edit 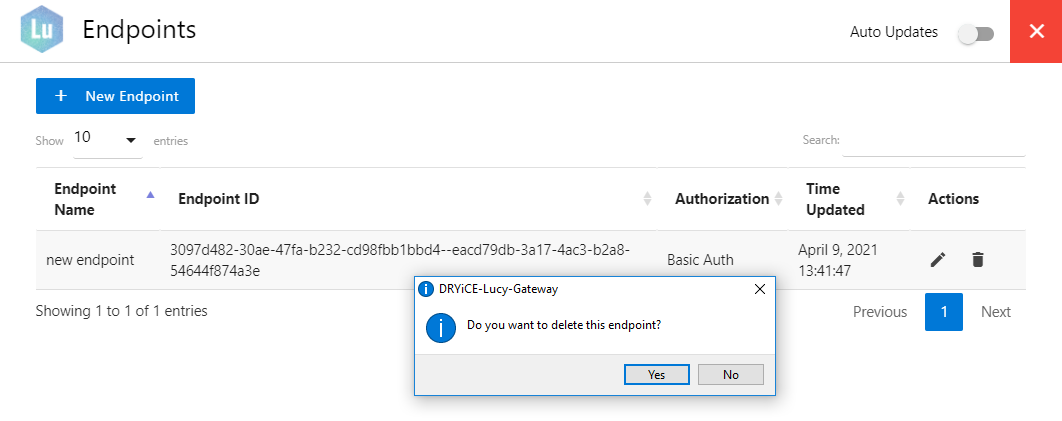
- If you add an endpoint with SCCM credentials, you’ll also get icon besides the auth
type under Authorization column which will have the scripts that can be executed for that
SCCM client.
Figure 11. Secure Gateway Endpoint SCCM Edit 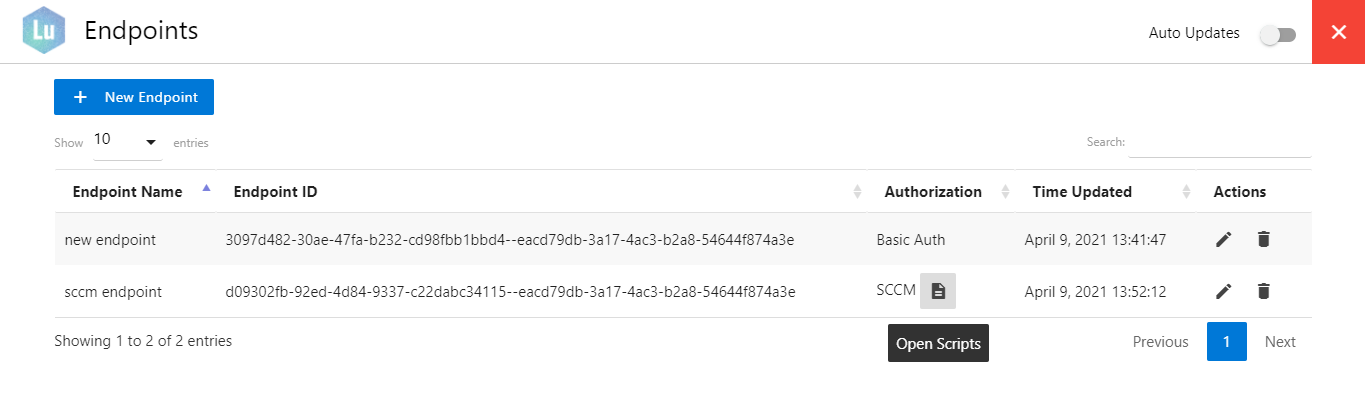
- SCCM activities and queries are triggered using specific scripts. A copy of these out
of the box scripts is created whenever a new SCCM endpoint is created. To view these
scripts, click on the open script’s icon.
Figure 12. Secure Gateway SCCM Scripts 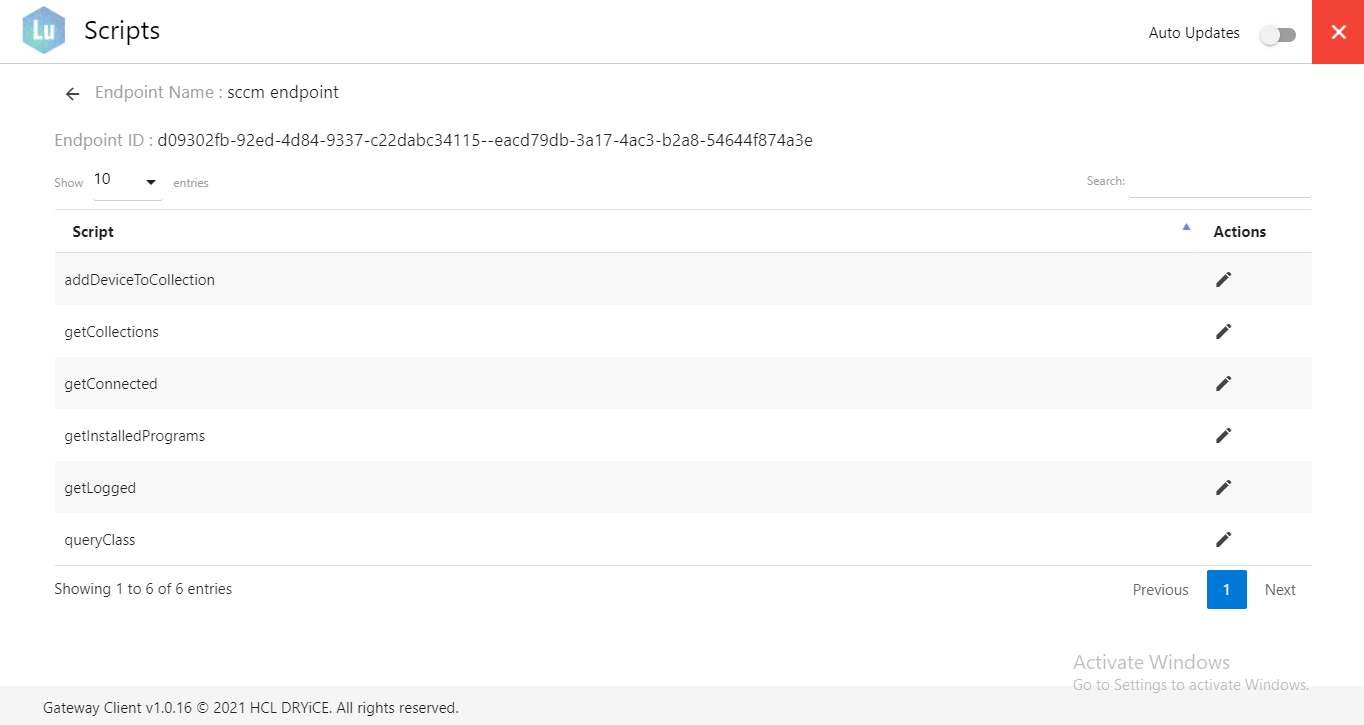
- Although these scripts work out of the box, customers can make changes to these copies
of scripts for this endpoint based on their configuration. To do this, click on the edit
icon for any script and you’ll be shown a modal where you can edit the scripts:
Figure 13. Secure Gateway SCCM Scripts Edit 
- For updating the gateway client, you’ll find the Auto Update toggle on the top bar,
which you can enable so that latest version of the Gateway Client. You can click on the red
cross icon to minimize the application to the tray.
Figure 14. Secure Gateway Enable Auto Update 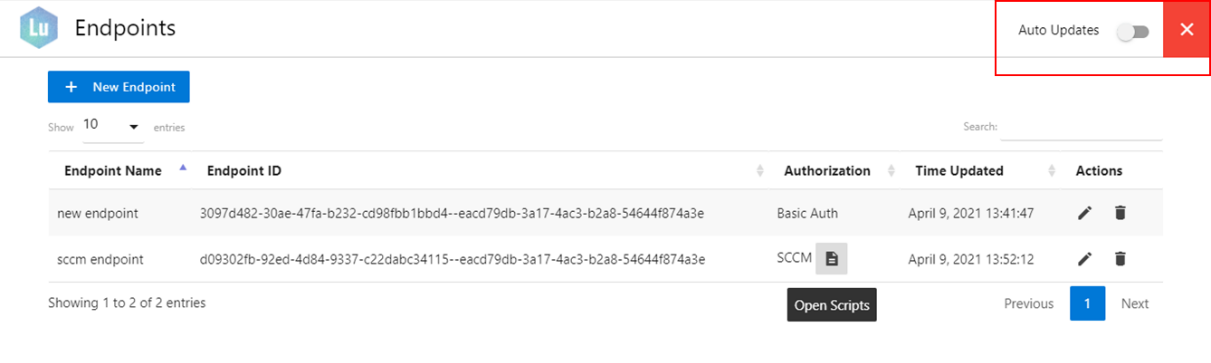
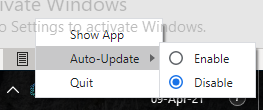
- Auto Updates can also be toggled via the tray icon:
Figure 15. Secure Gateway Enable Auto Update from Taskbar Tray