Login information
- The instance URL to be used for the HCL BigFix Service Management trial is: https://support.bigfixsm.io/
- You must have been provided with four sets of login credentials, one each for the
following roles:
- Consumer
- Approver
- Fulfiller/Support User
- Manager
- If at any time during your trial, you require assistance, please reach out to us at bigfixsm.trial@hcl-software.com
Log into the HCL BigFix Service Management instance
- Click on the URL https://support.bigfixsm.io/ and use the consumer role credentials to log into the instance.
- Click on Sign In upon entering the credentials.
Landing Page
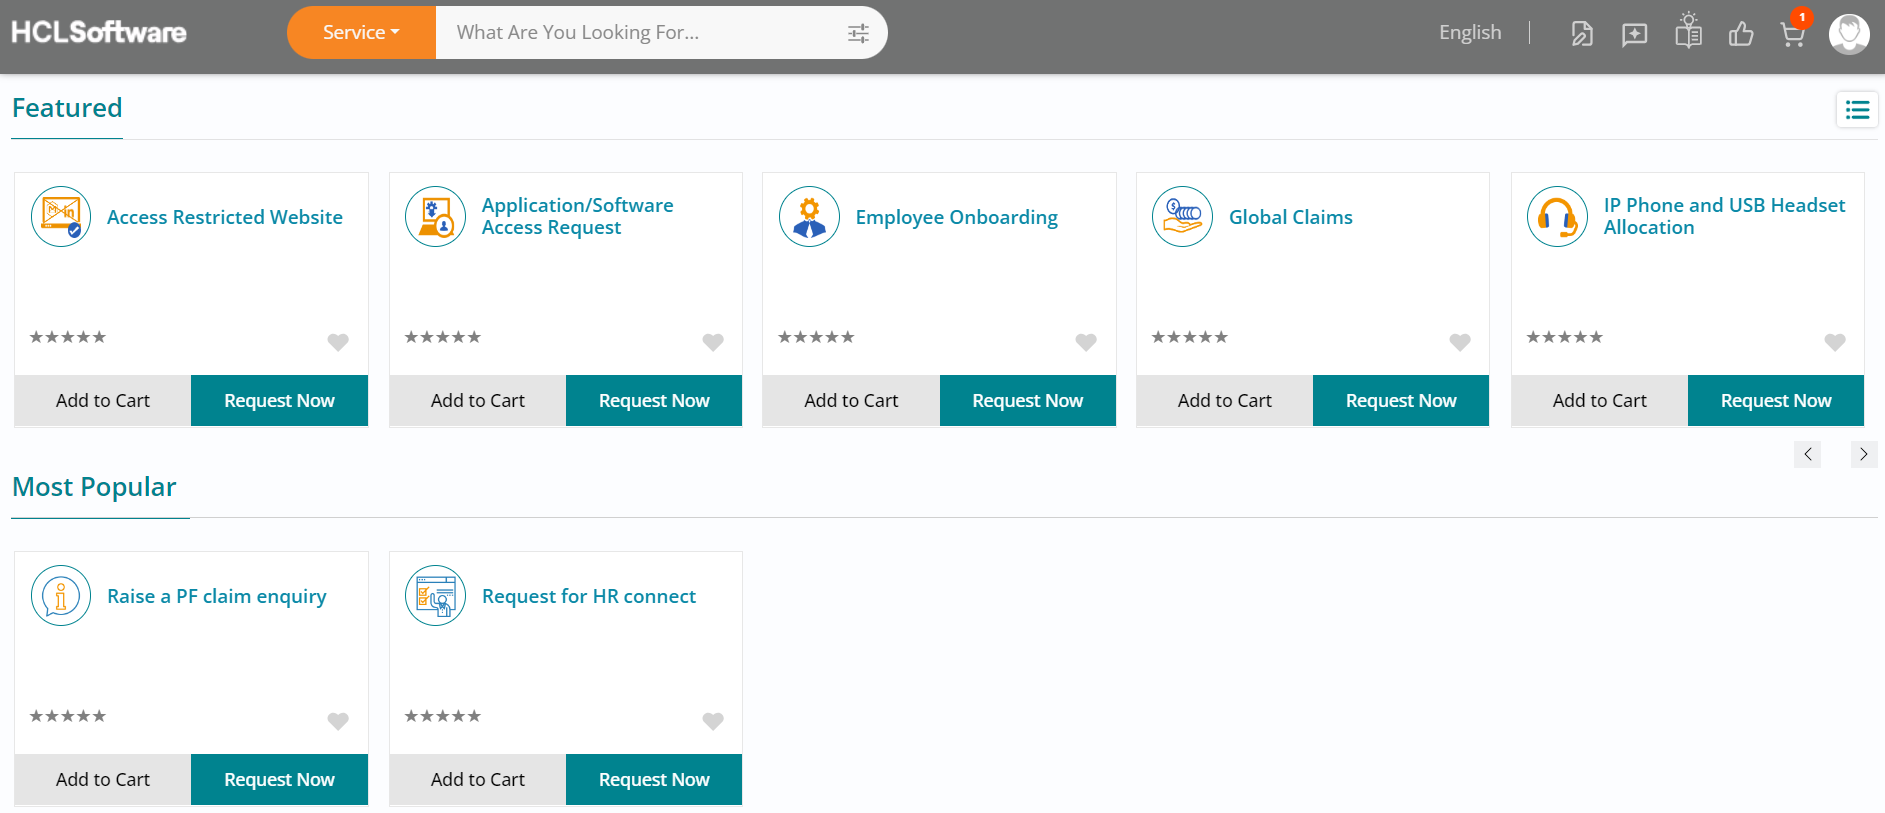
- Upon logging in, you will see the consumer homepage of HCL BigFix Service Management.
- You can make use of the navigation arrows in the featured section to browse through the
service offerings.
Browse Through the Offerings
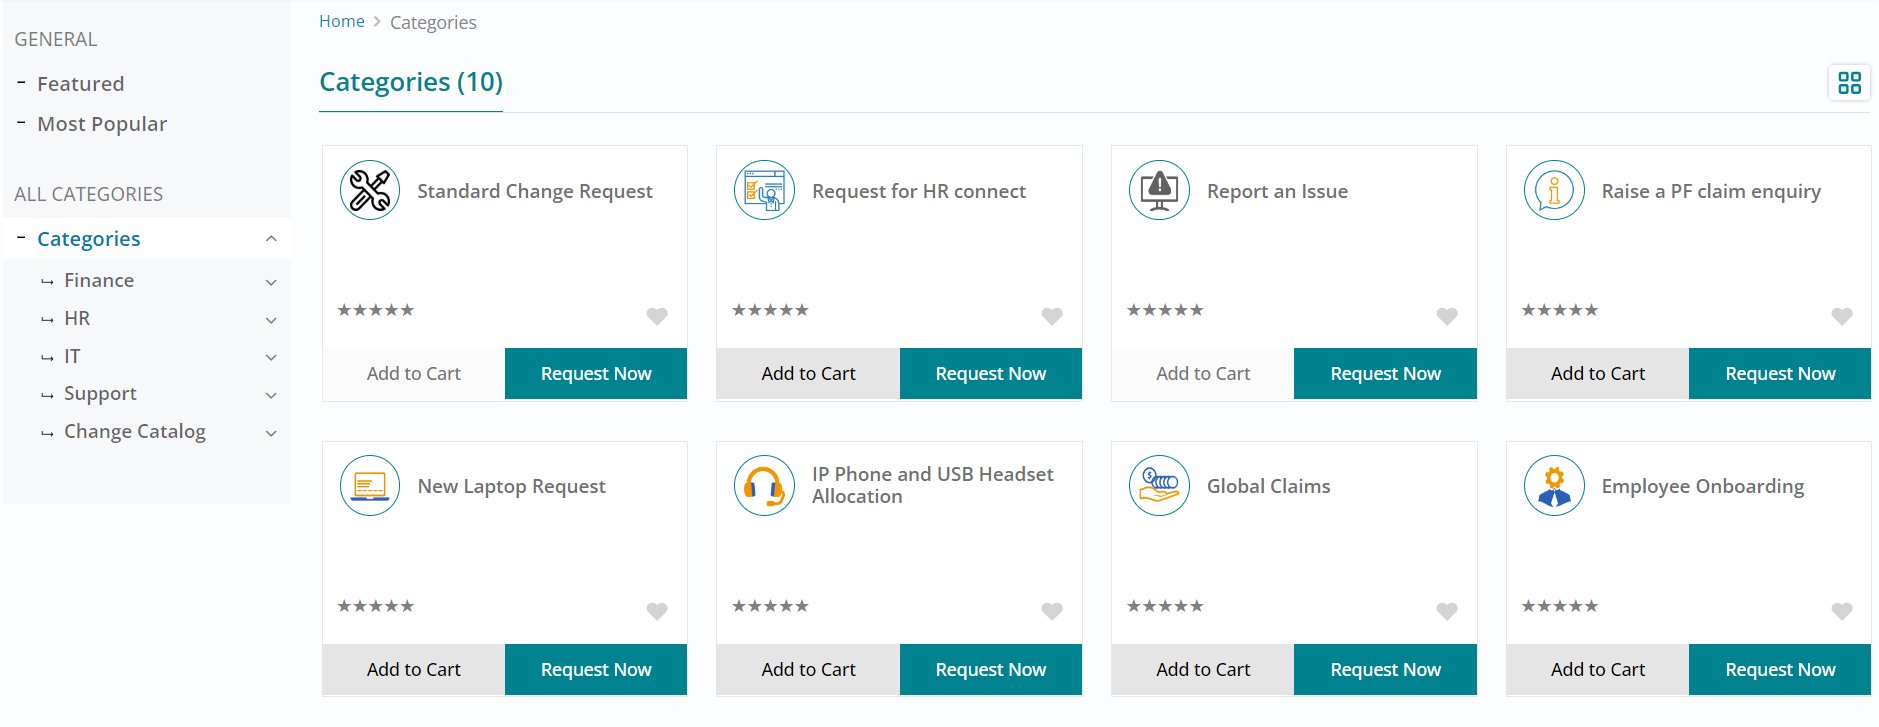
- To view the service offerings segregated by business functions specific categories, click
on List View button towards the top right of your screen.
.png)
- The business function specific category view is visible towards the left.
- Click on Categories to expand the section. You may choose to expand each category to view
the service offerings available to place an order / request.
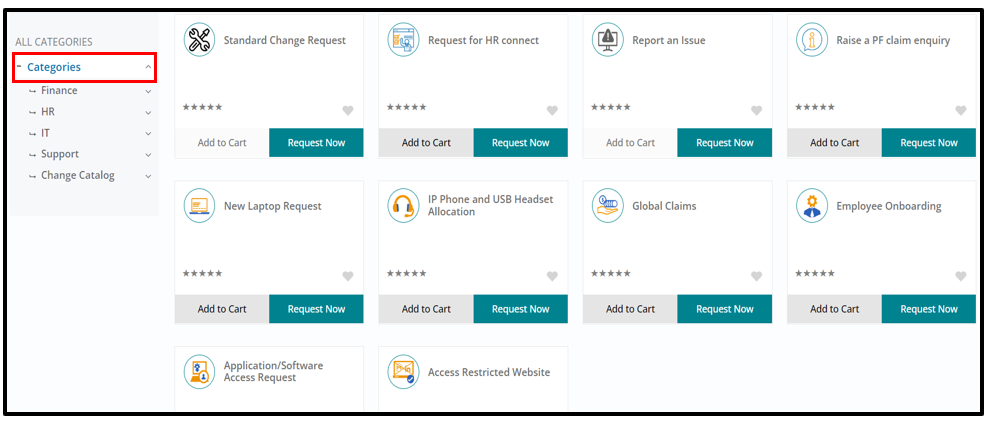
- Once you have browsed through the categories, to go back to the previous view, click on
the card view button on the top right of your screen.
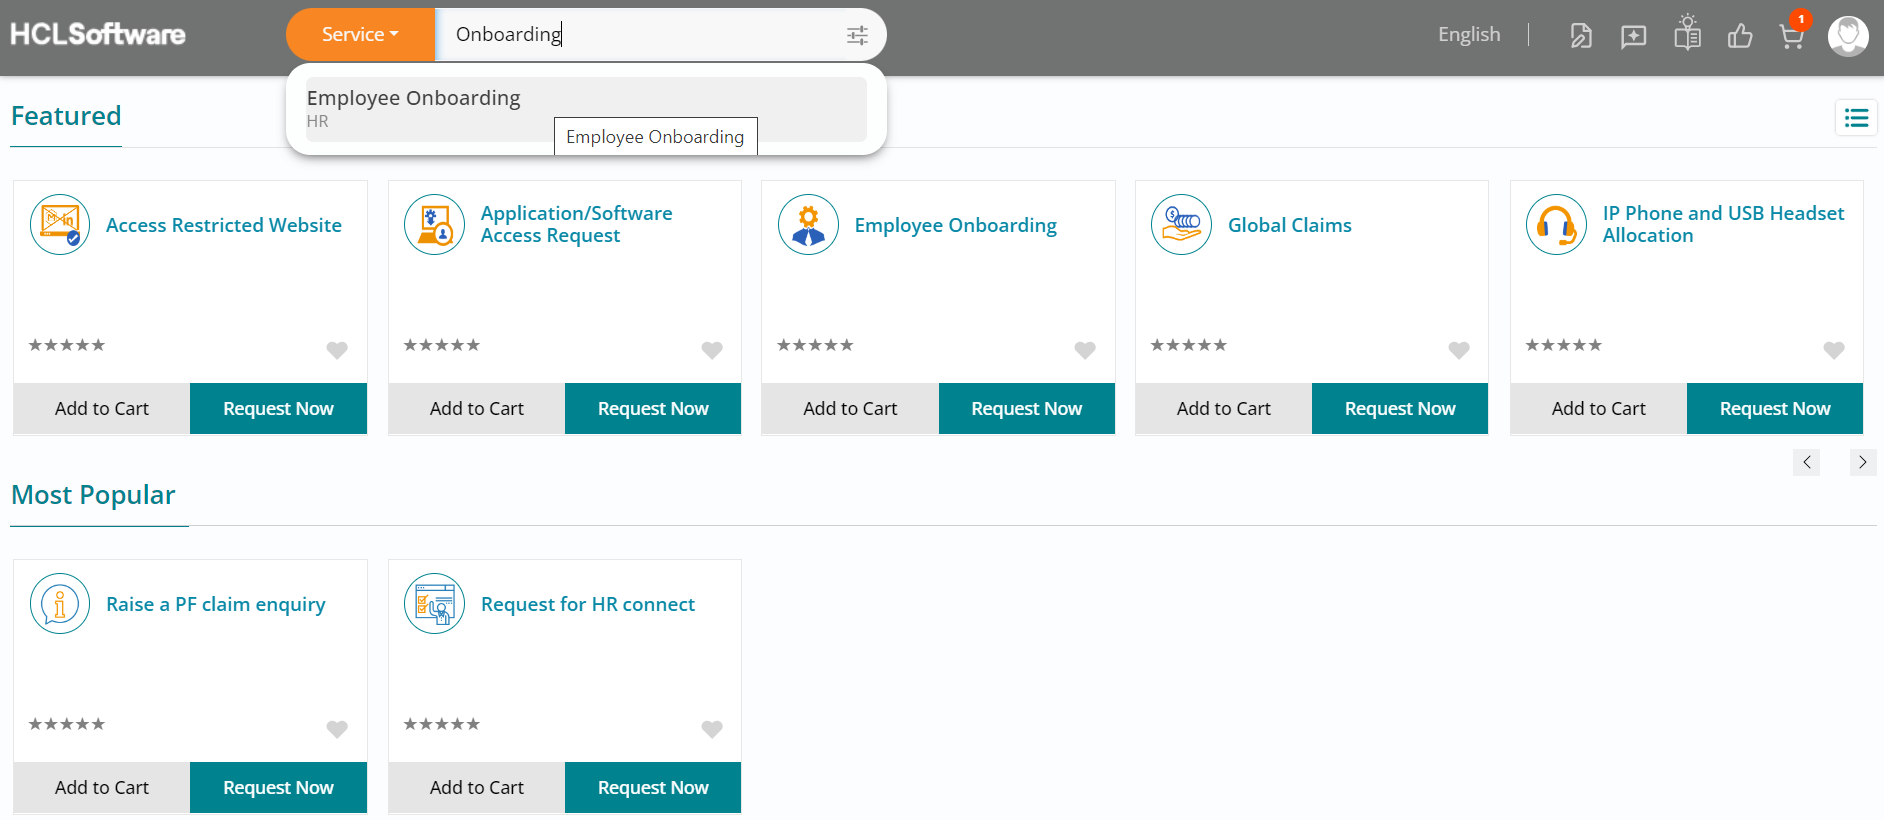
Global Search
- Type in ‘Onboarding’ on the Global Search section of the consumer homepage and basis the keyword typed in; the related service offerings will appear for selection.
- Click on Employee Onboarding offering.
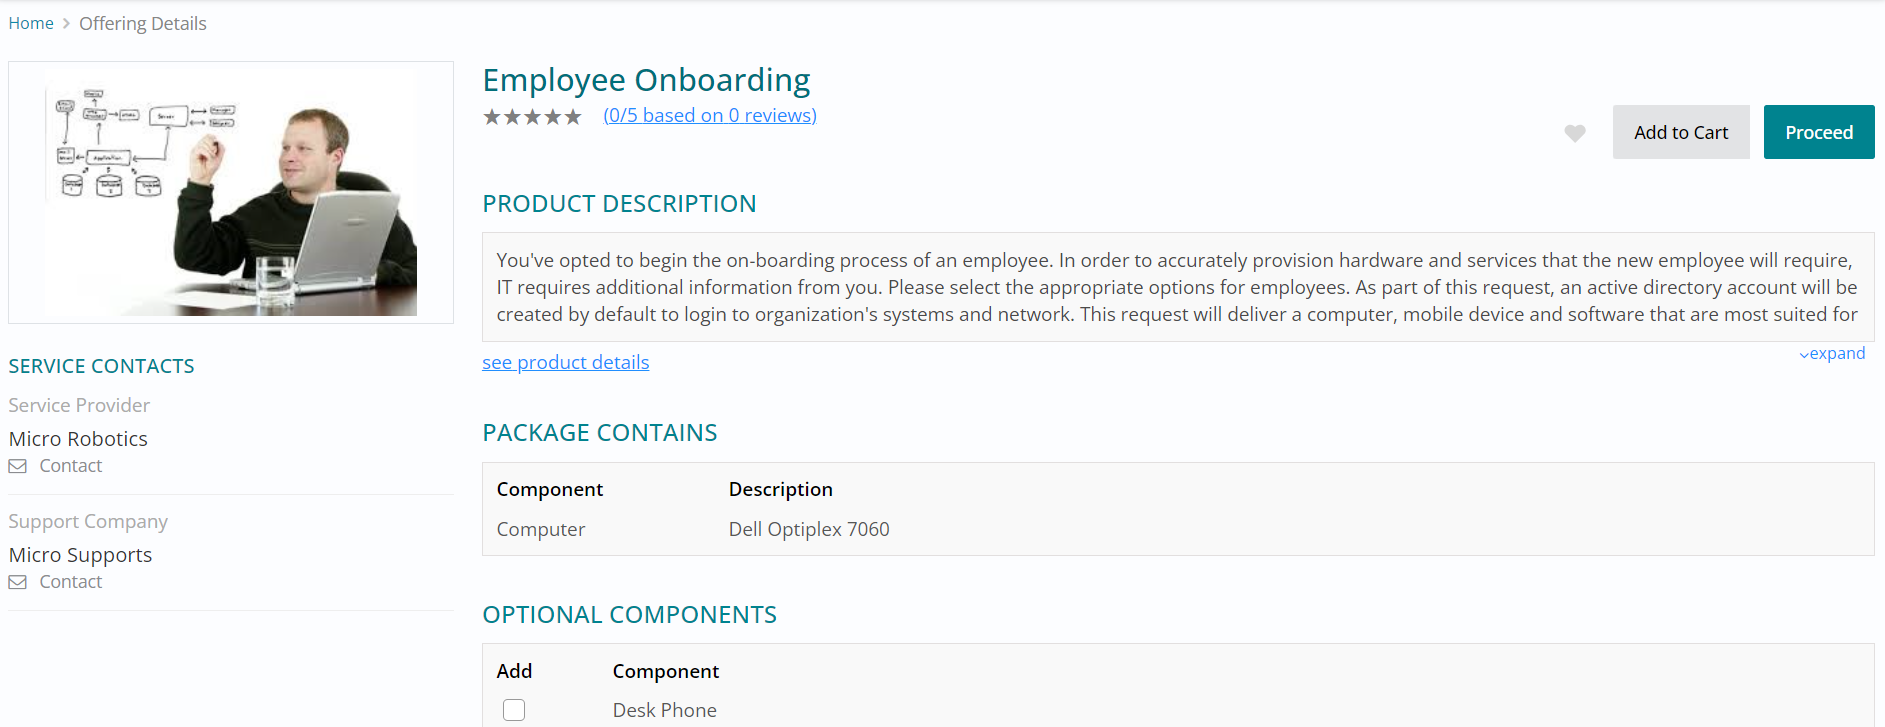
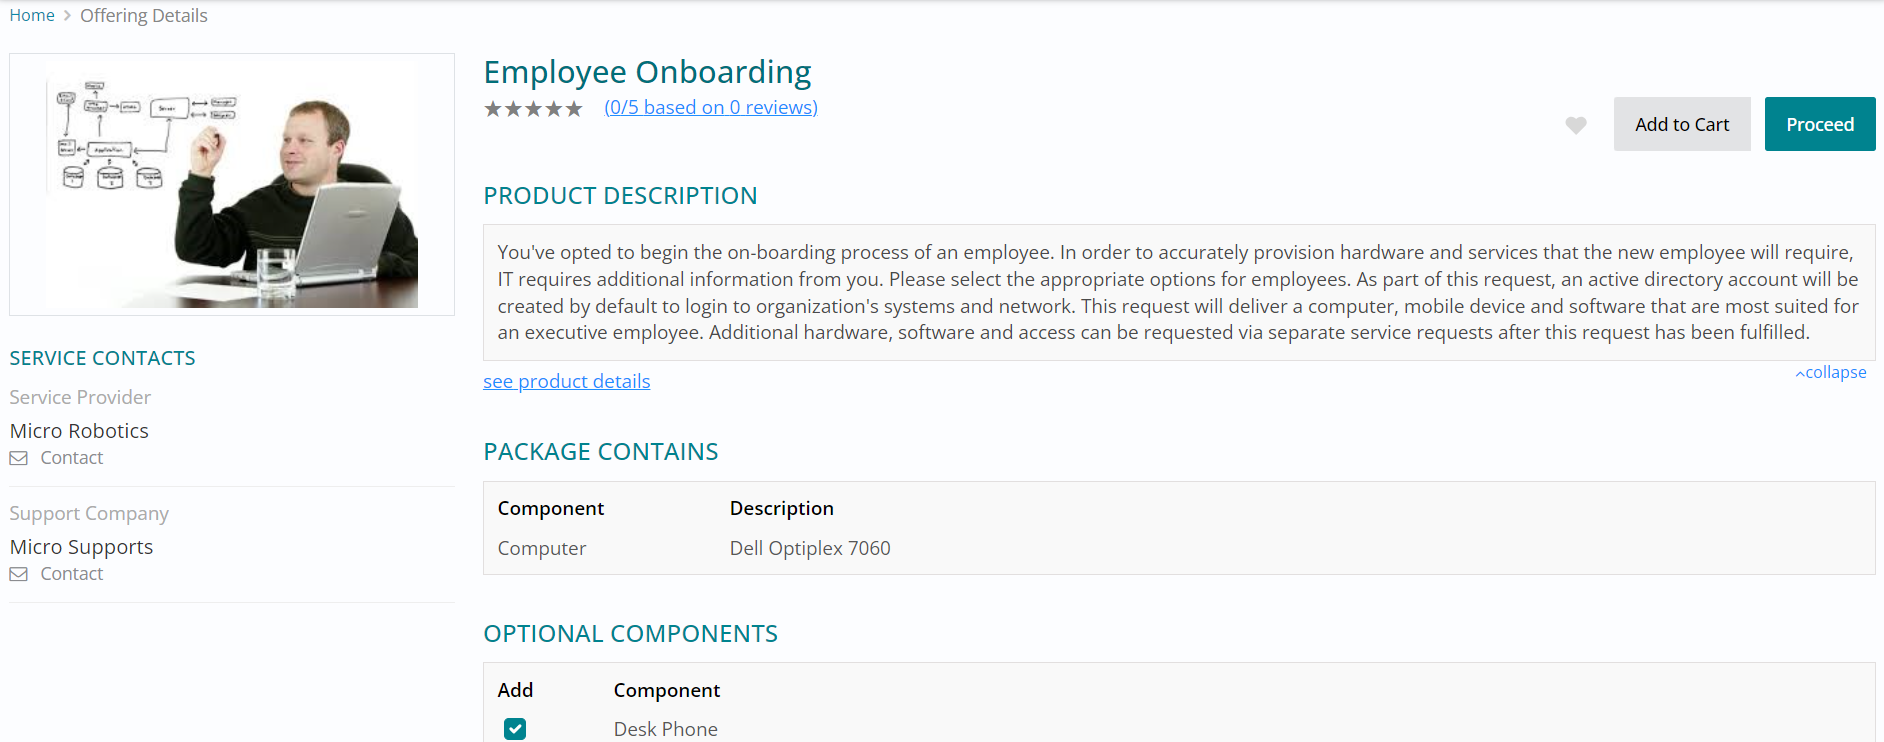
Offering Details
- You can view the offering details such as its description, optional components, contacts, specifications, reviews and ratings.
- Scroll down to view the complete offering details.
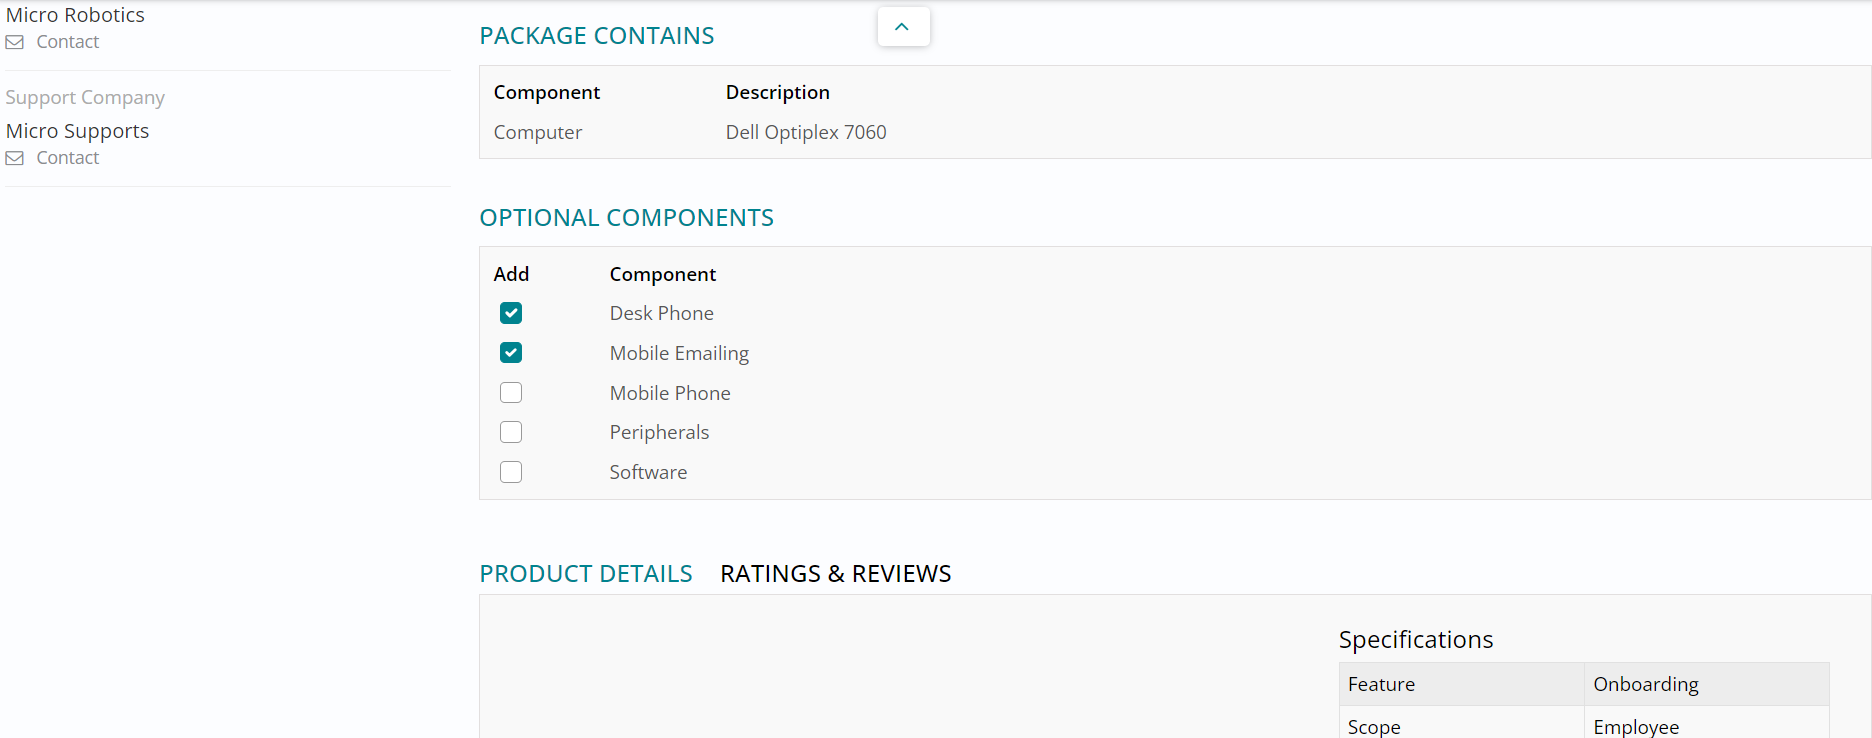
Components Selection
- A service offering can have multiple components, which includes the core component and the optional components.
- The core component is selected by default whereas you can click and select from the
list of available optional components.
Proceed to Checkout section
- Click on Proceed , to move to the next section and provide information against the selected service offering.
- Alternatively, Add to Cart provides you the option to place the order at a later point
in time or order multiple offerings together.
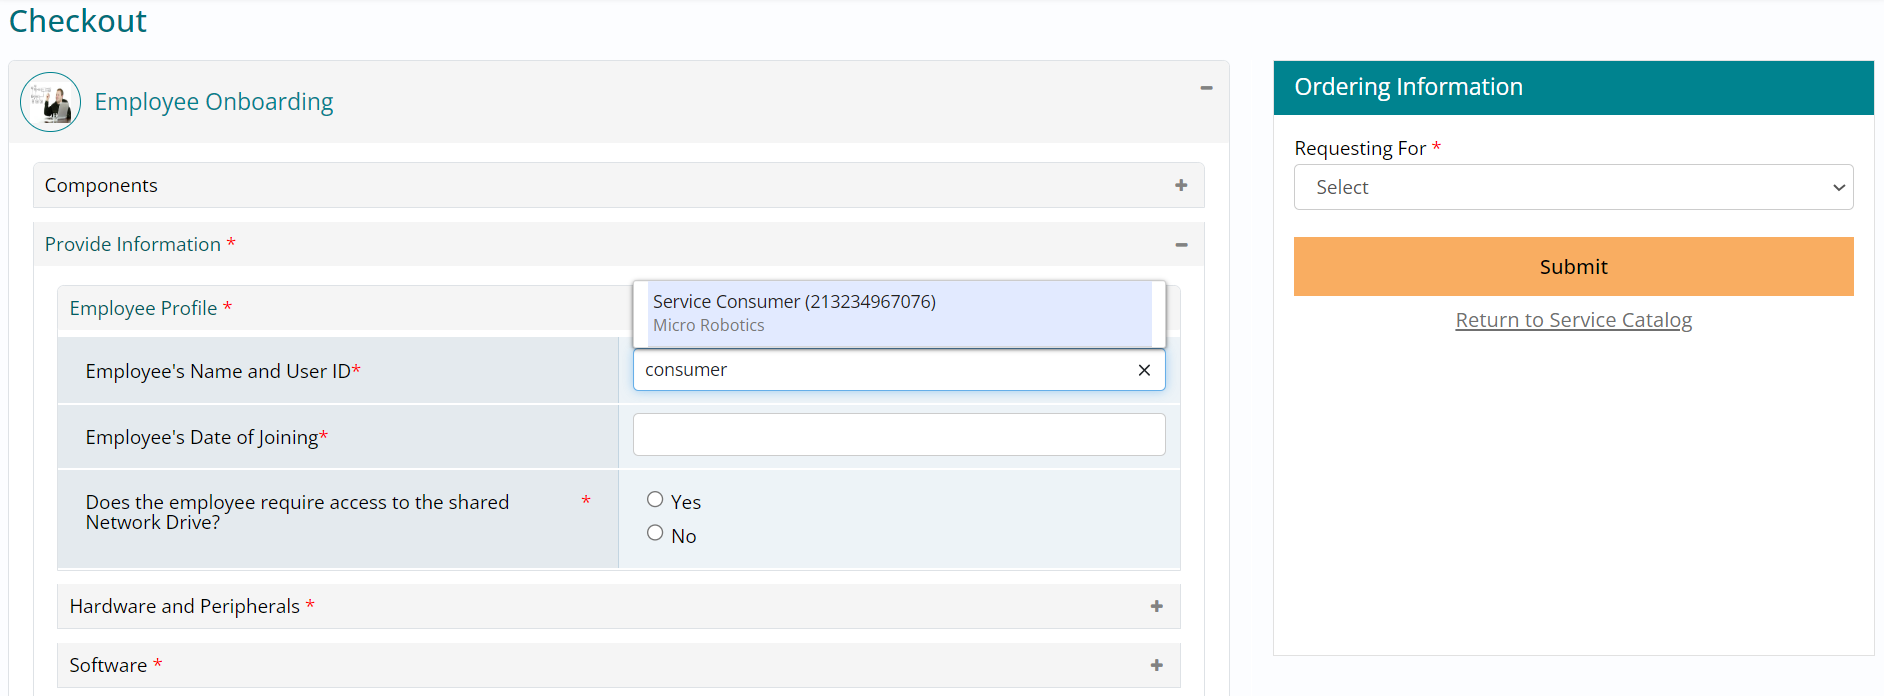
Checkout - Provide Information
- Expand the provide information section and type in ‘consumer’ followed by selecting Service Consumer.
- Service Consumer is the user which you are logged in with; in case you are using a
different user, select that one instead.
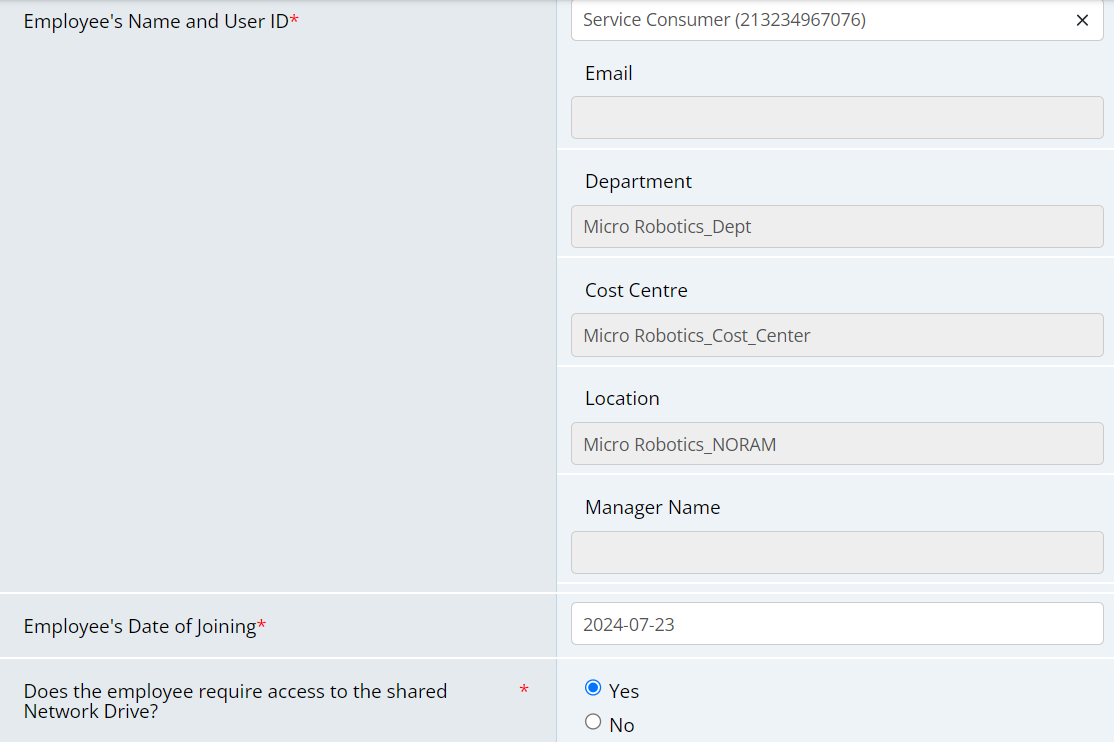
- Upon selecting Service Consumer as the response to the Employee’s Name and User ID question, you will see that the consumer’s department, cost centre, location details are populated automatically from the foundation data.
- Further, provide responses to the questions that follow. The asterisk symbol indicates
that a response is mandatory.
- Expand the next section to which response is mandatory and provide the details, in
this case Hardware and Peripherals.
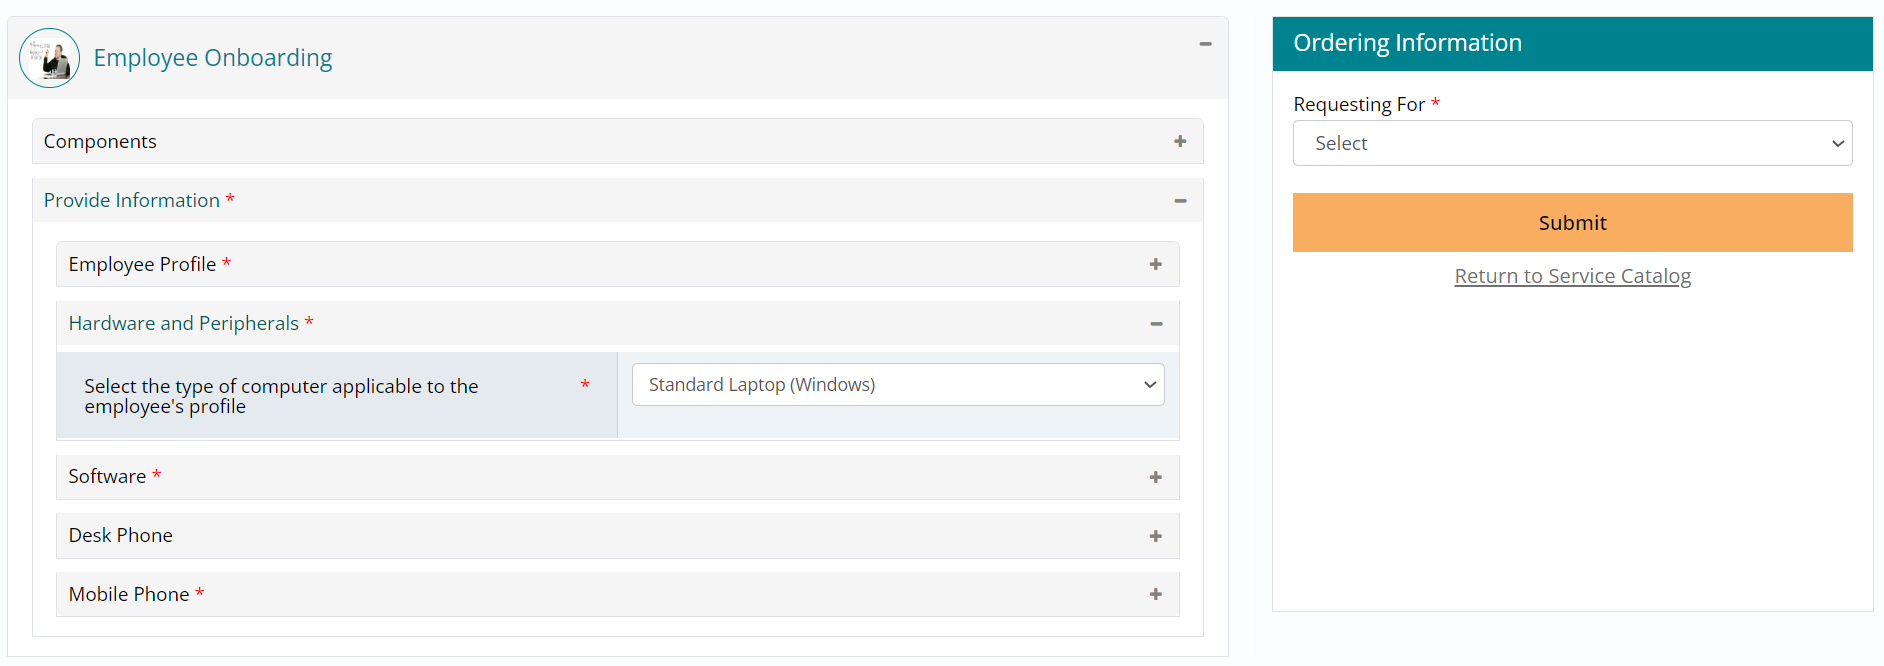
- Repeat the same by providing a response for the Software section.
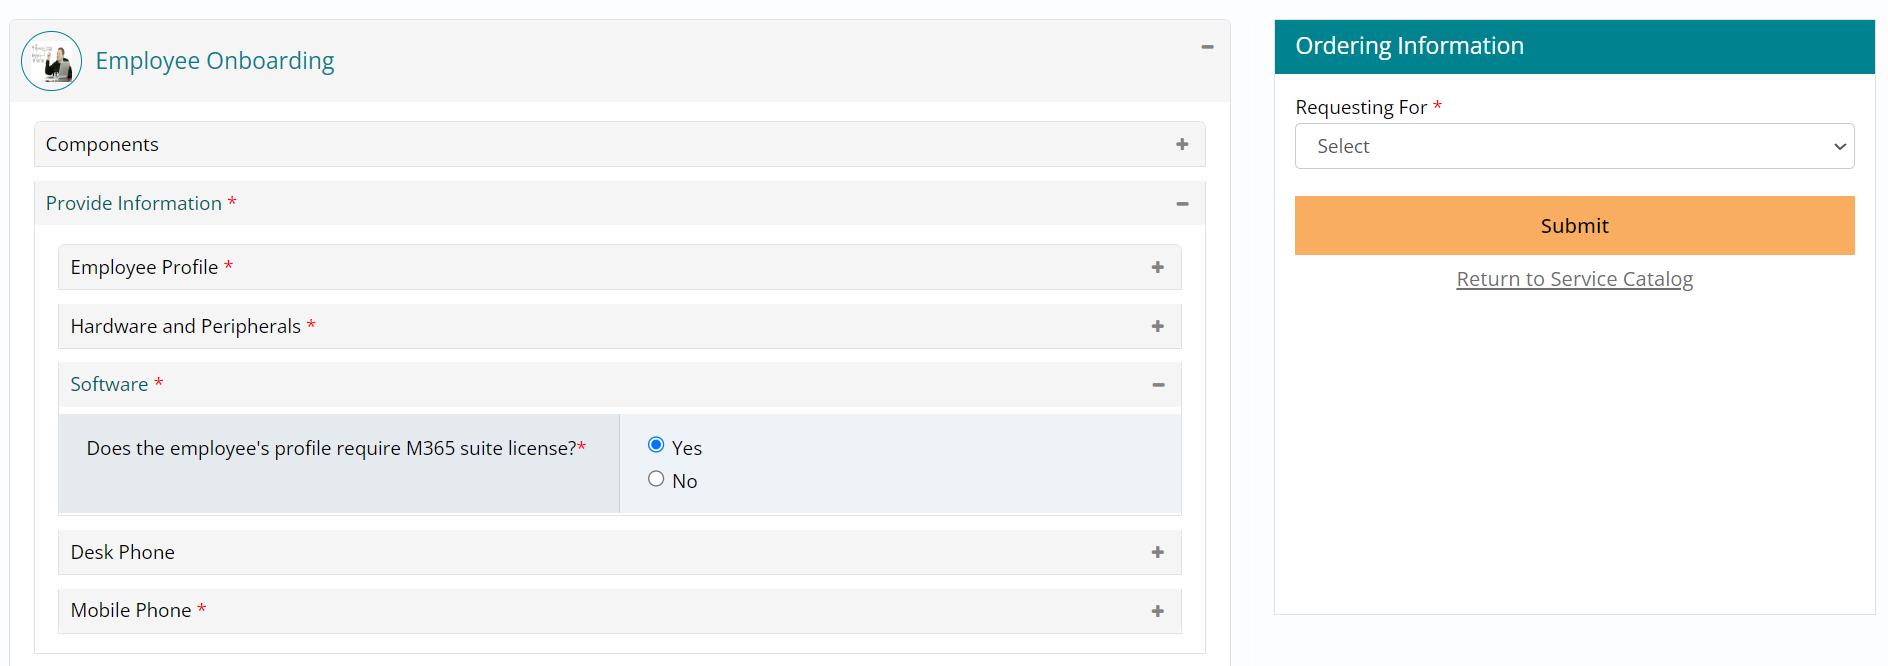
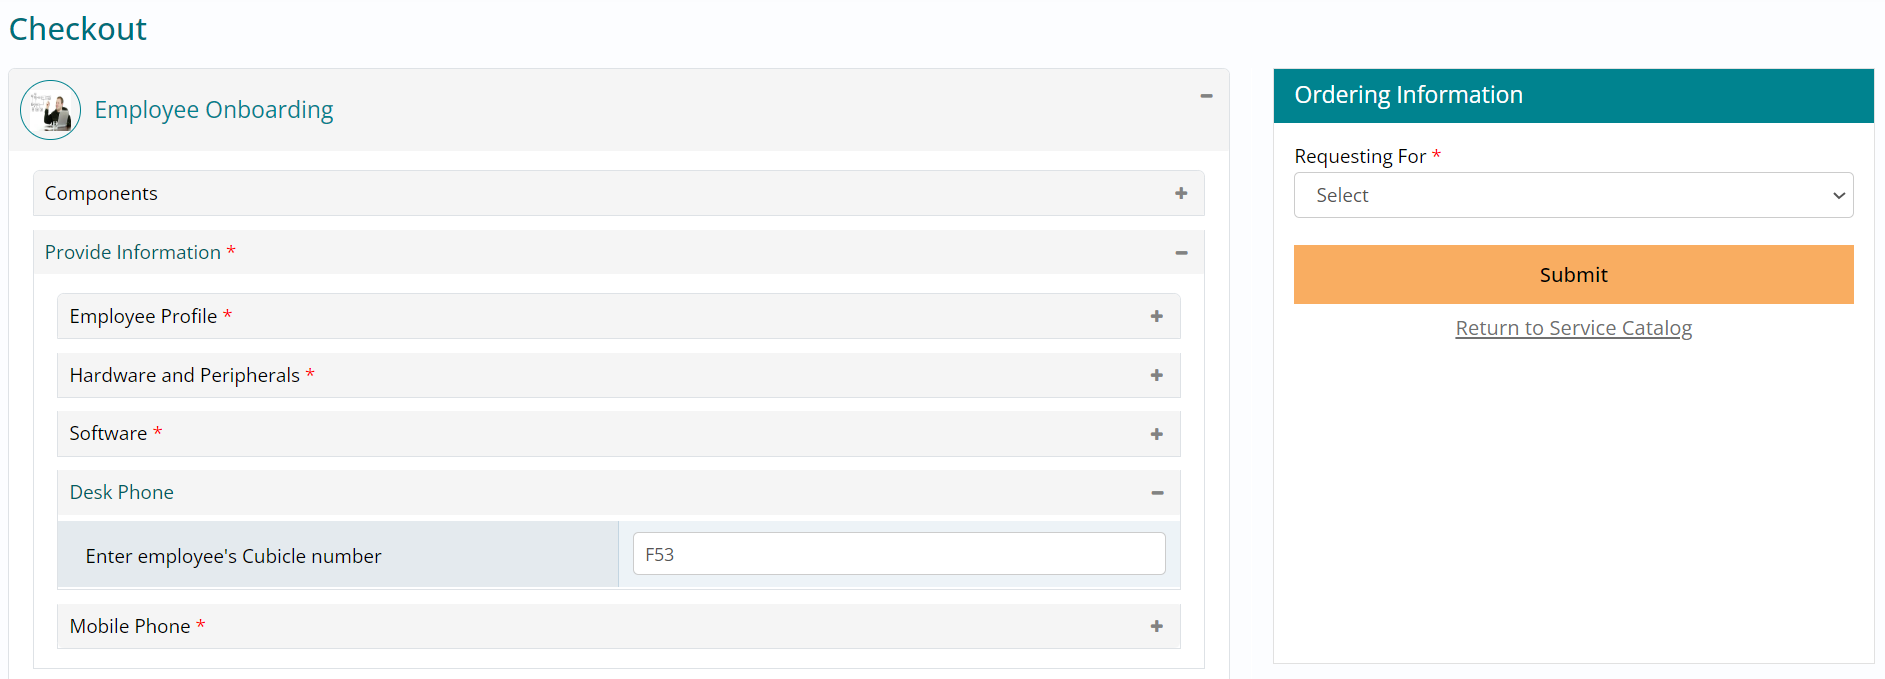
- In this case, the Desk Phone section is not mandatory, but you may choose to type in
the cubicle number for desk phone delivery.
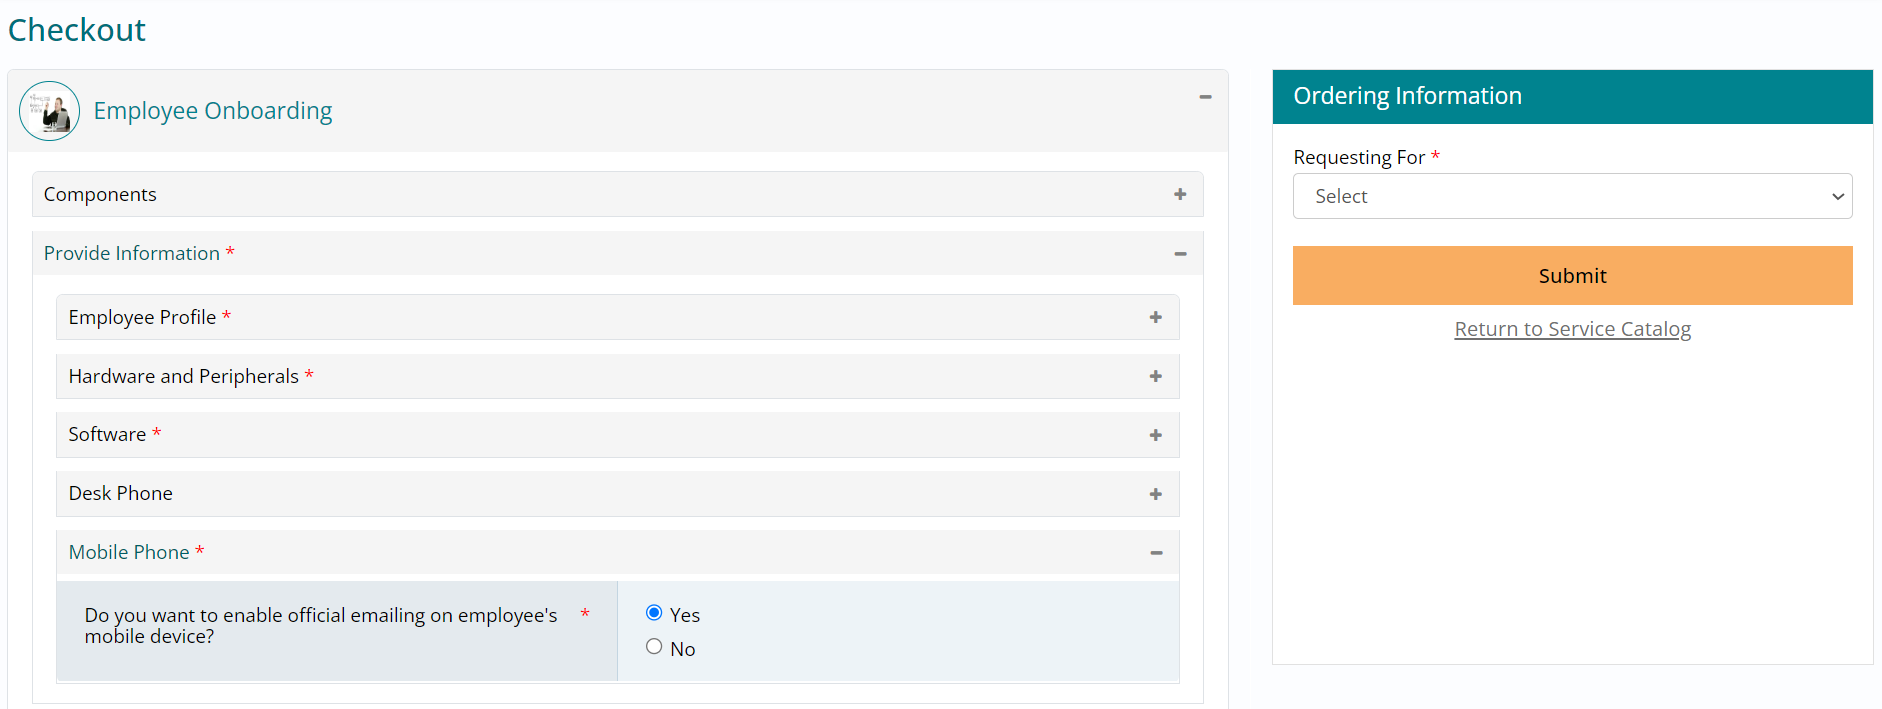
- The Mobile Phone section is the last one to be filled; select from the available options to record the responses.
- You can choose to expand each section to check the responses provided as well.
Ordering Information - Self / On Behalf
- Under the Ordering Information section towards the right of your screen, select Self to place the order for yourself.
- Selecting Other Person will prompt you to provide the user information for whom you would like to place the order.
- Click on Self and then on Submit button to complete placing the order.

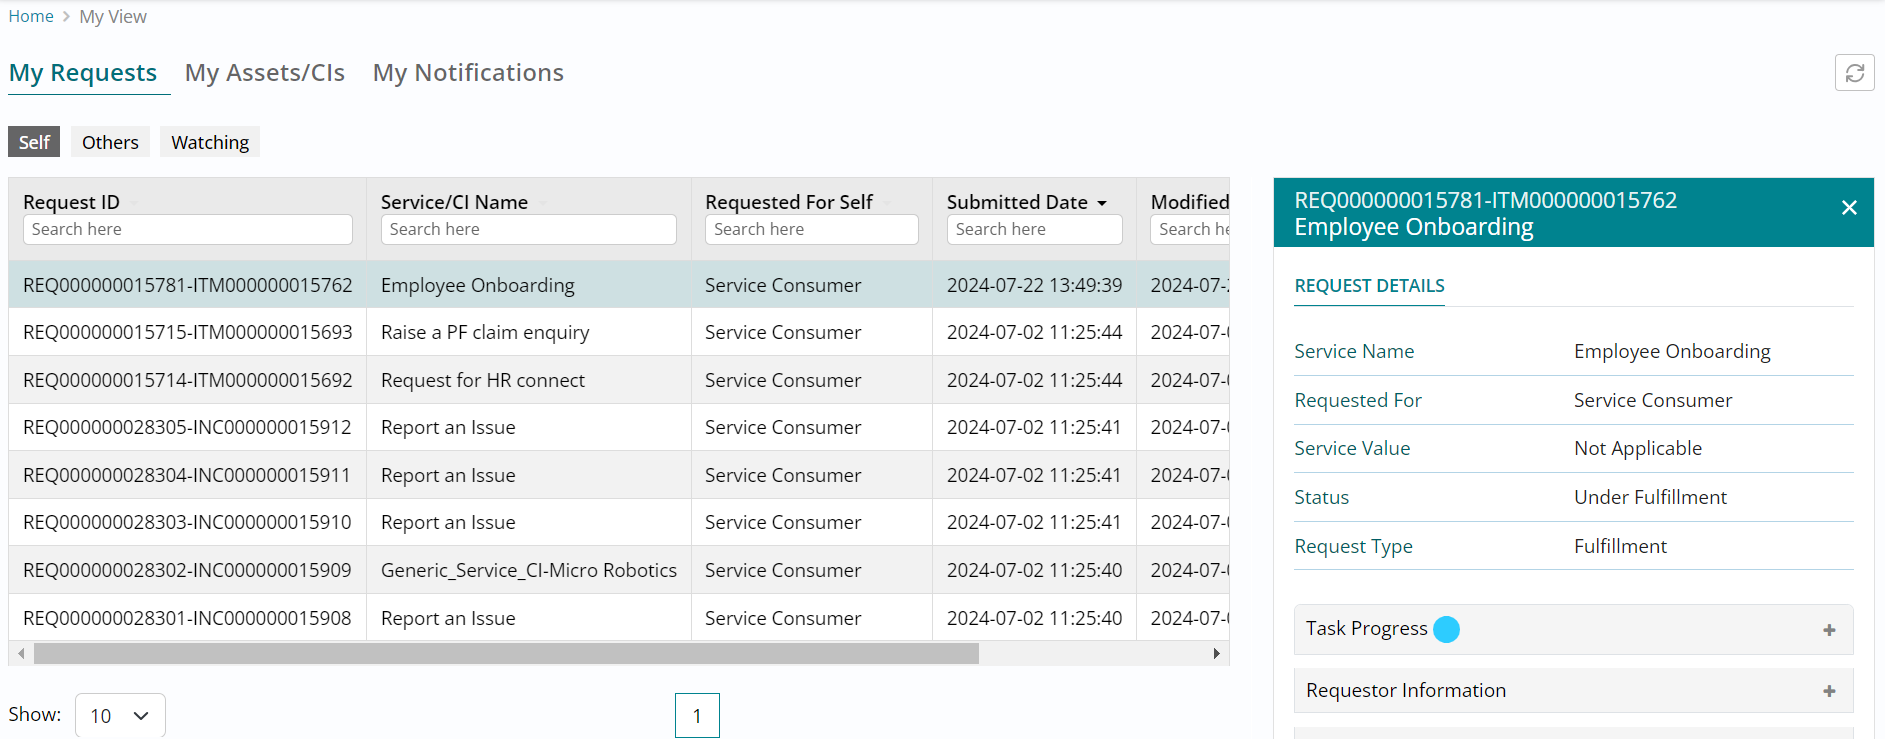
My Requests
- Upon placing the order / request, you will automatically be navigated to the My Requests section wherein you can view the latest request on top of the list view.
- If you had placed the request on behalf of someone else, you would see the request
under Others section.
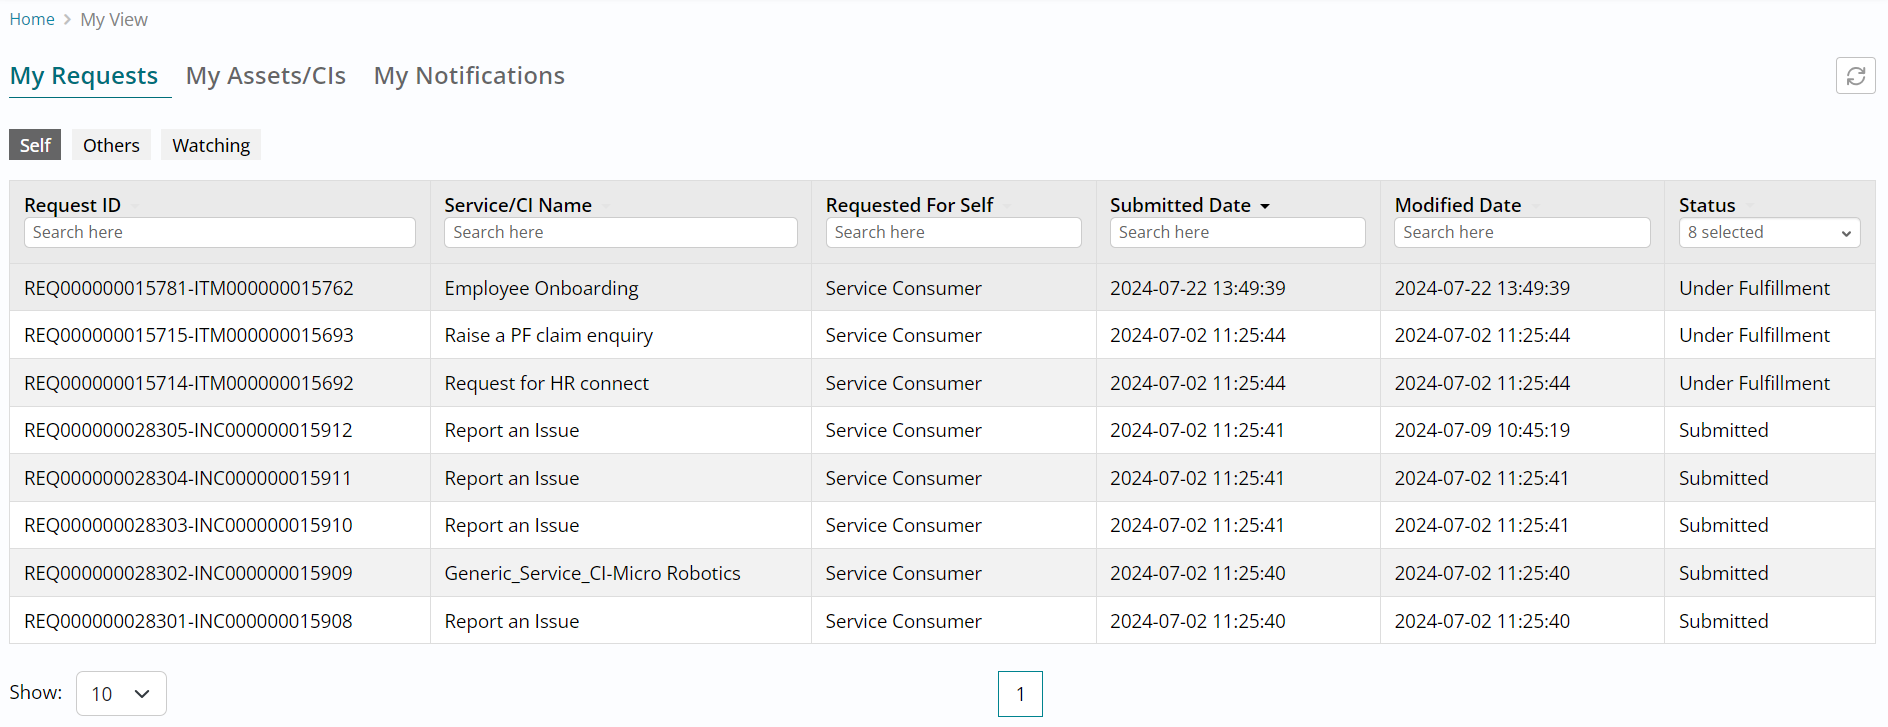
- Click on the request placed and you will see the request details open on the right of your screen.
- You can scroll down and expand each section of the selected request to browse through
its details.
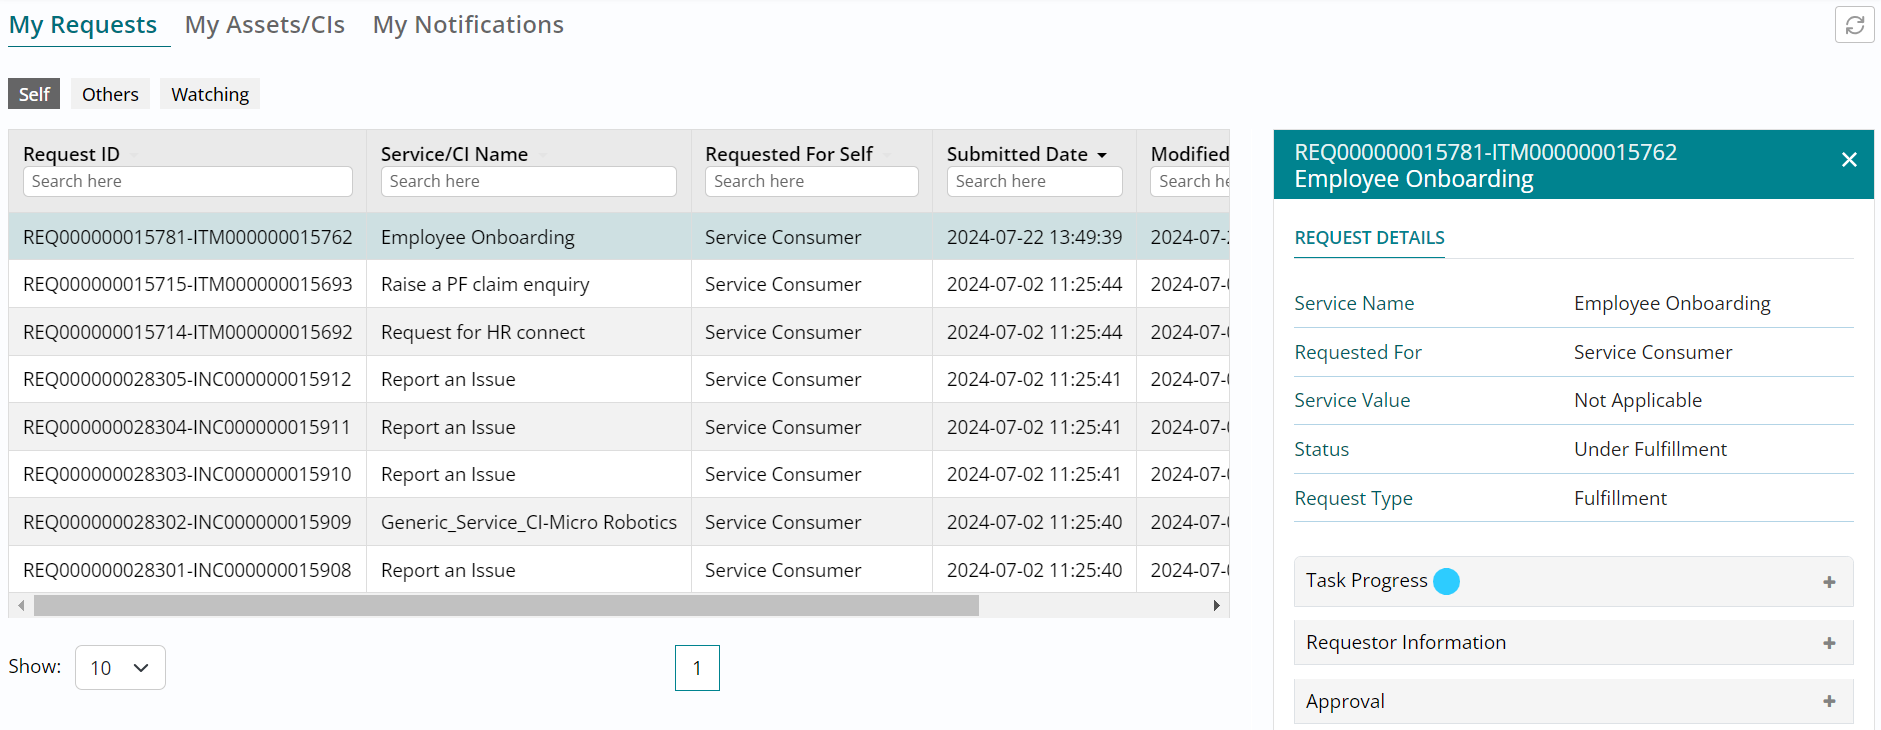
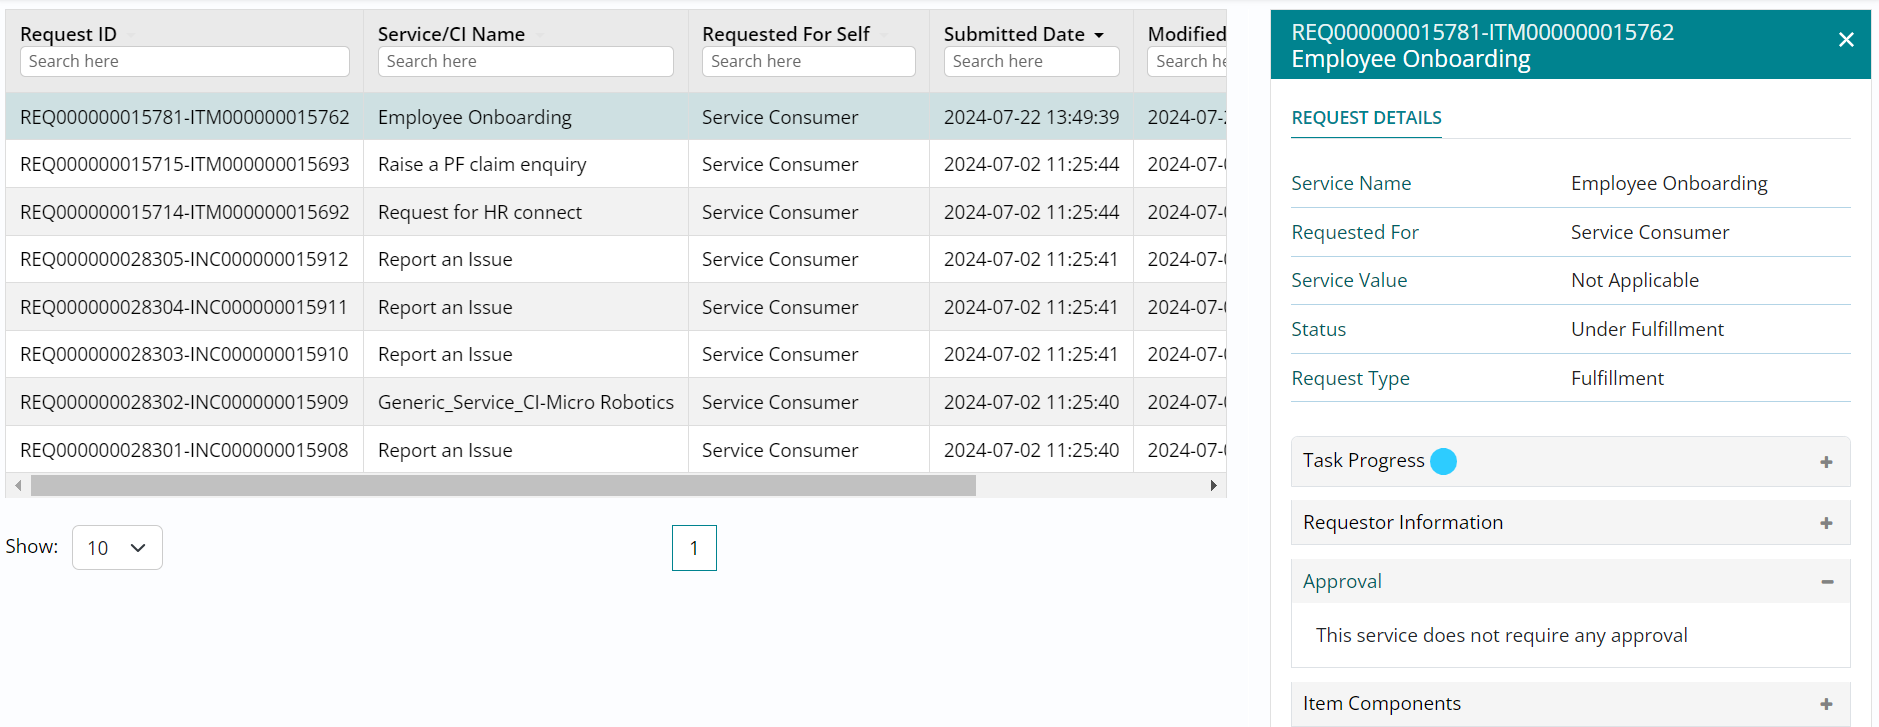
- The status of the request reads Under Fulfillment instead of Pending Approval, meaning that this service offering does not require any approval.
- Expand the Approval section to confirm the same and you can view the approval not
required message.
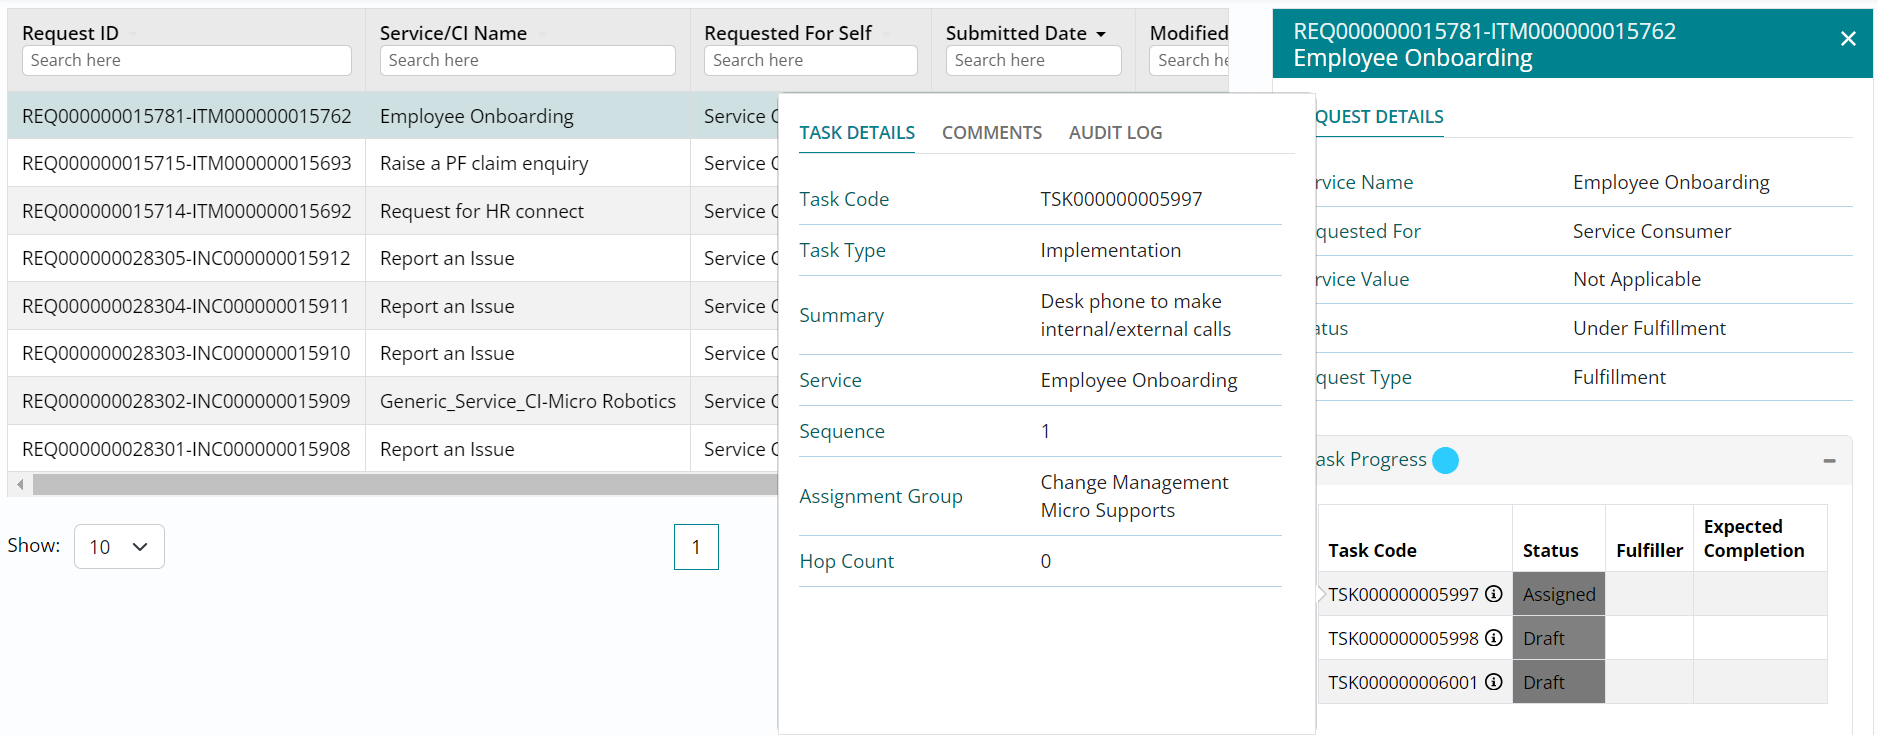
Task Progress
- Scroll upwards and expand the Task Progress section to view the pre-configured fulfillment tasks that are a part of this request.
- Clicking on the information symbol beside the Task Code will show a glimpse of the task details.
- The first task is in Assigned status and the other two are in Draft implying that they
will change status upon completion of the first one.
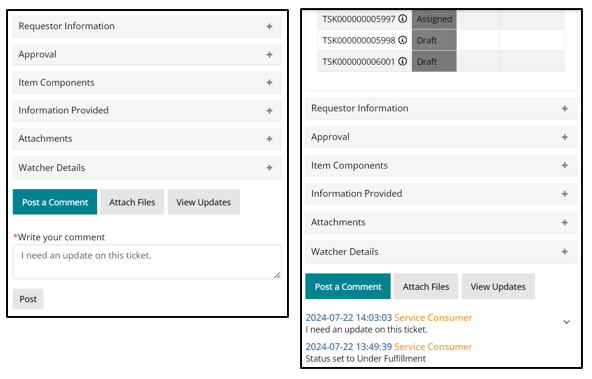
Comments and Updates
- Left image - Scroll to the bottom of the page and click on Post a Comment followed by typing a comment and clicking on Post.
- Right image - Click on View Updates to view the comment posted and other status
updates (if any) on the request.
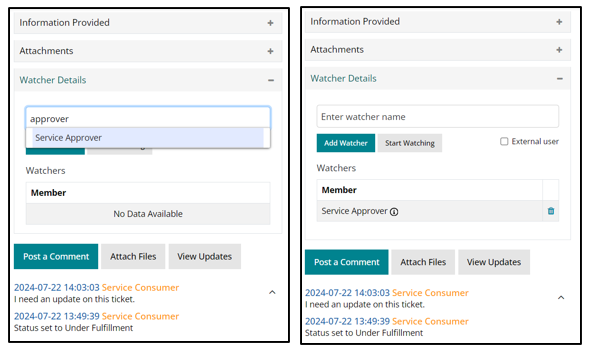
Watcher Details
- Left image - Expand Watcher Details section and type in ‘approver’ followed by selecting Service Approver and clicking on Add Watcher. This will ensure that the added watcher will receive all the request updates via notifications.
- Right image - The watcher is added, and the details are visible under Watcher Details
section of this request.
- Once you have browsed through details of the request, scroll up the screen and click on cross button to close the request details visible towards the right.
- This will show the complete list view and you can choose to view the details of other
requests as well.