Users can use Requisition Lists to periodically reorder the same items. User can add
frequently ordered items to a private or shared requisition lists. To use this feature on
Ruby B2B store, user must navigate to and click Requisition Lists in the Order Management
section.
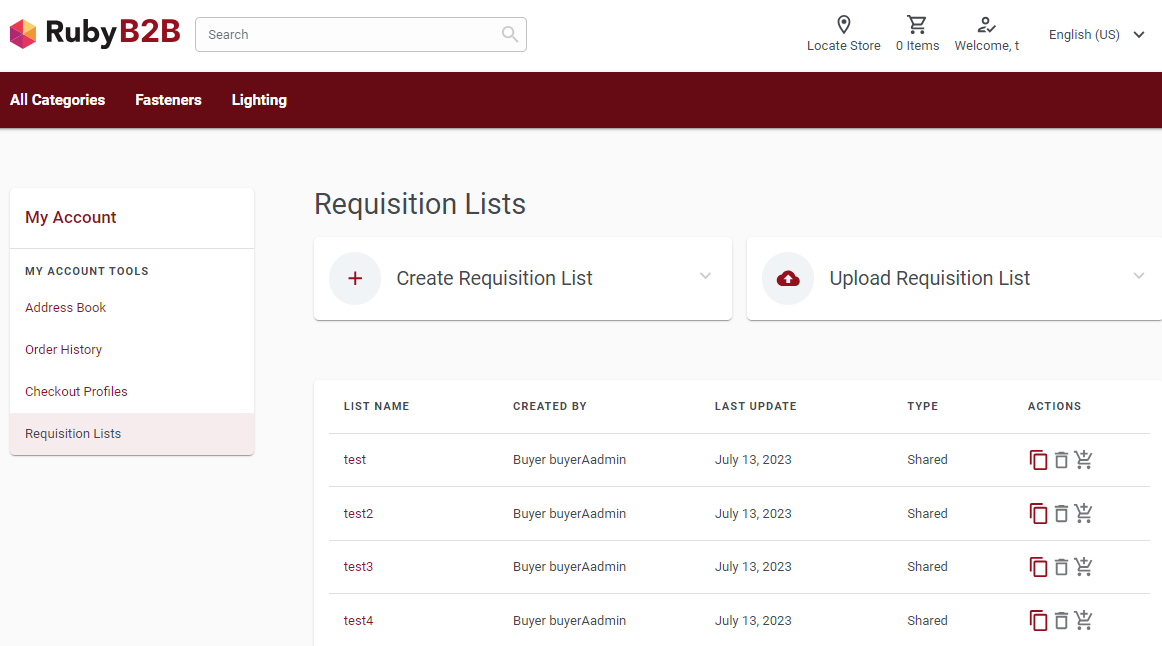
A Requisition Lists page is shown in the following image.

The
Requisition Lists page displays information such as list name,
username of the creator, date of the last update, type of the requisition list, and
three action buttons. These action buttons allow users to perform the following
actions:
- Make a copy of the respective list

- Delete the requisition list

- Add the contents of the requisition list directly to the shopping cart

Note: The delete and add buttons are dark red when enabled and gray
when disabled.
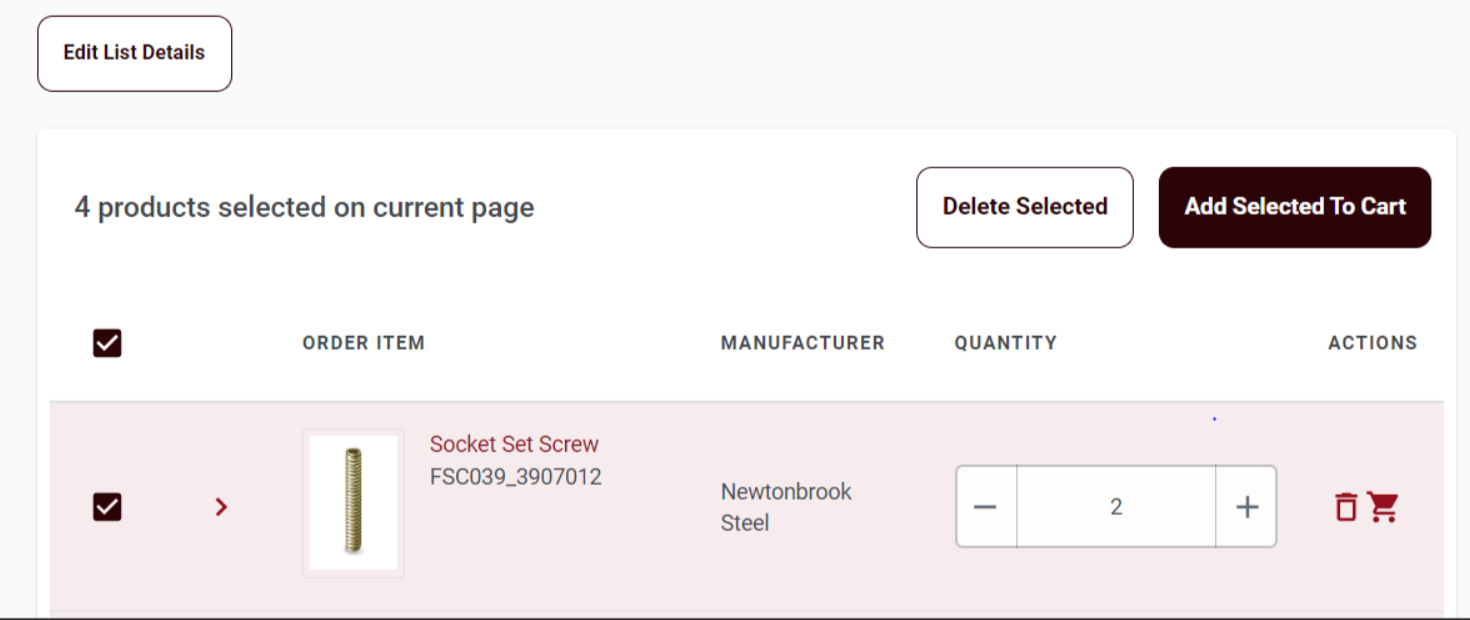
When users click on a requisition list name, the system navigates them to the requisition
list details page. This page displays information such as order items, manufacturer
names, quantities of the products, and action buttons. Users can perform actions such as
deleting an item from the list or adding an item to their shopping cart. To perform
these actions on multiple list items, users can select the check-box next to the item
and click the
Add Selected to Cart or
Delete
Selected buttons (Delete Selected button is disabled for lists created
by others).
Note: The Add Selected to Cart
and Delete Selected buttons will only appear if user click at
least one check-box against the items listed in the Requisition Lists.

The sorting is available for the following columns:
- ORDER ITEM: Sorted by part number
Note: Sorting is not available for the column
MANUFACTURER.
Creating a requisition list
Users can create a Requisition Lists by clicking the Create Requisition
List button on the Requisition Lists page.
For more information, see Creating a requisition list.
Uploading a requisition list
The Upload Requisition List page provides users with the
option to upload a Requisition Lists from their local folder. For more information,
see Upload a requisition list.


