IVR4 Fixlets and Tasks
Learn more about available Fixlets and tasks for BigFix Insights for Vulnerability Remediation v.4.
About this task
This task explains how to setup and manage IVR v.4 using the available Fixlets.
Download the latest BigFix IVR Retriever
About this task
Procedure
-
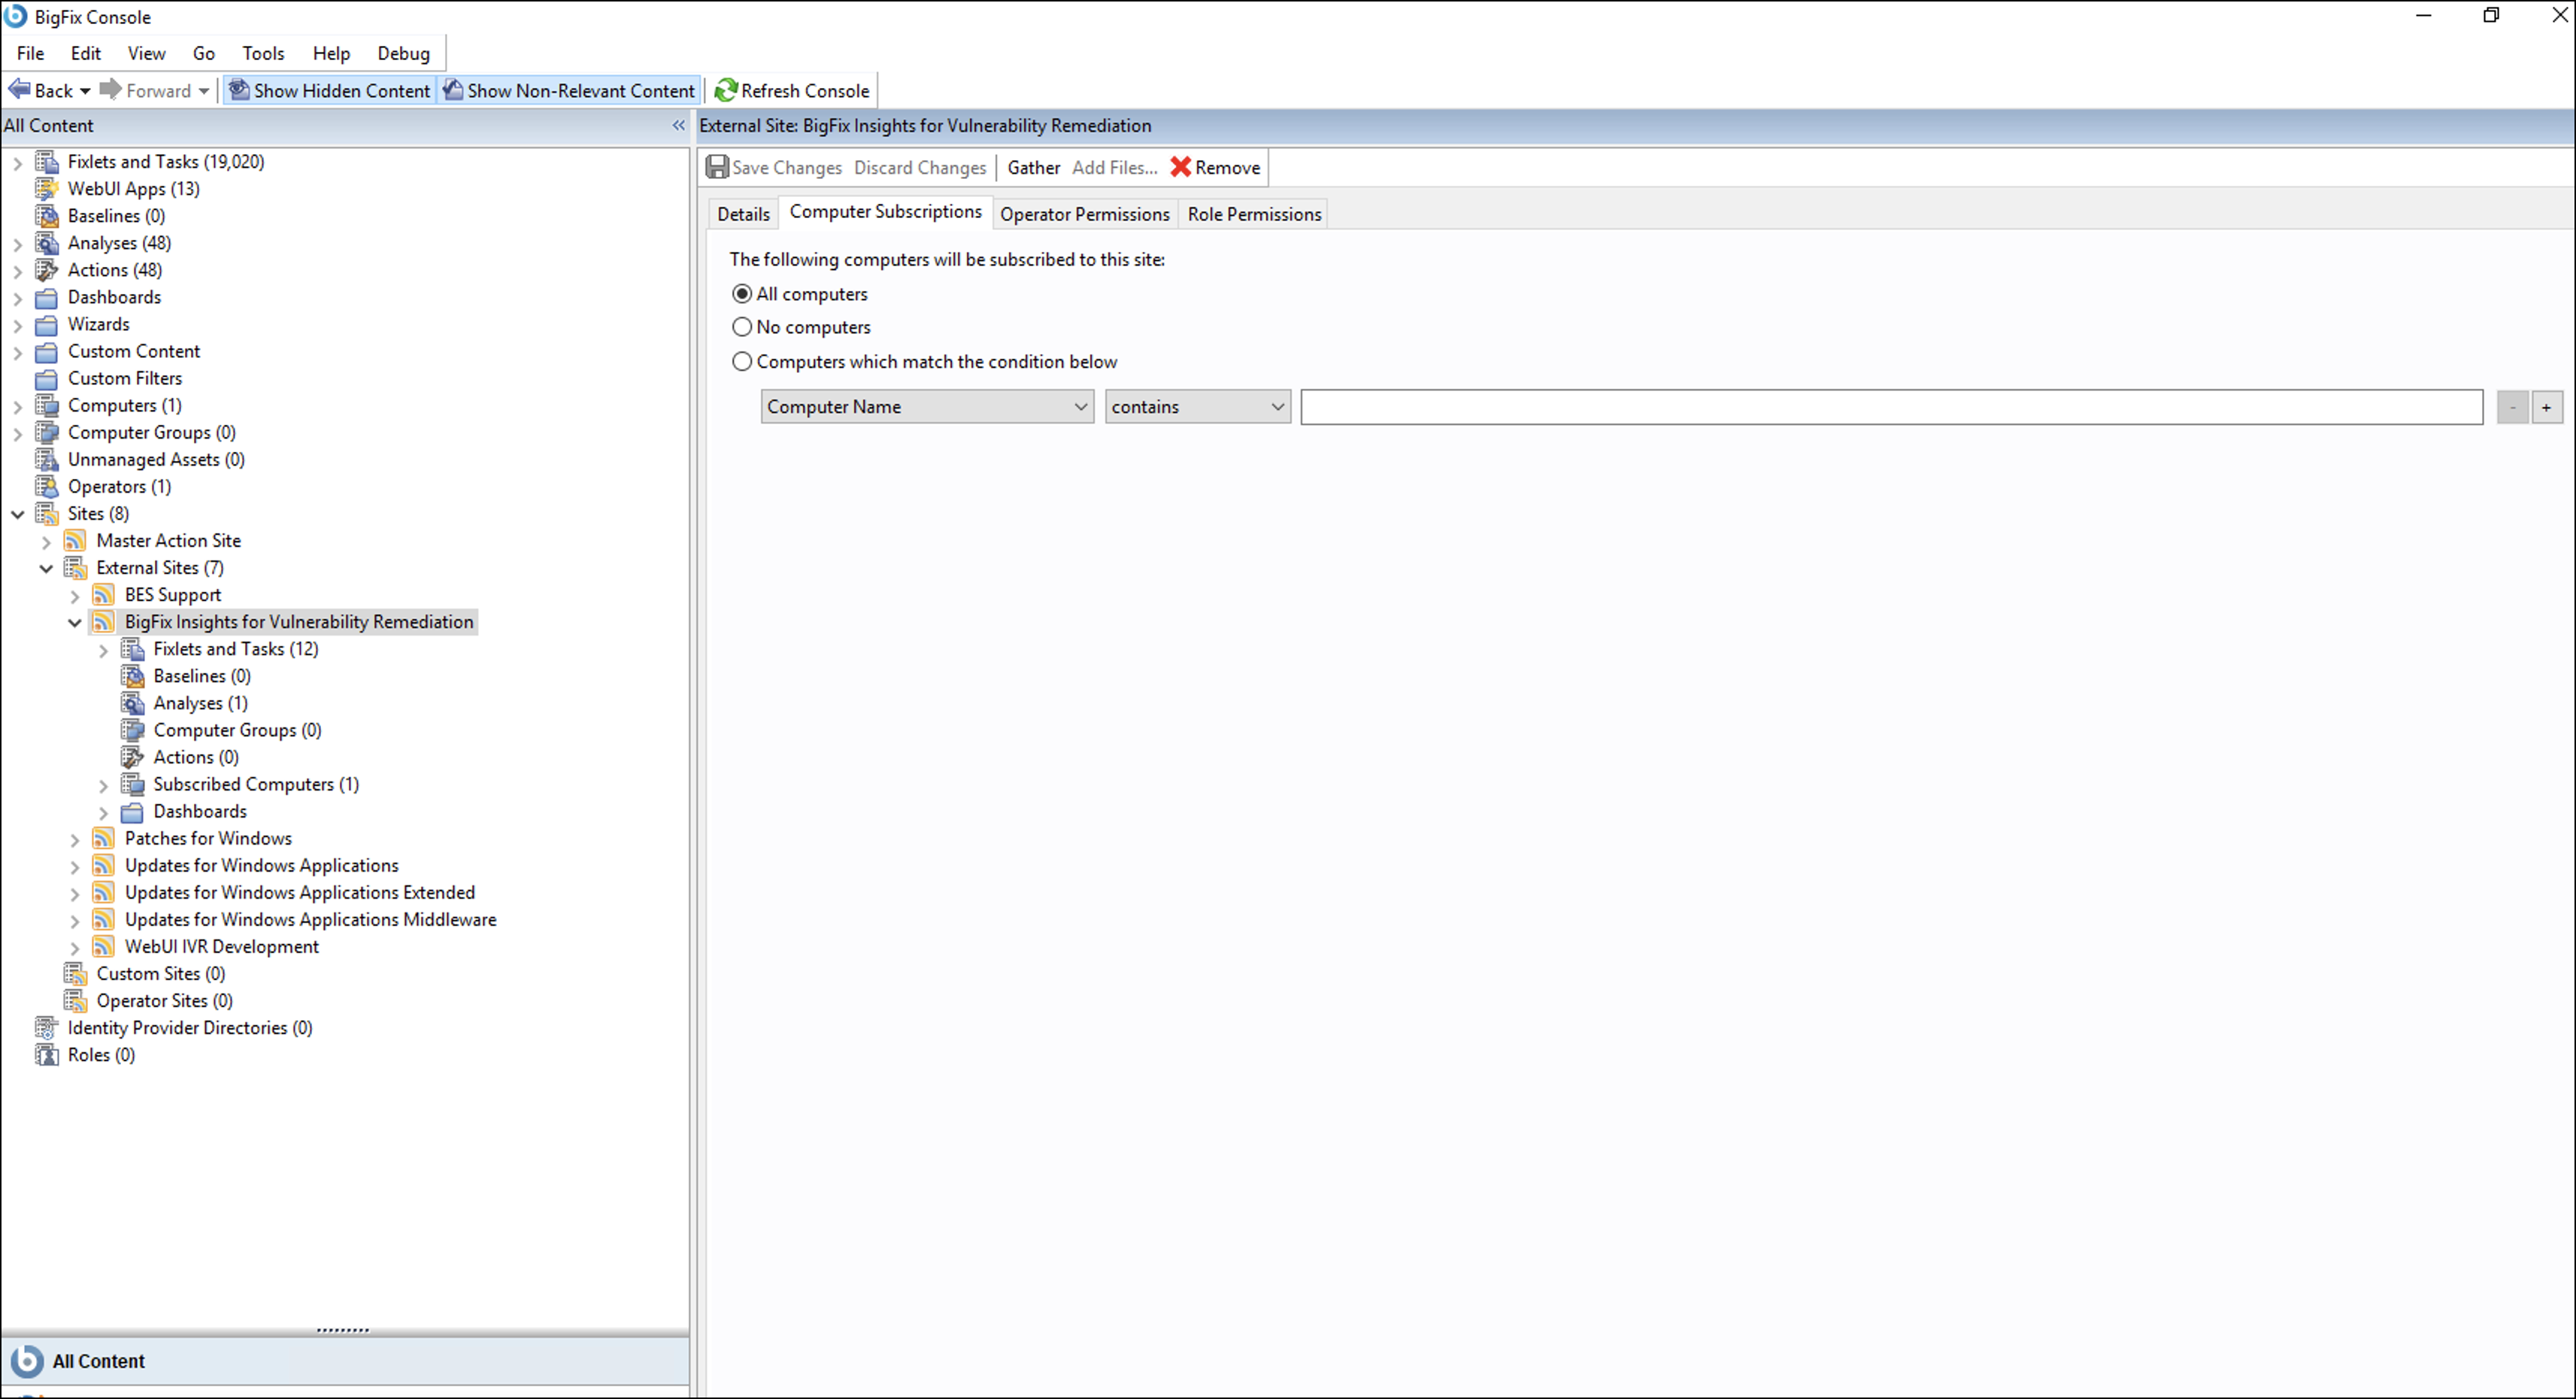
Enable the content site
Navigate to the BigFix License Overview Dashboard. In the Compliance/Lifecycle panel, click Enable BigFix Insights for Vulnerability Remediation Site to gather the required content.

-
Subscribe computers to the site. It is recommended to subscribe to All
computers.
Note:Analysis should be activated for IVR2 installation only. It does not belong to the IVR4 installation.
-
Download the BESRetriever to the target folder.

- Select the Download BigFix IVR Retriever v4.3.0 fixlet in the BigFix Insights for Vulnerability Remediation external site.
- In the Download BigFix IVR Retriever v4.3.0
fixlet Description view, select one of the following Deployment
Option from the Vulnerability Management Platform dropdown:
- Tenable
- Qualys
Important:Your selection in this dropdown must match the data source you intend to configure in the IVR Configuration Manager later.-
Tenable: Downloads the retriever without the NiFi service. If you choose this option and then attempt to configure a Qualys data source, the setup will fail because the required NiFi components are missing.
- Qualys: Downloads the retriever along with the NiFi service. If you choose this option, you can still configure a Tenable data source later; the NiFi service will remain active but will not interfere with Tenable operations.
- For Tenable:
- Enter the installation path for downloading the BigFix IVR
Retriever and click Take Action.
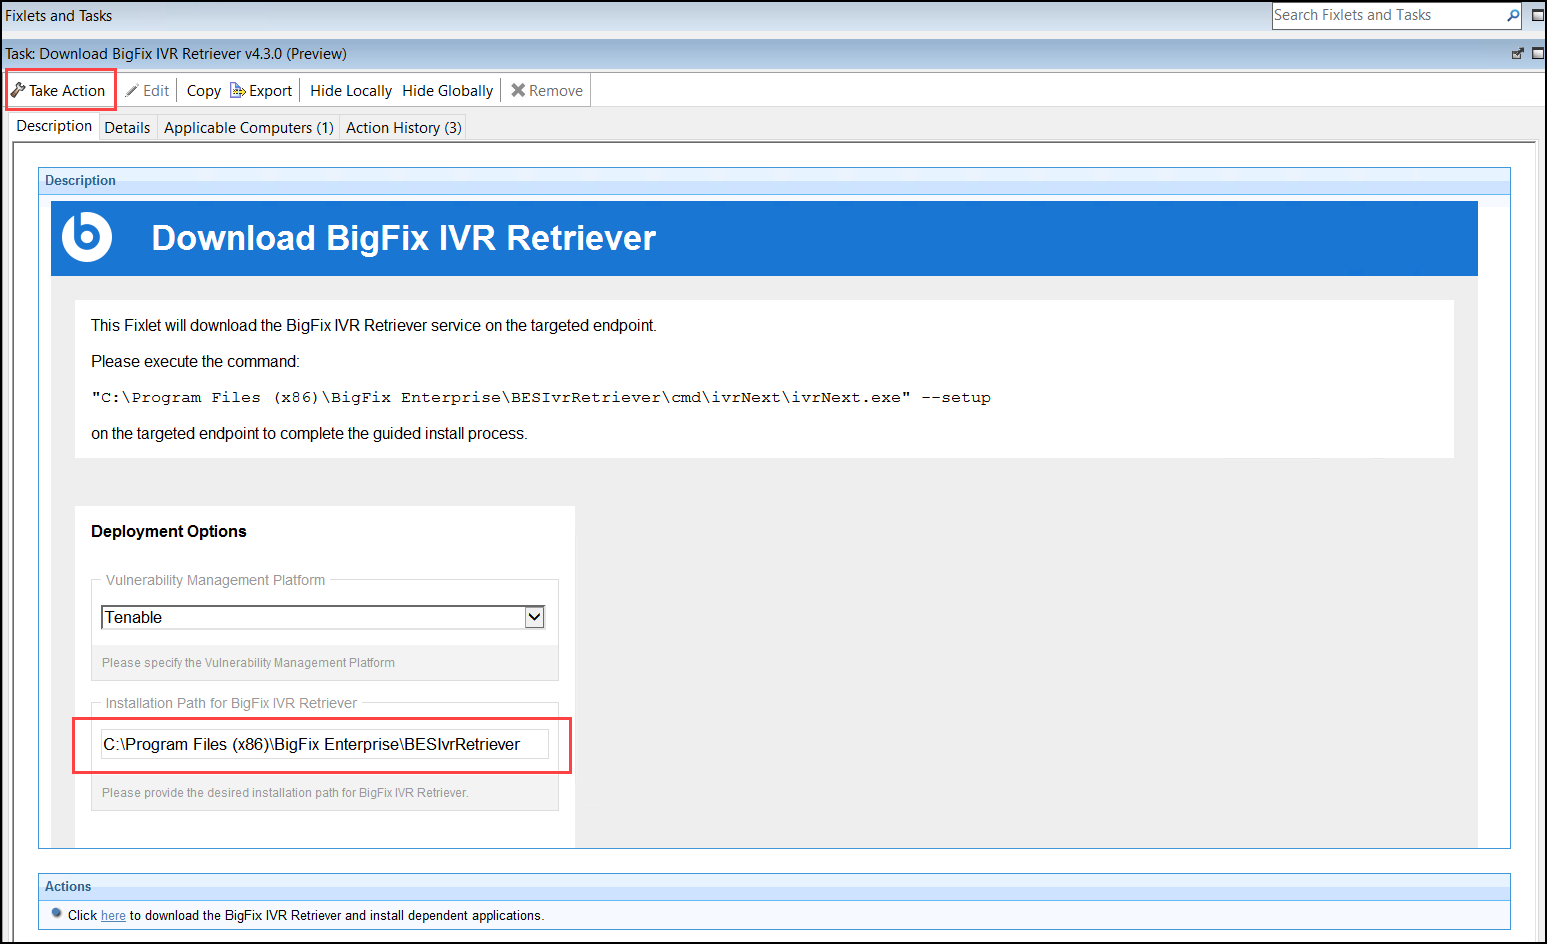 Note:Default location is C:\Program Files (x86)\BigFix Enterprise\BESIvrRetriever.
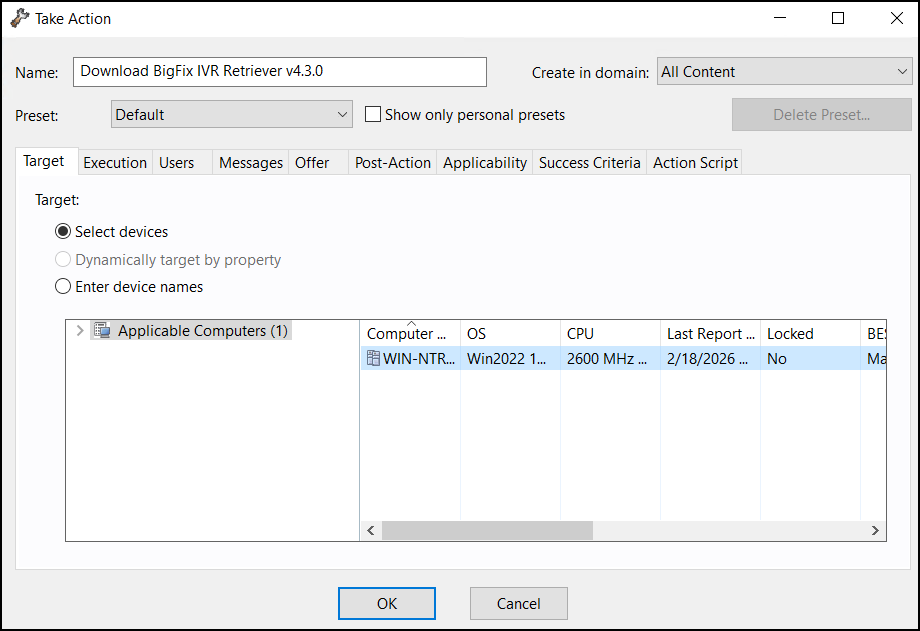
 - On the Take Action page, select the target devices under the
Target tab and click
OK.
- Wait for the task status to change to
Completed.
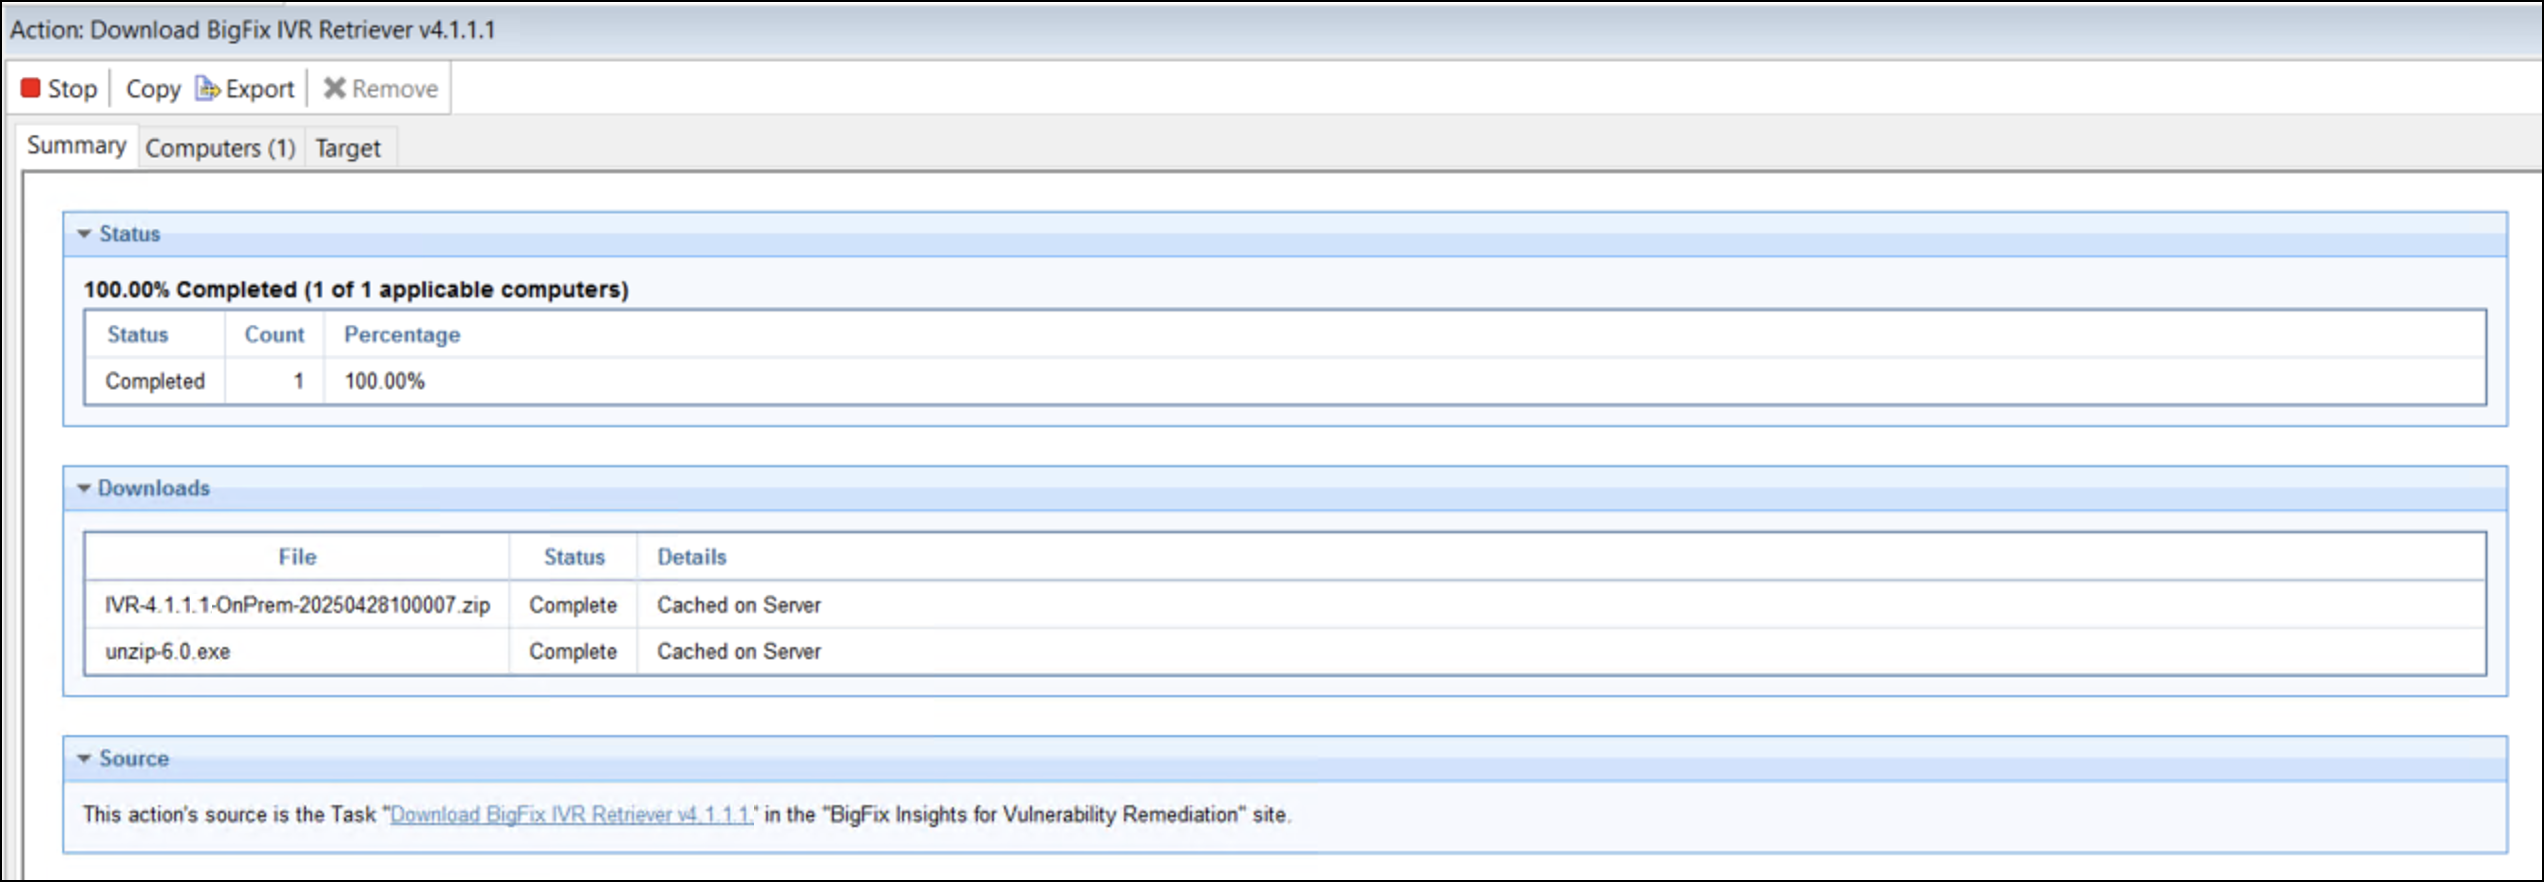
- On target computers, go to the installation path and verify
that the
BESIvrRetrieverfolder is created after the "Download BigFix IVR Retriever v4.3.0" task status changes to "Completed".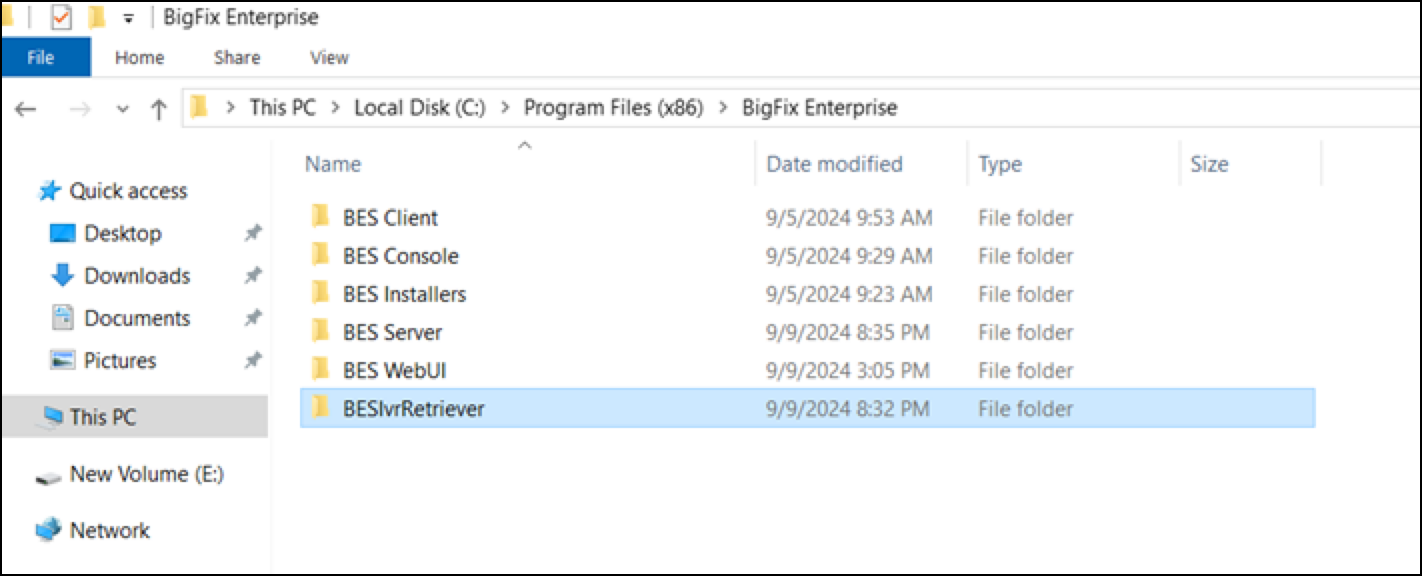 Note:Once the download of BigFix IVR Retriever v4.3.0 Fixlet is completed, Uninstall BigFix IVR Retriever v4 and WARNING: BigFix IVR Retriever v4 has an incomplete configuration fixlets will get enabled under the Fixlets and Tasks view.
- Enter the installation path for downloading the BigFix IVR
Retriever and click Take Action.
-
For Qualys:
Note:To fully integrate your vulnerability data, the BigFix IVR Retriever relies on Apache NiFi.- Apache NiFi acts as the dedicated workflow and automation engine behind the scenes. It handles the heavy lifting of the integration process, such as automatically fetching vulnerability data from the Qualys API, managing the scraper files, and coordinating the correlation of that data with BigFix fixlets.
- For optimal performance and streamlined communication between these components, the architecture utilizes a Standalone configuration. This means both the IVR Retriever application and Apache NiFi are installed and run directly on the exact same endpoint machine. Hosting them together ensures that the automation workflows execute smoothly and efficiently, without the need to manage complex cross-server networking.
Note:Before running the deployment Fixlet, verify the following on the target computer(s):- Dedicated Resources: The endpoint must have at least 32 GB of RAM available. At least 16 GB of this RAM must be allocated specifically for the NiFi installation.
-
Operating System: Windows Server 2016 or later.
- Activation: Prior to starting the automation, manually activate the IVR Vulnerability Scanner Host ID on your site.
- Configure the following fields under the Deployment
Options:
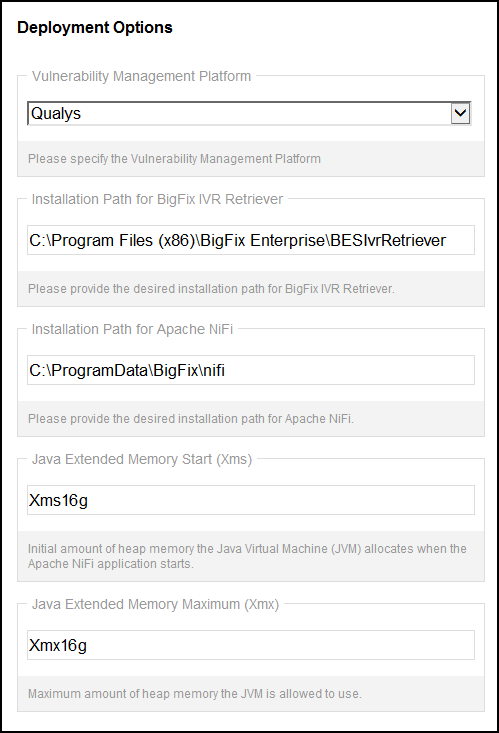
Fields Data Type Description Installation Path for BigFix IVR Retriever String The target directory path where the BigFix IVR Retriever service will be installed. Installation Path for Apache NiFi String The target directory path where the Apache NiFi application will be installed. Java Extended Memory Start (Xms) String The initial amount of heap memory the Java Virtual Machine (JVM) allocates when Apache NiFi starts, such as Xms12g.Java Extended Memory Maximum (Xmx) String The maximum amount of heap memory the JVM is permitted to use for Apache NiFi, such as Xmx12g. -
Configure the following fields under the Configure Apache NiFi User Credentials:
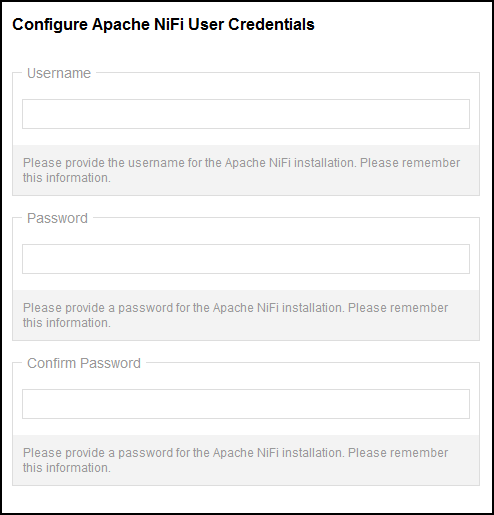
Fields Data Type Description Username String The administrative username created for the Apache NiFi application. Password Secure String The administrative password created for Apache NiFi. This password must be 14 or 15 characters long. Confirm Password Secure String Confirmation entry for the Apache NiFi password. - Configure the following fields under the Configure
KeyStore Trust Password:
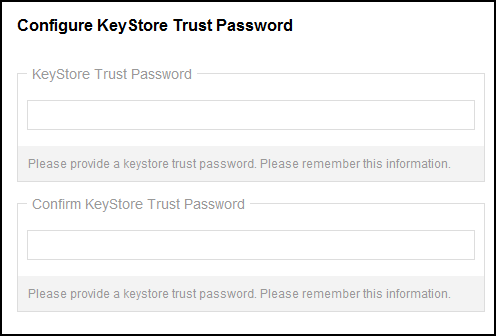
Fields Data Type Description KeyStore Trust Password Secure String A user-defined password for the keystore trust. This exact same password must be remembered and applied later in the UI setup page. Confirm KeyStore Trust Password Secure String Confirmation entry for the KeyStore Trust Password. - After entering all the required details, click Take Action on the Actions toolbar.
- On the Take Action page, select the target devices under the
Target tab and click
OK.
- Wait for the task status to change to
Completed.
- On target computers:
- Go to the installation path and verify that the
BESIvrRetrieverfolder is created after the "Download BigFix IVR Retriever v4.3.0" task status changes to "Completed".Note:Once the download of BigFix IVR Retriever v4.3.0 Fixlet is completed, Uninstall BigFix IVR Retriever v4 and WARNING: BigFix IVR Retriever v4 has an incomplete configuration fixlets will get enabled under the Fixlets and Tasks view. - Verify that NiFi gets installed to
C:\ProgramData\BigFix\nifi\nifi-2.7.2. Confirm the certificate directory (\certs) contains all required files, includingca.key,ca.crt, andnifi.server.p12 - Verify the settings in
\conf\nifi.propertiesare updated and a.bakbackup file was created. Ensureauthorizers.xmlcontains your client identities. - Validate via Windows Environment Variables, command
prompt, or registry that
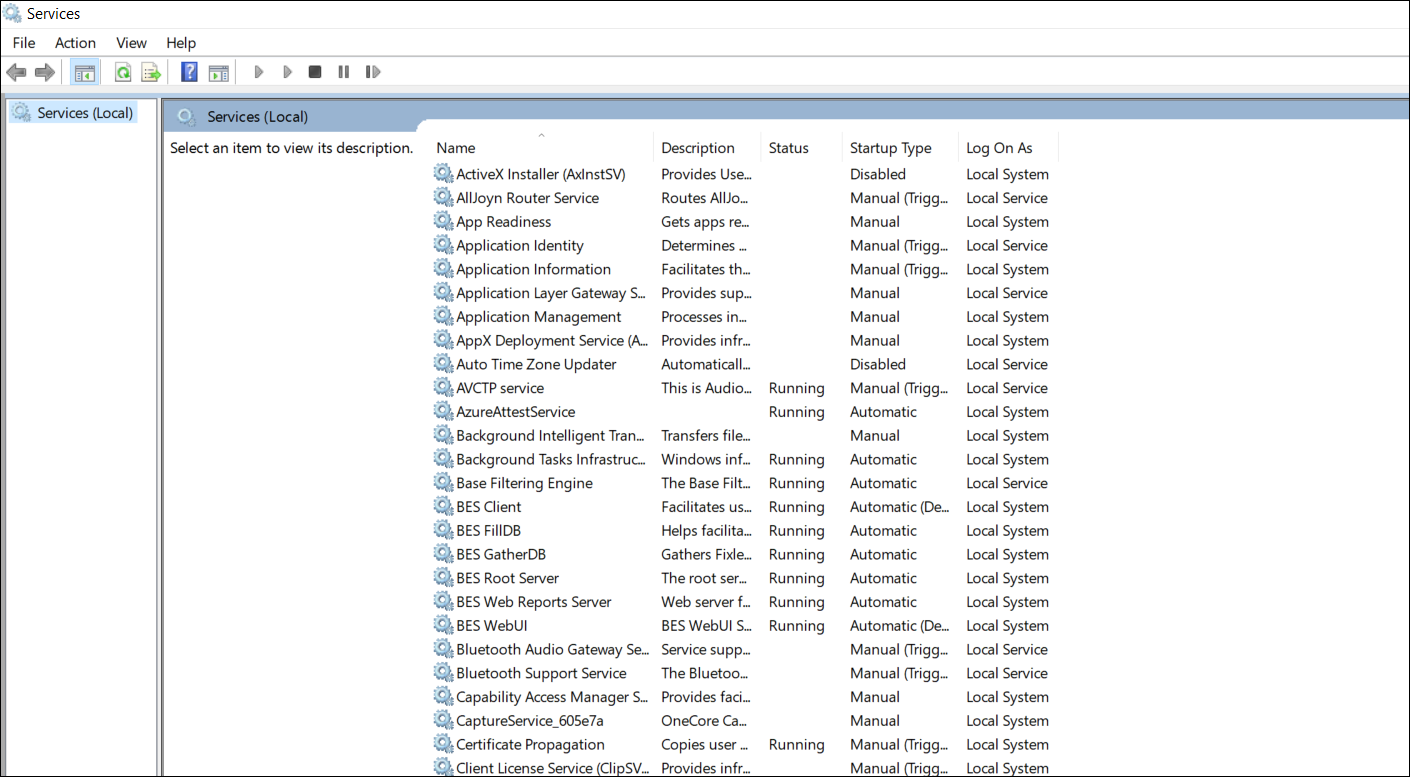
JAVA_HOME,NIFI_CA_CERT,NIFI_CLIENT_CERT,NIFI_CLIENT_KEY, andNIFI_HOMEare correctly mapped to your installation paths. - Open Windows Services and confirm that Apache
NiFi is running. Check
logs\nifi-app.logfor any errors.
- Go to the installation path and verify that the
Uninstall the BigFix IVR Retriever
Procedure
-
Select WARNING: BigFix IVR Retriever v4 has an incomplete
configuration fixlet and click Take Action.
This fixlet also can be used to launch the guide documentation which will
provide more information.
Note:The Warning: BigFix IVR Retriever v4 has an incomplete configuration Fixlet can be used to launch the guide documentation which will provide more information.Note:The WARNING: BigFix IVR Retriever v4.0 has an incomplete configuration audit fixlet has no action and provides awareness to the operator of an incomplete IVR v.4 configuration. Suggested action is to launch the ivrNext.exe –setup command and proceed with the guided setup procedure.
-
Select Uninstall BigFix IVR Retriever v4 fixlet and click on
Take Action. A pop-up confirming the action is
desplayed:
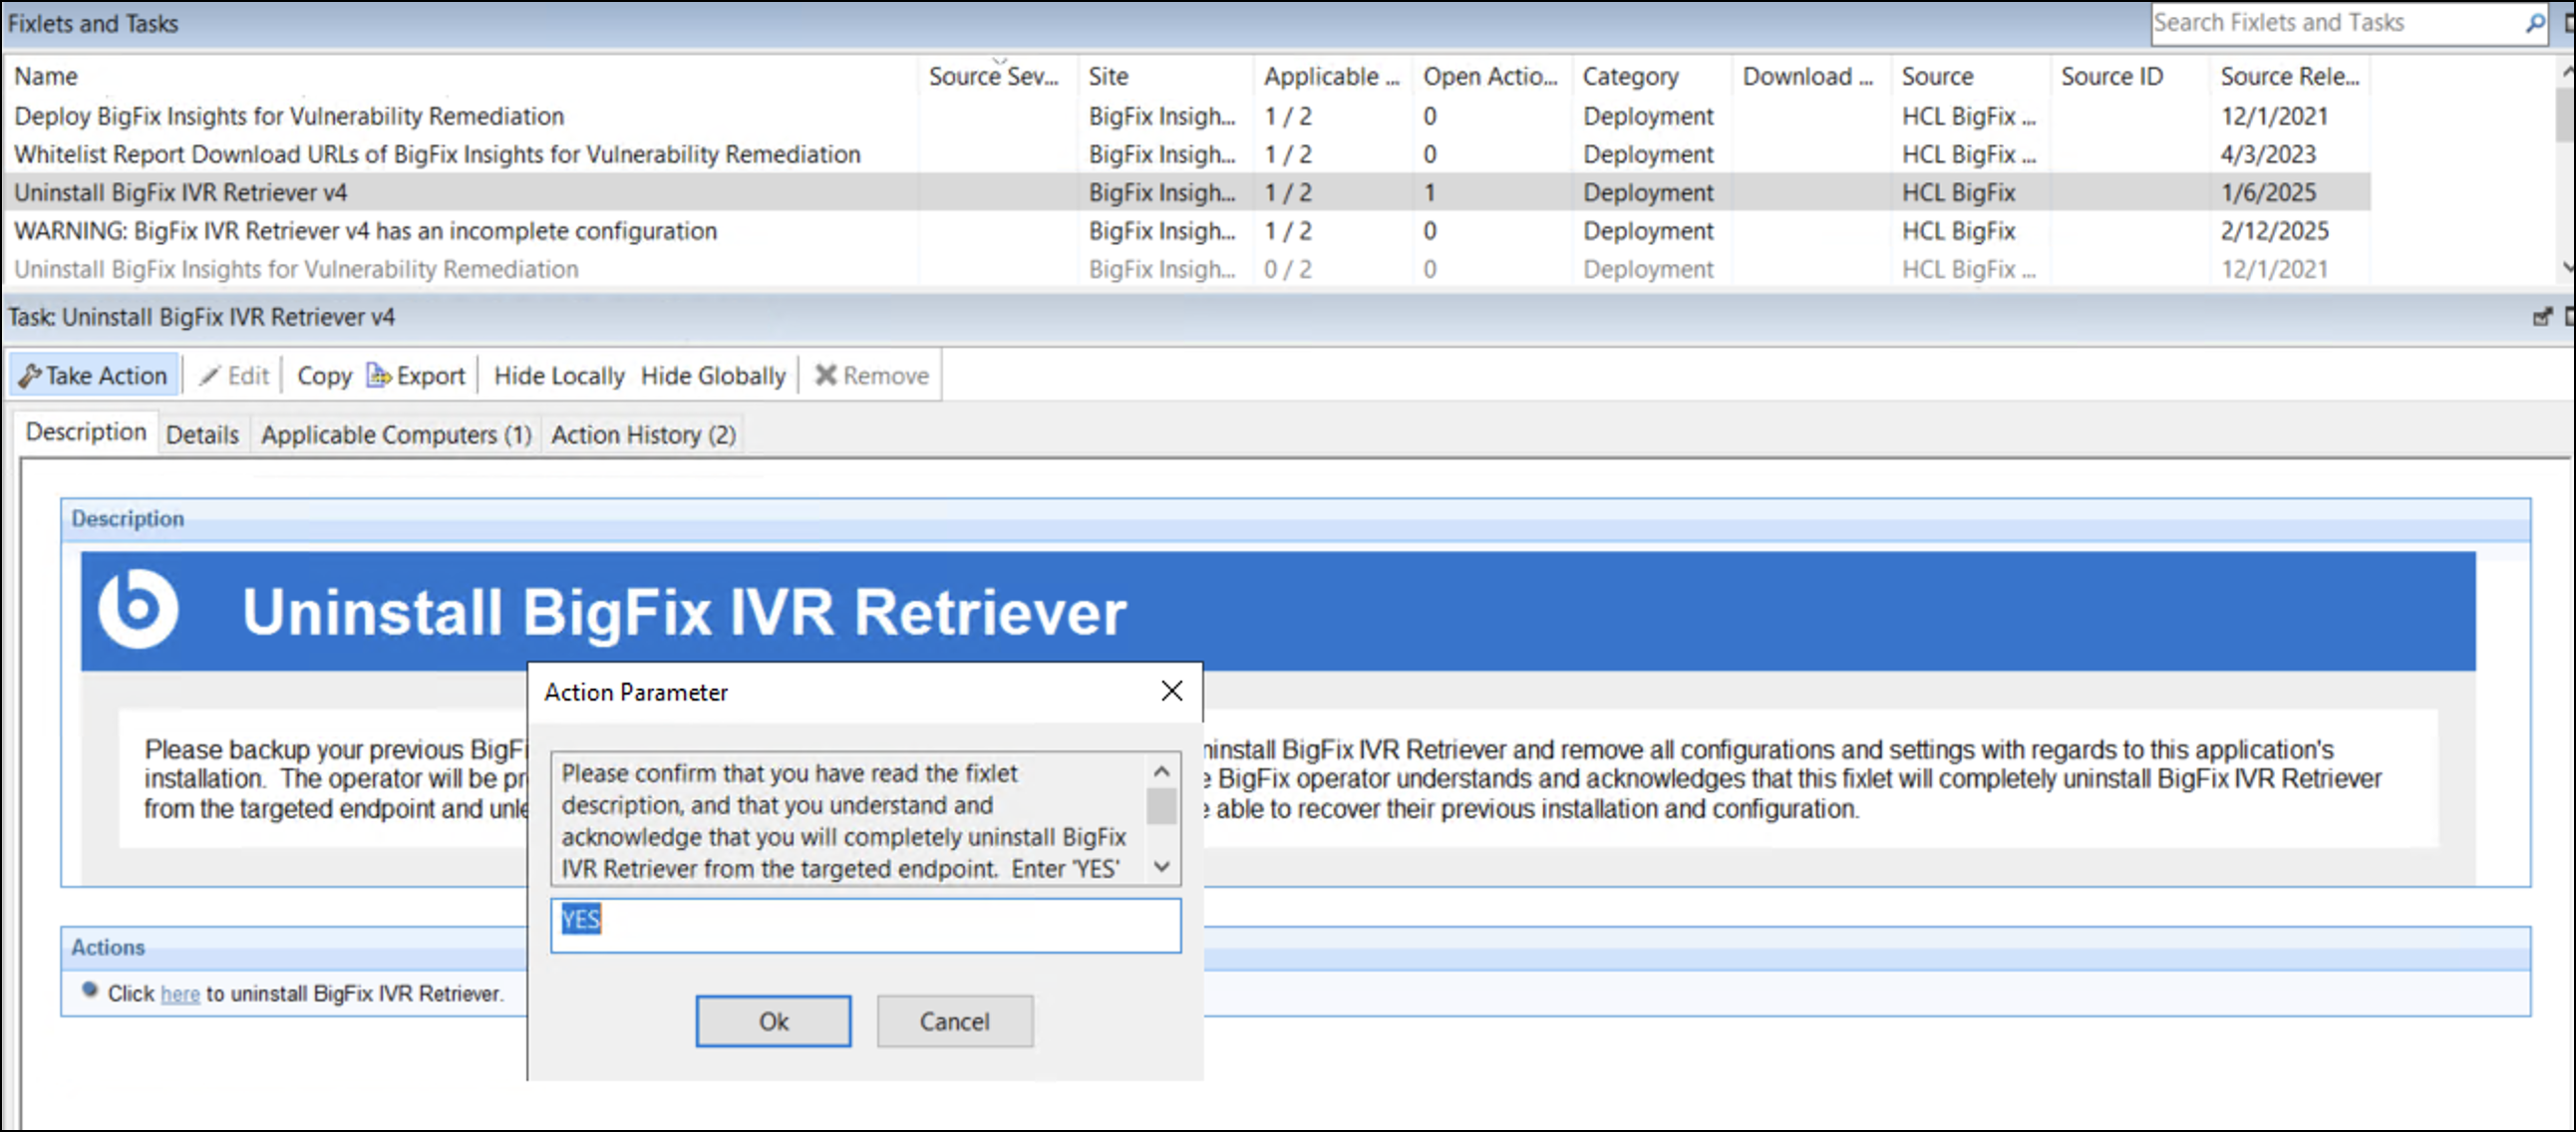
-
Enter YES and click Ok. Wait until the execution status
changes to "Completed".
- The BESIvrRetriever Folder will get deleted from the path given at the time of download.
- The BES IVR Retriever service will get removed from Services
App.
Upgrade the BigFix IVR Retriever
About this task
- Select Upgrade BigFix Insights for Vulnerability Remediation fixlet
in the BigFix Insights for Vulnerability Remediation external site and click
Take Action.Note:Start the IVR service immediately after upgrading IVR4 to allow the table upgrade to complete. Before removing a data source from the Setup page, verify that the database upgrade is finished and that all affected tables include the new columns.