Setting up WebUI IVR v.4 app
This section provides information on setting up the IVR application, remediation from the main vulnerability list page, remediation from the Vulnerability page, and exporting the vulnerability list.
Set up the WebUI IVR v.4
To set up the WebUI IVR v.4 app, perform the following steps:
- Upgrade the IVR to the latest WebUI version.
- After a successful on-prem setup and starting ivrNext.exe, wait for the automation process to complete. The process will be confirmed by a log entry stating 'Automation completed'.
- Log in to the WebUI App with valid credentials.
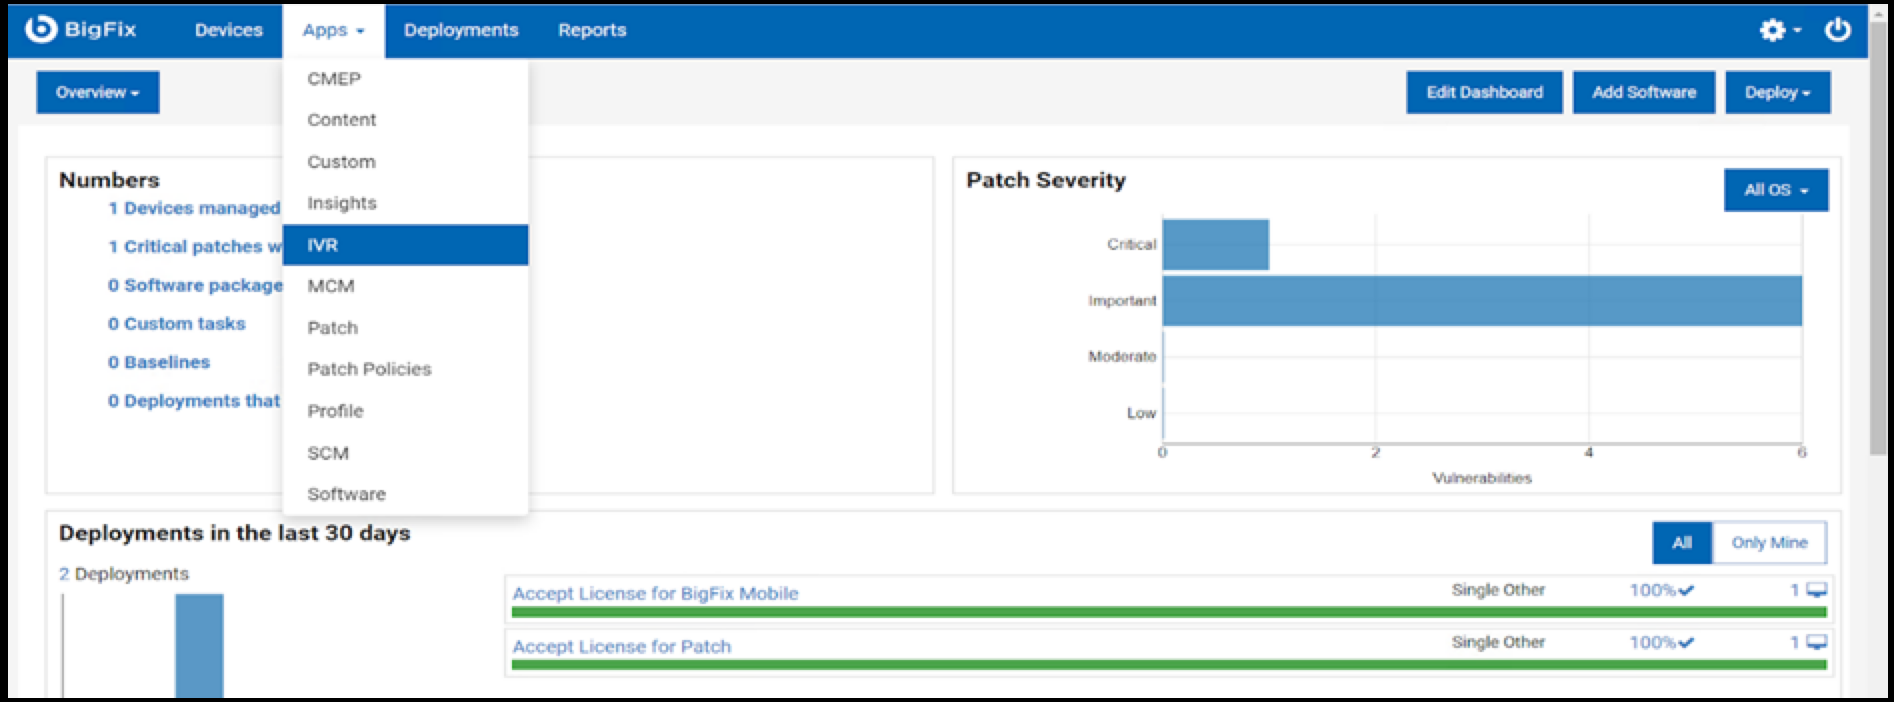
- Once on the default page, navigate to the IVR app by selecting it from the
Apps dropdown menu in the navigation bar.
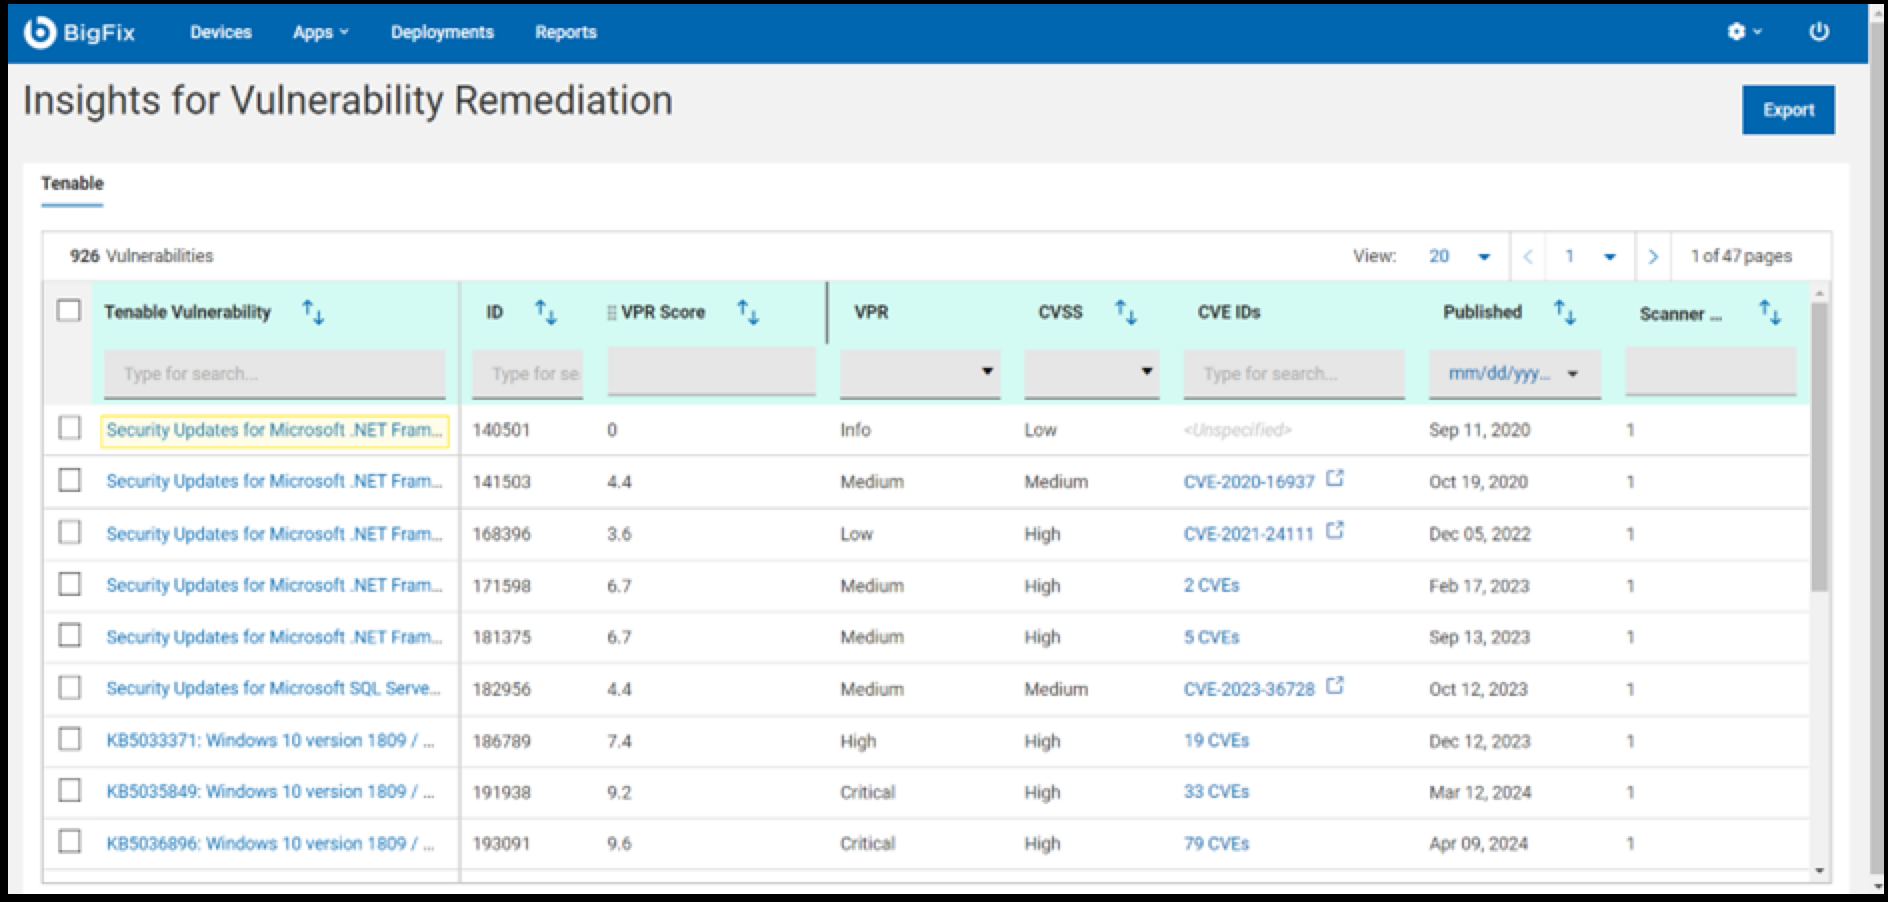
- Upon successful completion of the automation process, the data will be visible
in the grid as shown in the snapshot below.Note:The IVR page header shows the name of the vulnerability scanner based on the data source configuration. For example the following graphics indicate Tenable as the data source.
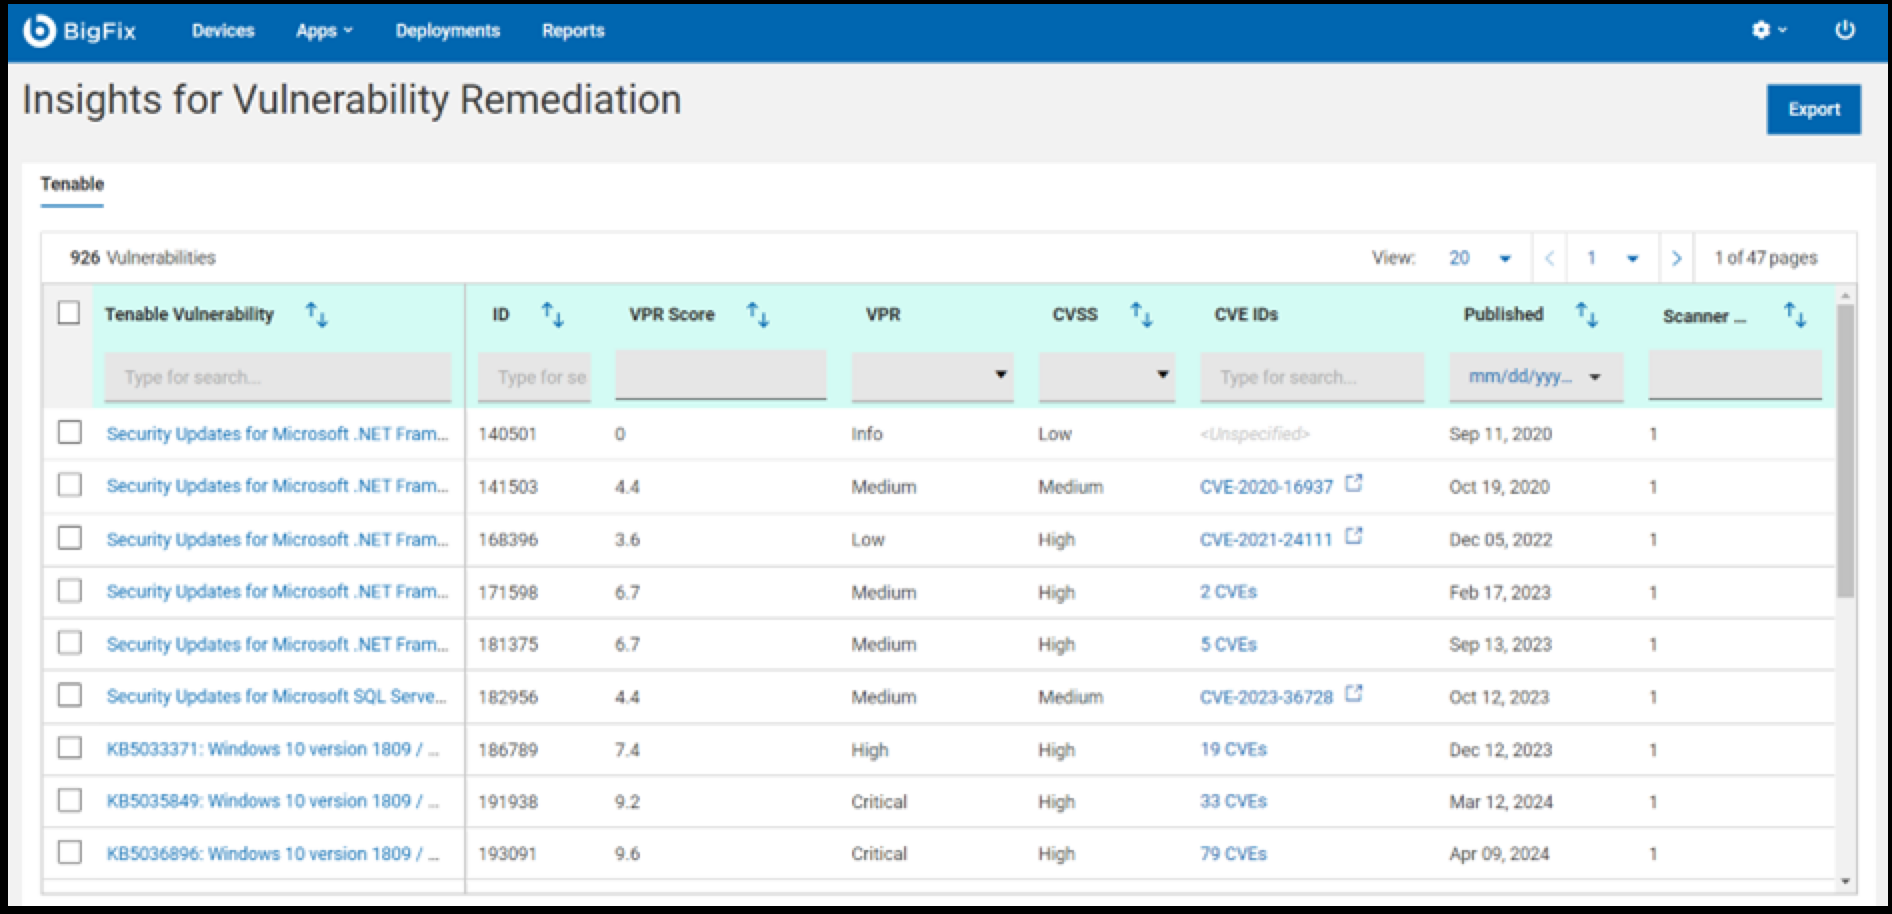 Note:The scanner count indicates the number of devices detected with the vulnerability by the external scanner. In contrast, the content page displays the devices that are relevant to the fixlet.
Remediation from the main vulnerability list page
-
Select vulnerabilities to remediate. Selecting a checkbox enables the Remediate button on the Actions toolbar.
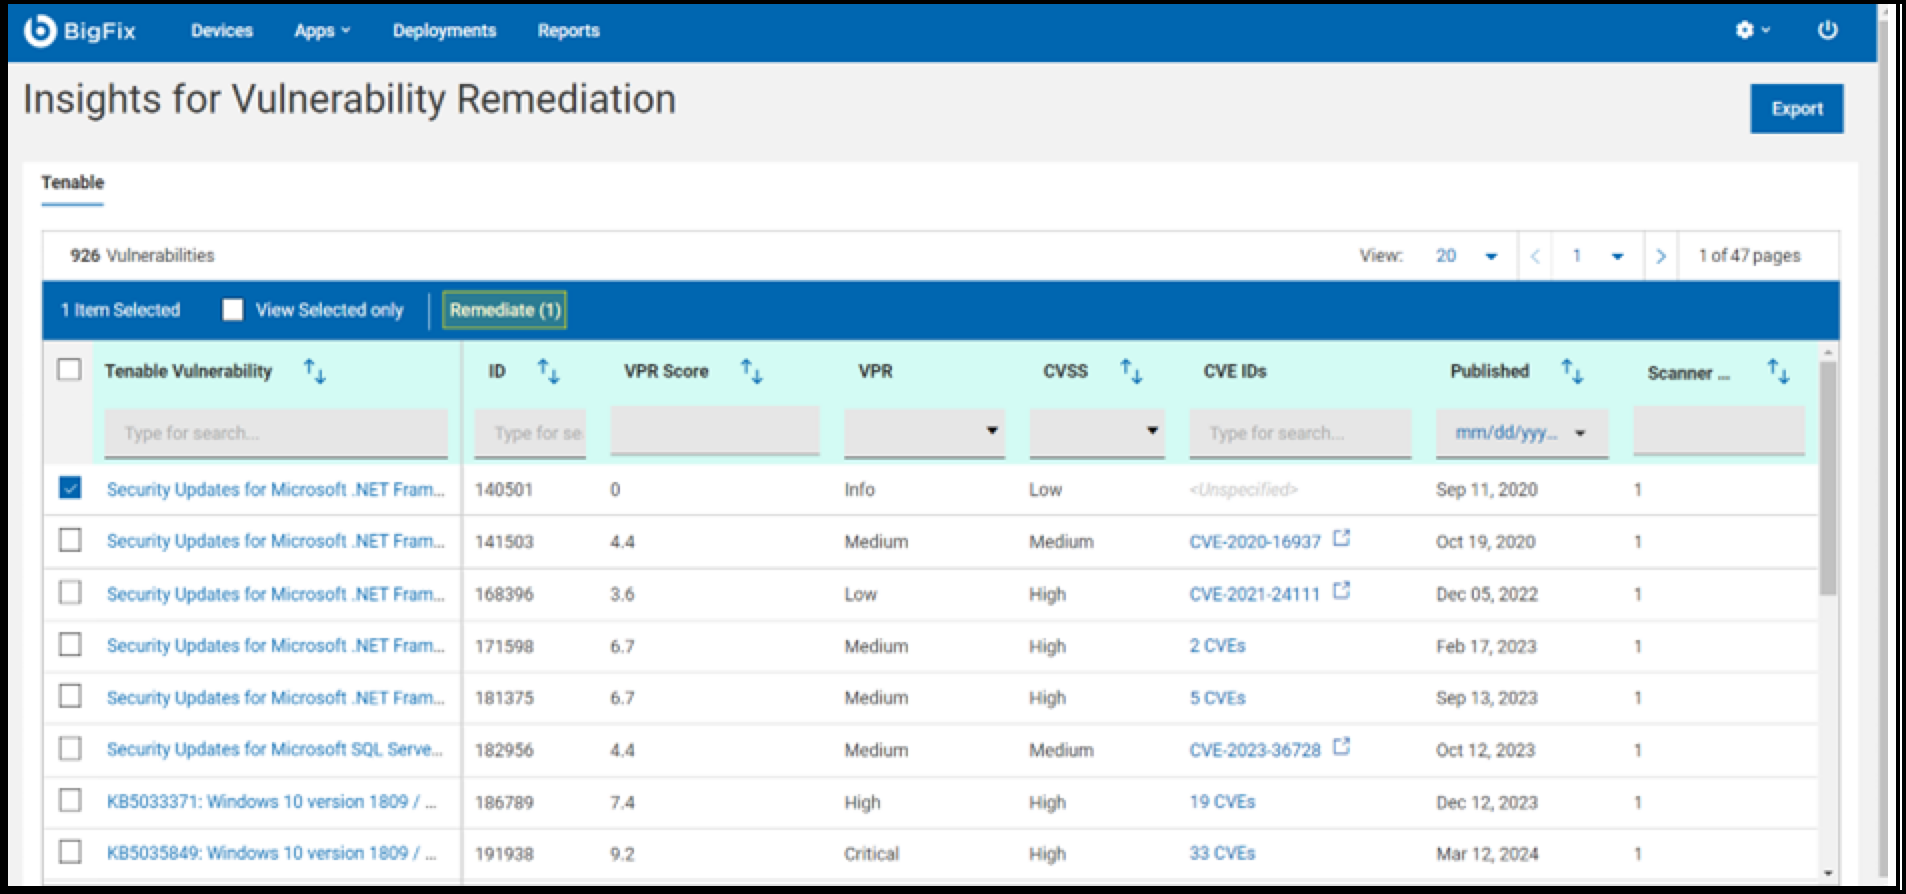
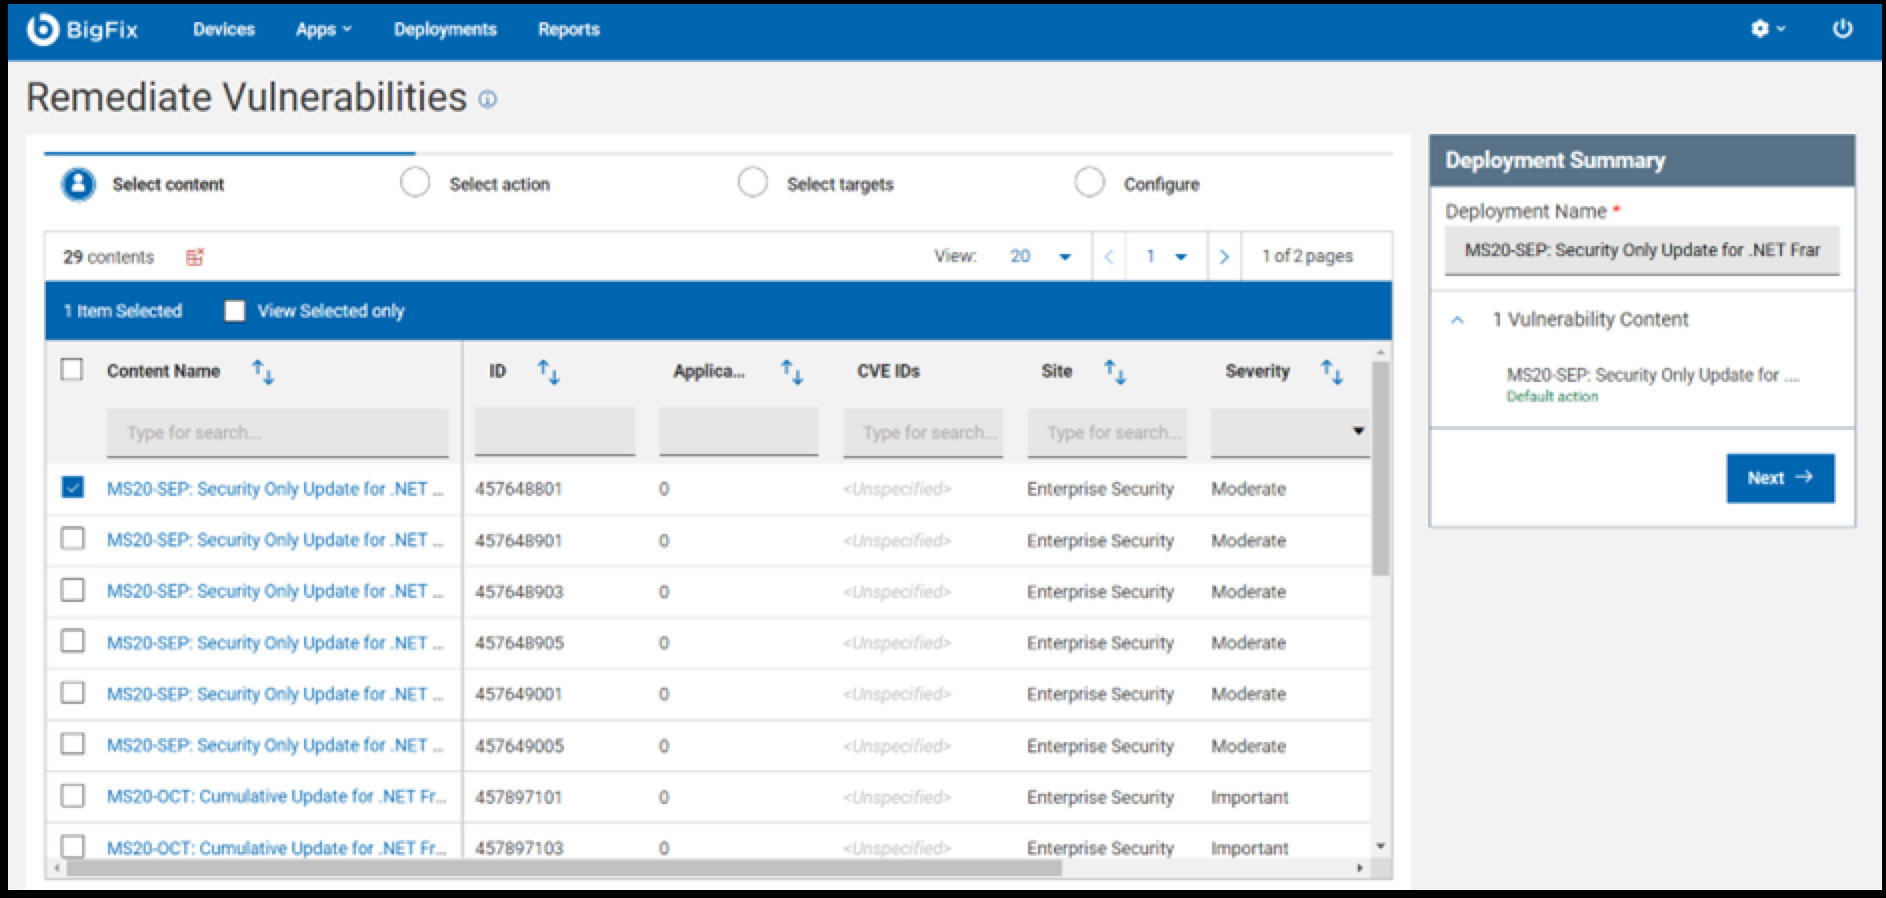
- Click Remediate to open the Remediate
Vulnerabilities page. On this page, select the content and then
click Next.
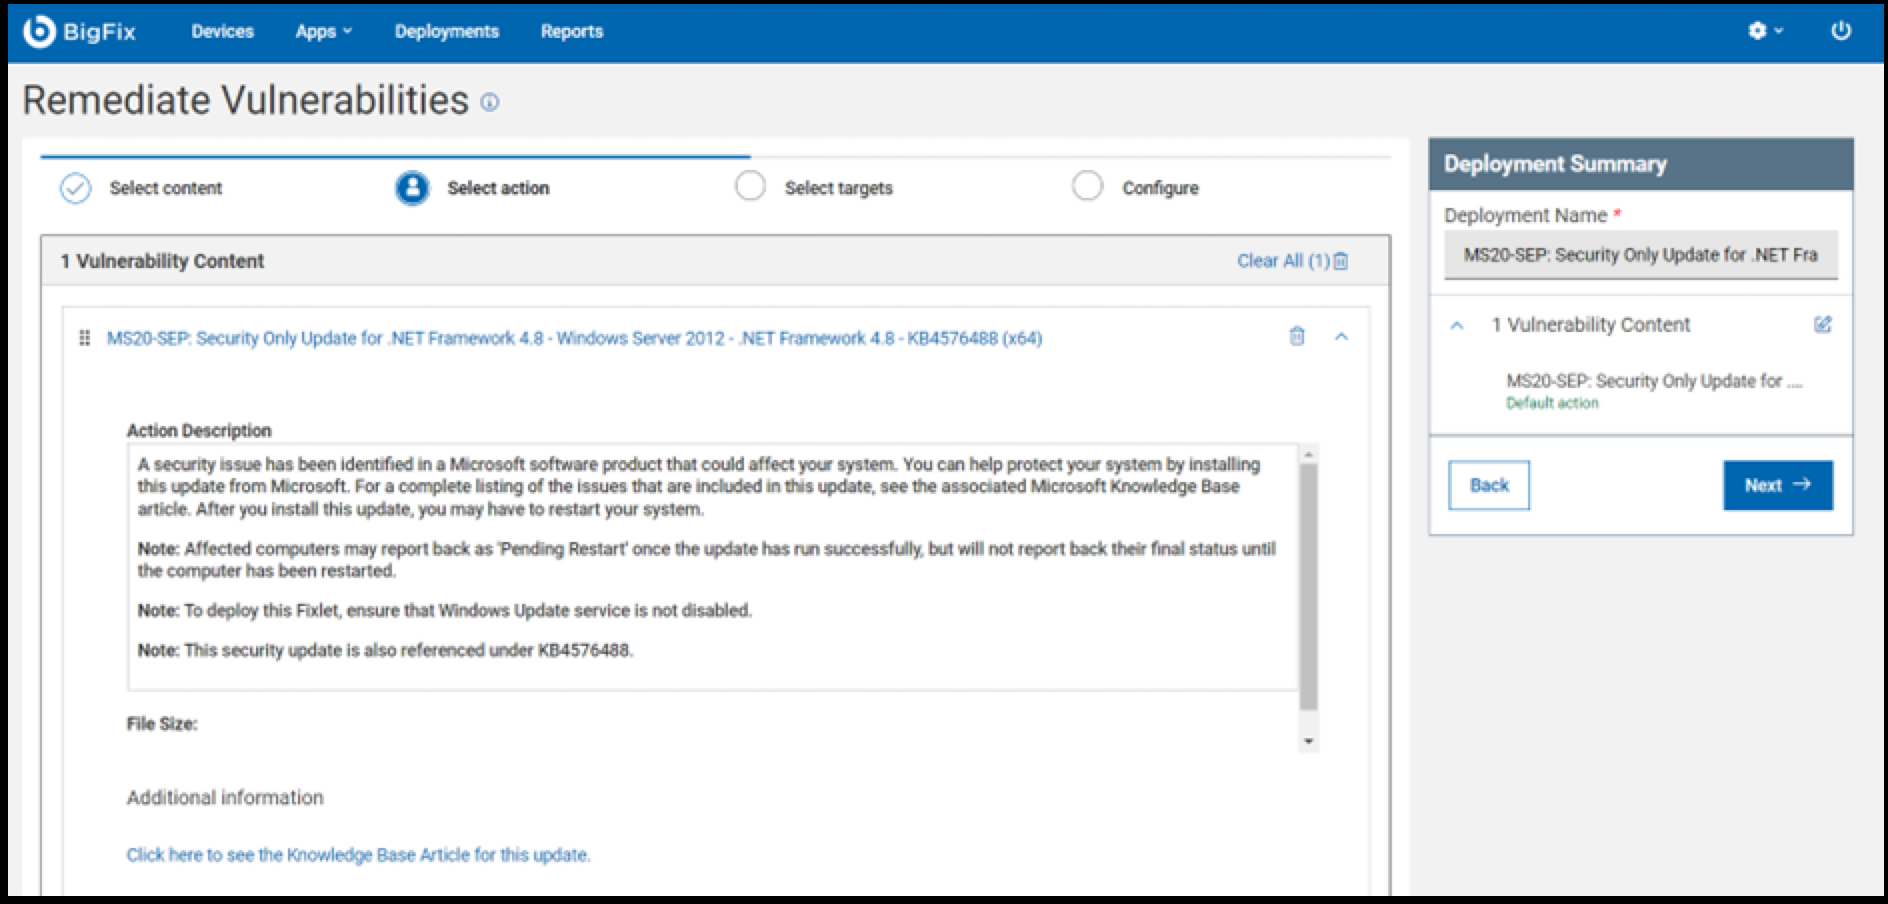
- Choose the appropriate action and click Next to
proceed.
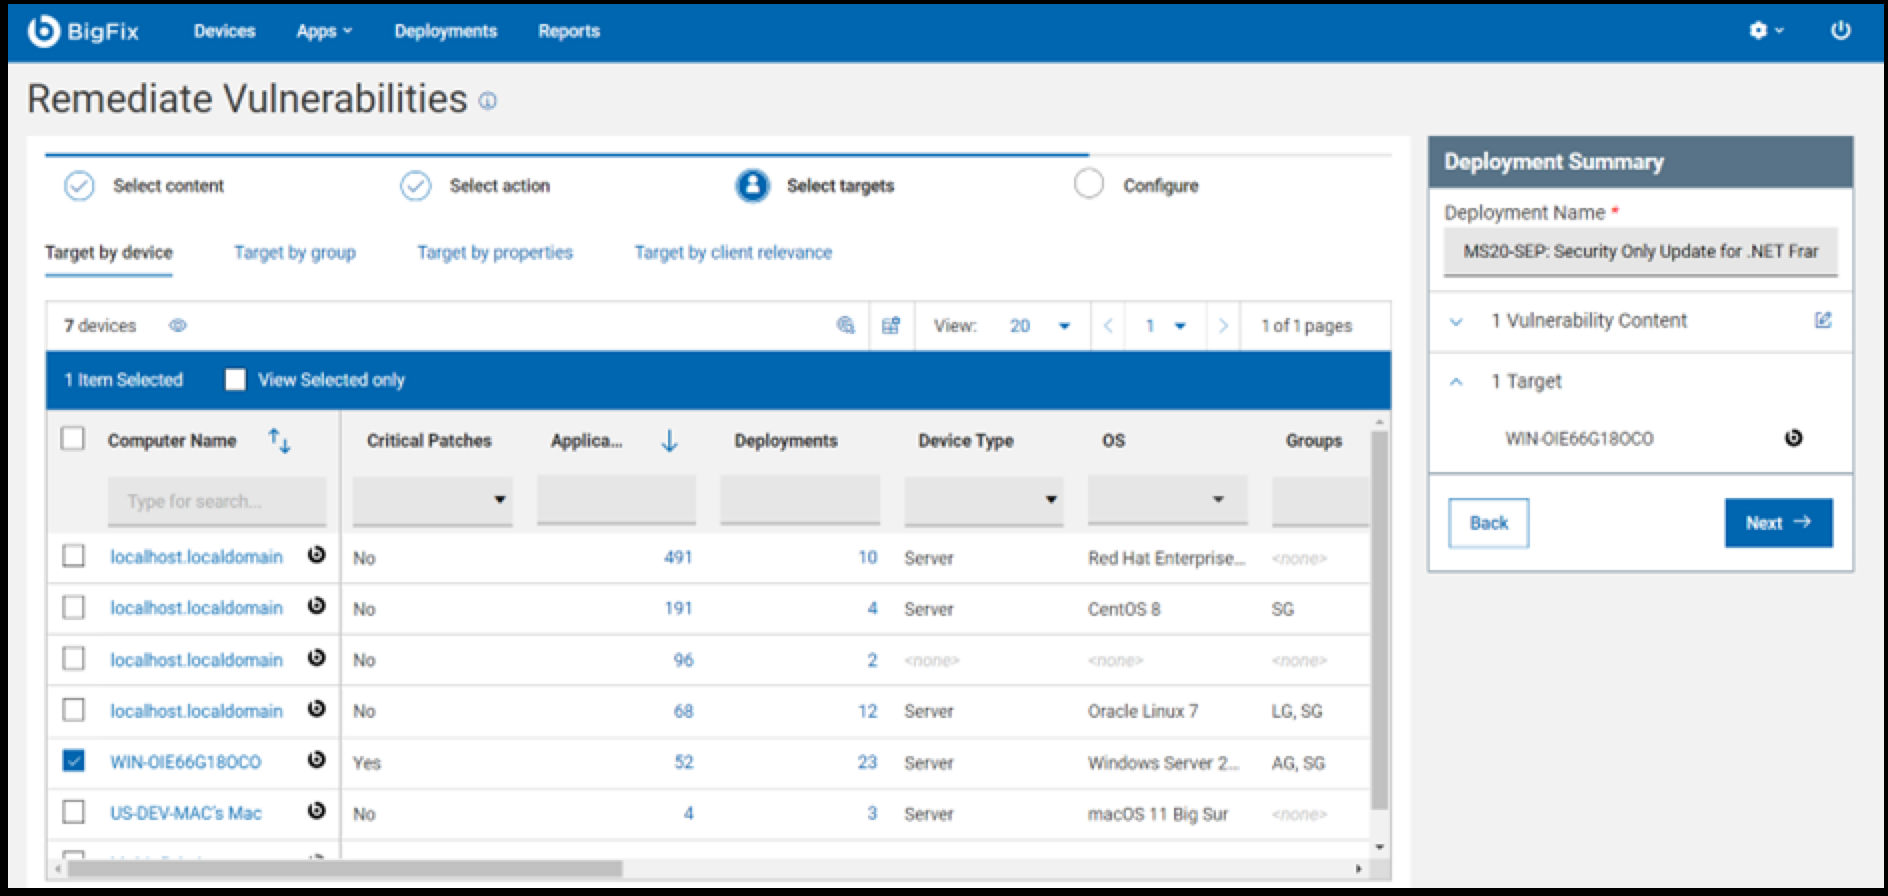
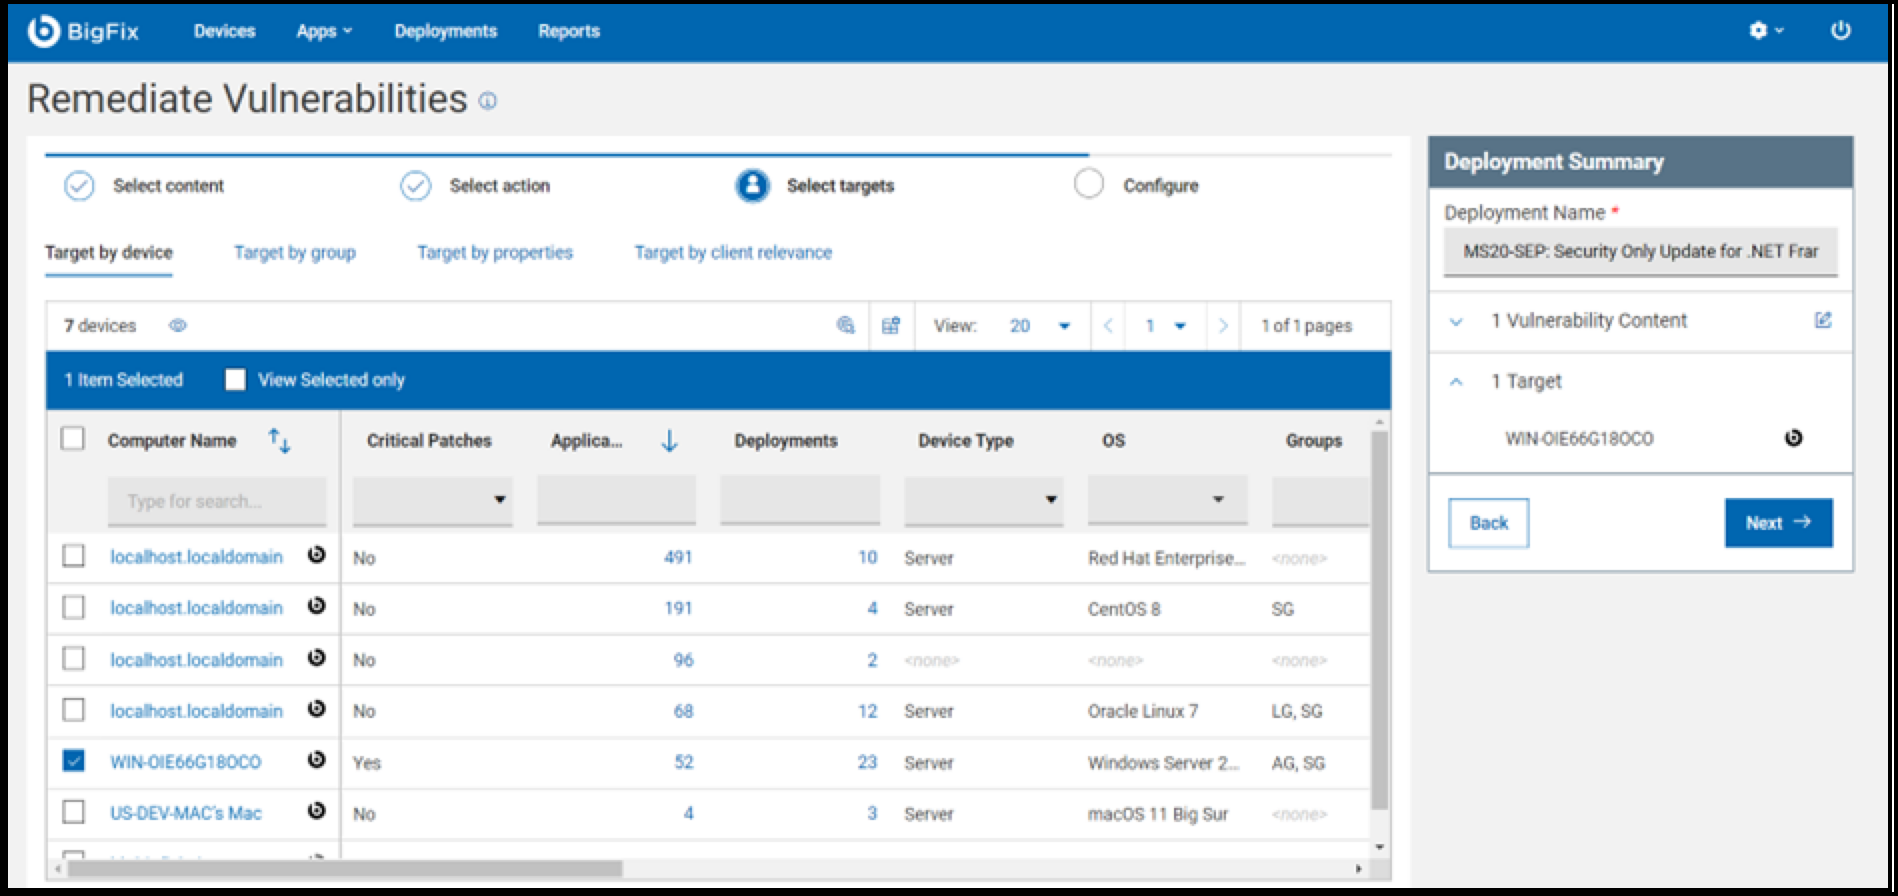
- Select the target machine for vulnerability remediation and click
Next to continue.
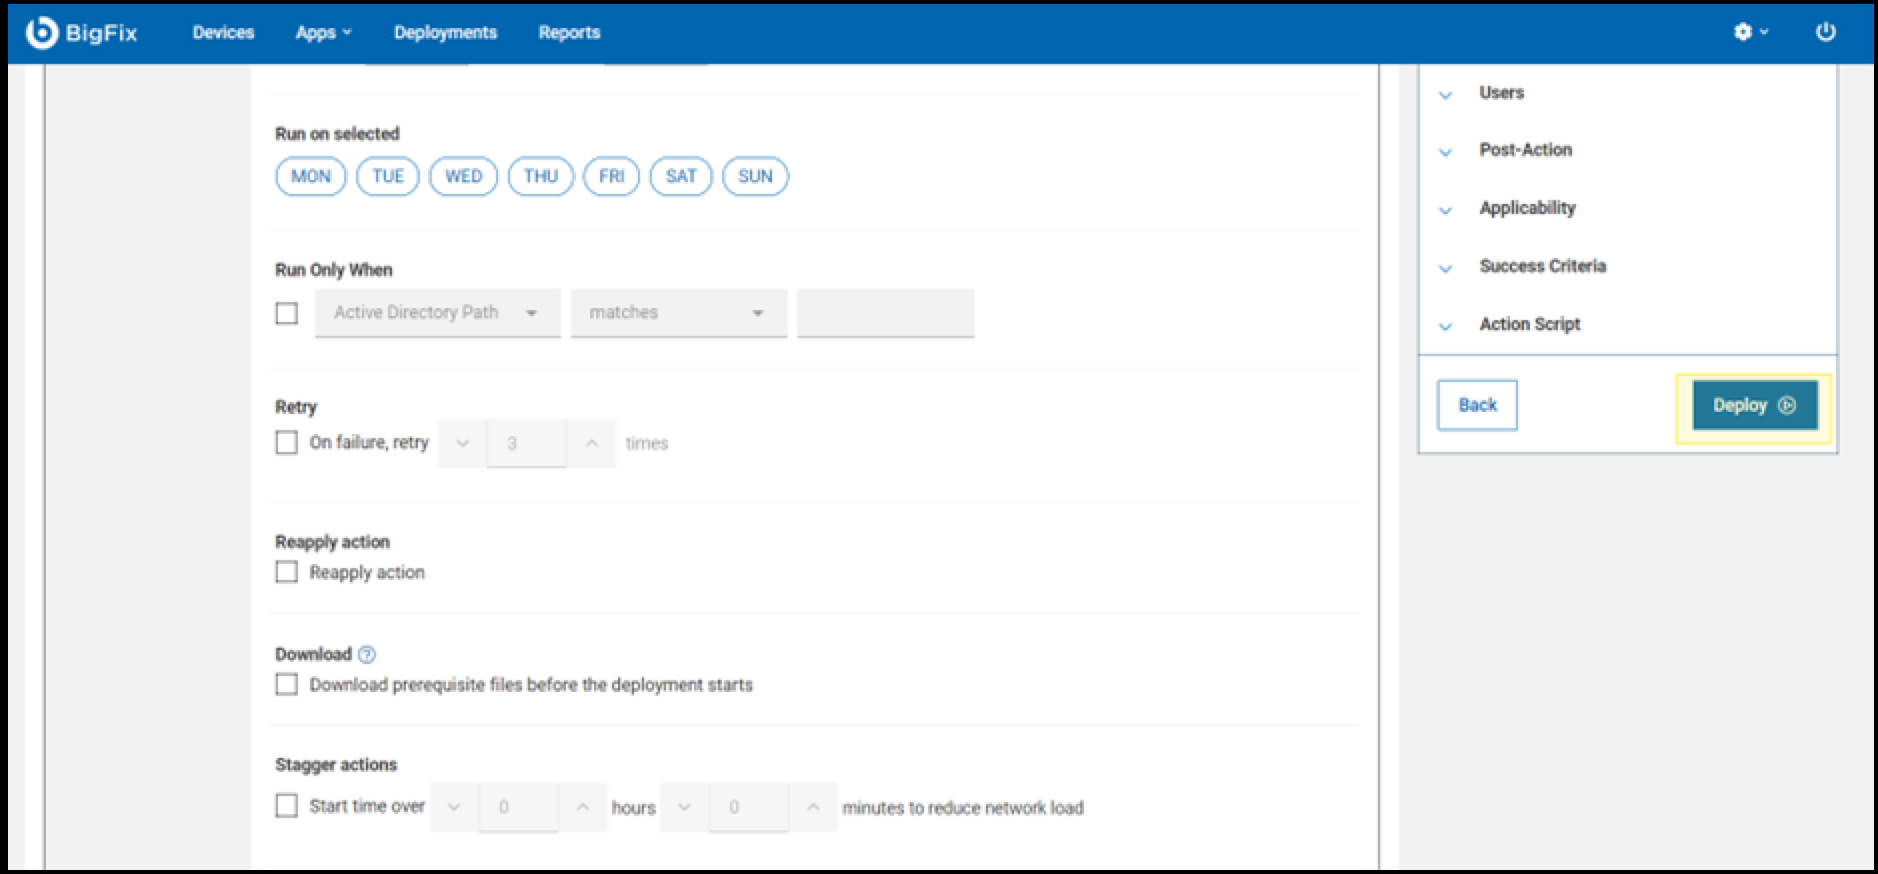
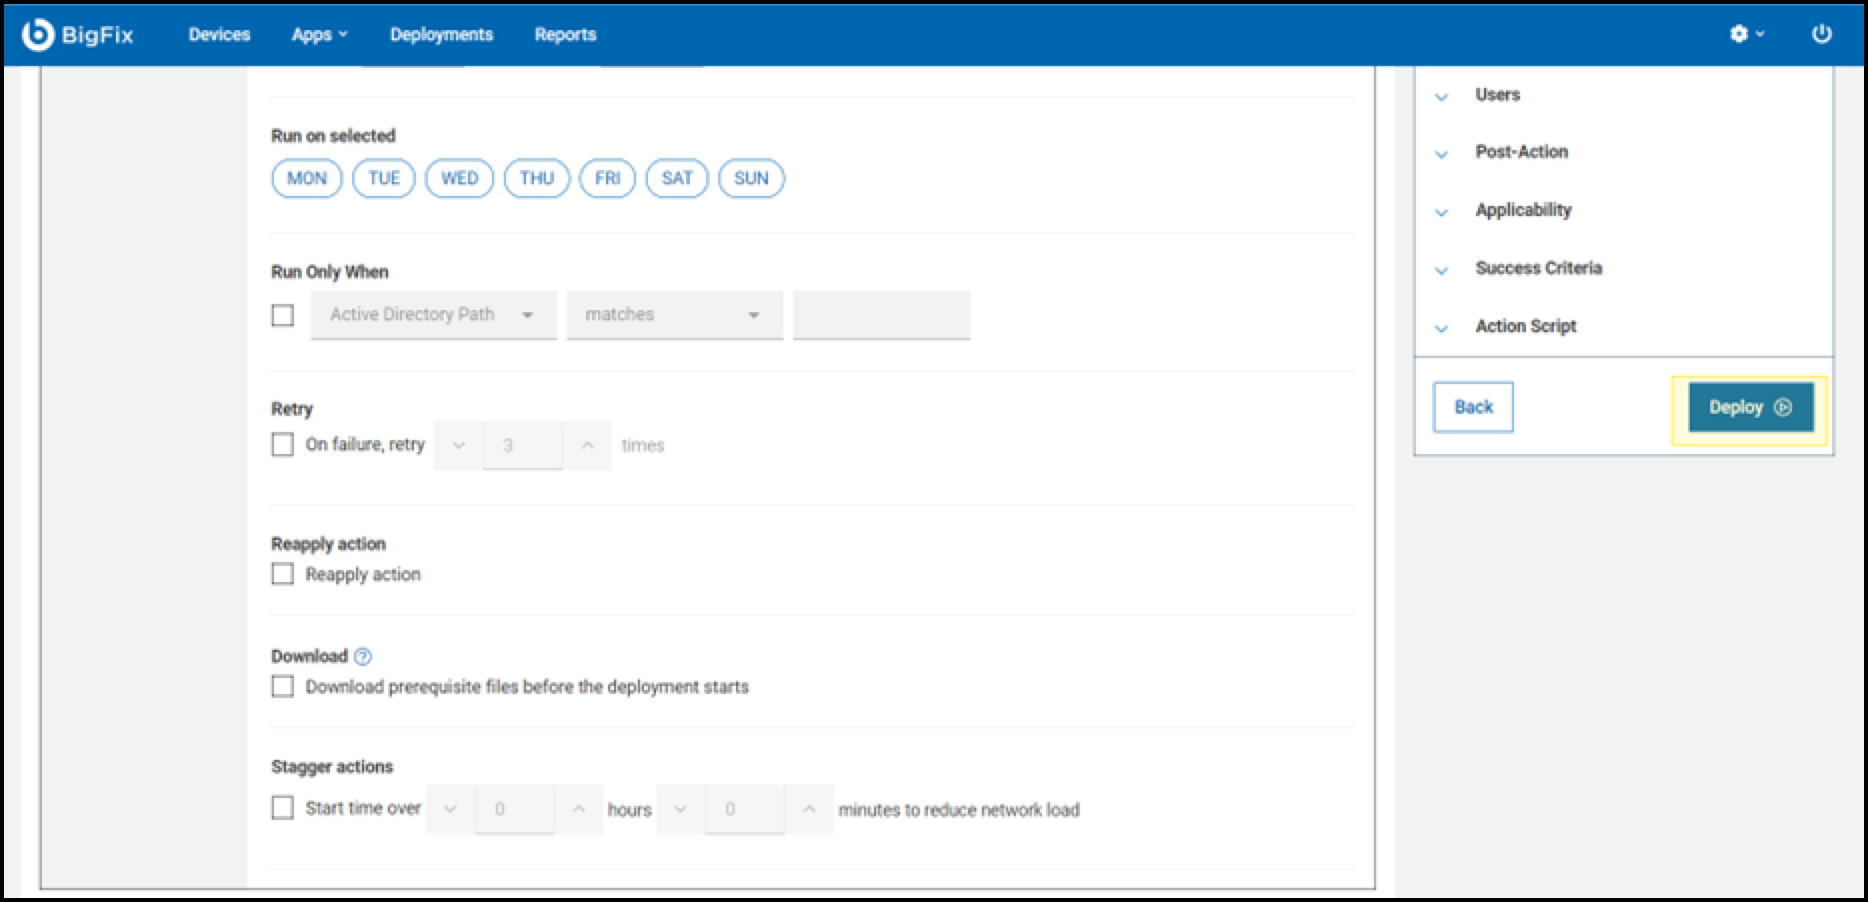
- Configure the deployment schedule and select preferred options before
clicking the Deploy button to initiate the
process.
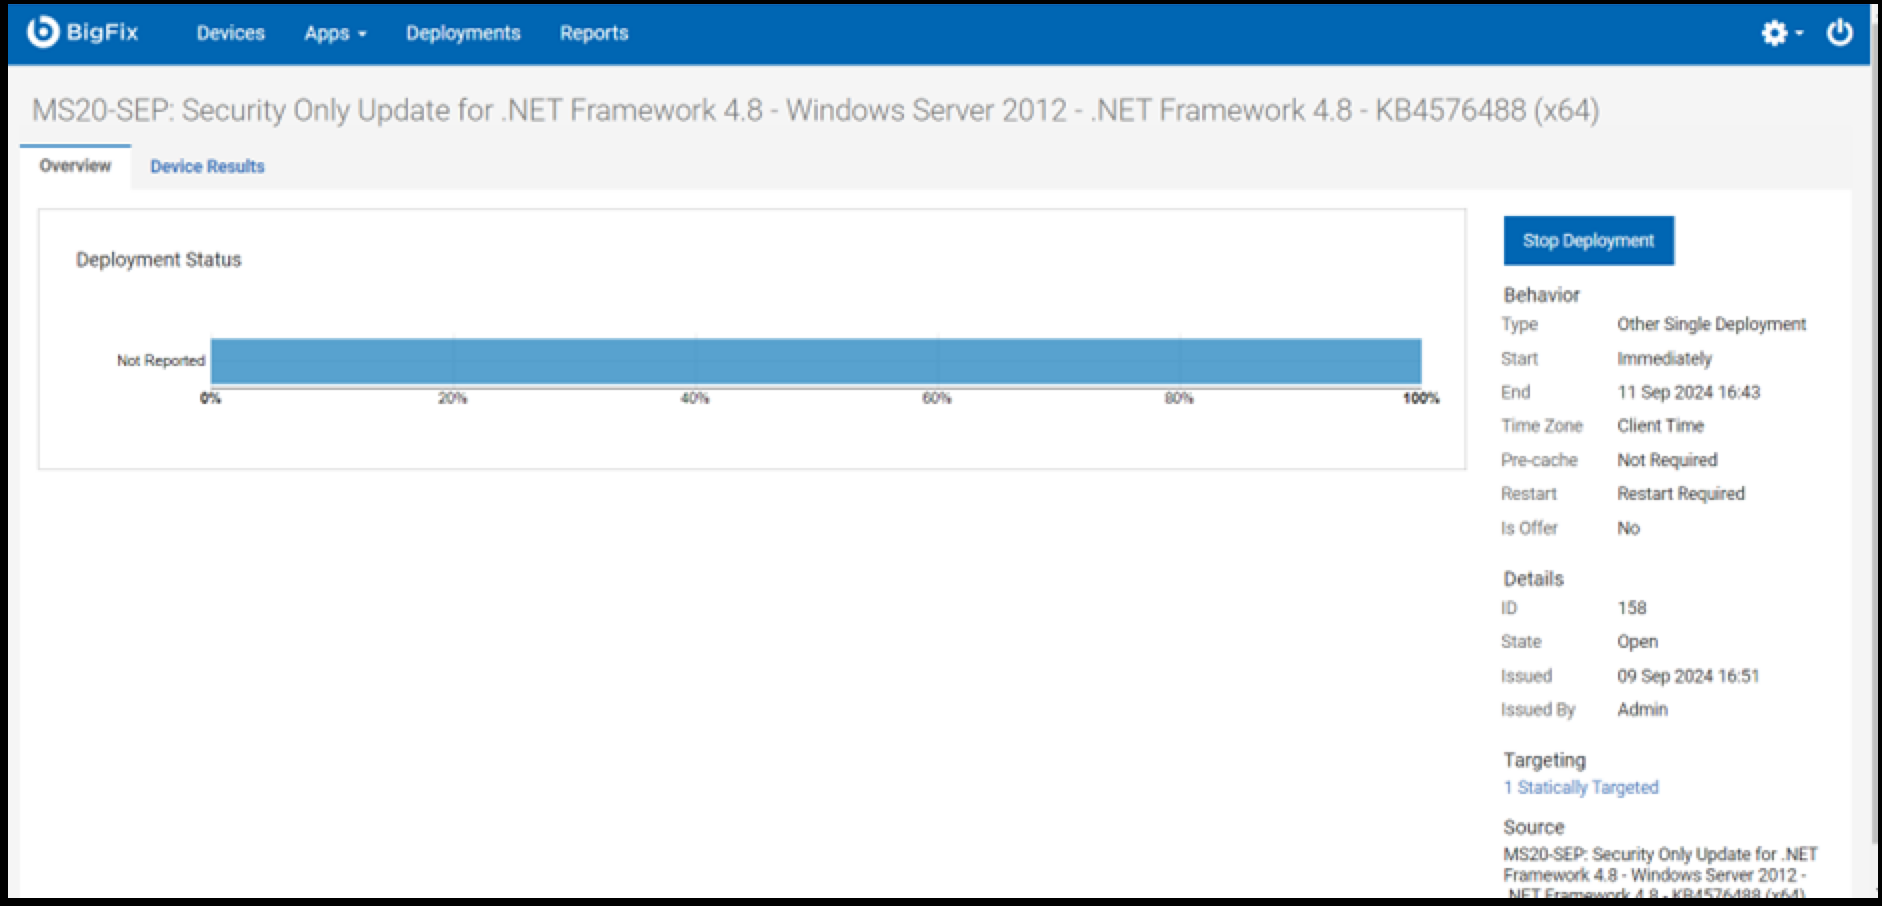
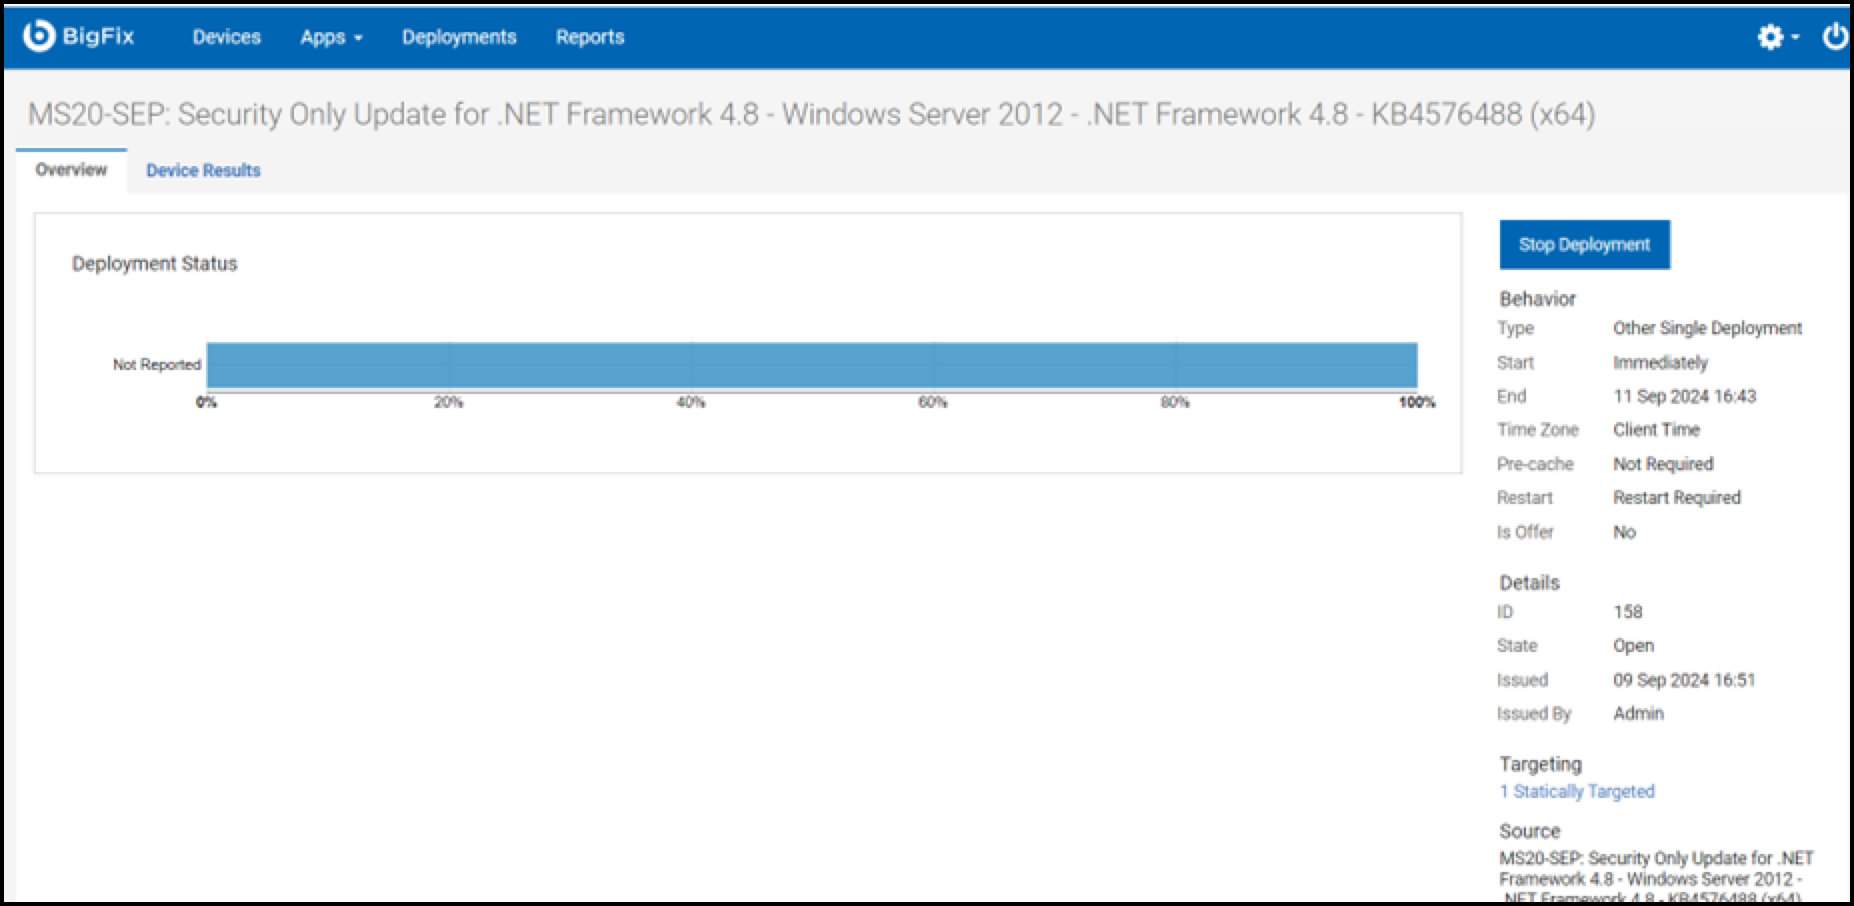
- The final screen allows you to monitor the deployment process.
Remediation from the vulnerability page
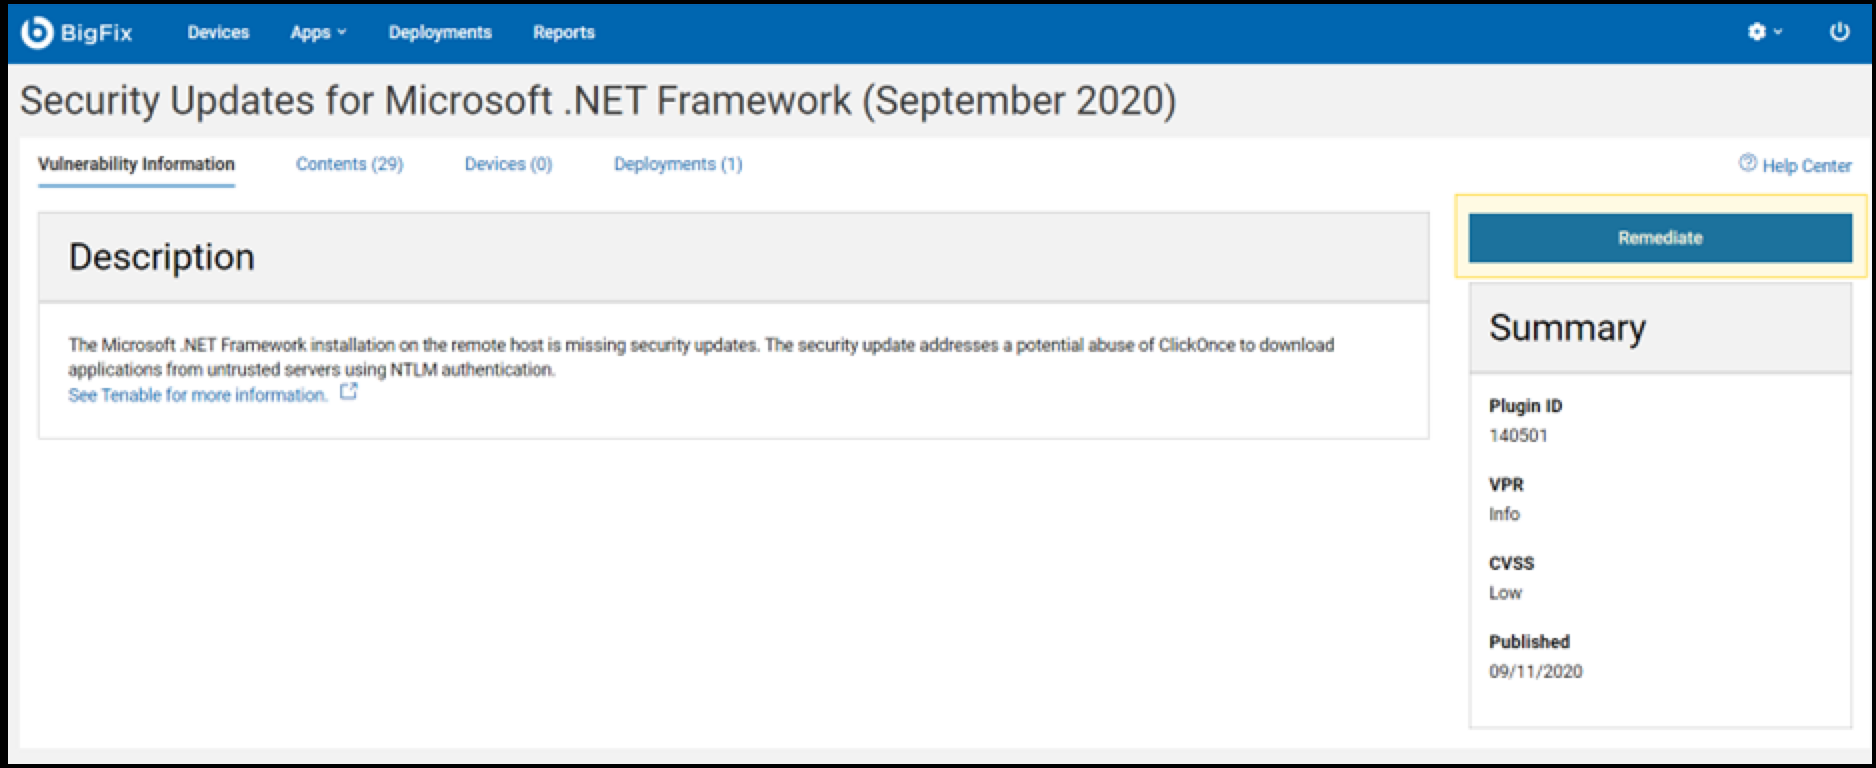
- Click on any vulnerability from the vulnerability list page.
- You will be directed to the vulnerability information page, as shown in the
snapshot below.

Here, you can view the content, devices, and deployments for the selected vulnerability.
- Click on the Remediate button, as shown in the
snapshot below.
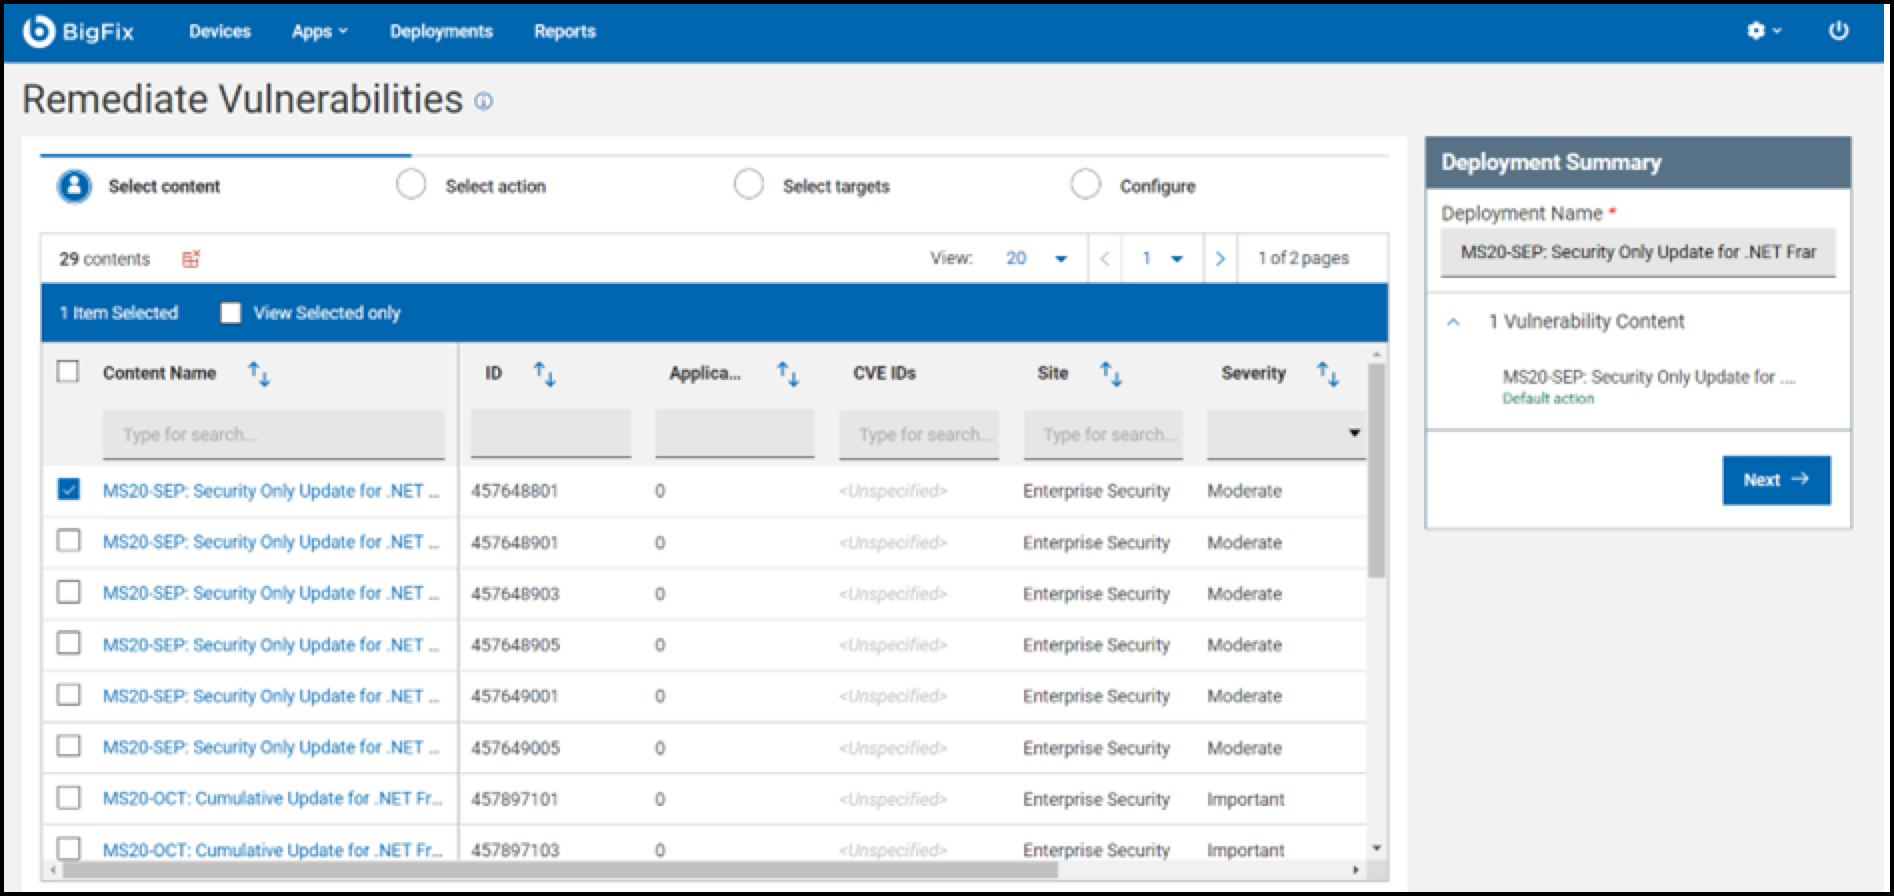
- You will be redirected to the Remediate Vulnerabilities page to
select the content. Select the content and then click
Next.
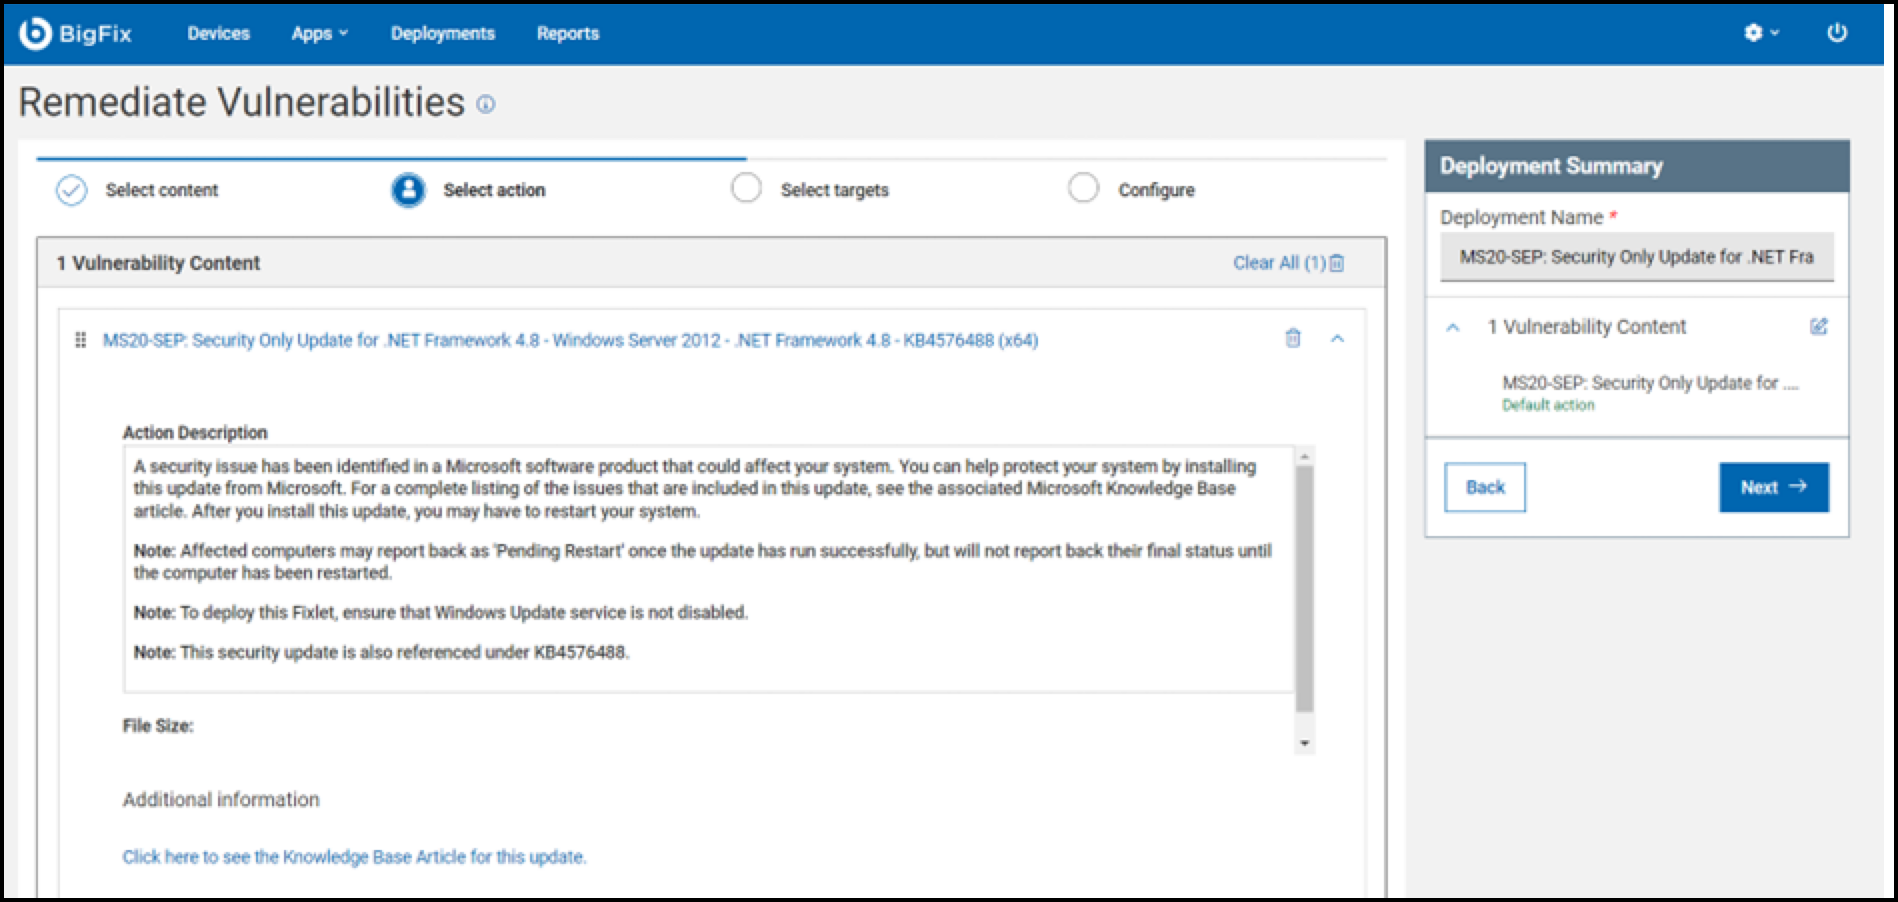
- Choose the appropriate action and click Next to
proceed.
- Select the target machine for vulnerability remediation and click
Next to continue.
- Configure the deployment schedule and select preferred options before
clicking the Deploy button to start the process.
- The final screen provides an overview of the deployment process.
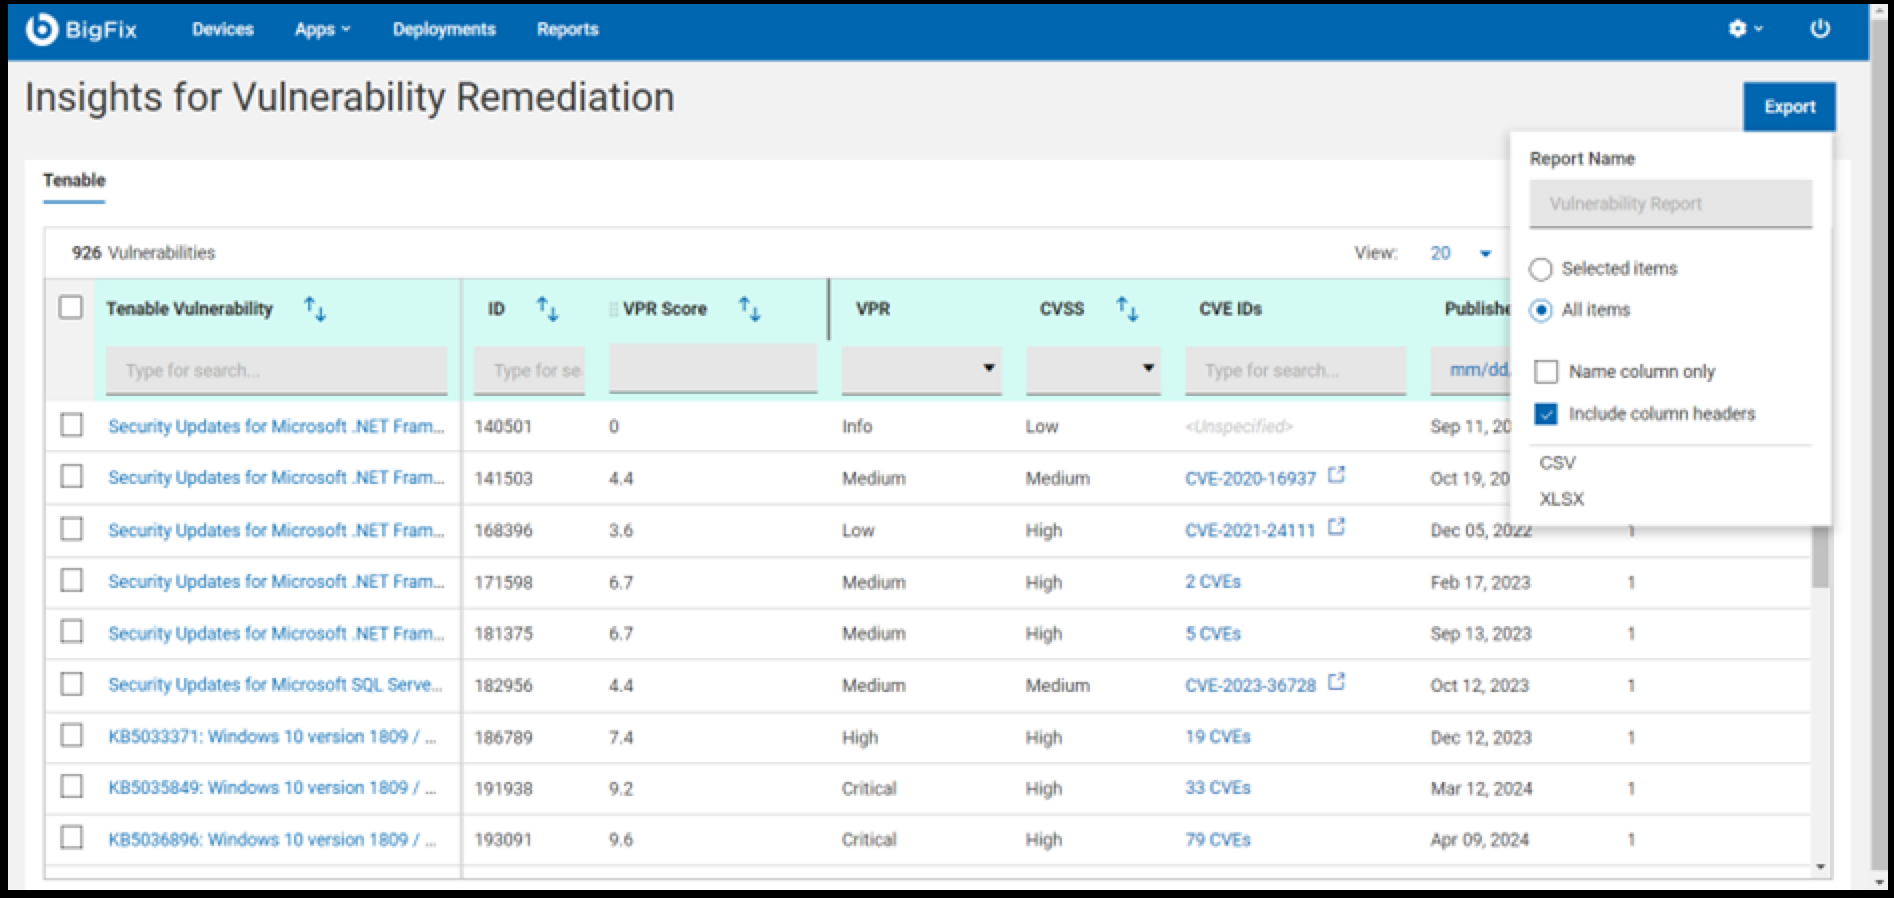
Export the vulnerability list
To export the vulnerability list, click on the Export button on the vulnerability information page.
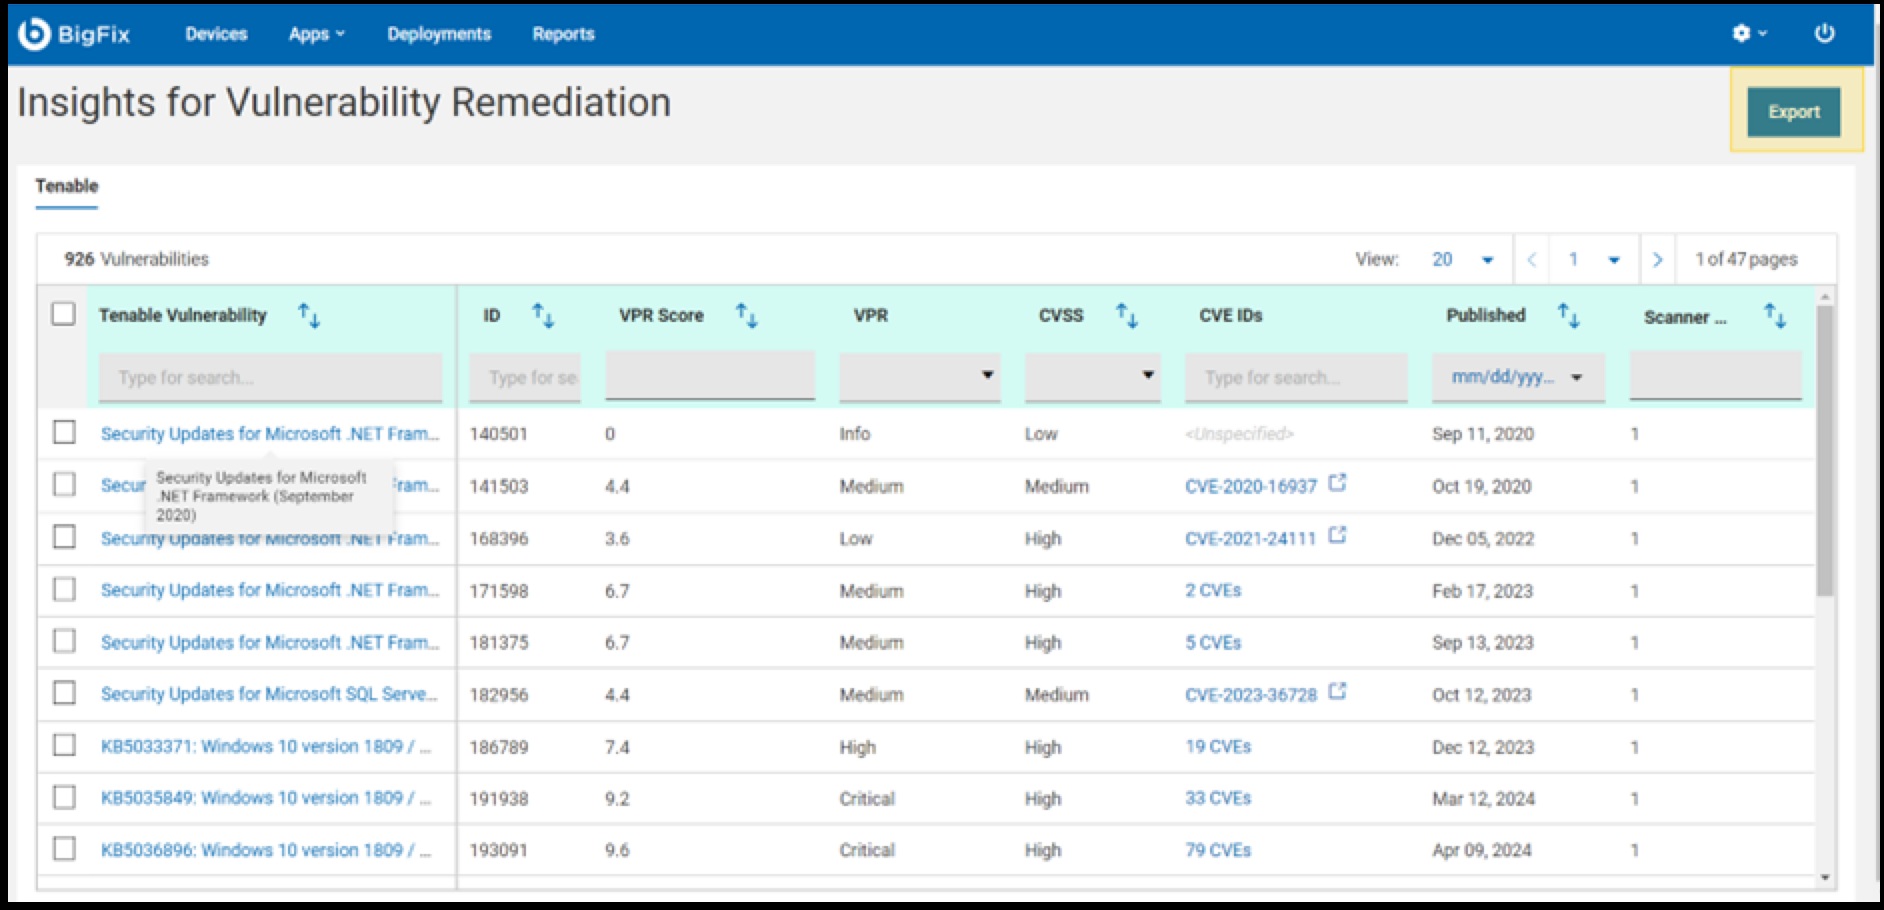
In the export dropdown, enter a name in the input area, select the desired options, and choose the file format. The file will be exported in the selected format.
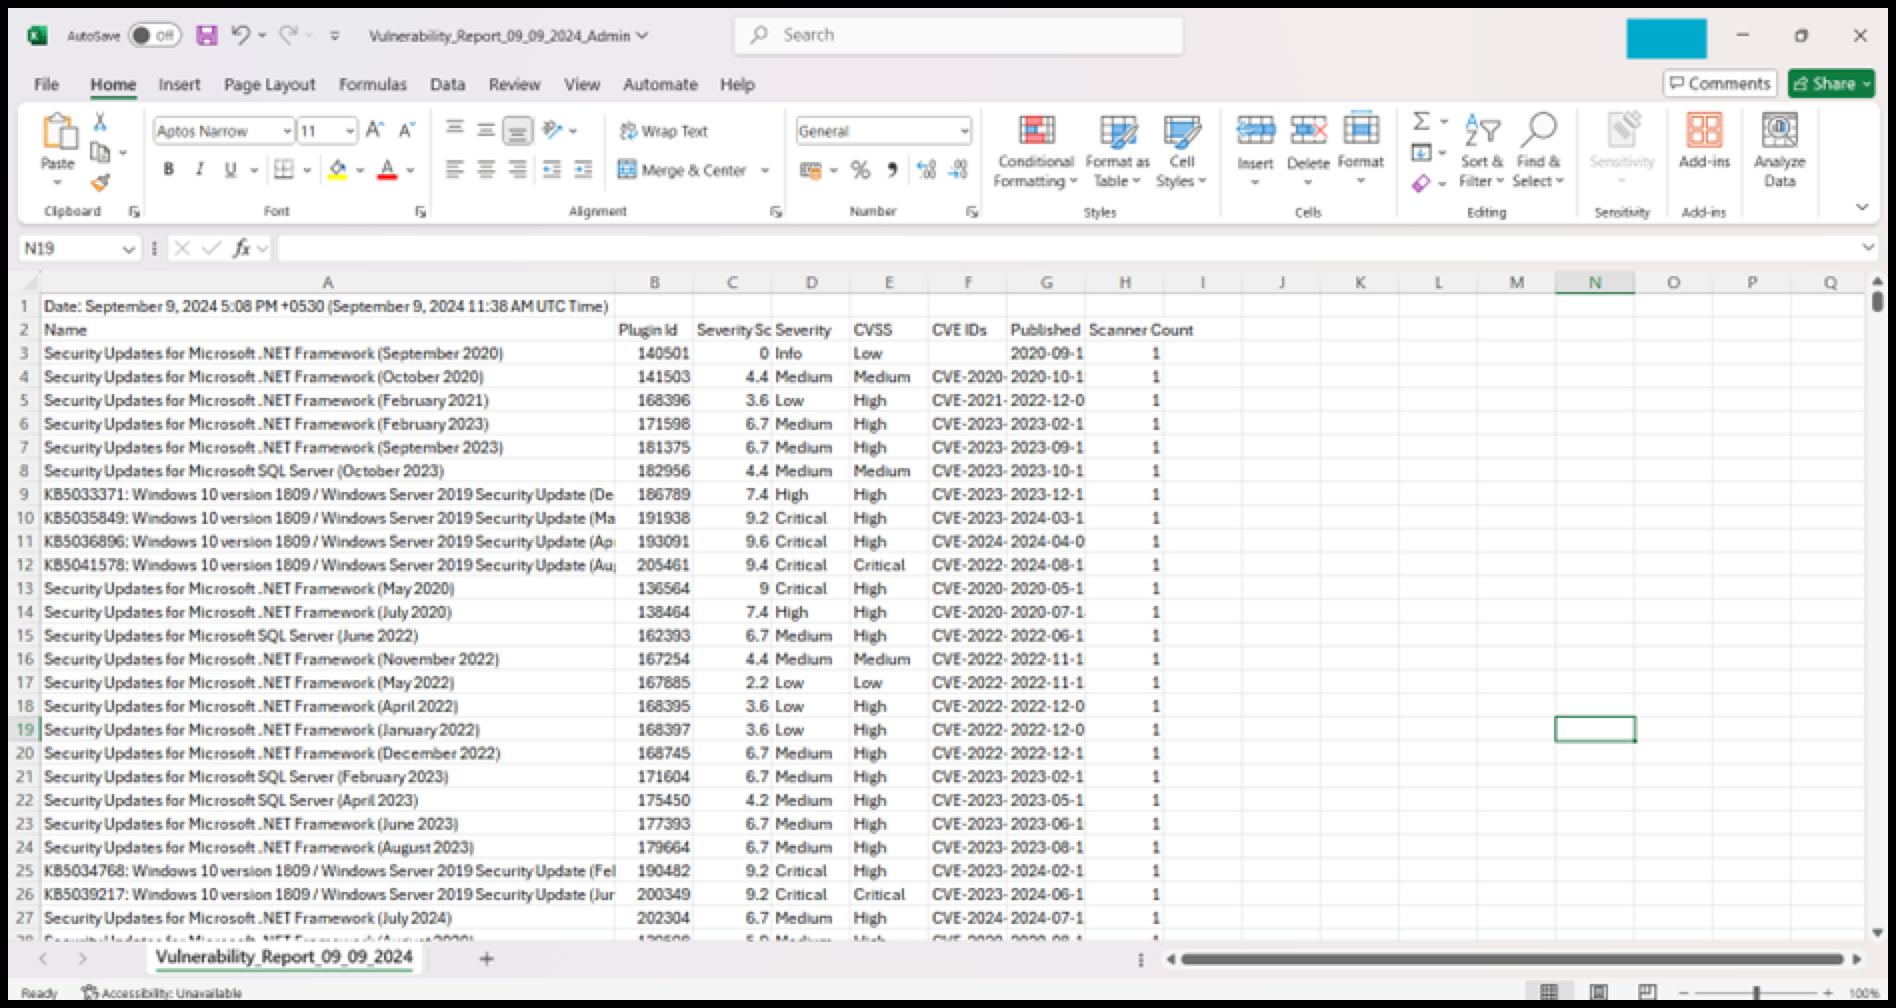
Below is the example of the exported CSV file.
Universal Vulnerability Ingestion (UVI) – File Import
The Universal Vulnerability Ingestion (UVI) – File Import feature enables users to import vulnerability reports into the IVR application from scanners like Tenable and Qualys, or from generic CSV files. The process includes file upload, column mapping, data verification, and integration into the IVR system for analysis and reporting. Users can also manage imported data by deleting or updating reports as needed. Refer to the Universal Vulnerability Ingestion (UVI) – File Import to learn more about this feature.
Device Centric view
The Device Centric view displays vulnerabilities associated with each device after data import. Users can access detailed device information, view applicable patches, vulnerabilities, and deployments, and initiate remediation actions directly from WebUI IVR app. Refer to Device Centric view to learn more about this feature.