
Configure IVR
Run the setup on the IVR Configuration page to point BigFix Insights for Vulnerability Remediation at its database, set the options that its service runs with, and connect the first scanner datasource. BigFix UI reports the application as Configured only after the background processes that the setup starts finish successfully.
Before you begin
Confirm that the prerequisites in IVR settings are met: the BigFix Insights for Vulnerability Remediation site is enabled and licensed, its version is greater than 0, and your role grants access to the application.
Collect the following before you start:
- The host, port, database name, and schema name of the BigFix UI database, and the credentials of a database user who can create a schema in it. Alternatively, an ADO.NET connection string for that database.
- The protocol, local web server port, and permitted cross-origin values that the IVR service runs with.
- The host, port, and credentials of your outbound proxy, if IVR reaches the scanner through one.
- The cloud URL, access key, and secret key of the scanner that you want to import from.
About this task
The setup has four steps: Database Configuration, Application configuration, Scanner Datasource configuration, and Summary. A stepper at the top of the page shows which step you are on. You do not configure the server here; the IVR service sets those values itself.
Each step validates against the system it describes before it lets you continue. Use Verify Connection on a step to test the values that you entered, and correct them there rather than at the end. Every field on a step is required, as the page states.
Procedure
-
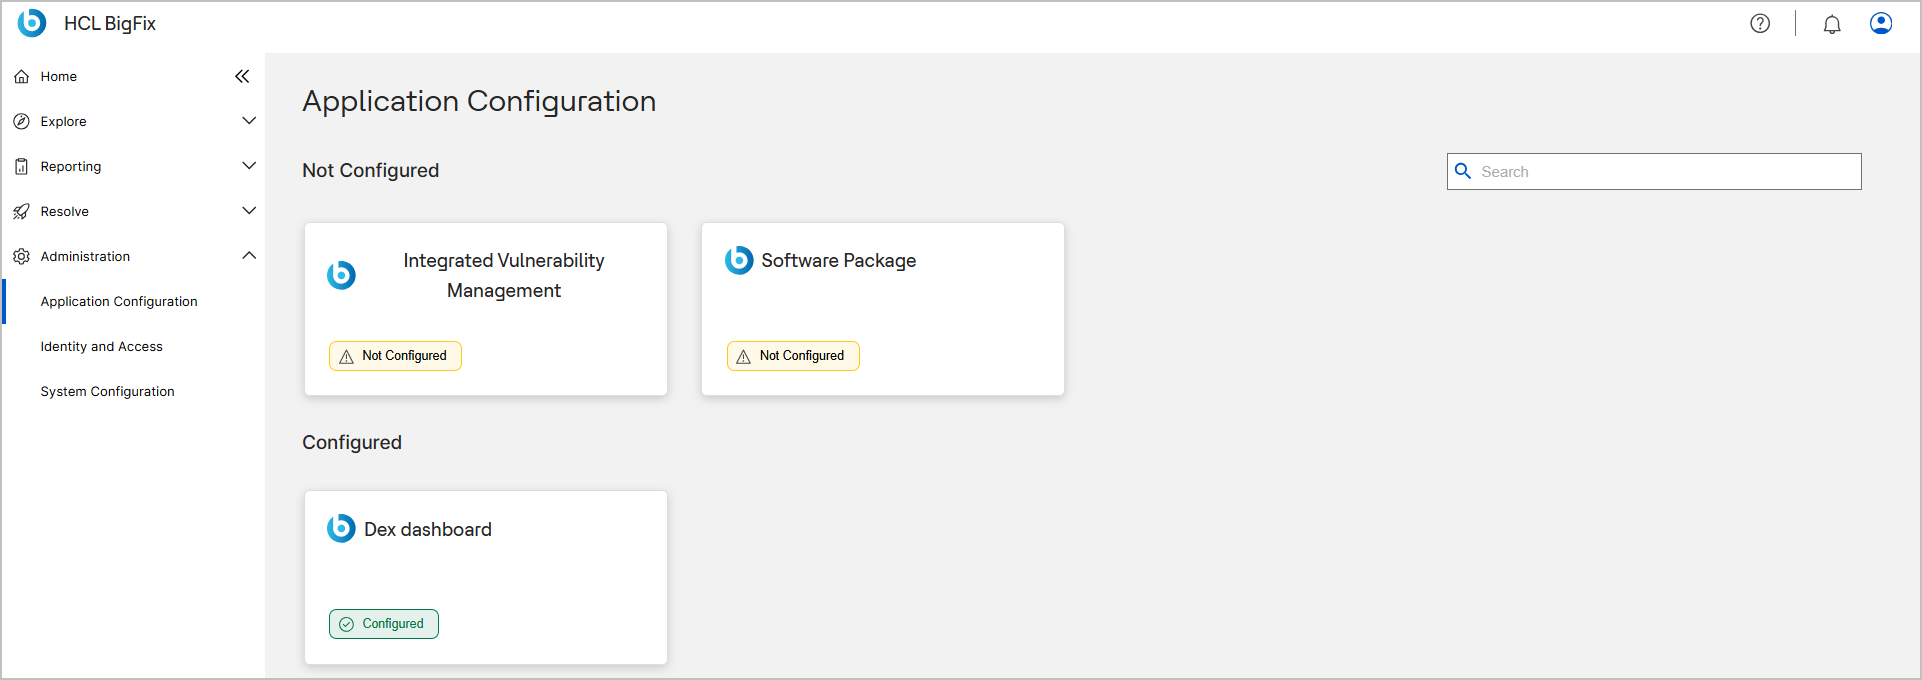
Expand Administration in the side navigation, and then select
Application Configuration.
-
In the Not Configured group, select the
Integrated Vulnerability Management card.
Use the search box in the upper right to find the card by name.
The IVR Configuration page opens on the first setup step. -
On the Database Configuration step, read the IVR
schema setup in BFUI Database banner.
The banner states what this step does: the setup creates a new IVR schema inside the database that BigFix UI already uses. You are not creating a database here, and you are not pointing IVR at a database of its own. You are naming the BigFix UI database and the new schema to add to it.
The page also states that all fields are required.
-
From the Database Type list, select how you want to identify
the database.
- Microsoft SQL Server – Enter the server, port, credentials, and database name in separate fields. Choose this if you know these values individually.
- Provide your own DSN – Enter one ADO.NET connection string. Choose this if your database administrator gave you a connection string, or if you need Windows authentication, which the separate fields do not offer.
The fields below the list change to match your choice. If you switch between the two options, re-check the fields that remain.
- Optional:
If you selected Microsoft SQL Server, enter the connection
values.
- Optional:
If you selected Provide your own DSN, enter an ADO.NET
connection string in the DSN field.
Only Microsoft SQL Server connection strings are supported, and the database that the string names must already exist. The help text above the field gives two examples, one for SQL Server authentication and one for Windows authentication:
- SQL Server authentication: server=192.168.0.5;database=myDataBase;user=myUsername;password=myPassword;port=1433
- Windows authentication: Server=192.168.0.5;Database=myDataBase;Integrated Security=True;Trusted_Connection=True
Note: The connection string contains the password in plain text. Follow your organization's handling rules when you copy it from another system. -
In Database Schema Name, enter a name for the schema that the
setup creates.
This field appears for both database types. Use a name that identifies the schema as belonging to IVR, and keep a record of it: administrators need it later when they query or back up the IVR data.
Use a name that does not already exist in the database. Reusing the name of an existing schema can cause the setup to fail.
-
Select Verify Connection.
The control stays unavailable until every required field holds a value. Always verify before you continue: a wrong value that you carry forward surfaces later as a failed background process, which is harder to trace back to its cause.
BigFix UI connects to the database server with the values that you entered and reports whether it succeeded. If the test fails, check the following before you try again:
- The server name and port are correct, and the database server accepts connections from the BigFix UI server.
- The database that you named exists on that server.
- The credentials are valid and the account can create a schema.
- For a DSN, the string is well formed and names a Microsoft SQL Server database.
If the test keeps failing with values that you believe are correct, a firewall between the BigFix UI server and the database server is a common cause. Confirm that the port is open in that direction.
- Select Next.
-
On the Application configuration step, set the options that the
IVR service runs with.
- Select Next.
-
On the Scanner Datasource configuration step, connect the
scanner that IVR imports findings from.
You can add more datasources later from the View Configuration page.
- Select Next.
-
On the Summary step, review every value that you entered.
The summary groups the values as Server Configuration, Database Configuration, and Application Configuration, and lists the datasources beneath them. To correct a value, return to the step that holds it by selecting that step in the stepper at the top of the page.
-
Select Finish.
BigFix UI saves the configuration and starts three background processes that build the IVR data set. The page returns to Application Configuration.
Results
When all three background processes complete successfully, the Integrated Vulnerability Management card moves to the Configured group and its status chip reads Configured. IVR then appears under Resolve and returns data.
If a process does not complete, the card stays in the Not Configured group and BigFix UI displays a message telling you to check the BigFix UI and IVR logs and then select Finish again to restart the service. Reopen the card, correct any values that the logs identify, and run the setup again.
What to do next
To review or change the saved values, or to connect another scanner, reopen the card and work from View Configuration. For a description of every value, see IVR configuration reference.