
Add a schedule
Create a schedule that runs an existing report once or on a daily, weekly, or monthly basis, emails the result, and keeps an archive of each run.
Before you begin
The report that you want to schedule must already exist on the All Reports page, and you must have created it (you must be the owner of the report). To create a report, see Create a report with custom configuration.
About this task
The Add schedule wizard has four steps: Selection of reports, Scheduler, Email and storage, and Preview schedule. A progress bar at the top of the wizard shows the current step. Select Previous to return to an earlier step, or Cancel to discard the schedule.
Procedure
- Expand Reporting in the side navigation, and then select Scheduled Reports.
-
Select Add schedule.
The wizard opens at step 1, Selection of reports.
-
In the Select report to schedule list, select the
report.
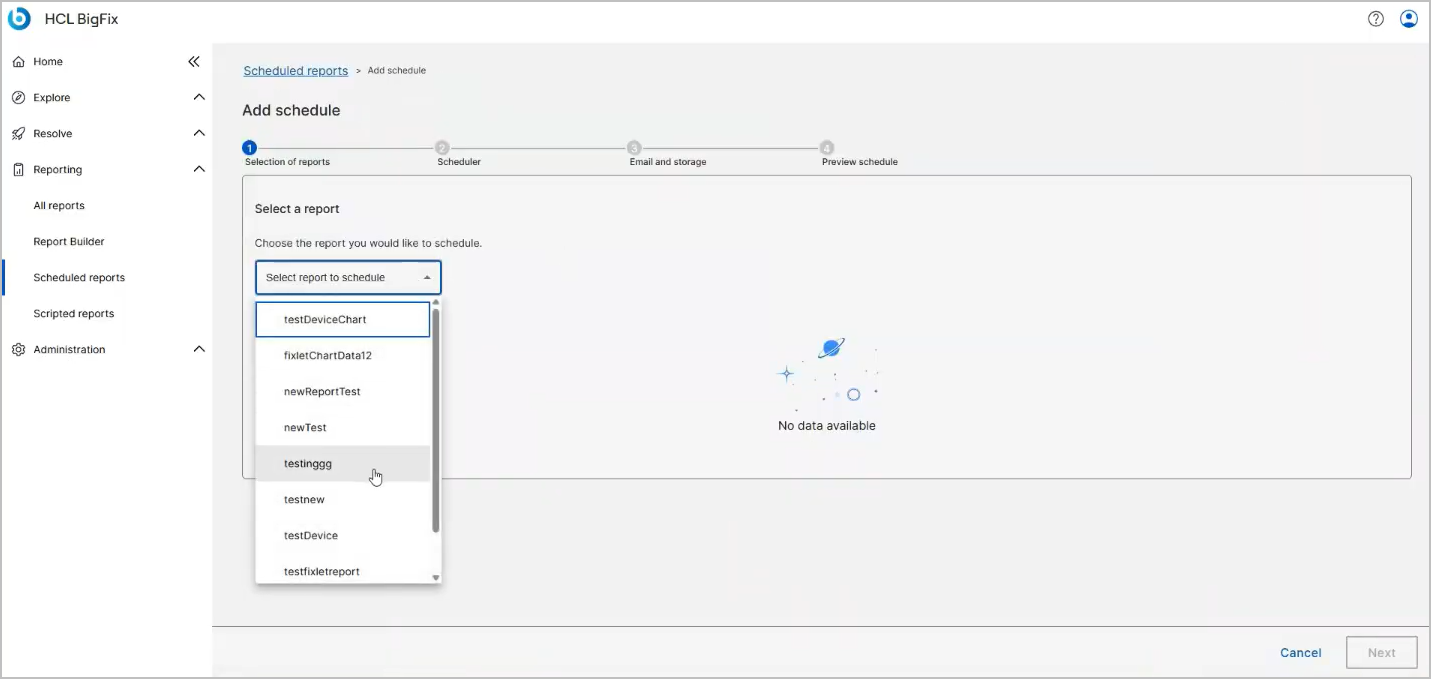
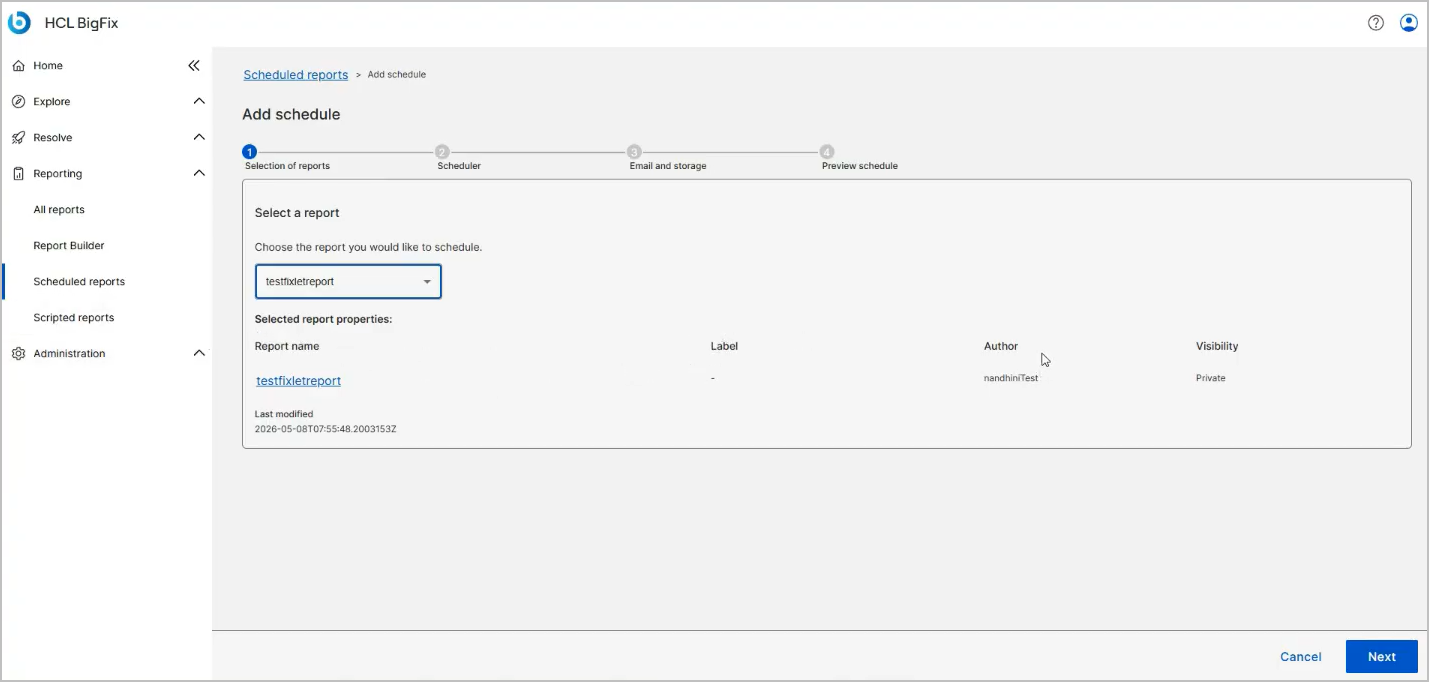
The Selected report properties table shows the Report name, Tags, Author, and Last modified values of the report, and Next becomes available.
-
Select Next.
Step 2, Scheduler, opens.
-
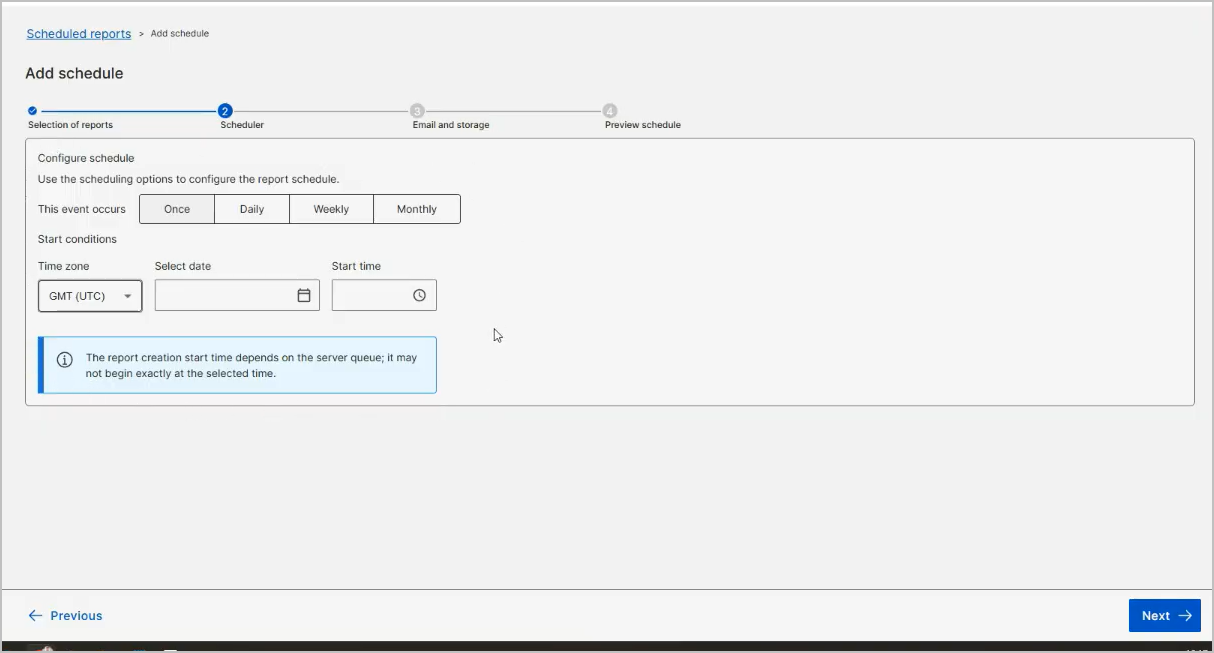
Under Configure schedule, define when the report
runs.
Note: The report generation start time depends on the server queue. A run might not begin exactly at the selected time.Note: All schedule dates in the list, on the details page, and in the preview are displayed with their time zone in brackets, for example 21 Sep 2026 at 14:58 (Client).
-
Select Next.
Step 3, Email and storage, opens.
-
Optional: Under Notifications, turn on Email
notifications and complete the email fields.
Note: The notification contains a report card and a View Report link that opens the archived report. By default, the link works for 30 days. Your administrator can change this period in the ScheduledReportAccessTokenExpirationHours configuration setting. See the BigFix UI Administration Guide, Configuration Variables. Any user who has a valid BigFix UI account can open the link while it is valid, including a user who received it by forwarding. For the full contents, see Email notification contents.Note: Email notifications require a configured SMTP profile. See the BigFix UI Administration Guide.
-
Optional: Turn on Retention, and then select how long to
keep each archive in the By duration list, for example
1 month from creation.
When the retention period ends, BigFix UI deletes the archive automatically.
Important: In this release, BigFix UI keeps every archive for 3 months, regardless of the period that you select in the By duration list and whether you turn on Retention.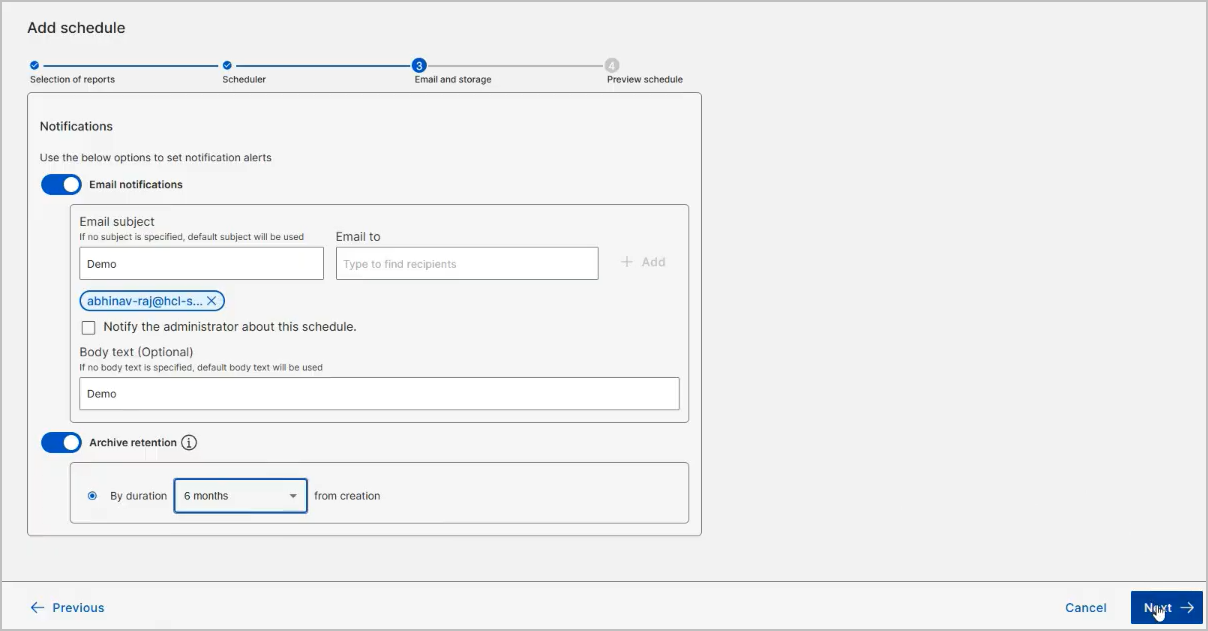
-
Select Next.
Step 4, Preview schedule, opens and summarizes the Report details, Time constraints & occurrences, Email, and Retention settings.
-
In Add schedule activity name (Mandatory), enter a name
for the schedule.
This name appears in the Name column of the Scheduled Reports page. Choose a name that tells the recipients what the schedule delivers.
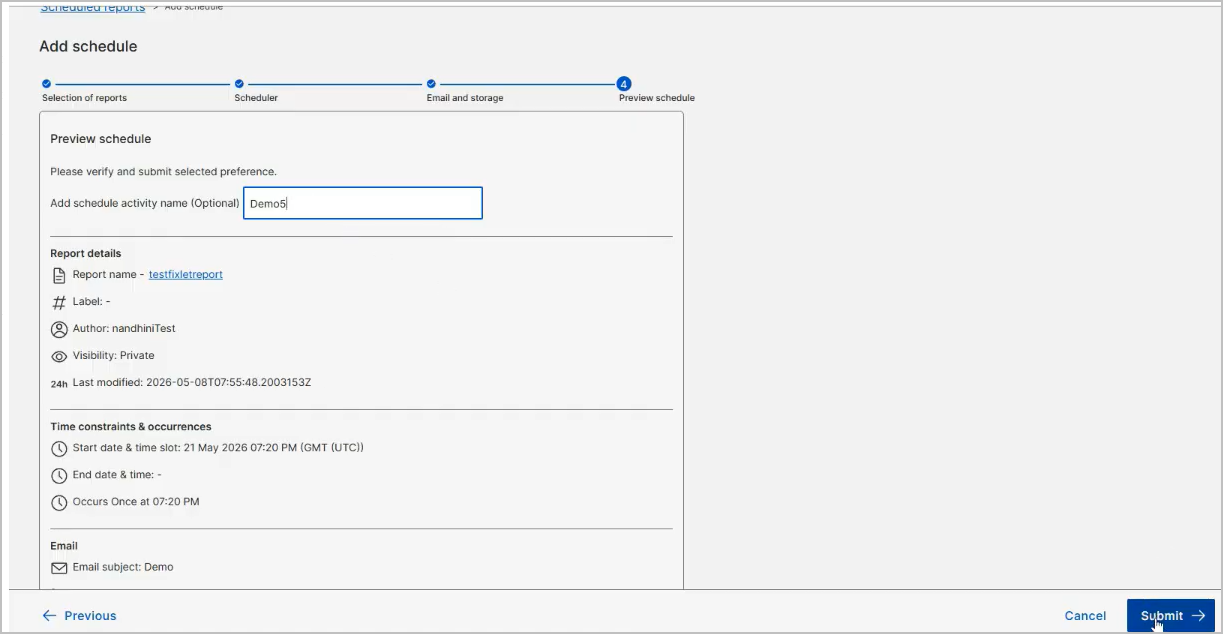
- Verify the summary, and then select Submit.
Results
The message Schedule submitted successfully confirms the action.
The schedule appears as a new row on the Scheduled Reports page with a new ID and the Active status. The Next occurrence column shows the first run. After each run, the generated report is listed on the Archives tab of the schedule details page, and the email is sent if you turned on notifications.
What to do next
To change an active schedule, pause it first. See Manage scheduled reports.