The Workflow Builder page
The Workflow Builder page contains a header with the page title, the Updated timestamp of the data, and the Create workflow button, plus two tabs: Workflows (all saved workflows) and Deployments (all workflow deployments and their results).
Your journey through the application follows the same order: create a workflow on the Workflows tab, deploy it, then track the results on the Deployments tab (see Monitoring deployments).
After installation, the Workflows tab contains five sample workflows, in Draft status: self-healing-of-the-webcam-and-audio-on-the-device, laptop-common-issues, google-drive-deployment, disk-guard-and-cleanup, and 7-zip-advanced-deployment. They are ordinary workflows with no special protection: open one to see how its steps are arranged, or duplicate it as a starting point for your own. Because they are in Draft status, their Deploy icon is not available until you change the status to Ready.
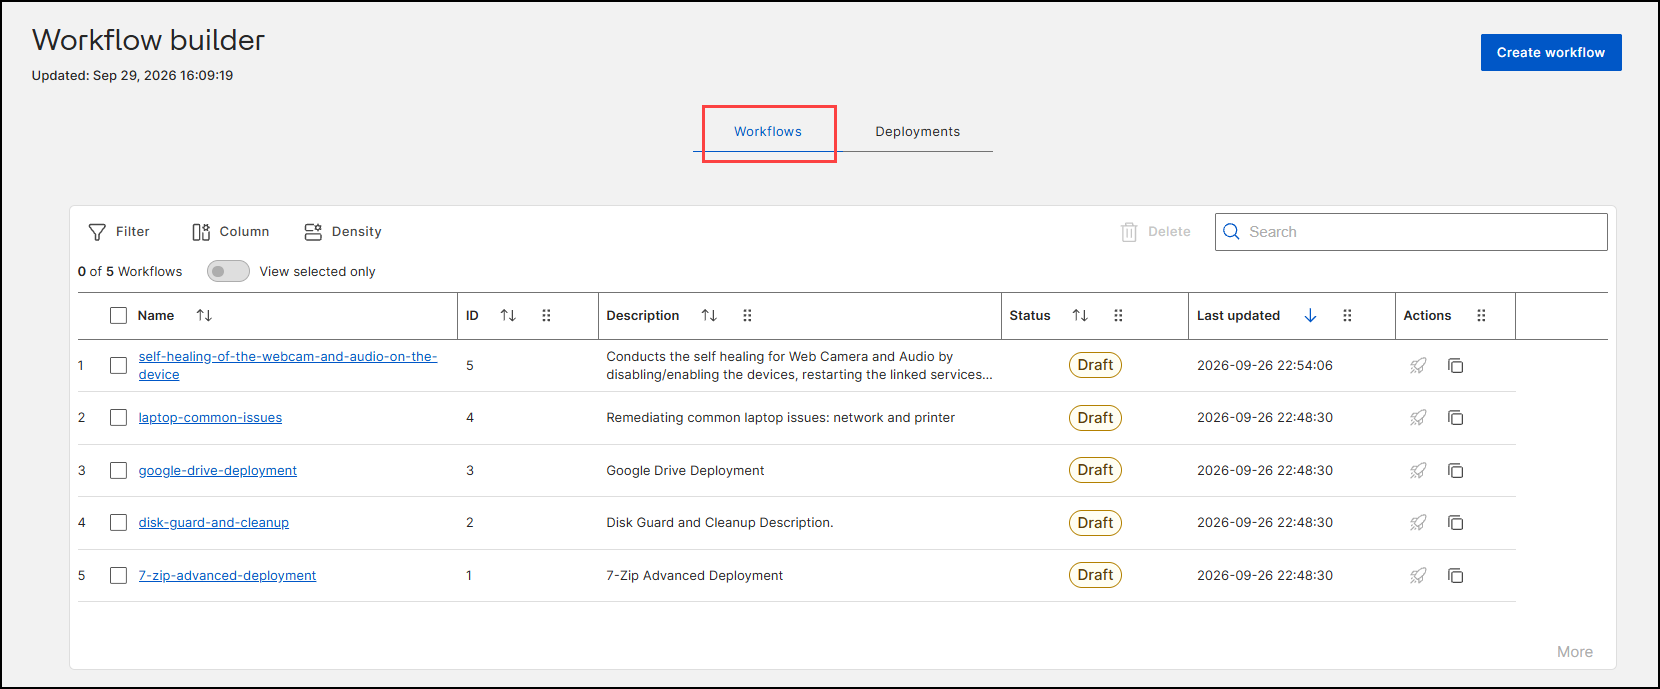
The Workflows tab
The Workflows tab displays a data grid with the following columns:
| Column | Description |
|---|---|
| (Selection checkbox) | Selects one or more workflows for bulk operations such as Delete. A master checkbox in the header selects all rows. The counter above the grid (for example, 0 of 5 Workflows) shows how many rows are selected, and the View selected only toggle limits the grid to selected rows. |
| Name | The workflow name. Select the name to open the workflow in the editor. |
| ID | The unique numeric identifier of the workflow. |
| Description | The workflow description. |
| Status | The workflow status: Draft or Ready. Draft lets you save at any time, even with partial step configuration and without validation. Promoting to Ready runs a full validation of every step's mandatory fields and succeeds only when the workflow passes; the change takes effect immediately, and you can switch back to Draft at any time. Only Ready workflows can be deployed. |
| Last updated | The date and time of the last modification. |
| Actions | Row-level action icons: Deploy (rocket icon) to start the deployment of the workflow, and Duplicate (copy icon) to create a copy of the workflow. |
List controls
Use the controls above the grid to adjust the view:
- Filter: builds one or more filter conditions. Select a
Property (Name,
ID, Description,
Status, or Last updated) and
an Operator (Equals,
Contains, Starts with, or
Ends with), then select Apply.
Select Add filter to combine conditions, or
Remove All to clear them.
Figure 2. Filter panel on the Workflows tab with the Property list open 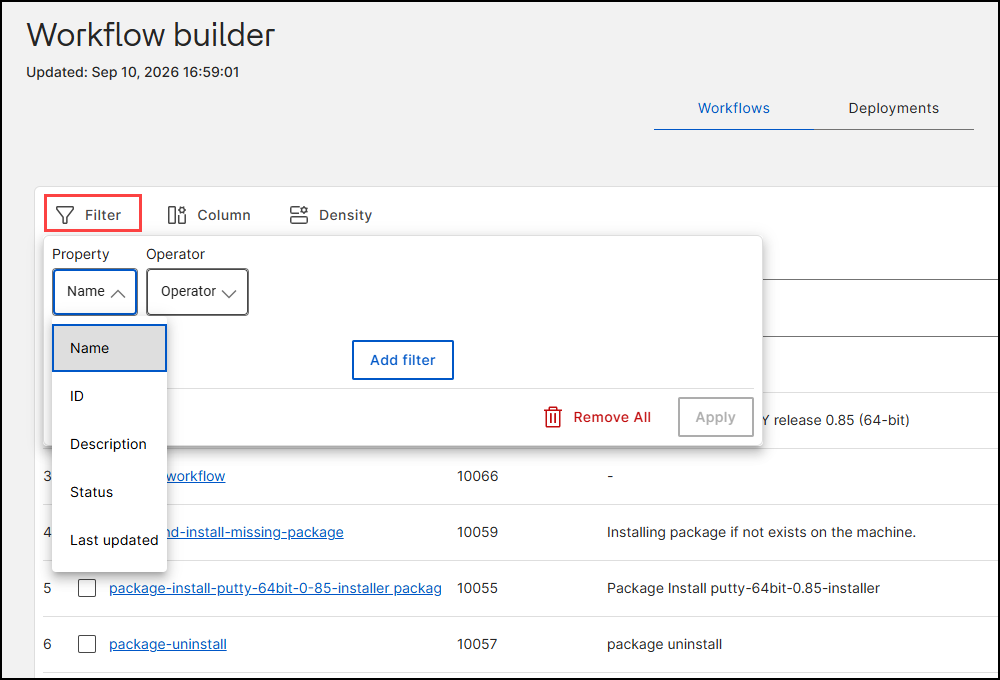
- Column: shows or hides the ID,
Description, Status, and
Last updated columns, with Select
all, Reset, and
Apply.
Figure 3. Column selection panel on the Workflows tab 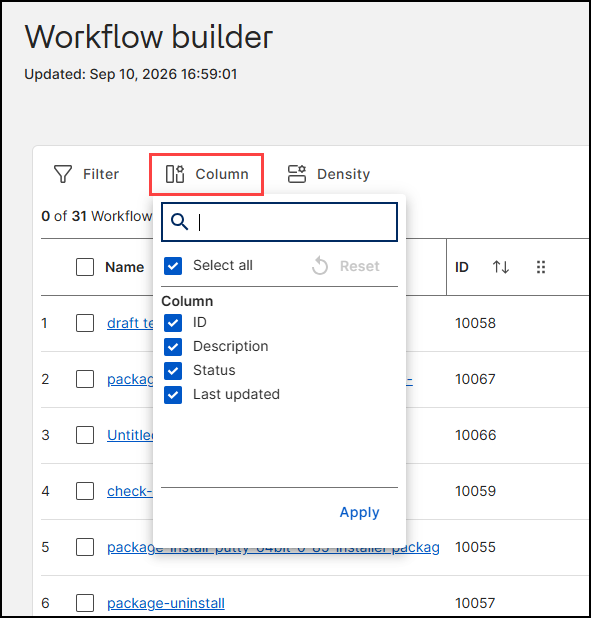
- Density: switches the row height between Compact,
Standard, and Comfortable.
Figure 4. Density options on the Workflows tab 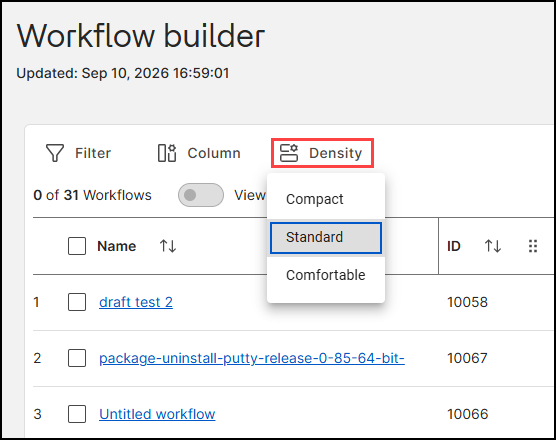
- Delete: deletes the selected workflows; enabled only when at least one workflow is selected. You can delete a workflow even when it has open deployments — a deployment is an effective runtime copy of the workflow, so existing deployments continue unaffected. Deletion is a soft delete: the data is retained in the database for auditing (kept indefinitely in this release).
- Search: filters the list as you type.