Create a workflow, configure its steps, branch execution with a Switch step, and
work with the underlying JSON document.
Design guidelines
Follow these guidelines to keep your workflows reliable and easy to maintain:
Guard the entry. Start the workflow with a check step (such as OS, File
Exists, or Disk Space) with execution_strategy set to
exit, so that devices in an unexpected state end the
execution early and report the exact stopping line (see How
workflows differ from Fixlets and Tasks).
Keep workflows simple. Create single-use-case workflows; if the logic is
too complex, split the workflow into two. This is not a limitation of Workflow
Builder but a recommendation: complex logic will always be complex, and two
small workflows are easier to manage and understand at a glance than one large
one.
Limit branching. If you need more than two Switch steps, consider
splitting or redesigning the workflow — for example, end the execution early
with execution_strategy: exit or a Stop
step instead of another Switch.
Reuse what you know. The generic Relevance and
Action Script steps let you use BigFix Relevance and
ActionScript directly, and the Script step runs
PowerShell (or Bash) scripts. Workflow Builder wraps the technology you already
know into the BigFix Platform execution engine.
Read the built-in help. The documentation for each step is available on
the Help tab of the step's Configure panel, where you
can find more hints on its use.
Creating a workflow
Before you begin:
The Workflow Builder application must be assigned to your user or role.
Assigning the application enforces the Custom Content
permission, which covers creating, editing, and deleting workflows.
Keep the workflow focused on a single use case; split complex logic into two
workflows (see Design
guidelines).
Procedure:
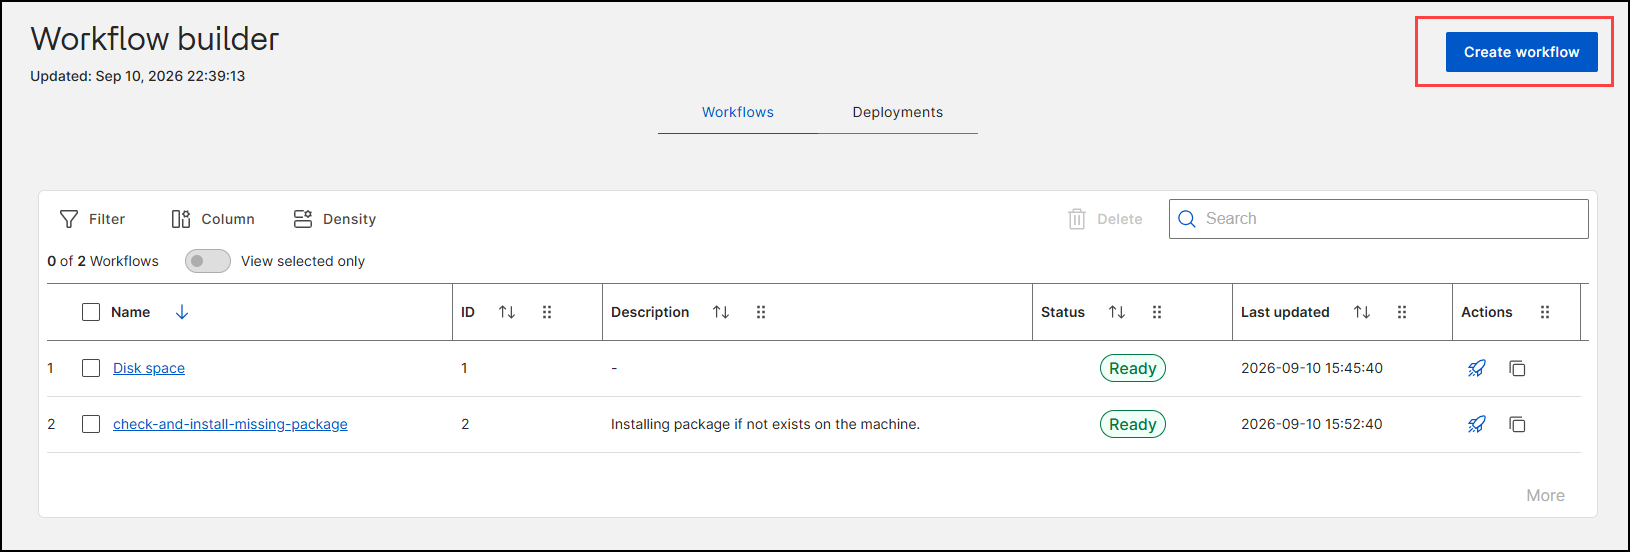
On the Workflow Builder page, select Create
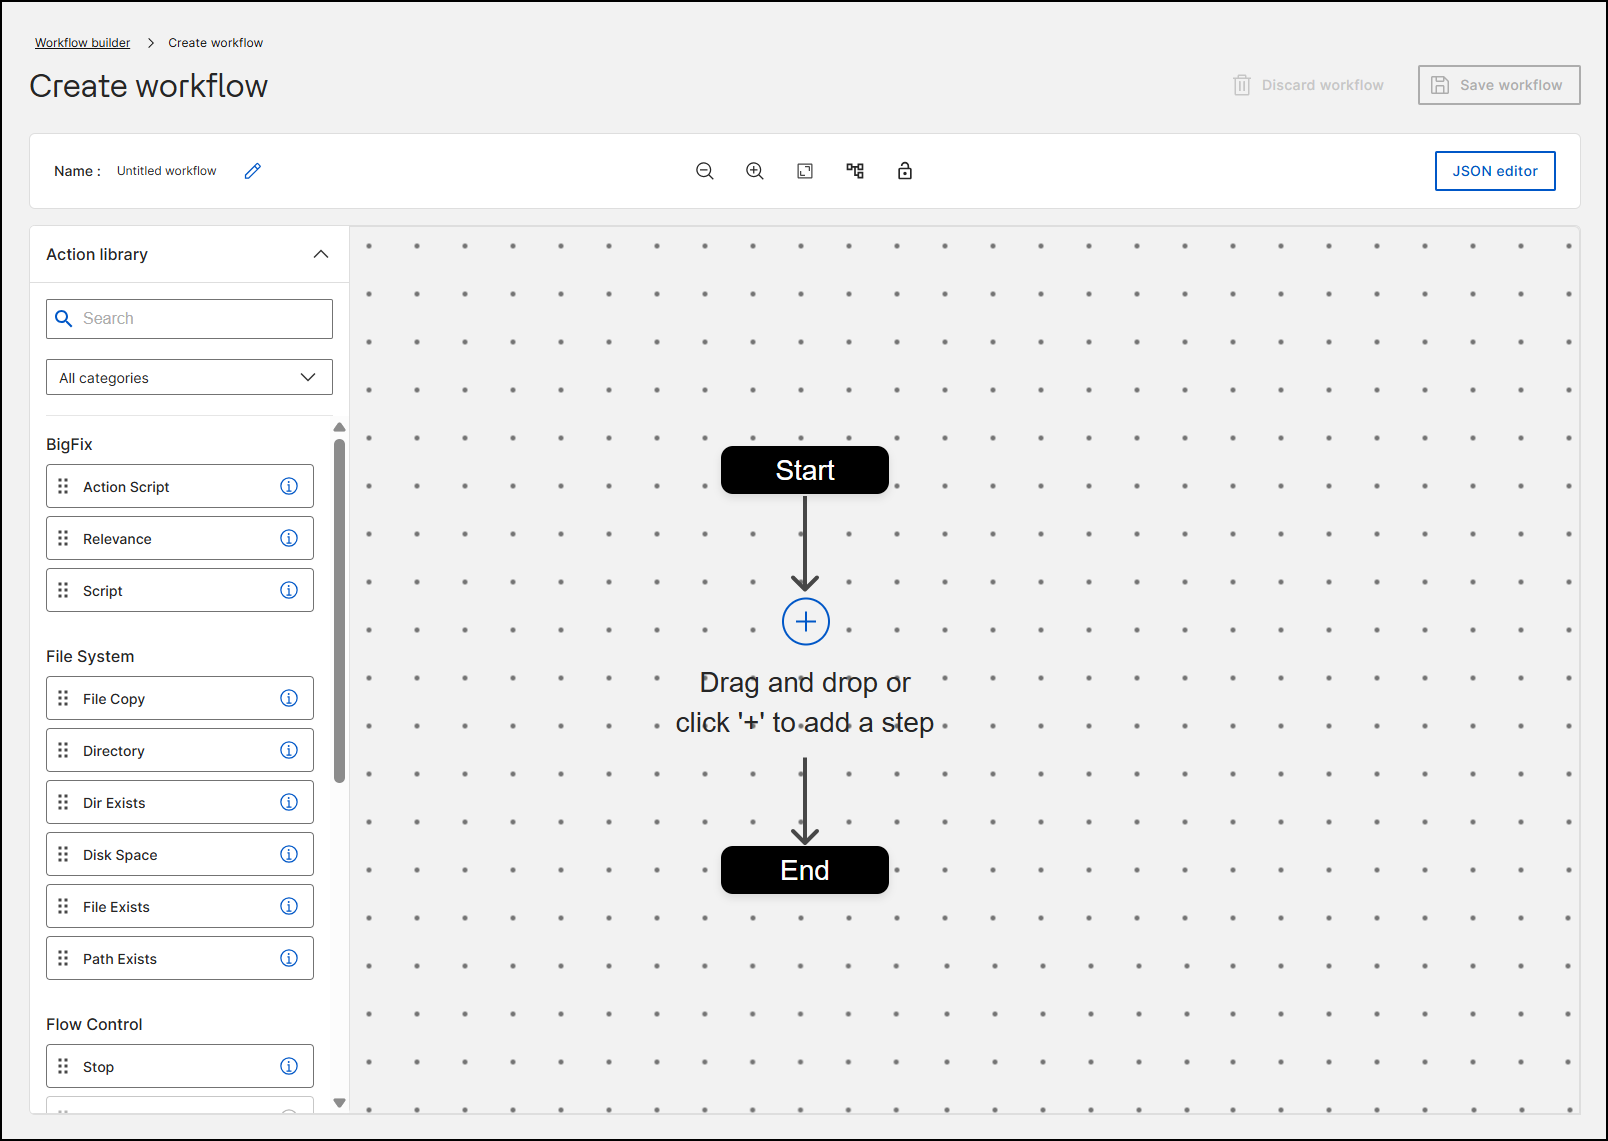
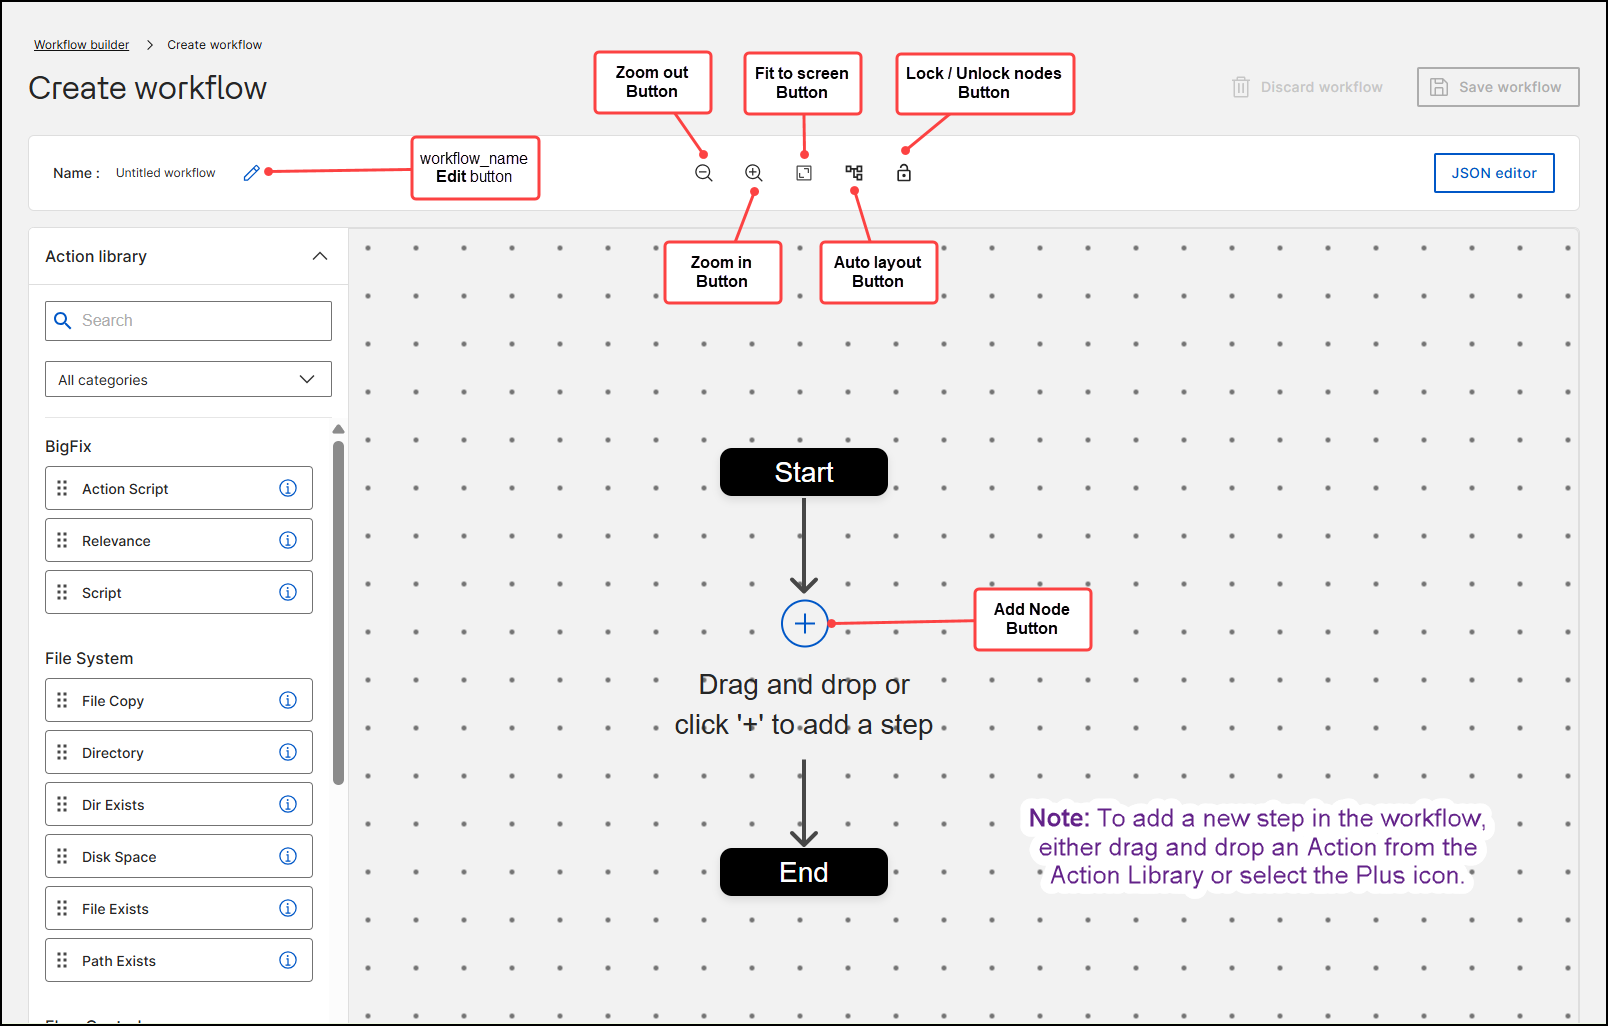
workflow.Figure 1. Create workflow button on the Workflow Builder page The Create workflow editor opens with an empty
canvas that contains a Start node, an
End node, and an Add node (+)
button between
them.Figure 2. Create workflow editor with Action library, canvas, and header
controls
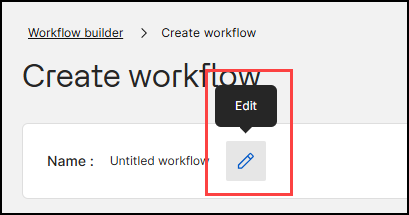
To name the workflow, select the Edit (pencil) icon next
to the Name field and replace the default name
Untitled workflow with a descriptive
name.Figure 3. Edit (pencil) icon next to the workflow name
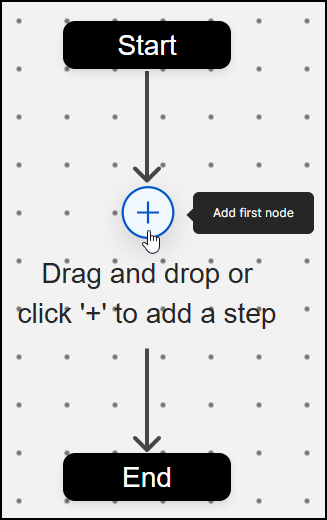
Add the first step: drag an action from the Action library
onto the canvas, or select the Add node (+) button and
pick a step.
Note:
A Switch node cannot be the first
step; the Switch entry remains disabled in the Action library until a
standard step is added.
Figure 4. Add first node button between the Start and End nodes The new node appears on the canvas with the status Not
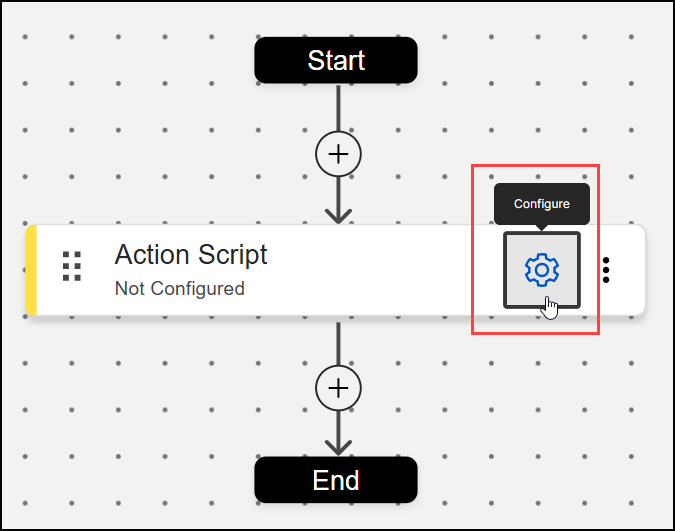
Configured (yellow status bar). Each node card carries a drag
handle (Drag to node) to reposition the node, a gear
icon (Configure) to open the configuration panel, and a
More options menu.
Configure the step (see Configuring a step). After you save the configuration, the node
status changes to Configured (green status bar).
Repeat the previous two steps to add further steps. To branch the execution
based on the returned values of previous steps, add a Switch
step (see Branching with the
Switch step).
Select Save workflow to save your work, or
Discard workflow to abandon it. The workflow is
saved in Draft status, which you can save at any time,
even when some steps are not configured yet. When the workflow is complete,
change its status to Ready: Workflow Builder validates
the mandatory fields of every step and sets the status only when the
validation passes. Only Ready workflows can be deployed.
To edit a saved workflow later, select its name on the
Workflows tab; the workflow opens on the
Edit workflow page, which offers the same
editor.
Arrange and inspect the flow with the canvas header controls:
Table 1. Canvas header controls
Control
Description
Zoom out /
Zoom in
Decreases or increases the canvas magnification.
Fit to screen
Scales the whole workflow to fit the visible canvas.
Auto layout
Rearranges the nodes into a clean automatic layout.
Lock / Unlock nodes
Locks the node positions to prevent accidental moves, or unlocks
them for editing.
On the node card, select the gear icon (Configure). The
Configure panel
opens.Figure 6. Configure (gear) icon on a node card
Optional: in Node title, replace the default step name
with a descriptive title. The title identifies the step in Switch conditions
and in the execution report.
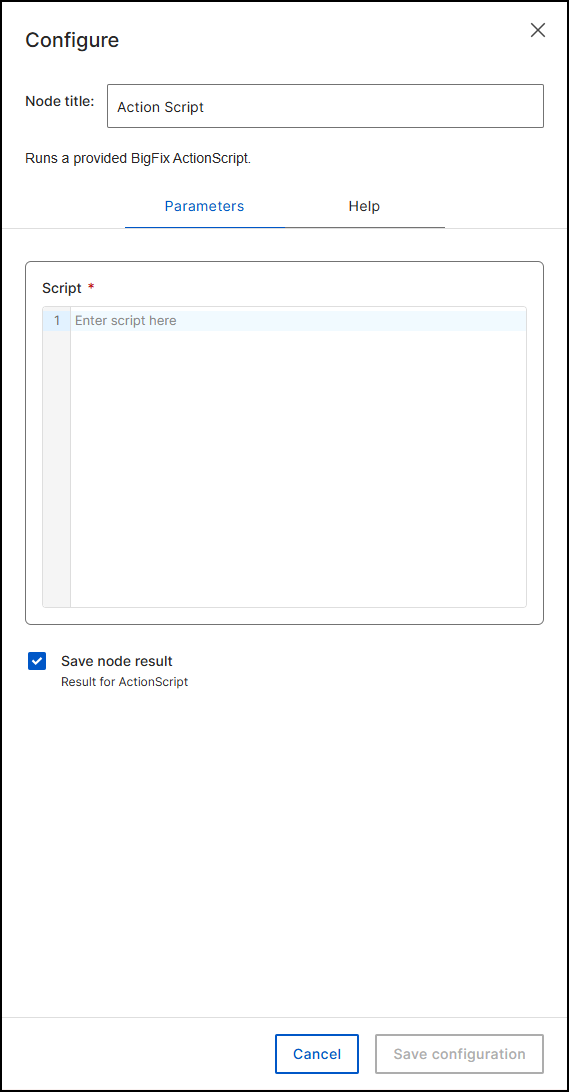
On the Parameters tab, complete the input fields.
Mandatory fields are marked with an asterisk (*), and the information icon
next to each field shows its description. Some fields offer a selection list —
for example, Execution Strategy (return
or exit) or Os Kind.
Figure 7. Parameters tab of the Configure panel for the Action Script step
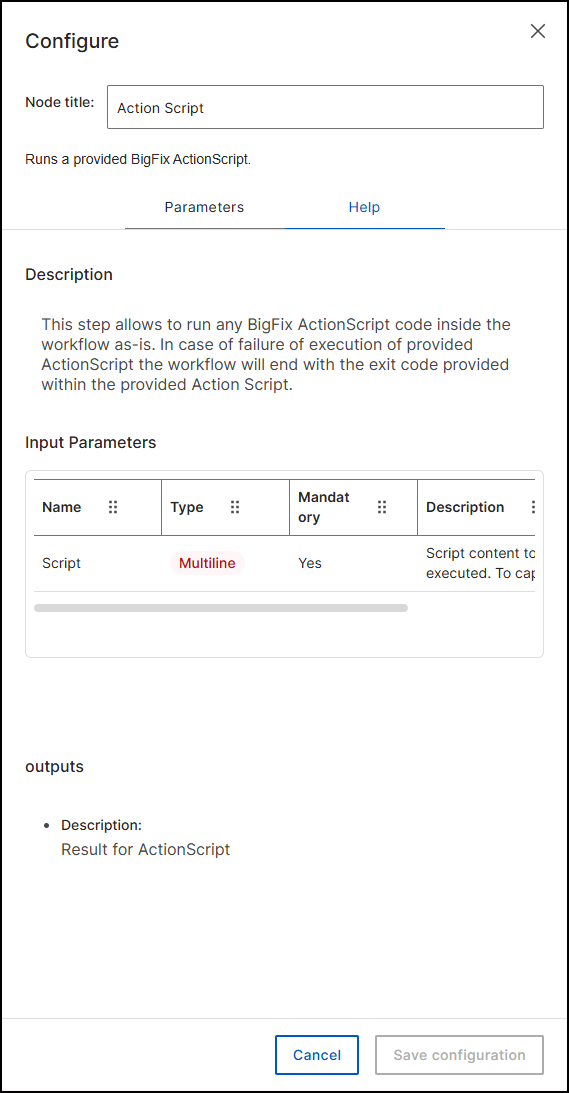
Optional: select the Help tab to view the step
description, its input parameters, and its output without leaving the
editor.Figure 8. Help tab of the Configure panel showing description, input
parameters, and outputs
Keep Save node result selected: it stores the step
output so that a later Switch step can evaluate it. Clearing the check box has
no special use in version 1.0.
Select Save configuration. The node status changes to
Configured.
Managing nodes on the canvas
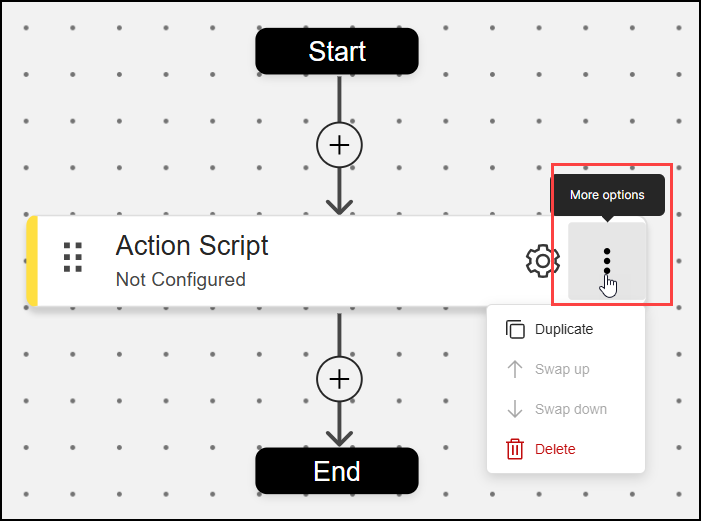
Select the More options (vertical ellipsis) menu on a node
card to Duplicate the node, Swap up
or Swap down to change its position in the sequence, or
Delete it. Use the drag handle on the left edge of the
card (Drag to node) to move the node on the canvas.
Figure 9. More options menu of a node with Duplicate, Swap up, Swap down, and Delete
Branching with the Switch step
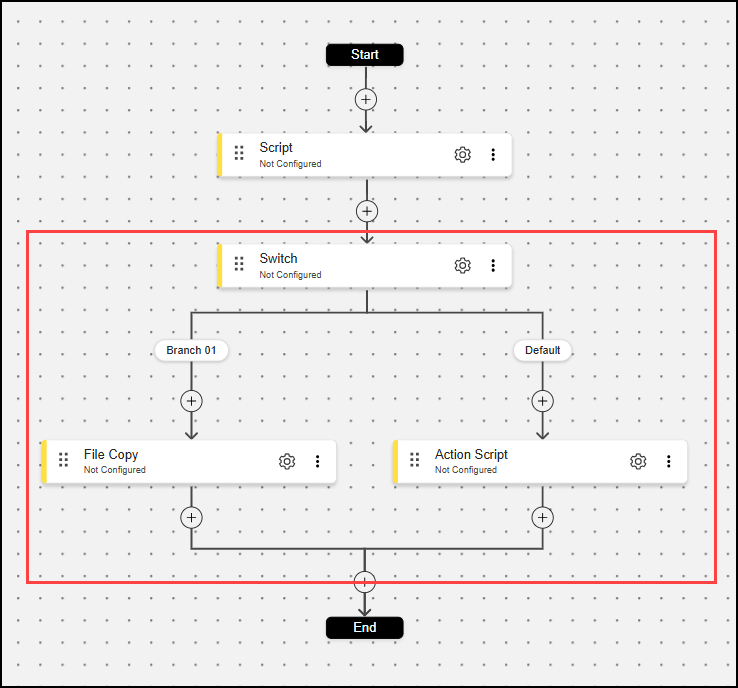
A Switch step splits the execution into two or more branches
based on the saved results of previous steps. On the canvas, each branch appears
as a labeled path under the Switch node, and every Switch ends with a
Default branch.
Figure 10. Switch node on the canvas with Branch 01 and Default branches
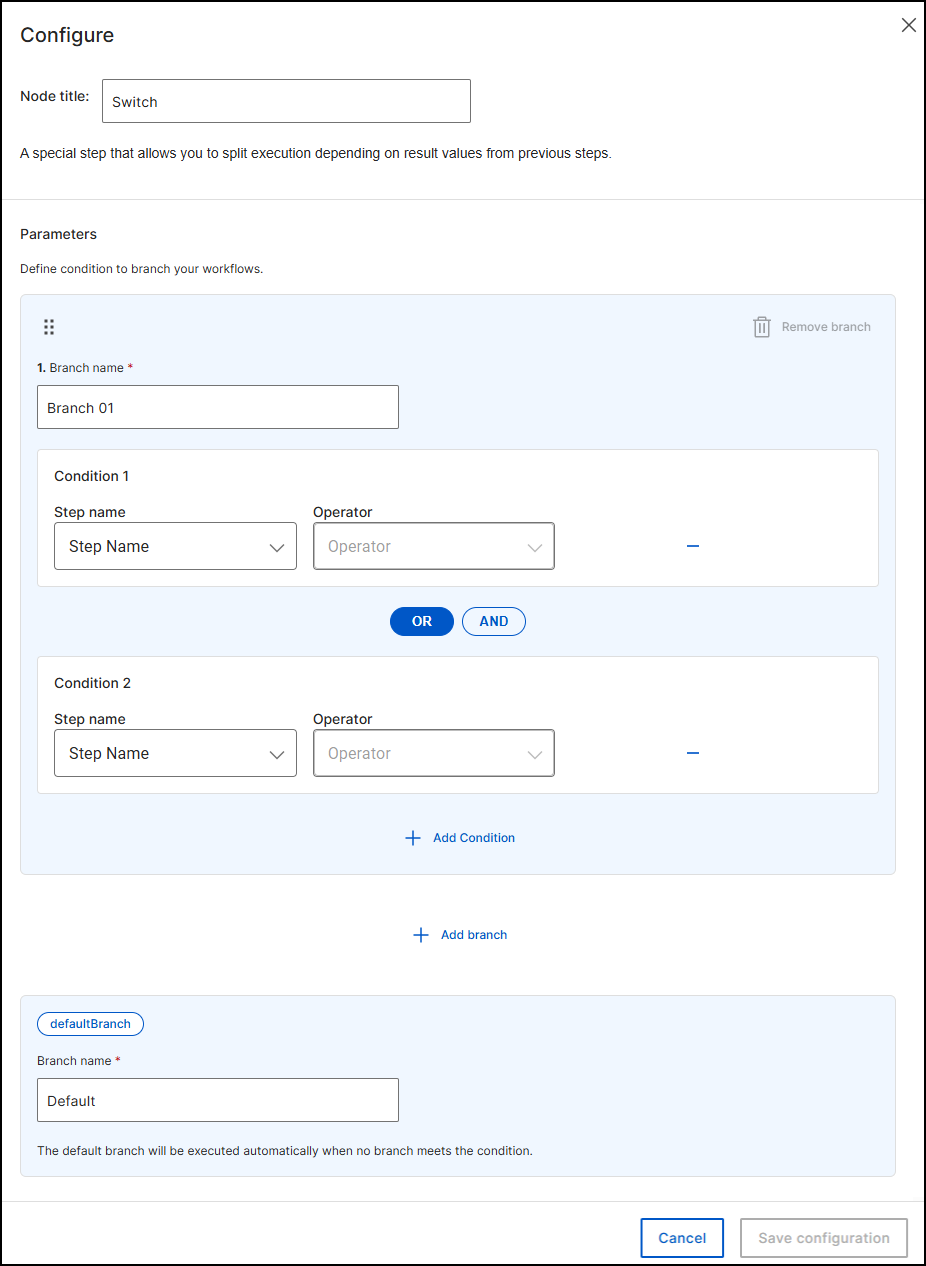
To configure the Switch, select its gear icon (Configure)
and define the branches:
Figure 11. Configure panel of the Switch step with branch name, conditions, and
default branch
In Branch name, type a descriptive name for the branch.
The name appears as the branch label on the canvas.
Under Condition 1, select the Step
name of a previous step whose saved result you want to
evaluate.
Select the Operator: Equals or
Does not equal.
Figure 12. Operator list of a Switch condition with Equals and Does not equal
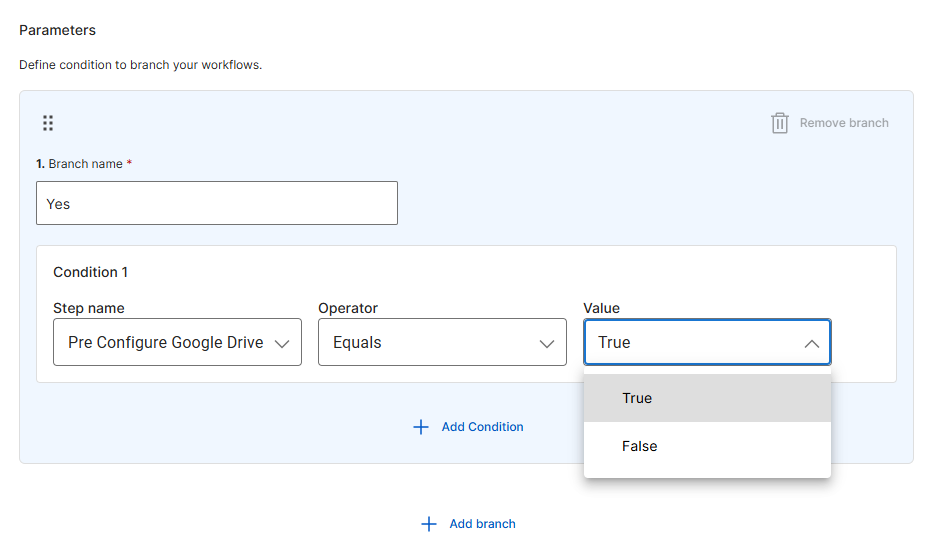
Select the Value to compare against. The list offers the
possible outputs of the selected step: True or
False for a step with a boolean output, or the list
of the step's possible values for a step with an enum output (for example, the
Service State statuses). In version 1.0, step results are boolean or enum
values that you select from the
list.Figure 13. Value list of a Switch condition showing True and False for a
boolean step
Optional: select Add Condition and combine multiple
conditions with the OR / AND
toggles.
Optional: select Add branch to define further branches,
or Remove branch to delete one. The order of the
branches is the order of evaluation: execution enters the first branch whose
conditions match.
In the defaultBranch section, optionally rename the
Default branch. The default branch executes
automatically when no other branch meets its conditions.
Select Save configuration.
Using the Action library
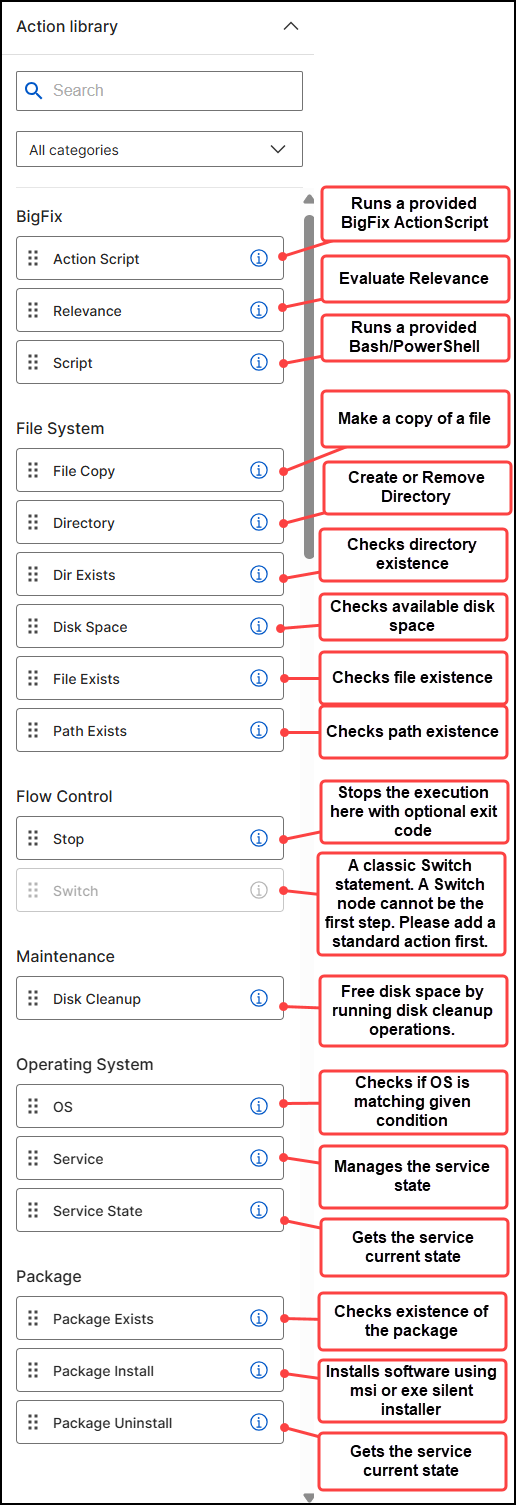
The Action library panel on the left side of the editor lists
all available steps grouped by category: BigFix (Action
Script, Relevance, Script), File System (File Copy,
Directory, Dir Exists, Disk Space, File Exists, Path Exists),
Flow Control (Stop, Switch),
Maintenance (Disk Cleanup),
Operating System (OS, Service, Service State), and
Package (Package Exists, Package Install, Package
Uninstall). Select the information icon next to a step to view its summary without
opening it. For the full description of every step, see Step Library Reference.
Figure 14. Action library panel with the summary of each step
Use the Search box to find a step by name. To narrow the
panel to specific categories, open the All categories list,
select or clear categories (Select all,
Reset), and select Add.
Figure 15. Category filter of the Action library
Working with the Live JSON editor
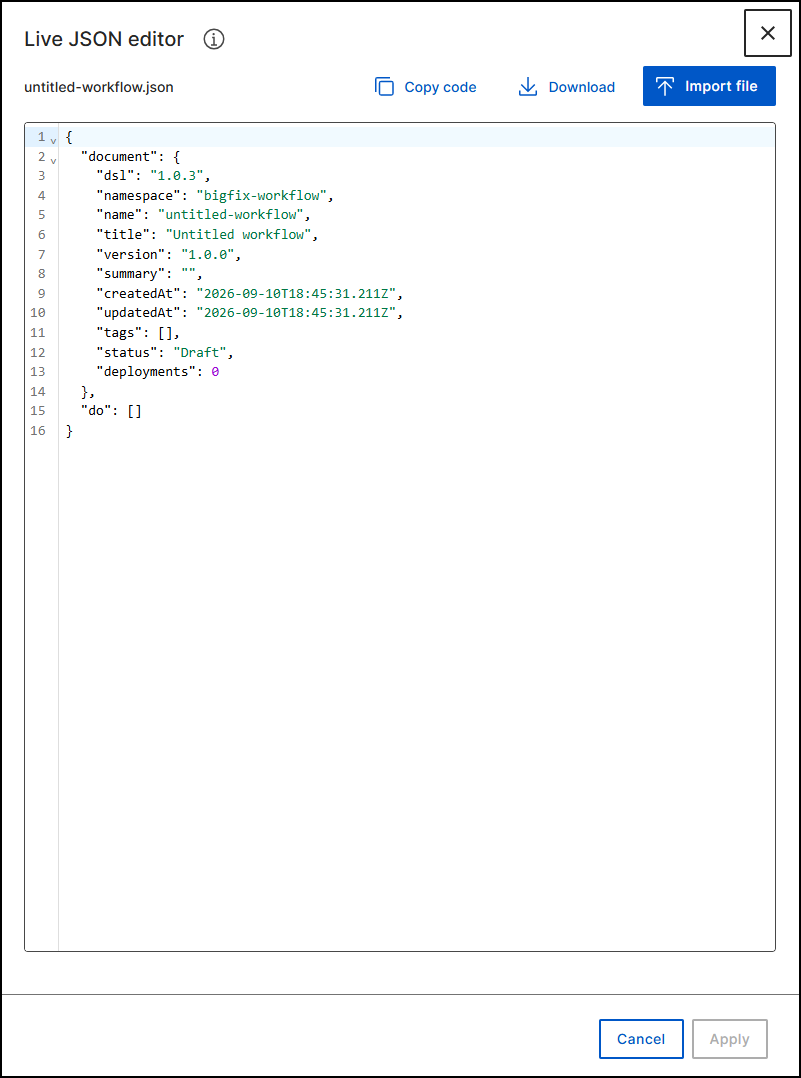
Every workflow is stored as a JSON document. Select JSON editor
in the editor header to open the Live JSON editor, which
shows the current definition, including the DSL version, namespace, name, title,
version, tags, status, deployment count, and the do array that
contains the steps. From the Live JSON editor, you can:
Copy code: copy the JSON to the clipboard.
Download: export the workflow as a JSON file — use this to transfer
workflows between environments (for example, from test to production) or to
share them with others.
Import file: import a previously exported workflow.
Edit the JSON directly, then select Apply to update the
canvas, or Cancel to discard the changes.