ASoC and Jira Cloud
HCL AppScan integration for Jira Cloud facilitates automatic or ad-hoc creation of Jira tickets for security issues identified by AppScan on Cloud.
This integration is applicable to only Jira Cloud software and cannot be installed for on-prem Jira Server.
Prerequisites
- HCL AppScan on Cloud service account and an API key and secret for AppScan on Cloud authentication.
- Jira Cloud user account with necessary permissions to install and manage the integration, and to create and modify all Jira issues for all projects to which you are importing AppScan security issues.
Installation
- Log in to your Jira Cloud instance with sufficient privileges to install the integration from the marketplace.
- Select .
- Click Find new apps to access the Atlassian Marketplace.
- Search for “HCL AppScan Integration for Jira Cloud”.
- On the page for the integration, click Get app.
- Review permissions and proceed with the installation.
Jira Cloud automatically downloads and installs the integration. When the installation is complete, Jira Cloud displays a confirmation message.
The integration is available for use within your Jira Cloud instance.
Using the Integration
- Credentials
Enter and verify HCL AppScan on Cloud credentials.
- Configuration
Customize import job parameters per application tailored to your organization’s security polices and priorities.
- One-time import
Initiate ad-hoc one time imports to Jira Cloud.
- Automatic import
Schedule recurring imports based on predefined frequencies.
- History
View the history of recent import jobs.
- On the HCL
AppScan Integration in
Jira Cloud click the Credentials tab.
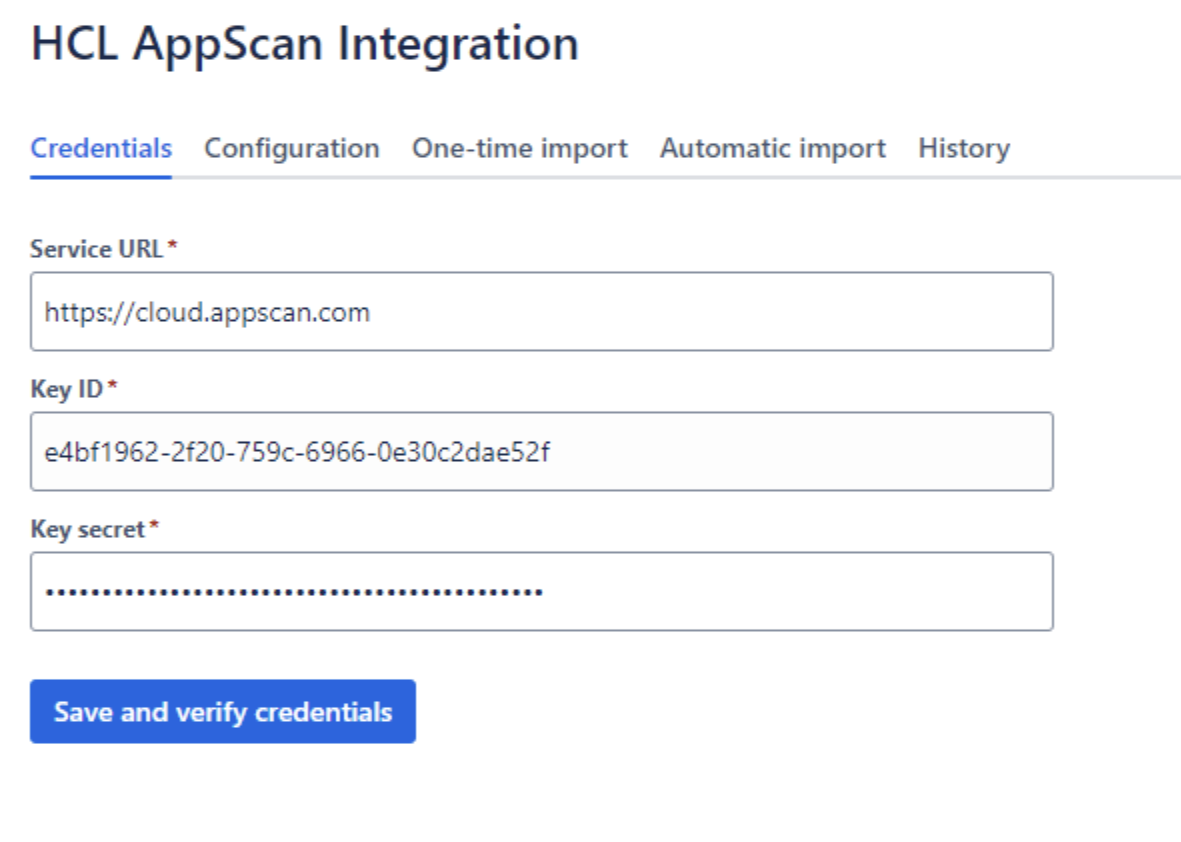
- Verify the service URL.
By default, the service URL is populated with https://cloud.appscan.com. To connect to EU server, change it to https://eu.cloud.appscan.com.
- Enter your key ID and key secret then click Save and verify Credentials.
Configuration
Customize import job settings to tailor how AppScan on Cloud applications are imported. Select configuration options that meet your organization’s security polices and priorities, ensuring accurate and actionable Jira ticket creation.
An application is a collection of scans related to the same project. One application can contain a combination of several scans, as well as issues imported from third-party scanners. All findings are consolidated at the application level.
To configure parameters for one or more applications:- On the HCL AppScan Integration page in Jira Cloud click the Configuration tab.
- From the Applications drop-down list, select one or more applications for
which to configure import of security issues. To configure for all applications,
select All. Note: When you select more than one application, changes to configuration parameters are applied to each of them.
- Select one or more Policies from the drop-down.
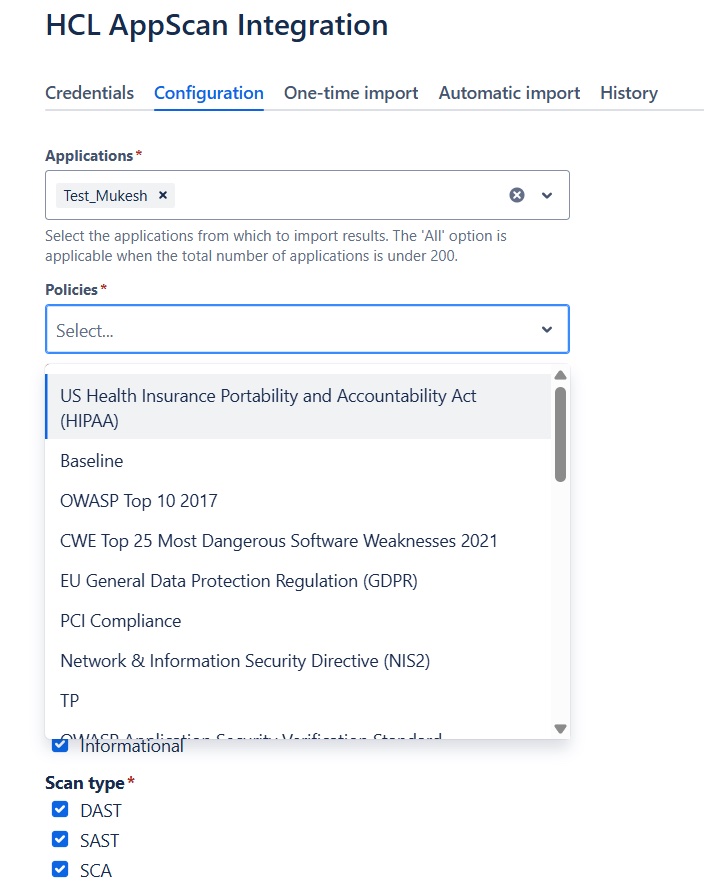
- Filter issues to import based on issue Status, Severity, and Scan Type.
The HCL AppScan Integration import issues to Jira Cloud based on selections made here. You can select multiple values for each filter.
Filter Values Default selection Status - Open
- In progress
- Reopened
Open Severity - Critical
- High
- Medium
- Low
- Informational
All Scan Type - DAST
- SAST
- SCA
- IAST
All - From the Jira project drop-down list, specify the Jira project into which the integration places the issues from AppScan on Cloud.
- At the Jira issue type drop-down list, specify the type of Jira issue that
should be created for each issue imported from AppScan on Cloud.
The drop-down is populated with Jira ticket types based on the project selected in step 5. Available Jira issue types may include Improvement, Task, Sub-task, New Feature, Bug, and Epic.
- In the Status management section, click the checkbox to
enable or disable automatic status manamgement, and confirm your selection in
the resulting dialog box.. When enabled, issues marked Done in Jira are
automatically updated to Fixed in AppScan on Cloud.


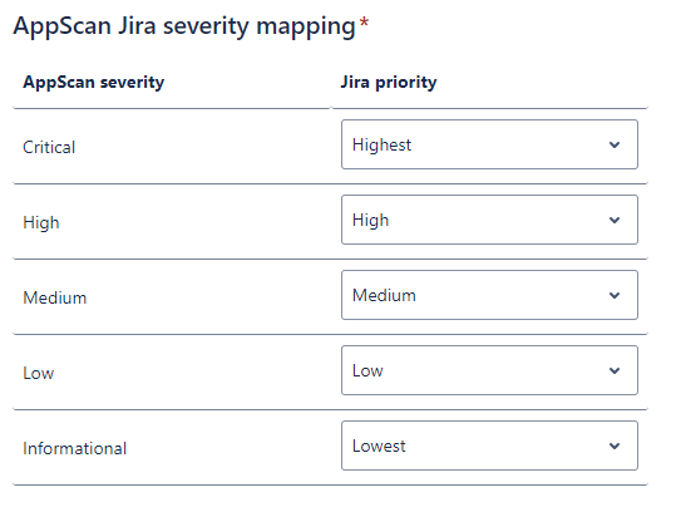
- For each AppScan severity, select a
Jira priority, thus mapping AppScan on Cloud issues to
Jira issues in the manner that best suits your organization
Default issue mapping is shown here:
-
Click Save configuration
This configuration used when initiating ad-hoc one time imports or scheduled imports for the selected AppScan on Cloud application or applications.
One-time import
- On the HCL
AppScan Integration page
in Jira Cloud click the One-time import tab.
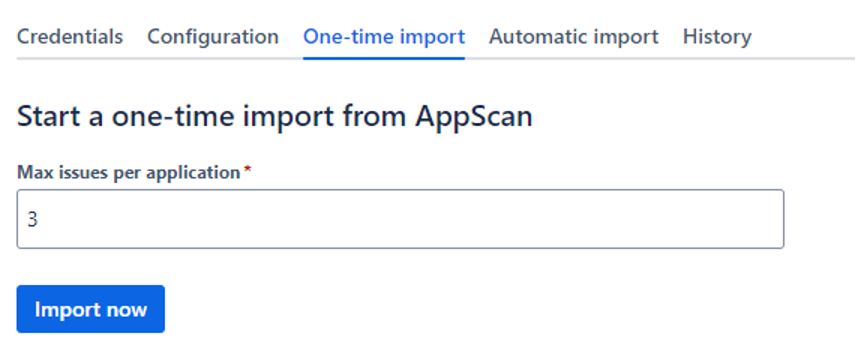
- Specify the maximum number of issues to import per application.
- Click Import now.
The integration shows the import status, including the count of issues imported. When complete, the integration displays a success message.
Automatic Import
- On the HCL
AppScan Integration page
in Jira Cloud click the Automatic import tab.
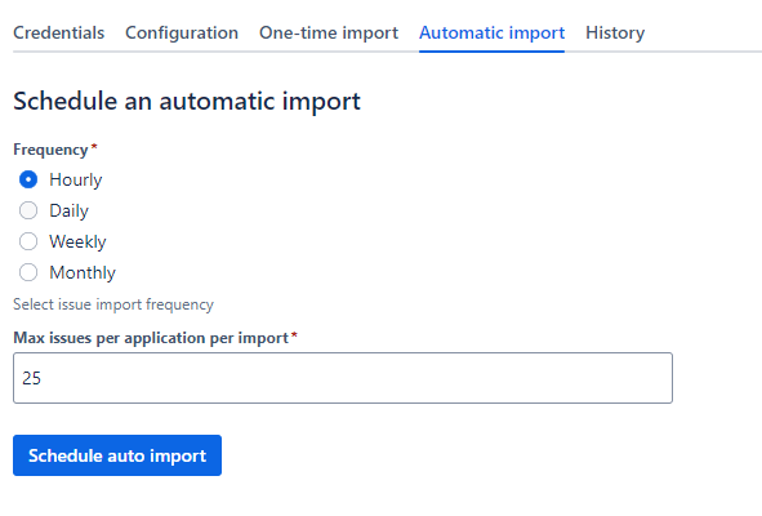
- Specify a frequency for importing issues.
- Specify the maximum number of issues to import per application.
- Specify additional information according to frequency specified:
Frequency Additional information required Hourly None. The import occurs at the top of every hour. Daily Time of day Weekly Day of week and time of day Monthly Date and time of day - Click Schedule auto import.
History
- On the HCL
AppScan Integration page
in Jira Cloud click the History tab.
View details of recent import jobs, such as import ID, last run date/time, import type, issues imported, and status.
Sample Jira ticket
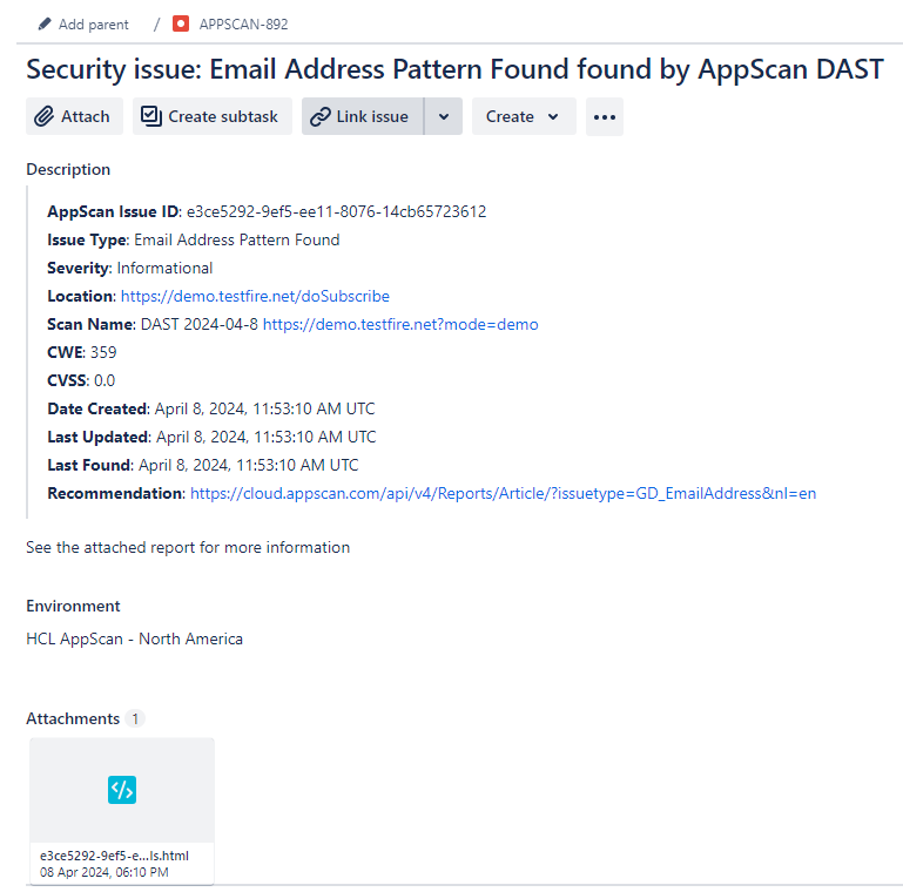
- The summary includes the scanning technology that detected the issue.
- The Description contains the relevant details about the issue, including type, location, environment, and so on.
- The attached file is a single-issue report that a developer can use to understand the details of the issue. For SAST issues, the attached file contains the stacktrace of the issue. For DAST issues, the file contains the Request/Response Details.
Troubleshooting
Once the integration is installed, HCLSoftware has access to the logs that are generated when the integration is used. The logs contain technical information about activities, import jobs, and so on. If you have technical issues, we can use the logs to diagnose and troubleshoot the issue.
- Visit https://support.atlassian.com/security-and-access-policies/docs/manage-your-users-third-party-apps/#Troubleshoot-an-app.
- Click Troubleshoot an app.
- Follow the instructions shown.
- Visit https://support.atlassian.com/security-and-access-policies/docs/manage-your-users-third-party-apps/#Disable-log-access.
- Click Disable log access.
- Follow the instructions shown.Note: Granting log access give us access to logs for up to 30 days ago, even if sharing wasn’t active before then. When you disable access to logs, we can no longer see any logs that have been created inside your site.