The Advance Configuration page allows users to configure how parameters are parsed and
how columns are used for parsing and recommendations.
The Advance Configuration page contains three tabs:
Manage Parameter Master
Configure Parameter Type
Manage Column
Manage Parameter Master
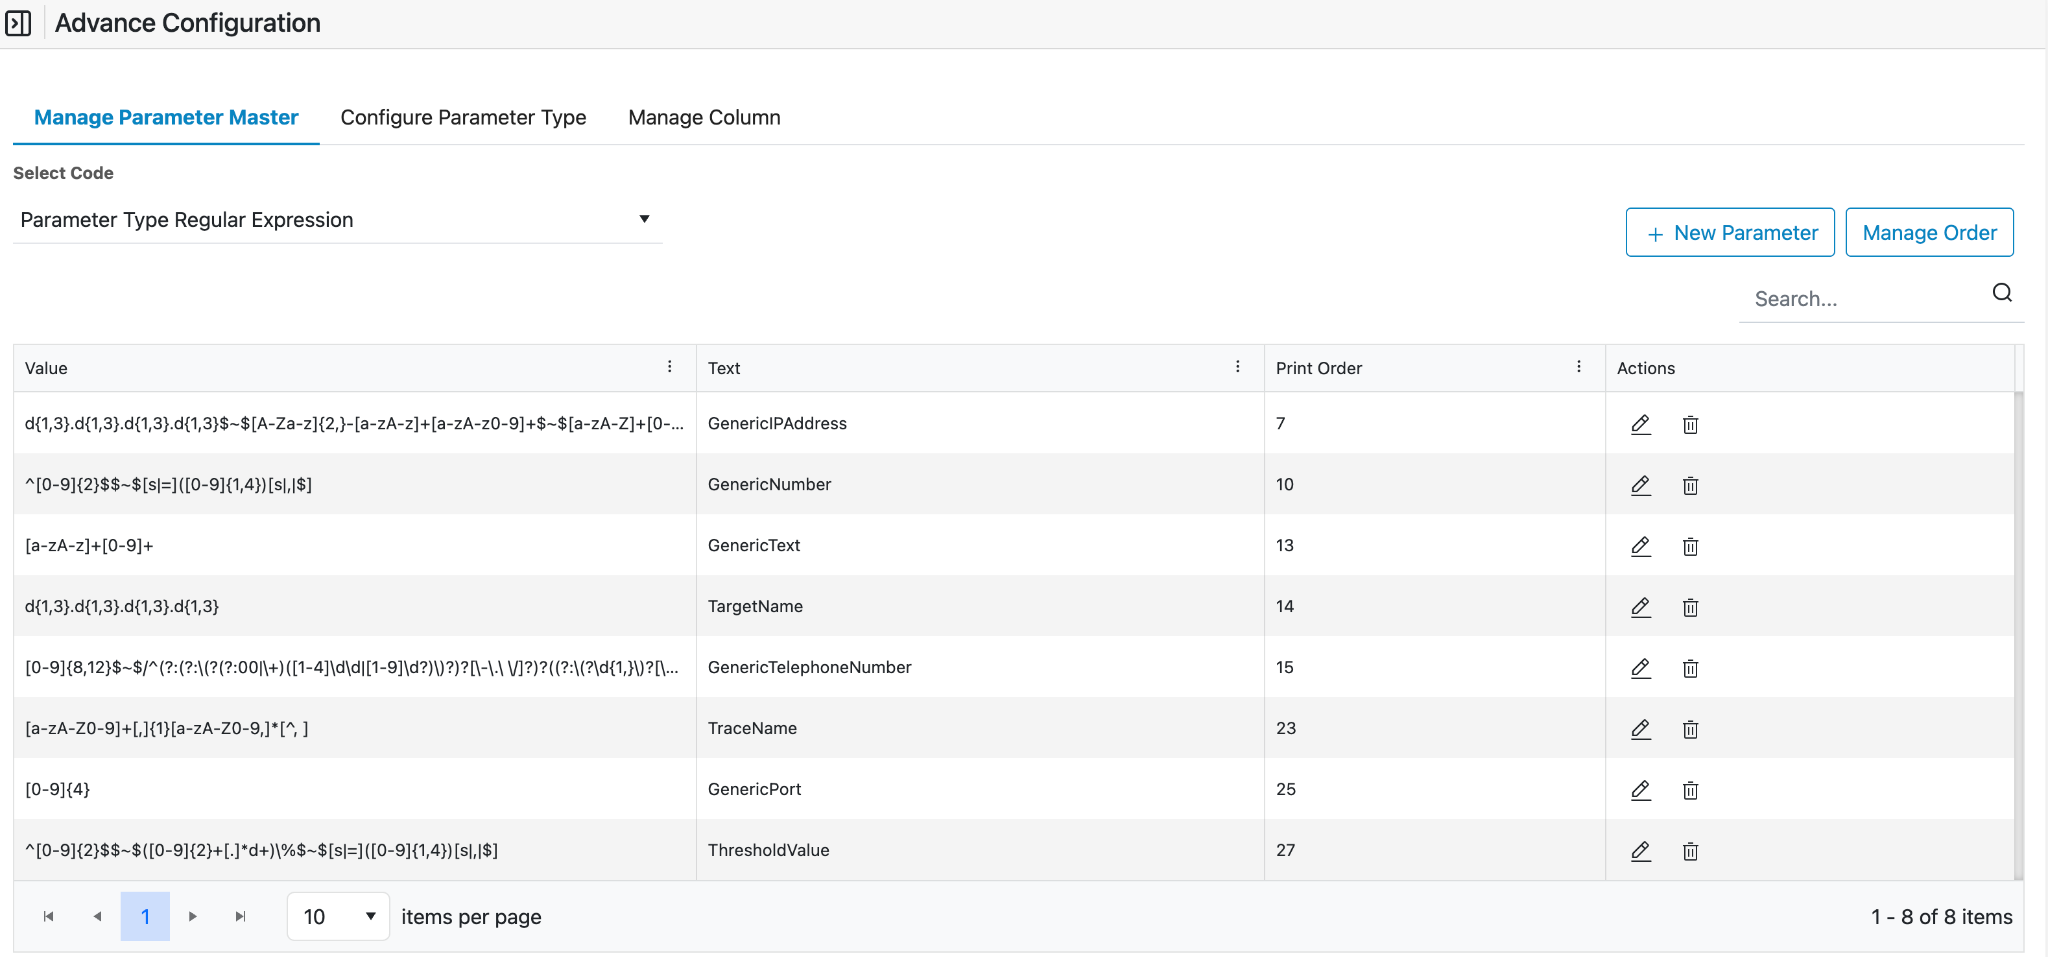
The Manage Parameter Master tab is used to configure Regular Expressions (Regex) that
are applied to parse parameter values from field data.Figure 1. Manage Parameter
Select Code
Figure 2. Manage Parameter Master
The user shall select the Code to choose the type of parameter to be
managed.
A default code is selected automatically.
The parameter type supported here is Regular Expression.
This configuration is used to parse parameters from field values using
regex.
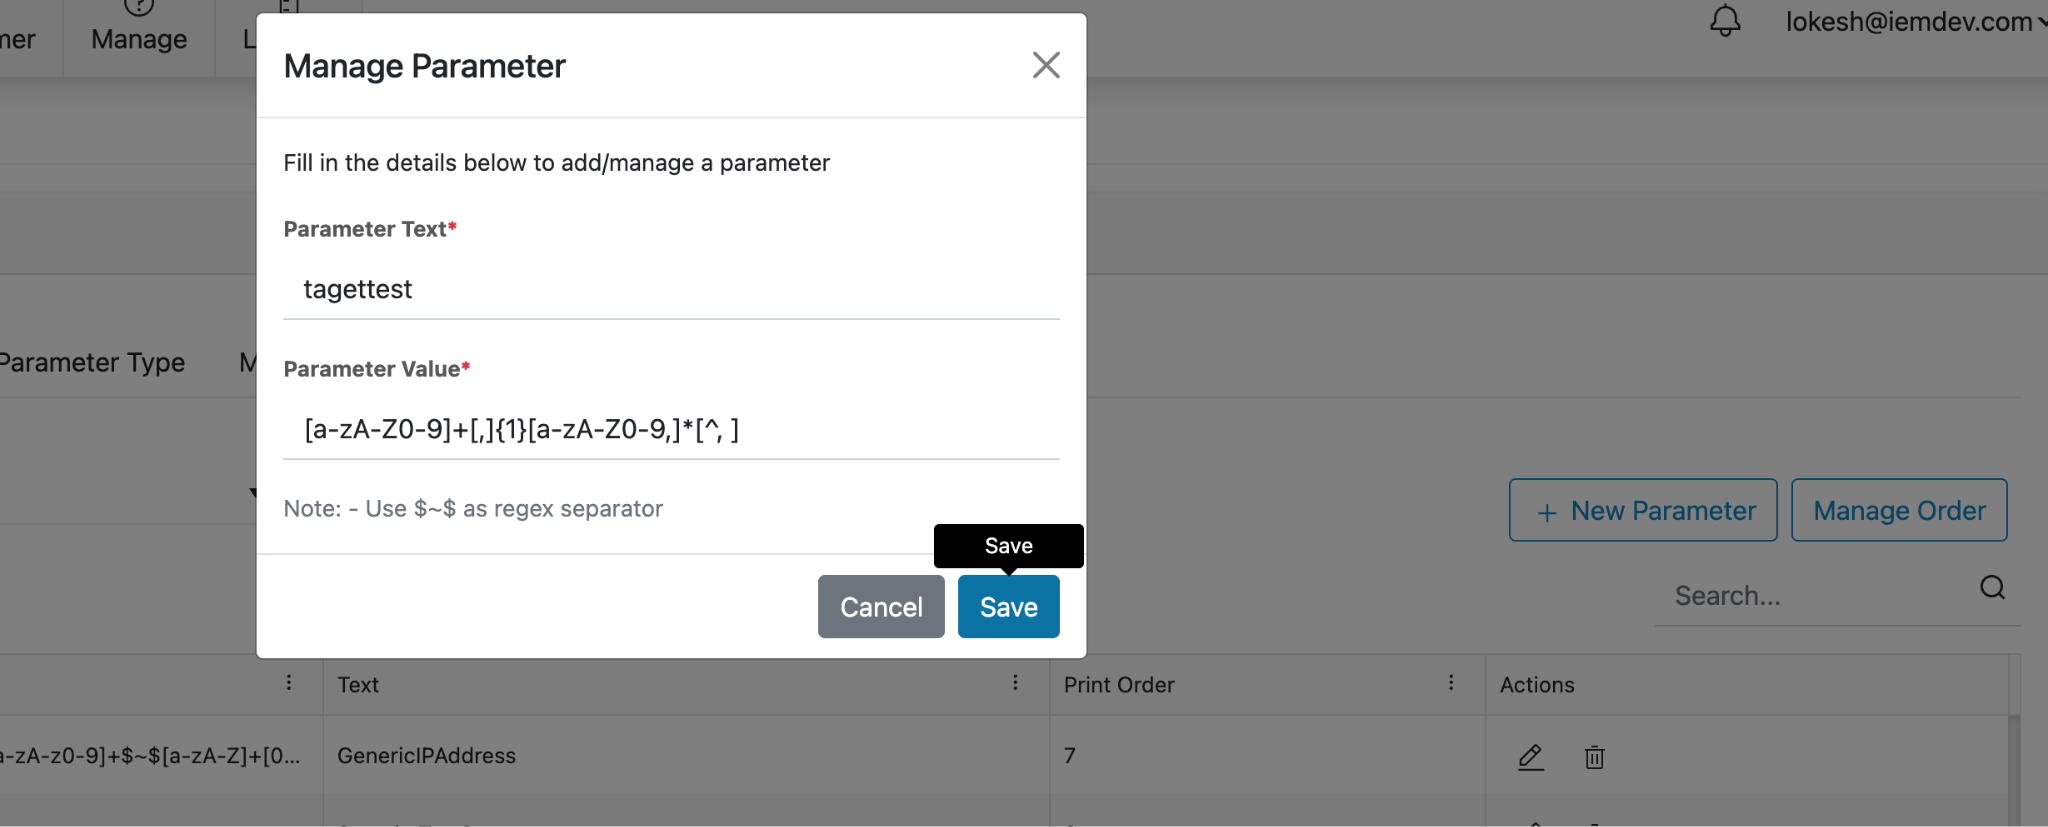
Add New Parameter
The user shall click the + New Parameter button.Figure 3. Manage Parameter Master New Parameter Button
A form will appear with the following fields:
Parameter Text
Enter a user-friendly name for the regex
(example:
GenericIPAddress).
Parameter Value
Enter the regex pattern associated with the parameter
Figure 4. Add New Paramter Form Figure 5. Add New Paramter Form Figure 6. Add New Paramter Success Message
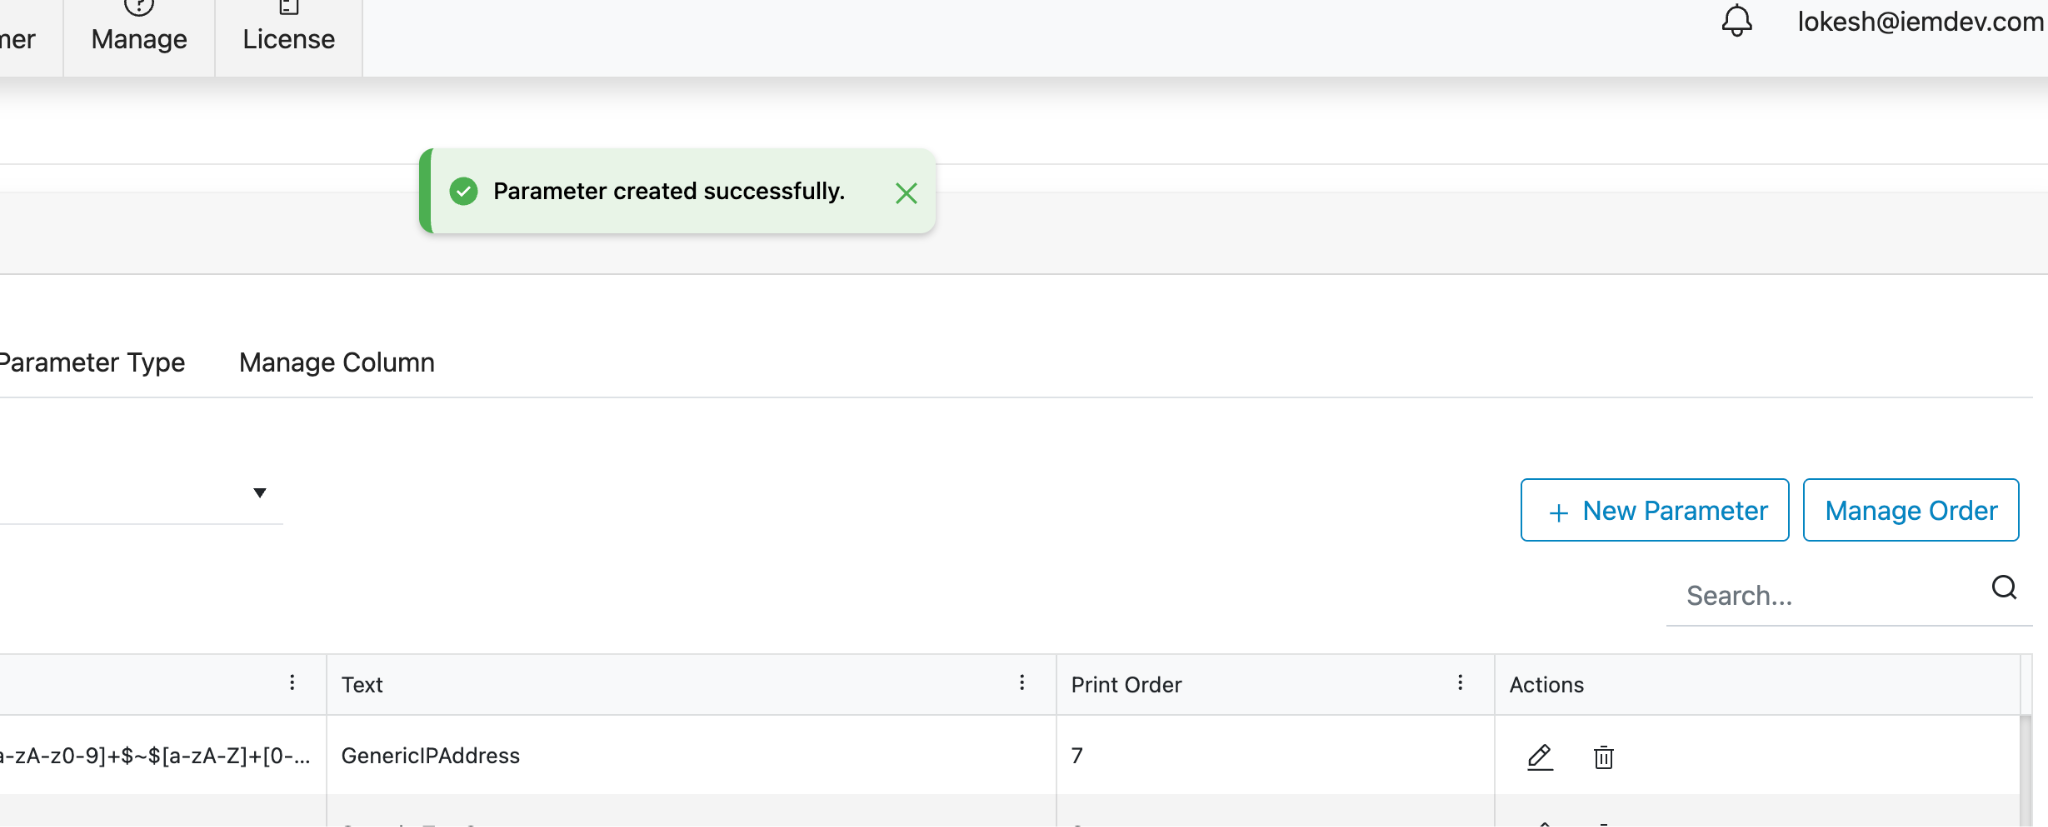
User shall click Save to add the parameter.
A success message will be displayed.
Parameter List
The parameter list displays the following columns:
Text – User-friendly name of the regex
Value – Regex pattern associated with the parameter
Print Order
Actions – Edit and DeleteFigure 7. Parameter List
Edit Parameter
The user shall click the Edit action.Figure 8. Parameter Edit Button
A form will appear with two fields:
Parameter Text – Non-editable
Parameter Value – EditableFigure 9. Parameter Edit Form
The user shall update the regex value.
The user shall click Update to save the changes.Figure 10. Parameter Edit Success Message
A success message will be displayed.
Delete Parameter
The user shall click the Delete action to remove the parameter.Figure 11. Parameter DeleteButton
A Confirmation Message will come, click on Delete button to confirm.Figure 12. Confirmation Prompt
A success message will appear on the screen.Figure 13. Success Message
Note:
The user shall use $~$ as the regex separator while
defining regex values.
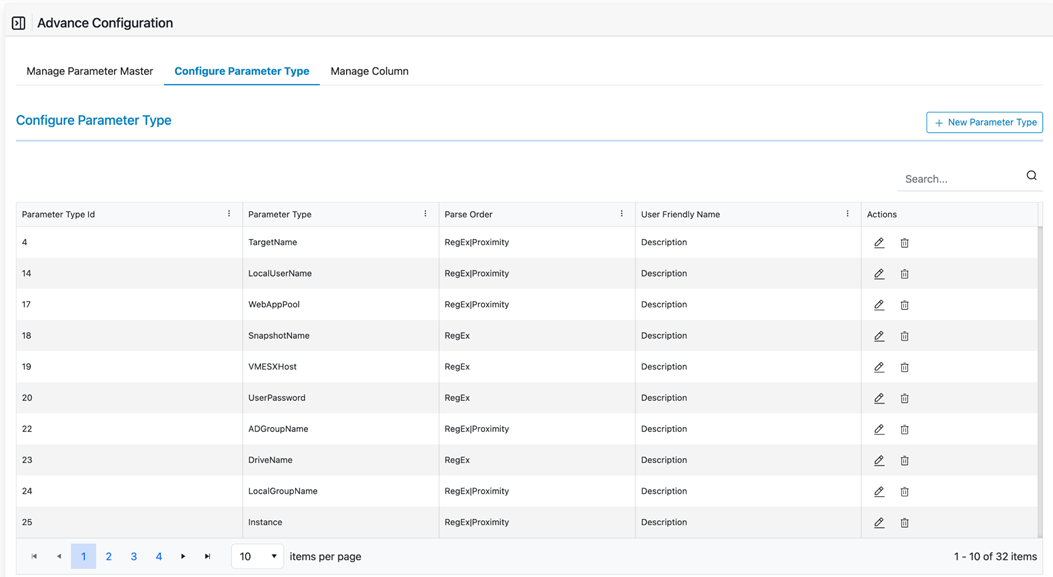
Configure Parameter Type
The Configure Parameter Type tab is used to define how parsing is performed for
parameters.Figure 14. Configure Parameter Type
Add New Parameter Type
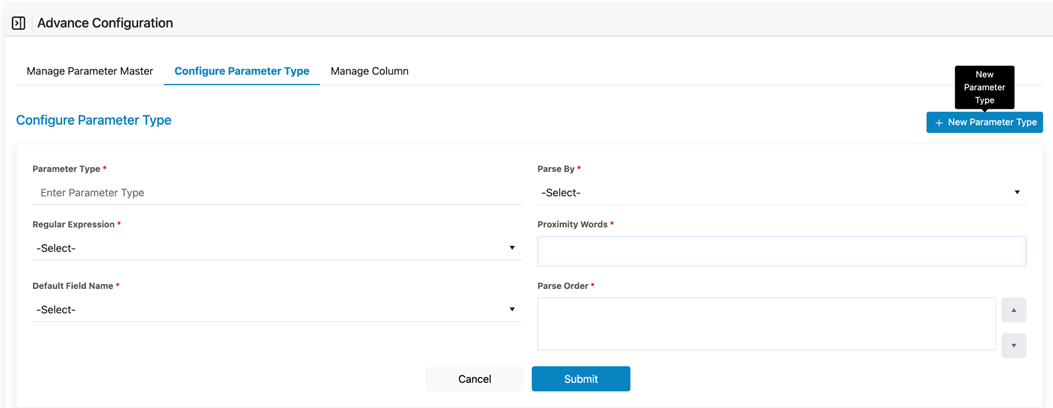
User shall click the + New Parameter Type button.Figure 15. Add Parameter Type ButtonFigure 16. Add Parameter Type Form
A form will appear to configure the parameter type.
Parameter Type
Users shall enter the Parameter Type Nam
Parse Type
The user shall select a parse type from the dropdown.
The available options are:
Regex and Proximity
Only Regex
Only Proximity
Equal Search
No Parsing
Description of Parse Types:
Regex and Proximity
Both regex and proximity parsing
are applied based on the parse order.
If the
first method returns no result, the second method is
applied.
Only Regex
Only regex parsing is applied.
Only Proximity
Only proximity word search is applied.
Equal Search
The value of the selected column is directly
assigned to the parameter.
No Parsing
No parsing logic is applied.
Proximity Words
The user shall enter a list of proximity words in case
the user selected Parse Type to be only proximity or
regex and proximity.
The parser searches for these words in the string to be
parsed.
If a proximity word is found, the next value is
extracted as the parameter value.
Default Field Name (Mandatory)
The user shall select the Default Field Name.
This dropdown displays columns configured under the
Manage Column tab.
This field tells the parser service from which column
the data shall be parsed.
Parse Order
The user shall define the Parse Order.
This determines whether regex or proximity parsing is
applied first in case of regex and proximity; else only
the Parse Type you chose will appear.
If the first parsing method does not return a result,
the next method is applied.
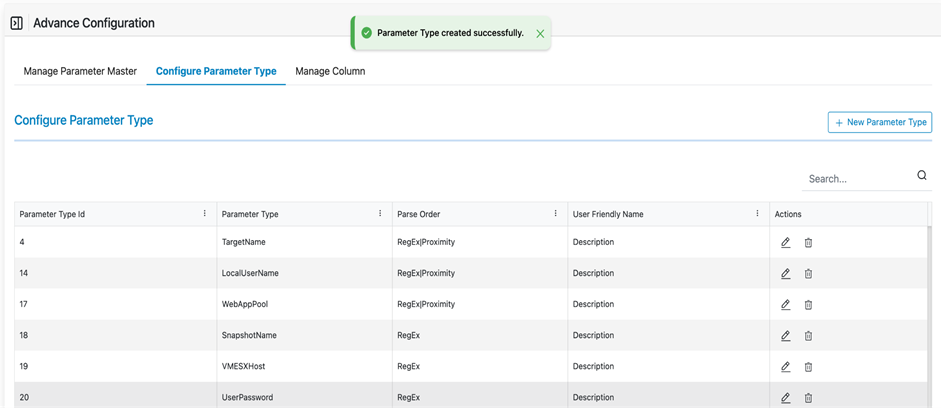
The User shall click Submit after completing the form.
A new entry will appear in the table below.Figure 17. Success Message
Parameter Type Table
The table displays the following columns:
Parameter Type ID
Parameter Type
Parse Order
User Friendly Name (Default Field Name)
Actions (Edit and Delete)
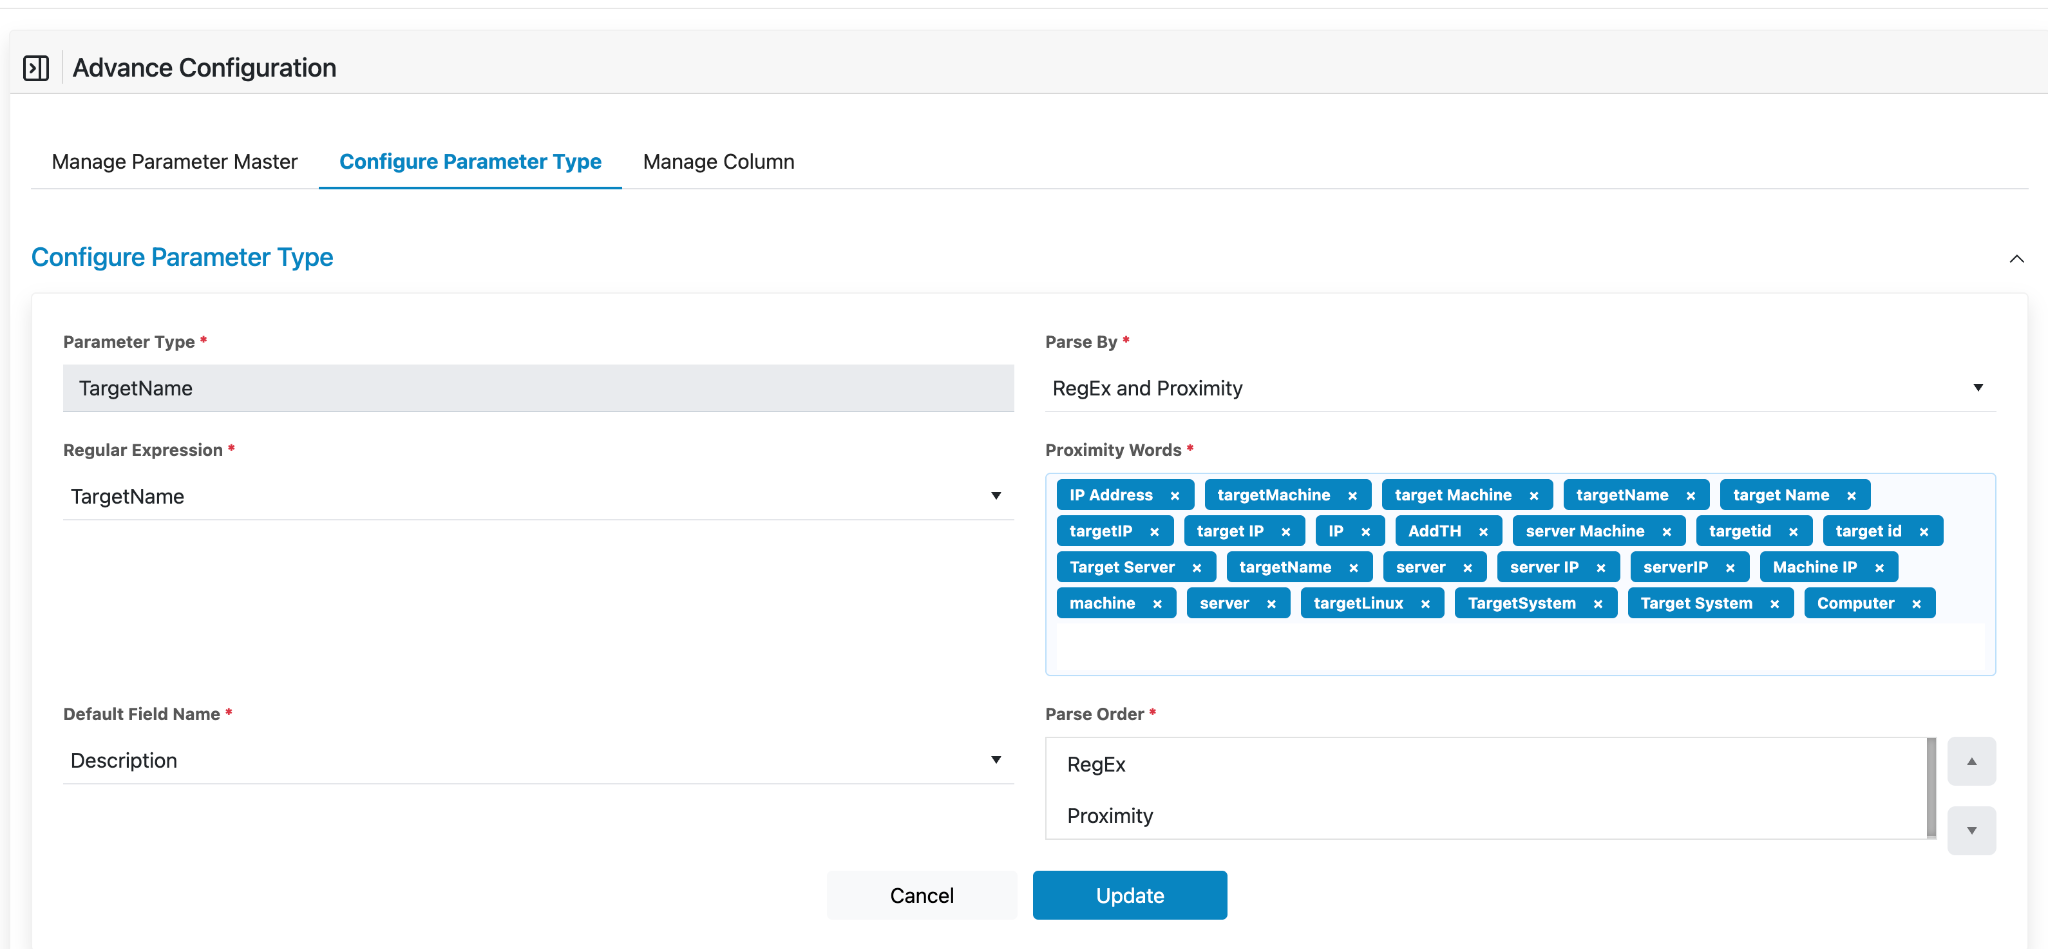
Edit Parameter :
Click on the Edit button.
A form will appear, pre-filled with the details entered at the time of
creation.
The user may update the fields as per the requirement.
Click the Update button to save the changes.
A success message will be displayed upon successful update.Figure 18. Figure Edit ButtonFigure 19. Figure Edit FormFigure 20. Figure Success Message
Note:
Parameter Type is not an editable Field.
All other fields are editable.
Delete Parameter :
Click on the Delete button under the Actions column for the parameter that needs to
be removed.
Upon successful deletion, a success message will be displayed.Figure 21. Delete ButtonFigure 22. Success Message