Installation of SOLR
This section describes the procedure for installation of Solr. As per the best practices, Solr instances (preferably two or more in number) should be configured on different servers, different from the servers where ZooKeeper cluster has been set up.
Two Solr Core Nodes installation on two different servers is required.Please follow the below steps for each of the Solr instances:
- Download the folder solr-9.7.0.zip file from the Path mentioned in source field of Apache SOLR Requirements.
- Extract zip file to desired location.
e.g.: C:\solr-9.7.0
- Ensure that Java version 23 or higher is configured in the system. And
JAVA_HOME variable is set. To check the same, open the Command Prompt and
type the command below:
java -version - Proceed with the installation if the Java version is displayed. If not, please install Java as mentioned in Java.
- Set SOLR_HOME environment variable and add to PATH environment variable.
Follow the steps below to set the SOLR_HOME and PATH.
- Go to Control Panel System and Security Advanced System Settings.
-
Click Environment Variables. A new dialog box appears.
Figure 1. Installation of Solr 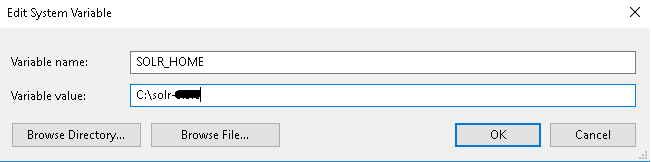
- Select Path in System Variables and add the respective path of Solr mentioned above.
- Set the environment variable as depicted in the image above.
- Add %SOLR_HOME%\bin to PATH environment variable.
Figure 2. Installation of SOLR (cont.) 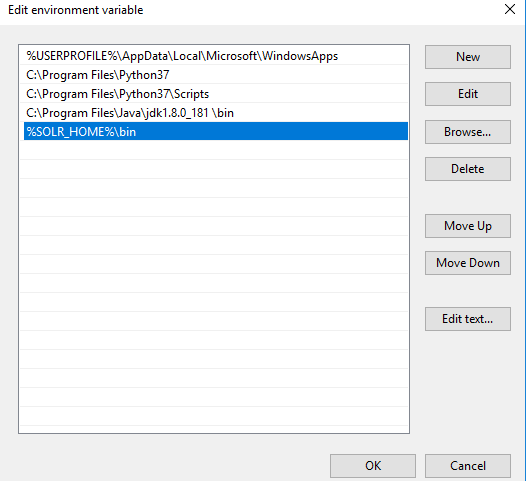
- Navigate to SOLR_HOME\bin and open the file “solr.in.cmd” in notepad/notepad++.
- Uncomment the two lines mentioned below, if commented and do the following changes. Save
the file.
Original: REM set SOLR_JETTY_HOST=127.0.0.1 REM set SOLR_ZK_EMBEDDED_HOST=127.0.0.1 Modified: set SOLR_JETTY_HOST=0.0.0.0 set SOLR_ZK_EMBEDDED_HOST=0.0.0.0 Original: REM set ZK_HOST= Modified: set ZK_HOST=10.x.x.x:<client_port>,10.x.x.x:<client_port>,10.x.x.x:<client_port>/solrNote:Use the server IP/hostname where zookeepers are configured and client_port mentioned in zoo.cfg file.Original: REM set SOLR_HOST=192.x.x.x Modified: set SOLR_HOST=10.1.X.XNote:While configuring each solr on different server, give that server’s hostname. - Navigate to path SOLR_HOME\server\solr and open solr.xml file in notepad++. Add the below
mentioned line inside <solrcloud>
section.
<solrcloud> <str name="zkHost">10.1.x.x:<client_port>,10.1.x.x: <client_port>,10.x.x.x: <client_port></str> </solrcloud> - Open the Command Prompt as Administrator, Navigate to
SOLR_HOME\bin and execute the below command: (Ignore the message in
terminal)
solr start -cloud -s <SOLR_HOME\server\solr> -p <PORT> -z <ZOOKEEPER_IP_1>:<CLIENT_PORT>, <ZOOKEEPER_IP_2>:< CLIENT_PORT >, <ZOOKEEPER_IP_3>:< CLIENT_PORT > - Enter the IP address and the Port as shown in below example in the
respective fields:(Ignore the message in terminal)
e.g. – solr start -cloud -s "C:\solr-9.7.0\server\solr” -p 8983 -z "1x.xx.xx.x1:2181,1x. xx. 1xx.x2:2181,1x.xx.xx.x3:2181" Here, -p for port, you can choose another port --host for hostname/IP -s for path where solr.xml and zoo.cfg is present in SOLR_HOME -z List of commas separated: Zookeeper IP with port - Create a folder named MyOrgSolr in the directory path SOLR_HOME\server\solr\configsets.
- This step requires the two conf folders (that contains schema.xml and solrconfig.xml) present in folder named “Solr_9_7_Prereq.zip” from path mentioned in Apache SOLR Requirements. Please reach out to iAuto-Product-Supp@hcl.com to get access to the folder.
- Copy the two conf folders received to the ‘MyOrgSolr’ folder created in previous steps.
- Open the Command Prompt as Administrator and navigate to
SOLR_HOME\server\scripts\cloud-scripts and execute the below command for all three
Zookeeper servers, for each of the two conf folders with different schema names,
respectively.
zkcli.bat -zkhost <ZOOKEEPER_IP>:< CLIENT_PORT> -cmd upconfig -confname <SCHEMA_NAME> -confdir SOLR_HOME\server\solr\configsets\MyOrgSolr\<CONF_FOLDER_NAME>Figure 3. Installation of SOLR (cont.) 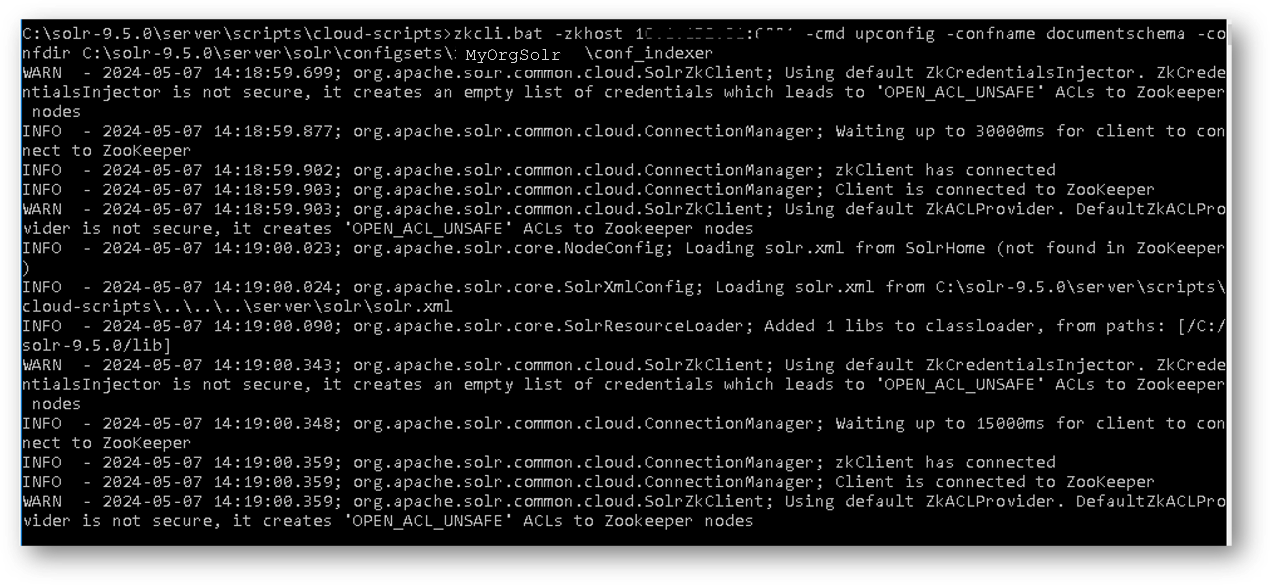
-
For
iScrape and iKnowledge: Enter the ZooKeeper
IP and ZooKeeper
Port that has been configured earlier. Set Schema Name as ‘ticketschema’ for
Basic Knowledge and iScrape conf folder named as
‘conf_iscrape_knowledge’.
e.g. for iScrape and iKnowledge – zkcli.bat -zkhost 1x.xx.xx.x1:2181 -cmd upconfig -confname ticketschema -confdir C:\solr-9.7.0\server\solr\configsets\MyOrgSolr\conf_iscrape_knowledge zkcli.bat -zkhost 1x.xx.xx.x2:2181 -cmd upconfig -confname ticketschema -confdir C:\solr-9.7.0\server\solr\configsets\MyOrgSolr\ conf_iscrape_knowledge zkcli.bat -zkhost 1x.xx.xx.x3:2181 -cmd upconfig -confname ticketschema -confdir C:\solr-9.7.0\server\solr\configsets\MyOrgSolr\ conf_iscrape_knowledge -
For Indexer: Enter the ZooKeeper IP and ZooKeeper Port that has been configured earlier. Set Schema Name as ‘documentschema’ for Advance iKnowledge conf folder named as ‘conf_indexer’.
e.g. for Indexer –
zkcli.bat -zkhost 1x.xx.xx.x1:2181 -cmd upconfig -confname documentschema -confdir C:\solr-9.7.0\server\solr\configsets\MyOrgSolr\conf_indexer
zkcli.bat -zkhost 1x.xx.xx.x2:2181 -cmd upconfig -confname documentschema -confdir C:\solr-9.7.0\server\solr\configsets\MyOrgSolr\conf_indexer
zkcli.bat -zkhost 1x.xx.xx.x3:2181 -cmd upconfig -confname documentschema -confdir C:\solr-9.7.0\server\solr\configsets\MyOrgSolr\conf_indexer
-
For
iScrape and iKnowledge: Enter the ZooKeeper
IP and ZooKeeper
Port that has been configured earlier. Set Schema Name as ‘ticketschema’ for
Basic Knowledge and iScrape conf folder named as
‘conf_iscrape_knowledge’.